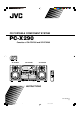
CD PORTABLE COMPONENT SYSTEM PC-X290 Consists of CA-PCX290 and SP-PCX290 SP-PCX290 SP-PCX290 CA-PCX290 CD PORTABLE COMPONENT SYSTEM VOLUME STANDBY/ON + FM MODE STANDBY O SE T U TAPE T WN R A A REC PLAY REC PLAY CD SYNCHRO RECORDING REW FF STOP/EJECT PAUSE DO AUX M T BAND TUNER/ BAND S/PRESET EQ PEA TUNER/ OG CD/ RANDOM PR TAPE CD/ RANDOM HB RE IN P/ T P RE R PHONES D I S PL AY SENSOR /S ET PR ES E PLAY AUTO STOP SYSTEM PLAY REW FF STOP/EJECT B PAUS
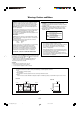
Warnings, Cautions and Others IMPORTANT for the U.K. IMPORTANT FOR LASER PRODUCTS DO NOT cut off the mains plug from this equipment. If the plug fitted is not suitable for the power points in your home or the cable is too short to reach a power point, then obtain an appropriate safety approved extension lead or consult your dealer. 1. CLASS 1 LASER PRODUCT 2. CAUTION: Do not open the top cover. There are no user serviceable parts inside the unit; leave all servicing to qualified service personnel. 3.
SAFETY INSTRUCTIONS “SOME DOS AND DON’TS ON THE SAFE USE OF EQUIPMENT” This equipment has been designed and manufactured to meet international safety standards but, like any electrical equipment, care must be taken if you are to obtain the best results and safety is to be assured. ✮✮✮✮✮✮✮✮✮✮✮✮✮✮✮✮✮✮✮✮✮✮✮✮✮✮✮✮✮✮✮✮✮✮✮✮✮✮✮✮✮✮✮✮✮✮✮ Do read the operating instructions before you attempt to use the equipment.
Introduction We would like to thank you for purchasing one of our JVC products. Before operating this unit, read this manual carefully and thoroughly to obtain the best possible performance from your unit, and retain this manual for future reference. About This Manual Power sources This manual is organized as follows: • When unplugging from the wall outlet, always pull the plug, not the AC power cord. • The manual mainly explains operations using the buttons and controls on the unit.
Contents Location of the Buttons and Controls ....................... 3 Front Panel ................................................................. 3 Remote Control .......................................................... 5 Getting Started ............................................................ 6 Unpacking .................................................................. 6 Putting the Batteries into the Remote Control ........... 6 Connecting the Speakers .........................................
Location of the Buttons and Controls Become familiar with the buttons and controls on your unit.
Continued Display Window 2 1 3 5 4 CD TUNER TAPE AUX SYNC REC REP 1 INTRO PROG RANDOM HBS MUTING ALL STEREO MONO FM MHz kHz AM CLASSIC ROCK POP JAZZ 6 7 8 FLAT 9 See pages in the parentheses for details.
Remote Control Remote Control CD/ RANDOM TAPE 1 2 3 4 5 6 7 TUNER/ BAND p q w e r t 8 y 9 1 2 3 4 5 6 7 8 9 p q w e r t y STANDBY/ON button (9) AUX button (9) DISPLAY button (9) FM MODE button (12) PROGRAM/SET button (9, 12, 14) MUTING button (10) INTRO button (15) HBS (Hyper Bass Sound)/PRESET EQ (Equalizer) button (10) 4/6/7/¢ buttons (12 – 15) TAPE button (9, 16, 18) CD/RANDOM button (9, 13, 15, 18) TUNER/BAND button (9, 12) Number buttons (12 – 14) PRE UP/REPEAT button (12, 15) PRE DOWN button
Getting Started Do not connect the AC power cord until all other connections have been made. Unpacking Connecting the Speakers After unpacking, check to be sure that you have all the following items. The number in the parentheses indicates the quantity of the pieces supplied. To connect speakers Continued You can connect the speakers using the speaker cords. 1 • Remote control (1) • AC power cord (1) • Battery (R03(UM-4)/AAA(24F)) (2) 2,3 If any is missing, consult your dealer immediately.
Connecting Other Equipment Attaching the speaker system to the main unit Fit the speaker into the grooves on the main unit (1) and slide down the speaker vertically (2) as the illustration shows. You can connect an audio equipment as a playback device. When you connect and use this equipment, refer also to its manual. • DO NOT connect any equipment while the power is on. • DO NOT plug in any equipment until all connections are complete.
Power Supply To insert the batteries Use AC power or dry batteries (not supplied) to operate the unit. • As long as the AC power cord is connected to a power source, the unit operates on AC power rather than on the batteries in it. 1 To connect the AC power cord 2 4 R20(SUM-1)/D(13D) (not supplied) 8 3 7 1 1 To the 5 2 AC IN terminal 6 3 AC power cord (supplied) 2 To a wall outlet • • • • DO NOT use an old battery together with a new one. DO NOT use different types of batteries together.
Common Operations 3 Press 4 or ¢ to adjust the minute, then press PROGRAM/SET. Turning On or Off the Power To turn on the unit, press STANDBY/ON . • When you use the batteries for power supply, the backlight of the display dims to save power consumption. P RE T O SE T U RE IN R P/ To turn off the unit (on standby), press STANDBY/ON again. The STANDBY lamp on the unit lights red.
Adjusting the Volume Reinforcing the Bass Sound You can adjust the volume level only while the unit is turned on. The Hyper Bass Sound function provided for this unit can enhance the bass sound while listening to any source at low volume. • You can use this function only for playback. VOLUME + S/PRESET EQ To turn on the function, press and hold HBS/ PRESET EQ for more than 1 second so that the HBS indicator appears on the display.
Ensuring Good FM and AM Reception FM reception: Pull out the antenna and reorient it for better reception. AM reception: Reorient the main unit for better reception. For better reception of both FM and AM • Make sure the antenna conductors do not touch any other terminals and connecting cords. • Keep the antennas away from metallic parts of the unit, connecting cords, and the AC power cord. – 11 – EN01-12_PC-X290[B]_f.p65 11 04.3.
Listening to FM and AM Broadcasts 3 Press PRESET UP/REPEAT T U IN T SE RE PEA WN T R DO A M T OG The unit automatically tunes in the previously tuned station (either FM or AM). • Each time you press the button, the band alternates between FM and AM. O PR or PRESET DOWN to select a preset number. 1 Press TUNER/BAND. P RE R P/ Tuning in a Station /S ET PR ES E TUNER PROG FM STEREO MHz 4 Press PROGRAM/SET again.
Playing Back CD This unit has been designed to play back the following CDs: Audio CD, CD-R, and CD-RW. Continued use of irregular shape CDs (heart-shape, octagonal, etc.) can damage the unit. When playing a CD-R or CD-RW User-edited CD-Rs (Recordable) and CD-RWs (Rewritable) can be played back only if they are already “finalized.” • You can play back your original CD-Rs or CD-RWs recorded in music CD format. (However, they may not be played back depending on their characteristics or recording conditions.
Continued T IN PEA WN T DO M T WN DO T ET PR ES E To add tracks in the program 2 Press PROGRAM/SET repeatedly unit “00” appears as the track number. T R A /S U RE OG PROG M 1 Press PROGRAM/SET repeatedly to show the last programmed track. PR CD U T T T PEA O SE P/ R SE O RE The PROG indicator flashes on the display. P RE R P/ 2 Press PROGRAM/SET. A R • If the current playing source is not the CD player, press CD/RANDOM before going to the next step.
Playing at Random—Random Play Repeating Tracks or CD—Repeat Play The tracks of loaded CD will play at random. • To use Repeat play for Random play, press PRESET UP/ REPEAT so that REP ALL indicator lights up on the display after starting Random play (Random play will be canceled when you select REP 1). You can have the CD, the program or the individual track currently playing repeat as many times as you like. To repeat play, press PRESET UP/ REPEAT during or before playing.
Playing Back Tapes To play the tapes in the decks B and A continuously You can play back only type I (Normal) tapes. 1 Set the cassette tapes in the decks A and B. Playing Back a Tape • If the tape direction is set wrong, replace the cassette. 1 Press STOP/EJECT 7 /0 for the deck you 2 Press PLAY 3 for the deck B. want to use. The tape in the deck B begins to play. 3 Press PAUSE 8, then press PLAY 3 for the deck A.
Recording Recording onto a Tape on Deck A IMPORTANT: • It should be noted that it may be unlawful to re-record pre-recorded tapes, records, or discs without the consent of the owner of copyright in the sound or video recording, broadcast or cable program and in any literary, dramatic, musical, or artistic embodied therein. • The recording level is automatically set correctly, so it is not affected by the VOLUME +/–.
Recording Disc —Disc Synchronized Recording To record an AM station—Beat Cut While recording an AM broadcast, beats may be heard (which are never heard when listening to the broadcast without recording it). If this occurs, set the BEAT CUT switch on the back of the unit to 1 or 2 to reduce the beating sound. You can start disc play and recording at the same time. 1 Put a recordable cassette into the deck A with the exposed part of the tape down. • See also page 16.
Maintenance To get the best performance of the unit, keep your discs, tapes, and mechanism clean. Handling cassette tapes Handling discs • Remove the disc from its case by holding it at the edge while pressing the center hole lightly. • Do not touch the shiny surface of the disc, or bend the disc. • Put the disc back in its case after use to prevent warping. • Be careful not to scratch the surface of the disc when placing it back in its case.
Troubleshooting If you are having a problem with your unit, check this list for a possible solution before calling for service. If you cannot solve the problem from the hints given here, or the unit has been physically damaged, call a qualified person, such as your dealer, for service. Symptom No sound is heard. Cause Action • Connections are incorrect or loose. • Check all connections and make corrections. (See pages 6 – 8.) • Press MUTING to cancel the mute. (See page 10.) • Muting is activated.
PC-X290 CD PORTABLE COMPONENT SYSTEM VICTOR COMPANY OF JAPAN, LIMITED EN © 2004 VICTOR COMPANY OF JAPAN, LIMITED PC-X290[B]COVER_f.p65 2 0204TMMMDWORI 04.3.