
SeparateVolume


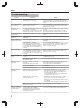

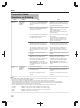
Table Of Contents

Troubleshooting
Problem Symptom Action
Power does not turn on The “HELLO” message remains displayed,
and the unit does not start up.
Press the [RESET] button on the front panel.
If it does not start up, stop using this unit, unplug the
plug from the outlet, and bring it to the dealer or Service
Center.
The cooling fan motor
is not working
“FAN LOCKED” is displayed on the
display window of this unit.
The cooling fan motor is spoiled. Stop using the unit,
remove the power plug from the outlet, and consult the
dealer or Service Center.
Power turns off
automatically
The “AUTO POWER (OFF)” setting is set
to “2 HOURS” or “6 HOURS”.
Change the “AUTO POWER (OFF)” setting of “SETUP”
to “OFF”.
The temperature of this unit has rose, and
operation has ceased for safety purposes.
Place this unit in an area with ventilation if possible,
and wait approximately 30 minutes for it to cool down.
The power turns on
automatically
The “HDMI-CEC” setting is set to “ON”. Change the “HDMI-CEC” setting of “CONNECTION” to
“OFF”.
Input cannot be
switched
i.LINK connection is currently being
established.
Cancel importing, or wait until the connection ends.
There are no video
images on the monitor
Monitor only supports RGB input. Set “HDMI --> DVI COLOR” in the setting menu to
“RGB FIX”.
“HDCP ERROR” is displayed. Use a monitor that supports HDCP.
Video images may be distorted during
reencoding/dubbing when the monitor (TV)
is connected to this unit using an HDMI
cable, or when the screen resolution is set
to “1080p”.
This is not a malfunction. Change the “HDMI OUTPUT
RESOLUTION” to a value other than “1080p” (e.g.,
1080i) if you find it annoying.
Screen is distorted Video images may be distorted during
reencoding/dubbing when the monitor (TV)
is connected to this unit using an HDMI
cable, or when the screen resolution is set
to “1080p”.
This is not a malfunction. Change the “HDMI OUTPUT
RESOLUTION” to a value other than “1080p” (e.g.,
1080i) if you find it annoying.
There is no audio
sound
The “HDMI AUDIO OUTPUT” setting is set
to “OFF”.
Change the “HDMI AUDIO OUTPUT” setting of
“CONNECTION” to “ON”.
The amplifier does not support
“BITSTREAM” output.
Use an amplifier that supports bitstream output.
Dubbing cannot be
performed
The title to be dubbed is copyright
protected.
Titles that are copyright-protected cannot be dubbed.
Select a title that is not copyright-protected.
A finalized disc has been inserted. Insert a disc that has not been finalized.
The disc is not formatted. Format the disc.
The SD card is write-protected. Remove the SD card and remove the write protect lock.
Dubbing cannot be
performed
“NEXT” cannot be selected when a title
that cannot be dubbed is chosen.
v
Dubbing may start when you return to recording
mode selection to change the recording mode.
v
Some titles cannot be dubbed depending on their
recording mode and format.
You can distinguish titles that cannot be dubbed by
selecting the titles one by one.
“NEXT” cannot be selected due to
insufficient disc space.
v
Dubbing may start when you return to recording
mode selection to change the recording mode.
v
Dubbing may start after reducing the number of titles
to be dubbed.
v
Dubbing may start by switching to a dual-layer disc.
“NEXT” cannot be selected as a dubbing
title list is not created.
Select at least one content for dubbing.
High-speed dubbing
cannot be performed
for EP mode titles
Dubbing cannot be performed and “SOME
TITLES CANNOT BE DUBBED” is
displayed when trying to perform high-
speed dubbing of a EP mode title to a
DVD-VIDEO mode disc.
Set “HIGH-SPEED DUBBING” in the settings menu to
“4:3” before recording or importing in the EP mode.
Others
8
2014/1/31 11:38:35