JVC VIDEO CASSETTE RECORDER SR VIOU S_ Rg-Wg SuperVHSET Professional series TRUCTIONS For Customer Use: Enter below the Model No. and Serial No. which are located on the rear of cabinet. Retain this information for future reference. Model No. Serial No.
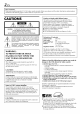
EN Thank you for purchasing the JVC S-VHS video cassette recorder. Before use, please read the safety information Dear Customer, contained in the following pages to ensure safe use of your new VCR. CAUTIONS [_A!]id[,]][ RISK OFELECTRIC SHOCK O0NOT OPEN CAUTION: TO REDUCE THE RISK OF ELECTRIC SHOCK. DO NOT REMOVE COVER (OR BACK). NO USER-SERVICEABLE PARTS INSIDE. REFER SERVICING TO QUALIFIED SERVICE PERSONNEL. Declaration of Conformity Model Number :SR-V10U that may be of sufficient shock to persons.
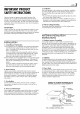
IMPORTANT PRODUCT SAFETY INSTRUCTIONS Electrical energy can perform many useful functions. But improper use can result in potential electrical shock or fire hazards. This product has been engineered and manufactured to assure your personal safety. In order not to defeat the built-in safeguards, observe the following basic rules for its installation, use and servicing. ATTENTION: 5. Ventilation Slots and openings in the cabinet are provided for ventilation.
EN USE SERVICING 1. Accessories 1. Servicing If your product is not operating correctly or exhibits a marked change in performance and you are unable to restore normal operation by following the detailed procedure in its operating instructions, do not attempt to service it yourself as opening or removing covers may expose you to dangerous voltage or other hazards. Refer all servicing to qualified service personnel.
CONTENTS INSTALLING EN YOUR NEW VCR Basic Connections .................................. 6 SPECIAL EFFECT PLAYBACK 6 Special Effect Playback ........................ 26 Locating particular scene rapidly -- Picture Search ..................................................... 26 Viewing still picture -- Still Picture Playback ........... 27 Skipping unwanted portionsSkip Search ............. 27 Viewing still picture frame by frame -- Frame-by-Frame Playback ...................................
EN INSTALLING YOUR NEW VCR Basic Connections ANTENNA IN (Antenna or cable input) Antenna or cable Coaxial cable _ VIDEO OUT AUDIO OUT AC Power Cord Back of VCR S VIDEO OUT TV OUT AC Outlet S-video cable (Supplied) To S-video input connector Audio/video (Supplied) To Audio/video connectors cable input RF cable (Supplied) To 75 ohm terminal TV
Checkcontents Connect VCR to power source Make sure the package contains all of the accessories listed in "SPECIFICATIONS" Connect the AC power plug to an AC outlet. The clock and tuner channels will automatically be set when the antenna is connected and when the AC power cord is first connected to an AC power outlet (_ pg. 8). (If "Auto" or "CH" is displayed on the front display panel before the VCR is turned on, the clock and tuner channels are being set automatically.
EN INITIAL Plug & Play Setting Auto Clock Set/Auto Tuner Set SETTINGS This VCR sets the clock and tuner channels automatically when AC power cord is first connected to an AC outlet. The antenna cable must be connected for the Plug & Play setting. The time and date can be set automatically by the clock setting data transmitted from one of the regular TV broadcast channels. We call this TV channel the "host channel" and it is a PBS channel in your area.
INFORMATION • If "AUTO CLOCK" is set to "ON" on the Clock Set screen on page 11, the clock will be adjusted automatically by the host channel every hour (except 11:00 PM, midnight, 1:00 AM and 2:00 AM) using the incoming PBS channel clock setting data. (This automatic clock adjustment can only be performed when the VCR is turned off. The clock will be adjusted just on these hours -- on the time displayed on the front display panel, not on the actual real time.) The default setting of "AUTO CLOCK" is "ON".
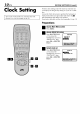
lO Clock Setting INITIAL Perform correctly clock setting only if the clock (cont.) has not been set by the Plug & Play setting or if you use a cable box. Access the Clock Turn on the VCR and the TV, and select the VCR channel 3 or 4 (or AV mode) on the TV. SETTINGS Manual Clock Set screen to perform Set. Each procedure after preparation If you use a cable steps below the Semiauto are finished. box, set the clock manually. (_ pg. 12) Preparations AccessMain Menuscreen Press MENU.
eN11 Setting clock semiautomatically Select D.S.T. mode m Semiauto ClockSet You You can change the host setting manually. First follow steps [] to [] following steps. channel/D.S.T./time on page zone 10, then have AUTO- go to the to move bar the to "AUTO PLUS OFF- t> TIME DATE HOST CH D.S.T. TIMEZONE _-'AU'I_ : AUTO :AUTO to "D.S.T.", the until Time Each will be erased when "AUTO "D.S.T.
INITIAL SETTINGS (cont.) Set date Press SHUTTLE appears, PLUS AV until the desired then press OK or SHUTTLE date PLUS r>. • Holding SHUTTLE PLUS AV changes the date in 15-day intervals. Set year Press SHUTTLE PLUS AV until the appears, then press OK or SHUTTLE desired year PLUS _>twice. Select D.S.T. mode You can select either "ON" ON- Adjustment will clock itself. OFF- Select when or "OFF". be made by the built-in Daylight not apply to you.
Tuner Setting Turn on the VCR and the TV, and select the VCR channel 3 or 4 (or AV mode) on the TV. Setting channels automatically - Auto Channel Set Use Auto Channel Set only if channels have not been set correctly by the Plug & Play setting. If you want to add or delete channels, use Manual Channel Set (_ pg. 14). AccessMain Menuscreen Press MENU.
INITIAL SETTINGS (cont.) Access Tuner Set screen PressSHUTTLE PLUS/xV to move the highlight bar (arrow) to "TUNER SET", then press OK or SHUTTLE PLUS E>. AccessManual ChannelSet screen PressSHUTTLE PLUS /xV to move the highlight bar (arrow) to "MANUAL CHANNEL SET", then press OK or SHUTTLE PLUS E>. TUNER SET BAND AUTO CHANNEL SET CATV Add or skip desired channels ITo add channels I 0 Pressthe Number keys to input a channel number you want to add. O Press OK or SHUTTLE PLUS _>to set to "ADD".
Basic Playback This VCR can check the tape condition during playback (and recording), and realizes the best possible pictures. Loada cassette Make sure the window side is facing the cassette is pointing Turn on the VCR and the TV, and select the VCR channel 3 or 4 (or AV mode) on the TV. _ on the front of towards the VCR. Do not apply too much pressure when inserting. • The VCR turns on automatically.
BASIC PLAYBACK Basic Playback Features AND RECORDING (cont.) • To display the VCR status including the tape remaining time, the time counter and the clock time on the TV screen, see "Showing on-screen display" (_:_pg. 21). • The approximate tape remaining time appears and the "1_--.." indicator lights on the front display panel. • The tape remaining time is calculated based on the tape speed (SPor EP)being used. The indicated remaining time is only an estimate. To reset the time counter, Remote.
Adjustingtrackingcondition Automaticoperationsafter rewinding- Next FunctionMemory -- TrackingAdjustments Automatictrackingadjustment This VCR automatically The Next Function adjusts the tracking condition.
BASIC PLAYBACK m / AND RECORDING (cont.) Locatingbeginningof timer recordings- InstantReview At the press of a button, you can turn on the VCR, rewind the tape and begin to view the most recent timerrecorded program. After ensuring that the VCR is turned off and that the timer mode is disengaged, pressREVIEW. • The VCR turns on, and rewinds to the index code indicating the beginning of the last timer-recorded program, then begins playback automatically.
Basic Recording Select recordingchannel On the front panel: Push the JOG dial, then turn it to the left or right. On the Remote: a- Press CH + or-. b- Press the Number or Turn on the VCR and the TV, and select the VCR channel 3 or 4 (or AV mode) on the TV. • If you connect the TV and the VCR only the RF connection, JOG dial POWER keys. press TV/VCR so that the VCR mode indicator display PLAY ( m,- using on the Remote lights on the front panel, to view the program to be recorded.
BASIC PLAYBACK Basic Recording Features AND RECORDING (cont.) Changingdisplayinformation Press DISPLAY during recording or recording pause. Each time you press the button, the front display panel shows the time counter, tape remaining time, channel number and the clock time in sequence. Tape RemainingTime _-_ Time Counter ClockTime STOP/EJECT ( • / A ) ChannelNo.
1 Watchingoneprogramwhile recordinganother If there Press TV/VCR indicator (_ setting goes off from the front display being recorded view pictures from the VCR, change (_ pg. 7) to the TV's you want to watch, When "ON SCREEN(REC)" is set to "ON" (_:_pg. 37, 38), you can see the current VCR status on the TV screen. • For more detailed information about the on-screen display, see page 61.
SERIES PLAYBACK AND RECORDING Series Playback To REMOTE OUT SR-V10U-1 To S VIDEO To REMOTE IN OUT Audio/Vide S-Video Cable _, (Supplied) -_ To S VIDEO _ Cable _ Mini-plug cable (Not supplied) (Supplied) AUDIO/ _To VIDEO OUT j To AUDIO/ VIDEO IN To REMOTE f OUT 7 IN o_ Mini-plug cable (Not supplied) To REMOTE IN SR-V10U-2 To S VIDEO OUT S-Video Cable (Supplied) ::::::::::::::::::::: • To S-Video Input To AUDIO/VIDEO OUT • Audio/Video Cable (Supplied) To Audio/Video Input
EN23 NOTE: If there is a power outage during Series Playback, the playback will resume automatically when the power is restored to the VCR. (No setting is required for this function.) To prohibit operations during Series Playback (Mode Lock) Press and hold OK on the Remote for more than 5 seconds. (_ STOP/EJECT (i/±) Using two sets of SR-V10U, you can play back two cassettes alternately as many times as you want. You can select the returning point for Series Playback (_ pg.
SERIES PLAYBACK AND RECORDING (cont.) Series Recording or OutputT° S Video_v _.
STOP/EJECT (i/±) Start recording Press REC ( • ) on either of SR-V10U. tape remaining recording, time reaches the other When to 2 minutes SR-V10U the while successively starts to record. Therefore, recording will be continued onto cassettes loaded on two SR-V10U alternately. • The cassette will when automatically the recording be rewound stops.
SPECIAL Special Effect Playback Locatingparticularscene rapidly - PictureSearch • High-Speed PictureSearch: You can rapidly On the front Possible locate a particular scene on the tape. panel: during normal To do forward PLAY ( EFFECT PLAYBACK playback. picture search, turn the JOG dial quickly to the right. To do reverse picture search, turn the JOG dial quickly to the left. • If you release the dial, picture search continues.
How to use the SHUTTLE To do forward PLUS buttons on the Remote: picture search, press SHUTTLE viewing still pictureframe by frame - Frame-by-FramePlayback PLUS repeatedly. Each time you press the button, increases. • To decrease (toward the search speed During the speed while normal playback, press SHUTTLE On the front forward then picture search reverse picture search), PLUS t_l_l repeatedly.
EN TIMER VCR Plus+ ® Timer Programing Turn on the VCR and the TV, and select the VCR channel 3 or 4 (or AV mode) on the TV. RECORDING Timer recording allows you to program the VCR to automatically record a broadcast at some future time. Up to 8 timer recording programs can be made using VCR Plus+ timer programing, Express timer programing (_ pg. 32) or 24HR quick programing method (_ pg. 34) as far as a year in advance.
eN29 Returnto normal screen Input receiving channel number The guide channel number, which is GUIDE CHANNEL SET Press PROG. assigned to the TV or cable station for the _" "PROGRAM COMPLETED" appears on the screen for about 5 seconds, then normal screen PlusCode number you entered will appears. that • If "PROGRAM in step I_11, appear automatically on the Guide Channel Set screen.
Changing VCR Plus+ ® Setting Turn on the VCR and the TV, and select the VCR channel 3 or 4 (or AV mode) on the TV. TIMER RECORDING (cont.) IMPORTANT If you have moved to a different area or if a broadcasting station's channel number has been changed, the wrong VCR CH number will be displayed on the Program screen (_o step [] on page 29). When this happens, perform the following steps to set the correct guide channel number for that station.
Access Main Menu screen Input receiving channel number Press MENU. Press the Number keys or SHUTTLE PLUS AV AccessInitial Set screen Press SHUTTLE PLUS AV to move the highlight "INITIAL bar (arrow) to SET", then to input the number of the channel on which MAIN MENU then press OK or SHUTTLE PLUS E>. • Repeat steps [] and [] for each instance. • If you receive AccessGuideChannelSet screen AV PLUS bar (arrow) to CHANNEL channel INITIAL SET programs Press MENU. (Ex.
TIMER Express Timer Programing Turn on the VCR and the TV, and select the VCR channel 3 or 4 (or AV mode) on the TV. RECORDING (cont.) You can directly program the VCR's timer to record up to 8 programmes, as far as a year in advance. Remember, the clock must be set before you can program the timer (_ pg. 8 or 10). Loada cassette Make sure the record safety tab is intact. If not, set "REC SAFETY" to "OFF" ( _ pg. 37, 41 ). • The VCR turns on, and the counter is reset, automatically.
Set tape speed NOTES: Press SP/EP to set the tape speed. • In case of a power failure after programming, the recorder's memory backup keeps your selections fff the lithium battery is not exhausted). Return to normal screen Press PROG. • Programs that start after midnight must have the next day's date. or OK. "PROGRAM COMPLETED" screen for about 5 seconds, appears on the then normal screen appears.
EN TIMER 24HR Quick Programing RECORDING (cont.) You can program a timer recording that starts within 24 hours. Up to 8 timer recording programs can be made as far as a year in advance. Remember, the clock must be set before you can program the timer (_ pg. 8 or 10). Loada cassette JOGdial Make sure the record safety tab is intact. If not, cover the hole with adhesive tape, then load it into the VCR. • The VCR turns on, and the counter is reset, automatically. Access 24HR quick program display.
TurnontheVCRandtheTV,andselect theVCR channel 3or4 (orAVmode) ontheTV. Checkingprogramsettings 1 Disengage timer Press TIMER, • When then "AUTO press POWER. TIMER" is set to "ON" (_ pg. 37, 38), you do not have to press TIMER. Z AccessProgramCheckscreen Press PROG. CHECK. _R STARTSTOP ¢H DATE 8:00P 10:00A 10:00 10:45 12 40 12/24 12/25 11:30P 1:00 125 12/25 Access Program screen Press PROG. CHECK again to check more detailed information. Each time you press PROG.
TIMER 3 RECORDING (cont.) Cancelor changeprogramsetting To cancel a program, press CANCEL Program PROGRAM 4 when the START screen you do STOP 9:00PM IO:OOPM -* DATE not want is shown. "PROGRAM CH 12/24/00 SON 10 SP COMPLETED" appears on the screen for about 5 seconds, then normal screen appears.
Useful Function Selting You can use the other useful function settings on the Function Set screen by following the procedure described below. • For the functions you can set on the Function Set screen, see pages 38 to 41. Access Main Menu screen Turn on the VCR and the TV, and select the VCR channel 3 or 4 (or AV mode) on the TV. Press MENU.
_N JO EN OTHER USEFUL FUNCTIONS (cont.) * The default setting is bold in the table below. • VIDEO CALIBRATION ON OFF When this function is set to "ON", tape in use during playback the highest-possible pictures. tape or start recording this VCR checks and recording, the condition and compensates This takes place whenever after inserting of the to provide you play back a a tape.
EN39 * The default setting is bold in the table below. • ONSCREEN(PLAY) ON OFF When this display) function appears is set to "ON", on the screen various during VCR status information (on-screen playback.
OTHER USEFUL * The default • 2ND AUDIO RECORD ON OFF • AUDIO MONITOR HI-FI: Normally select this. Hi-Fi sound is played back. HI-FI L: Sound on the left Hi-Fi channel is played back. HI-FI R: Sound on the right Hi-Fi channel is played back. NORM: Sound on the normal track MIX: is played back. Both sounds on the Hi-Fi track and normal track are mixed and played back. When this function setting (cont.) is bold in the table below.
EN41 * The default setting is bold in the table below. • S-VHS ET ON OFF This function allows you to record on VHS tapes with S-VHS picture quality. Tapes equipped the recorded with the using S-VHS display panel front this function ET function. when can The "S-VHS be played S-VHS back on a VCR lights indicator up on ET" is set to "ON". NOTES: • Before recording, make sure that "VIDEO CALIBRATION" is set to "ON". (_" pg. 37, 38) • You cannot activate the S-VHS ET function...
OTHER SatelliteAuto Recording This function USEFUL allows satellite program receiver. FUNCTIONS you to automatically which (cont.) record is timer-programed a on your DBS Preparation: Connect a DBS receiver to the AUDIO/ VIDEO IN or S VIDEO IN (L-l) connectors* on the rear; otherwise, you cannot use this function. • You can also connect the cable box if it has a timer. * To use these connectors, you have to select which one to use (_ pg. 40).
Child Lock You can disable the VCR operations. • You can only use the Remote for this operation. While the VCR is turned on, press and hold POWER on the Remote for more than 10 seconds. The VCR turns off, and "CL" appears on the front display panel for about 5 seconds, then the clock time appears again. POWER • The child lock function is now activated and you cannot turn on the VCR by pressing POWER on the front panel. NMER To release the child lock, press and hold POWER Remote until the VCR turns on.
EN EDITING Edit From Camcorder Connection This VCR (for recording) To AUDIO/ VIDEO Input Audio/video cable (supplied) _To S VIDEO Input* S-video cable (supplied) I I I I I I I I To Audio/video Camcorder (for playback) Variousconnectionfor editingtapes The following three methods • VHS to S-VHS editing Although original quality • S-VHS the picture VHS quality, than those edited quality is inherently the edited source limited by the tape has better picture (VIDEO-VIDEO is recorded tap
You can use a camcorder as the playback VCR and your VCR as the recording VCR Returnto normal screen PressMENU. Make connections Start playback Connect an audio/video cable between the Set the camcorder to its play mode. camcorder's audio/video output connectors and your VCR's audio/video input connectors. NOTE: • When using a camcorder with a monaural output, connect the audio output connector on the camcorder to the left audio input connector on this VCR.
EDITING Edit To Or (cont.) Loadcassettes Insert the playback cassette into the playback VCR and the cassette to be recorded on into the From Another VCR recording VCR. Select input mode on recording VCR Select the correct external input on the other VCR.
Audio Dubbing Loada cassetteand prepare the audio source Select input mode Connection Select "F-1" -- when component to the the front panel. Select %-1" -- when component to the the rear panel. This VCR (for recording) connecting the audio audio input connectors on connecting the audio audio input connectors on On the front panel: Push the JOG dial, then turn it to the left or right. On the Remote: Pressthe Number key "0 (AUX)" and/or CH +/-. input _.
EDITING Insert Editing and AV Dubbing Connection This VCR (for recording) Refer also to the other component's instruction manual for connection and its operations. Insert Editing: You can replace a recorded scene with new scene recorded on another tape or with other material. Both the picture and the sound recorded on the Hi-Fi sound track are replaced at the same time. Audio/Video Dubbing: You can perform Audio Dubbing and Insert Editing at the same time.
Make connections Locate start point Connect an audio/video cable between the VCR's Use REW ((_) or JOG dial to reverse the tape (See "Special Effect Playback": _ pg. 26). When you find the begining of the scene you want to edit, press PAUSE( II ). audio/video input connectors and the other component's audio/video output connectors. Preparetapes Activateediting mode Load the source tape on the other VCR, and the tape to be edited on this VCR. PressINSERT on the front panel.
EN MULTI-BRAND TV Brand Setting REMOTE CONTROL This Remote can control some functions of remote controllable TVs of the brands listed below. Without setting, you can control a JVC TV. Turn on the TV Turn on the TV using the Power button on the TV or its Remote. Set TV brand code )WER TV TV/VCR ,_ Number Follow the example shown below. O Pressand hold TV. O PressMBR SET. O Pressthe Number keys to enter your TV's brand code by referring to the table below. O PressOK, and release TV.
Cable Box This Remote can control boxes of the brands some functions listed below. have more than one code. Brand Setting function of the cable Some cable If your cable with a specified box brands box does not code, try other codes. Turn on the cable box Turn on the cable box using the Power the cable box or its Remote. button on Entercable boxbrandcode Follow the example shown below. O Press and hold CABLE/DBS. CABLE/DBS O Press MBR SET. O Press the Number O Number box's brand below.
MULTI-BRAND DBS Receiver Brand Setting REMOTE CONTROL (cont.) This Remote can control some functions of the DBS (Direct Broadcast Satellite) receivers of the brands listed below. Turn on the DBS receiver Turn on the DBS receiver using the Power on the DBS receiver or its Remote. button Enter DBS receiver brand code Follow the example shown below. O Press and hold CABLE/DBS. )WER O Press MBR SET. O Press the Number receiver's below.
EN53 Changing Remote Control Code This Remote is capable of transmitting two control codes; one set to respond to A code control signals and another set to respond to B code control signals. This Remote control is preset to send A code signals because your VCR is initially set to respond to A code signals. You can easily modify your VCR and the Remote to respond to B code control signals.
TROUBLESHOOTING Before requesting corrected, service, use this chart and see if you can repair the trouble and this can save you from the trouble of sending yourself. Small problems are often easily your VCR off for repair. 1. The power will not come on. • The AC power cord is disconnected. • Child lock is on. Connect the AC power cord. Turn off child lock function (_:_ pg. 43). 2. The clock works, but the VCR's power will not come on.
1.Timer recording willnotwork. • Theclock and/or thetimer have been setincorrectly. • The timerisnotengaged. • The VCR has notbeen setupproperly. 2. Timer programing willnotwork. • Timer recording isinprogress. 3.(Z)and_ onthefront display panel willnotstop blinking. • Thetimer isengaged butthere isno cassette loaded. "REC SAFETY '' issetto"ON ''andthe loaded cassette has haditsrecord safety tabremoved. 4. (Z)blinks for10seconds andthe timer mode isdisengaged. 5.
EN TROUBLESHOOTING (cont.) 1. When scanning channels, some of them are skipped over. • Those channels have been preset to be skipped. If you need the skipped channels, restore them (_ pg. 14). 2. The channel cannot be changed. • Recording is in progress. Press PAUSE ( II ) to pause the recording, change channels, then press PLAY ( I_ ) to resume recording. 3. The Remote will not operate your TV or cable box or DBS receiver. • The brand codes are set incorrectly.
Questions and answers PLAYBACK RECORDING Q. What happens if the tape reaches its end during Q. playback A. The VCR automatically rewinds Q. Can the VCR indefinitely remain A. after 5 minutes No. It stops automatically the heads. A. in still mode? to protect picture search, still picture playback A. Picture loss occurs attempted with Can the VCR indefinitely and A. remain No. The VCR automatically protect at the pause and in the recording stops after 5 minutes to the heads.
EN INDEX List of terms This guide serves as a quick way to locate frequently used terms and on-screen display names.
EN59 Frontpanel O O O O O O O O POWER button : _ pg. 15, 19 Cassette loading slot PLAY ( _>) button : _ pg. 15 Advanced JOG dial : _ pg. 15, 19, 26 S VIDEO input connector : _ pg. 44, 48 AUDIO/VIDEO input connectors : _ pg. 47, 48 DIGITAL TBC/NR button and lamp: _ pg. 18 REC LINK button and lamp : _ pg. 42 O Front display panel : _ pg. 60 (D Remote sensor • INSERT button : _ pg. 49 (_A.DUB button : _ pg. 47 _24HR QUICK PROGRAM button : _ pg. 34 (D REC ( • ) button : _ pg.
EN INDEX (cont.) Frontdisplaypanel O Symbolic Mode Indicators PLAY: FF/REW VARIABLE SHUTTLE SEARCH: iii::' STILL: SLOW: ii:::.iiiiii RECORD: ..'"t RECORD AUDIO DUBBING: AUDIO DUBBING PAUSE: ""'i'ii'i _...!-.: ._:!.,PAUSE: ;._....'._._ INSERT: !C" INSERT PAUSE: iC_ili[i[ AUDIO DUBBING INSERT: !ii:::ii: (- AUDIO DUBBING INSERT PAUSE: !!_i:ii:ii:ii:i O Tape speed indicators O Program start time and stop time indicator : pg. 34 Mode Lock indicators :_ pg.
Rear panel O AC power cord : _ pg. 6 OREMOTE OUT terminal : pg. 22, 24 O REMOTE IN terminal : _ pg. 22, 24 *For the Remote Control Unit RM-G30 (not supplied). I[) ANTENNA IN terminal :_ O O O O O I_ Lithium battery compartment: _ pg. 7 S VIDEO IN connector : _ pg. 48 S VIDEO OUT connector : _ pg. 6 AUDIO/VIDEO IN connectors : _ pg. 48 AUDIO/VIDEO OUT connectors : _ pg. 46 TV OUT terminal : _ pg. 6 pg.
EN INDEX Remote (cont.) O O O O O O O The glow-in-the-dark buttons shown in white on the illustration above are helpful when using the Remote in darkened rooms. Buttons with a small dot on the left side of the name can also be used to operate your TV while holding down TV on the Remote. (_ pg. 50). CABLE/DBS button : _ pg. 51, 52 TV button: _ pg. 50 TV/VCR button : _ pg. 19, 21, 50 REVIEW button : _ pg. 18 Number buttons : _ pg. 19, 28, 31 DBS button (No function) CANCEL button : _ pg. 29, 35 C.
SPECIFICATIONS EN GENERAL Power requirement Power consumption Power on Power off Temperatu re Operating Storage Operating position Dimensions (W x H x D) Weight Format Maximum recording time TIMER :AC120VQ, Clock ,60Hz : 20w :2.5w : 5°C to 40°C (41 °F to 104°F) : -20°C to 60°C (-4°F to140°F) : Horizontal only : 400 mm x 94 mm x 283 mm : 3.4 kg : S-VHS/VHS NTSC standard reference Program capacity Memory backup : Quartz : 1-year programmable timer/ 8 programs : Approx.
< O C: JVC VICTOR COMPANY COPYRIGHT © 2001 VICTOR COMPANY OF JAPAN, LTD.