
Manual
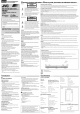

DONOTconnectthe powercord until all other connectionshavebeen made.
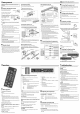
Prepare the Remote Control
Whenyouusethe remotecontrol for the
first time, pull outthe insulationsheet,
If therangeor effectivenessof the remote
control decreases,replacethe battery,
To Replace the Battery in the Remote Control
Insertthe batteryinto theremote
control bymatchingthe polarities
(+ and -) correctly.
1 Pinchthe sideof the battery
case. 2
2 Pull out the battery caseand insert the battery bymatching the
polarities.
NOTE
• Store the battery in aplace where children cannotreach.Ifa childaccidentally
swallows the battery, consulta donor immediately.
• Topreventthebatteryfromoverheating, cracking,orstarfingafire:
Donot recharge,short, disassemble orheat the battery, or disposeof it in
a fire.
Donot leave the battery with othermetallic materials.
Wrapthe battery with tape and insulate when throwing away or saving it.
• Donotpoke the battery with tweezers or similartools.
• Disposeofthe batteryin theproper manner, accordingto federal,state, and
localregulations.
CAUTION:
Dangerof explosionif batteryisincorrectlyreplaced,
Replaceonlywith thesameorequivalenttype,
ForUSA-CaliforniaOnly
Thisproduct containsa CRCoinCellLithiumBatterywhichcontains
Perchloratematerial--special handling mayapply,
Seewww,dtsc,ca,gov/hazardouswaste/perchlorate
Speaker layout
Installthe speakerson afiat andlevelsurfaceto ensurethe bestsoundquality,
• Thesoundmaybeaffecteddependingon the locationinwhichyou install
them. Toimprovethe sound,adjust the locationand orientation of the
speakers,
• Ifyou installthespeakersnearthe TV,colordistortionmayoccur.Toprevent
this,turn offthe TV'smain poweror unplugit beforeinstallingthespeakers.
Waitat least30minutes beforeturningon theTV'smainpoweragain,Ifthe
TVisstill affected,movethe speakersfurther away,
Assembling the speaker
Beforeyou installthespeaker,assembleit,
• Takecarenot to pinchyourfingers betweenthe units,
1 Slidethe right unit into the left unit.
2 Pressthe knobon the rear of the right unit.
Rearview
Right unit
3 Insert the right unit completely until you hear a dicking sound.
• Thespeakerhasprojectionson the back,
betweenwhichyoucanfit thecordto holdit
in placeout ofsight,
Connecting the speaker cord
Connectthespeakercordtothecenterunitasillustrated.
Red
[]
[]
White
Centerunit
CAUtiON
• Ifyou connect any speakersother than those supplied for theSystem,be sure
to usespeakers of the same speaker impedance (SPEAKERIMPEDANCE)asthat
indicatedon the rearof the center unit.
• DONOTcannectmorethan onespeaker cord to one ___eaker terminal.
When installing on the floor
Attachthe suppliedfoot to thespeakerasillustrated below.
• Youcanchoosethe foot type--flat type(× 5)or slantedtype(× 2),
Peel offthe release paper and attach the feet to the bottom of
the speaker.
Flattype Slantedtype
Double-sided
When installing on the wall
Youcaninstallthe centerunitand speakeron thewall,
Ex,:Speaker
1
A: Minimum 13mm (9/16") /
B: Maximum 10mm (7/16")/
C: Maximum 6mm(1/4") /
D: 0 4 mm (Dia.3/16,,) j Slot the screws
Screw(notsupplied) into the holesas
shown.
Forinstallingthe centerunit I
AI A:Minimum 3.6mm (3//6")/'
_l B: Maximum 10mm (7/16")
!_ D C: Maximum 4mm (3/16")
c i D: • 4 mm (Dia,3/16")
Screw(notsupplied)
CAUTION
• ThecenterunitweighsapproximatelyO.73kg(1.71bs)andspeakerweighs
approximately 1.6kg (3.6Ibs). Sufficientcaremust be taken when installing it
on the wal!toprevent any accidents causedby its falling off.
• Usescrewswhichare compatible with the strength and materia! ofthe pillaror
wal! toprevent the units from fallingoff.
• DonotinstaRthecenterunitandspeakerontoaplywoodorplasterboardwaR;
otherwise, they wil!fal!and sustain damage.
• When installing the centerunit andspeaker on the wal!;
Besureto have them installed on the wal!by quaRfiedpersonne!.
Caremust be taken when selectinga locationfor installationon the wal!.
Injuryto personnel ordamage to equipment may resultif the installedunit
interfere with daily activities.
ACadaptor should not be hanging/put aboveof any other items. It is
acceptable toplace theACadaptor on the flat flooronly.
Recommended mounting surface: Woodenstuds. Ifthe mount is to be
installed onany surface otherthan wooden studs, use suitable hardware
(which is commerciallyavailable).
e_ Connecting external components
Youcanconnectananalogcomponentto theANALOGINterminal anddigital
componentsto the OPTICALDIGITALIN terminals,
Rearsideof the
centerunit
ANALOG IN
[]
OPTICAL DIGITAL IN
I
[]
RCApin plugcord (notsupplied)
/
White
Digitalopticalcord
(notsupplied)
Connecting the power cord
• ConnectthesuppliedACadaptorto theDCINjack onthecenterunit, Then
connectthesuppliedACpowercordto the ACadaptor, and plugit inawall
outlet.
• Plug inthe powercordof thesubwooferto awall outlet,
NOTE
• Disconnectthe power cord beforecleaning ormovingthe speakers.
Setting up the subwoofer
ThisSystemisequippedwith awirelesssubwoofer,Whenyou useit for thefirst
time, activatethe wirelesspairing.
Referto the suppliedinformationsheet--"Activate wirelesspairing,"
NOTE
• Thewirelesspairingisnotcanceledevenafierthepowercordhasbeenpu!led
out.
Using the core filter
Attachthe providedcorefiltersto the powercordandthe externalcomponents
cord,then thecorefiltersreduceinterference,
I Releasethe stopper of the corefilter.
Stopper
2 Runthe cordthrough the corefilter, and wind the cordfirmly once
inside the cutout of the corefilter asshownin the illustration.
* Youcanwind 2 externalcomponentscordstogether,
3 Closethe core filter until it clicks shut.
CAUTION
• Donot damage the cordby applyingexcessiveforce
when winding.
Selecting the display setting
Youcaninstallthe centerunit verticallyor horizontally,
Onthe front panel,two setsof button namesareequipped,Selectthe
appropriatesetof button namesto illuminateaccordingtoyour installation
method,
Horizontally
Vertically
PressDISPLAYSETTINGto selectbetween the two sets.
Basic operation
Turning on/off the power
Press_/I.
• Youcanalsousethe powerbutton on thefront panel,
NOTE
• Thesubwooferisalsotumedon/ofL
• Asmafiamountofpowerisconsumedevenwhenthepoweristumedoff
(standby mode). Duringstandby mode, the _ / Isymbo!on the frontpane!
lightsred. Unplugthe power cord from the waRoutlet to turn thepower off
completely.
• Youcan alsoturn on the System bypressing one of the input buttons (DIGITAL
1,DIGITALZ DIGITAL3orANALOG).
Selecting the input source
Pressoneofthe inputbuttons:DIGITAL1, DIGITAL2,DIGITAL3or
ANALOG.
D! (DIGITALI), D2(DIGITAL2),D3(DIGITAL3)orAN(ANALOG)appearson
thedisplay.
• Youcanalsousetheinputbuttononthefrontpanel,
Adjusting the volume
PressVOL+/- (0to 40).
• Youcanalsousethevolumebuttonsonthefrontpanel,
Centerunit
Buttonsandlampsonthefront panel
iT Display
Showsthe volumelevel,selectedinput source,surroundmode,etc,
i2 Remote sensor
Receivesthe signalfrom theremotecontrol,
i3 Audio signal format lamps
Showsthe audiosignalformat ofthe incomingsignal,Eachlamp lights
when;
- PLII(DOLBY
PROLOGICII):
- mD:
- DTS:
- PCM:
• Surroundisactivatedwith ananaloginput source
selected.
• Surroundisactivatedand adigital input source
with 2channelaudioformat isselected,
A DolbyDigitalsignalcomesin.
A DTSsignalcomesin.
A LinearPCMsignalcomesin.
14 Input button
Selectsainputsource:"DIGITALI," "DIGITAL2, ""DIGITAL3" or
"ANALOG,"
15] SURROUNDbutton
Selectsasurroundmode:"SURROUNDI," "SURROUND2" orSURROUND
OFF,
16] Volumebuttons
Adjuststhevolumewithin the rangeof 0 to 40,
171 (bll(power) button
Turnson/off the System,
• The(_llsymbol lights redwhile the Systemisturned off,
CAUTION
• Setthe volumeto theminimumleve!beforestartinganysource.If thevolume
isset to ahighlevel,thesuddenblastof soundmaydamageyour hearingand
blowoutthespeakers.
Turning off the sound temporarily
PressFADEMUTING•
• Torestorethesound,pressthebutton againoradjust thevolume,
Making sound clearer (only for Dolby Digital and
DTS)
Youcanenjoylow levelrecordedsoundclearlyevenat a low volume
level--Dynamic RangeCompression.Ithastwo setting levels.
PressDRC.
• Eachtime you pressthe button,the effectchangesasfollows:
OF(off) _ MD(middle)_ MX (maximum),
Changing the display brightness
Adjusting the output level
Youcanadjustthe output levelwithin therangeof-6 dBto +6 dB,
PressSPEAKERLEVEL+/- corresponding.
- SUBWOOFER:Adjuststheoutput levelofthe subwoofer,
- CENTER: Adjuststheoutput levelofthe centerchannelsignal,
- SURROUND: Adjuststheoutput levelofthe fiont surroundchannel
signal,
m_ Using the surround mode
Youcanlistento amorerealisticsoundthanstereosoundbyusingsurround,
Availablesurroundmodesareasfollows:
-surround I: Suitablefor the reproductionof multi-channelsources.
-surround 2: Suitablefor the reproductionof anystereomusicsources,
PressDIMMER. PressSURROUNDMODE.
• Eachtime you pressthe button,the LEDbrightnesschangesasfollows:
normal_ dim _ off,
• Eachtime you pressthebutton,the surroundmodechangesasfollows:
surround1($1 appearson thedisplaywhenselected)_ surround2($2)
off (OF).
Ifyou haveaproblemwith this System,checkthis listfor apossiblesolution
beforecallingfor service.
POWER
Powerdoesnot comeon.
Thepowercordisnotinsertedsecurely,Plugit insecurely,
REMOTE CONTROL
Theremote controldoesnot work.
Thebatteryisexhausted.Replacethebattery.
--* Sunlight isshiningdirectlyon the remotesensor.Hidethe remotesensor
from directsunlight.
--* Thepath betweenthe remotecontrol andthe remotesensoronthe fiont
panelisblocked.
--* Pointtheremotecontrol at the remotesensoronthe fiont panel.
--* Signalscannot reachthe remotesensor.Movecloserto thecenterunit.
--* Pullout theinsulationsheet.
--* Thedisplaysetting isdifferent flora theinstallationmethod.Changethe
setting.
SOUND
Soundsaresometimesinterrupted.
"-_ Theradiowaveconnectionbetweenthe centerunit andsubwoofermaybe
interrupted.Changethe locationandorientationof the speakers,
Nosoundfrom speakers.
--* Thesoundhasbeenturnedoff temporarily,PressFADEMUTINGonthe
remotecontrolor adjustthevolume.
--* Thespeakercablesarenotconnectedcorrectlyorare loose.Checkthe
connections.
No soundfrom the subwoofer.
Thewirelessconnectionshavenotbeenactivatedcorrectly,Checkthe
connection,
Radio wave reflections
Thesubwooferisconnecteddirectly byradiowaveswhichare reflectedby
walls, furniture and buildings.Ifthesubwoofercannotreceivethewaves
properly,movethesubwooferto obtain betterreception.
Radiowavereceptionmayalso beinterruptedby peoplemovingbetween
the units.