ENGLISH TU-DB1SU DIGITAL TERRESTRIAL SET TOP BOX INSTRUCTIONS Trade Mark of the DVB Digital Video Broadcasting Project (1991 to 1996) Number: 3205
CONTENTS Safety Precautions 2 In the box 3 Over Air Download 3 STB buttons 4 Remote control buttons 5 Preparation 7 Connections 7 Switching on 8 Inithial settings 8 Everyday Operation 9 Changing Channels 9 Channel List 10 Electronic Programme Guide 10 Digital Teletext 11 Widescreen 12 Advanced Operation 12 Configuring Your Receiver 12 Editing The Channel List 13 Channel and Menu Protection 14 Favourite Channels 15 Programme Reminders and Timers 15 Installation 16
SAFETY PRECAUTIONS POWER Always use the provided AC adapter. Operate only from the power source specified (AC 100-240 V,50/60Hz) on the AC adapter. In using, the AC adapter get heat on the surface of the case. It is normal, not defective. Do not be covered with any material on case of AC adapter while it is in operation. Leave the 15 cm space(minimum) around the AC adapter. The rating information and safety caution of the AC adapter are on its case.
IN THE BOX Thank you for buying this JVC Degital Terrestrial Set Top Box. Inside your package you should have: Degital Terrestrial Set Top Box (STB) receiver AC adaptor x1 Remote control unit: RM-C1890S Dry battery for the remote control unit AA (R06) x2 Instruction book Warranty Card Aerial cable x1 Scart cable x1 OVER AIR DOWNLOAD Over Air Download (OAD): To ensure that your STB always has the most up todate information. Please ensure that after use it is set to its standby mode.
RECEIVER BUTTONS Front: 6WDQGE\ EXWWRQ 3URJUDP GRZQ XS EXWWRQV -4-
REMOTE CONTROL BUTTONS 0XWH 6WDQGE\ 6OLGH 6ZLWFK 1XPEHU EXWWRQV ,QIRUPDWLRQ EXWWRQ $9 EXWWRQ &RORXU EXWWRQV 79 '79 EXWWRQ 0(18 EXWWRQ 8S 'RZQ 5LJKW /HIW EXWWRQV 2. EXWWRQ %$&.
REMOTE CONTROL BUTTONS To operate this STB: Set the Slide Switch to STB position. For details of the use of each buttons, see each sections explanation. Note: Volume-/+ buttons and the Mute button work for the volume from the TV. To operate a JVC brand TV or VCR: Set the Slide Switch to the TV/VCR position. Pressing a button that looks the same as the devices original remote control button has the same effect as the original remote control.
PREPARATION Connections Place your receiver on a firm, level surface with at least a 10cm gap around all sides of the case and in a position convenient for connection to your television, a mains power outlet and a TV aerial wall outlet (or the 'flying lead' from your TV aerial, as appropriate). Please refer to the Safety Precautions on page 2.
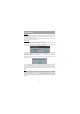
PREPARATION Switching on Turn on your TV set and select the SCART input (with the AV key, or similar, on the television remote control). Press the [STANDBY] key on the remote control handset. The power lamp change to green and the receiver's menu will be seen on the TV screen. If you do not see the receiver's menu on the television screen, press the AV button on your TV remote control until you see the First Time Installation menu.
If no digital terrestrial television broadcasts are found the receiver will display a message: CHANGING CHANNELS You can choose the channel by using the P / buttons or the number buttons. When using the number buttons, enter the programme number as follows. Example: PR6 You should then refer to the Troubleshooting Guide on page 20 to establish the cause of the problem.
Icons are also displayed in the information banner and if this channel is a favourite channel (see ADVANCED OPERATION - Favourite Channels on page 15). favorite channel icon If the selected channel is locked (see - ADVANCED OPERATION - Channel Protection on page 14), you must enter the correct four digit code to view the channel. Here, you can preview any channel stored by the receiver before viewing it full screen.
You can return to normal television viewing (to watch the channel last selected in the EPG screen) by pressing the [GUIDE] key again, or the [MENU] key. DIGITAL TELETEXT Many digital terrestrial television channels not only broadcast pictures and sound for programmes but also pages of information on the programmes, the weather, news and many other topics. This digital teletext can be displayed by the receiver.
WIDESCREEN TV sets are available with screens of the standard (4:3) format and widescreen (16:9) format. When you first installed your receiver you specified the format of the connected TV (this can now be altered i f n e c e s s a r y ; s e e S e c t i o n 3 - ADVA N C E D OPERATION - Configuring Your Receiver). Digital terrestrial television broadcasts are also made in both standard and widescreen formats.
SYSTEM TV OUT Use LEFT/RIGHT buttons to toggle System Menu Language. Press OK on the preferred language. Use LEFT/RIGHT buttons to toggle Country options. Press OK on the preferred Country. The receiver can output either an RGB/Y/C,Video signal from the TV SCART on the rear panel. Although the RGB format results in a better quality picture, not all equipment - particularly some VCRs - can cope with an RGB signal (see Appendix C Connecting A VCR).
The Channel List screen displays the list of channels in the receiver's memory, with a quarterscreen image window showing the selected channel, and can be used to change channels for viewing, delete channels from the memory, edit the name of the channel as it appears in the list and on-screen, lock a channel against viewing by younger members of the family, and set up favourite channels. Channel List functions are carried out on one channel at a time.
Hint The PIN is factory set to 0000. This code should be reset (as described below) to another sequence of numbers, known only to you, when you have finished setting up the receiver. You can now leave the Channel List screen and return to normal TV viewing by pressing [MENU]. Any attempt to change channel to the locked channel will now display the same window requesting the PIN code and the channel will only be displayed on entry of the correct code.
PROGRAMME REMINDERS Programme reminders can be set to signal that a programme is about to start when you are watching another channel. A reminder is set from the Electronic Programme Guide screen. Press the [GUIDE] key to display the EPG screen and press [RIGHT] to display the next programme details in the text window and highlight the name of the next programme in the list of channels.
INSTALLATION Although your receiver will not lose its settings or stored channels when switched off, you may wish to re-install the receiver because you have moved to a different area with different broadcast frequencies, you wish to reinstate a channel previously deleted from the channel list, or you want to watch new channels which have started broadcasting.
SPECIFICATION GENERAL Broad casting system DVB-T 2k & 8k Video system PAL Number of preset channels 200 Channel frequencies 47 - 858 Mhz Stereo system MPEG Layer I & II 32/44.1/48 KHz Power requirements DC 6V, AC adapter: 100 - 240V, 50/60 Hz Terminals U/V Input PAL type U/V Output PAL type SCART-1 (TV) RGB, Y/C, Video output and Audio output are available. SCART-2 (Aux) RGB, Y/C, Video output, Audio output and Video input are available.
CONNECTING THE EXTERNAL DEVICES If your TV and VCR both have two scart sockets you can connect as follows.Unplug the aerial lead and connect this to the ANT IN socket on the rear of your receiver. Connect the aerial lead (supplied) from the LT OUT on the receiver to the ANT IN on the rear of the VCR. Then connect an aerial lead from the LT OUT on the VCR to the ANT IN socket on the rear of your TV. If your VCR has only one scart socket, connect only Scart 1 to VCR.
TROUBLESHOOTING GUIDE If you experience problems with the receiver or its installation, in the first instance please read carefully the relevant sections of this User Guide and this Troubleshooting section.
50054835 C 2004 Victor Company of Japan, Limited 0804MKH-VT-VT