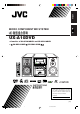
English MICRO COMPONENT MD SYSTEM UX-A10DVD —Consists of CA-UXA10DVD and SP-UXA10DVD — SP-UXA10DVD CA-UXA10DVD COMPACT D V D / M D S U P E R V L O A D I N G C D / V C D / C D SUPER VIDEO M E C H A N I S M STANDBY/ON MARK ABC DEF 1 2 3 GHI JKL MNO 4 5 6 TUV WXYZ PQRS 7 DISP/CHARA CLOCK/TIMER 8 9 0 +10 A.P. SLEEP OFF 10 ON SCREEN AUX REV.MODE PLAY MODE REV.
Warnings, Cautions and Others Caution— button! Disconnect the mains plug to shut the power off completely. The button in any position does not disconnect the mains line. The power can be remote controlled. CAUTION To reduce the risk of electrical shocks, fire, etc.: 1. Do not remove screws, covers or cabinet. 2. Do not expose this appliance to rain or moisture. CAUTION • Do not block the ventilation openings or holes. (If the ventilation openings or holes are blocked by a newspaper or cloth, etc.
IMPORTANT FOR LASER PRODUCTS / REPRODUCTION OF LABELS / 1 CLASSIFICATION LABEL ON EXTERIOR SURFACE CLASS LASER 1 PRODUCT 2 WARNING LABEL INSIDE THE UNIT 1. CLASS 1 LASER PRODUCT 2. CAUTION: Visible and invisible laser radiation when open and interlock failed or defeated. Avoid direct exposure to beam. 3. CAUTION: Do not open the top cover. There are no user serviceable parts inside the unit; leave all servicing to qualified service personnel. G-2 UX-A10DVD[UB]SAFETY.pm6 2 02.9.
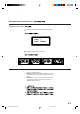
English Introduction We would like to thank you for purchasing one of our JVC products. Before operating this unit, read this manual carefully and thoroughly to obtain the best possible performance from your unit, and retain this manual for future reference. About This Manual This manual is organized as follows: • This manual mainly explains playback and editing operations using the remote control, and other operations such as recording using the buttons on the main unit.
Location of the Buttons and Controls ........... 3 About Discs ...................................................... 6 Playable Disc Types ........................................................ 6 Disc structure .................................................................. 7 Getting Started ................................................ 8 Unpacking ....................................................................... 8 Putting the Batteries into the Remote Control ................
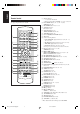
English Location of the Buttons and Controls Become familiar with the buttons and controls on your unit. Main Unit 1 COMPACT D V D / S U P E R V C D / V C D / C D SUPER VIDEO w 2 M D L O A D I N G e r t y M E C H A N I S M 3 4 5 6 7 AUX REV.MODE DVD MD u FM/AM TAPE i o ; a 8 A U T O R E V E R S E 9 p s q U X - A10 D V D d f g D I G I T A L Main unit See pages in parentheses for details.
English Display window on the electronic swing panel 1 2 3 45 6 7 8 9 0- = ~ !@ Display window See pages in parentheses for details.
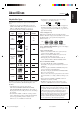
English Remote Control See pages in parentheses for details. STANDBY/ON MARK 1 ABC DEF 1 2 3 GHI JKL MNO 4 5 6 PQRS TUV WXYZ 7 8 9 u DISP/CHARA i CLOCK/TIMER o A.P. SLEEP OFF 10 2 3 4 5 6 ON SCREEN 0 ; +10 PLAY MODE REV. MODE COLOR DVD LEVEL ZOOM DIGEST SUB TITLE AUDIO TITLE SEARCH ANGLE LP: TOP MENU DIMMER MENU CHOICE 7 ENTER CANCEL RETURN SET h 8 DVD 9 SELECT MD TAPE FM/AM /AUX FM MODE STROBE p PREV.
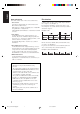
About Discs Playable Disc Types • Continued use of irregular shape discs (heart-shape, octagonal, etc.) can damage the unit. This unit has been designed to play back the following discs: • This unit can also play back MP3 files recorded on CD-Rs and CD-RWs. For in-depth information about MP3, see “MP3 Basic Operations” on page 32. • We refer to DVD Video as DVD in this manual.
English Disc structure About audio formats Some audio formats used on discs are described below: • Linear PCM Uncompressed digital audio, the same format used on CDs and most studio masters. DVD supports 2-channels at sampling rates of 48/96 kHz and quantization of 16/20/24 bits. Audio CD/Video CD is limited to 2-channels at 44.1 kHz at 16 bits. • Dolby Digital A surround audio format configured with up to six channels. Because the “LFE (Low-Frequency Effect for sub-woofer, etc.
Getting Started Unpacking Connecting Antennas After unpacking, check to be sure that you have all the following items. The number in parentheses indicates the quantity of each piece supplied. FM antenna • • • • • • FM antenna (supplied) English Continued AN TE NN A FM antenna (1) AM loop antenna (1) Remote control (1) Batteries (2) Video cord (1) Speaker cords (2) FM (75 CO ) AX IAL A LOM OP AM EX T If any item is missing, consult your dealer immediately.
English Connecting Speakers AM antenna 1 2 To connect speakers You can connect the speakers using the speaker cords. 1 ANTENNA 2 AV COMPU LINK Speaker terminals 3,4 Vinyl-covered wire (not supplied) 3 Red SPEAKERS RIGHT Speaker cord If the cords are covered with insulation, remove the short section of insulation at the end of each cord by twisting and pulling it off. 2 Connect the AM loop antenna to the AM LOOP terminals as illustrated.
English Connecting a TV To remove the speaker grilles The speaker grilles are removable as illustrated below: Holes Projections Connect your TV and this unit using the composite video cord (supplied) or an S-video cord (not supplied). • DVDs are protected by the copyguard system. Connecting to a TV through a VCR (or to a TV with a built-in VCR) may cause distortion of picture. • You can also use JVC’s AV COMPU LINK control system. (See page 93.
English Connecting Other Equipment You can connect other equipment such as a digital decorder to reproduce multichannel sounds or audio equipment which can be used as a playback device. Before playing back a disc, select “DIGITAL AUDIO OUTPUT” in the AUDIO menu according to audio equipment connected to the DVD OPTICAL DIGITAL OUT terminal. See “To select the output signal type” on page 16. When you connect and use such equipment, refer also to its manual.
By using an optical digital cord (not supplied), you can connect audio equipment with an optical digital output terminal. English To connect audio equipment with an optical digital output terminal To connect analog audio equipment By using an RCA pin plug cord (not supplied), you can connect analog audio equipment. • Be sure that the plugs of the audio cords and the jacks on the rear of the unit are color-coded: White plugs and jacks are for left audio signals, and red ones for right audio signals.
English NOW you are ready to plug in the unit and any other connected equipment. ANTENNA You need to set the following, using the setting menu shown on the TV, before starting playback. • You can select the language used in the setting menu. • If an Audio CD or MP3 disc is loaded, you cannot show the setting menu. Before starting the setting, remove the disc. • For further information about the setting menu, see pages 83 to 87.
English Continued 4 Press Cursor ∞ repeatedly to move On the remote control ONLY: “ to ” (ON SCREEN LANGUAGE). MENU CHOICE LP: TITLE SEARCH ANGLE TOP MENU MENU CHOICE ENTER CANCEL RETURN SET DVD DVD SELECT MD TAPE FM/AM /AUX SELECT STROBE PREV. FM MODE NEXT GROUP SKIP SHIFT SLOW MD GROUP MD TITLE/EDIT TITLE/EDIT 3D PHONIC AHB PRO MD FADE SP/LP2/LP4 GROUP REC MUTING SOUND SHIFT ENTER – SLOW + VOLUME 5 Press Cursor 3/2 to select the language you want.
English 7 Guidelines to select the monitor type To select the monitor type—Step 2: You need to select the monitor type to match your TV to play back DVDs recorded with a height/width ratio of 16:9. 1 Press Cursor 5 repeatedly to move Selectable types: 4:3 LB • 4:3 LB (Letter Box) : Select when viewing on a TV whose aspect ratio is 4:3. While viewing a wide screen picture, the black bars appear on the top and the bottom of the screen. to “LANGUAGE.
If you connect audio equipment to the DVD OPTICAL DIGITAL OUT terminal, you need to select the type of digital signals output through the terminal according to the particular kind of audio equipment. 1 Press Cursor 5 to move to “DISPLAY.” MONITOR TYPE 4:3 LB SCREEN SAVER MODE 2 ON SCREEN GUIDE ON EXIT PRESS to “AUDIO.” AUDIO menu appears on the TV. DIGITAL AUDIO OUTPUT STREAM/PCM DOWN MIX Lo / Ro COMPRESSION ON EXIT KEY 3 Press Cursor ∞ to move to “DIGITAL AUDIO OUTPUT.
English 4 Press ¢ or 4 repeatedly to adjust the minute. Setting the Clock You can set the clock when the unit is either turned on or in standby mode. On the remote control ONLY: STANDBY/ON MARK ABC DEF 1 2 3 GHI JKL MNO 4 5 6 PQRS TUV WXYZ 7 8 9 DISP/CHARA CLOCK/TIMER DISP/CHARA 5 Press SET to finish setting the clock. CLOCK/TIMER A.P. SLEEP OFF 10 ON SCREEN 0 PLAY MODE REV.
English Basic and Common Operations The buttons emphasized in the illustration below are used and explained in the following section (pages 19 to 23). Remote control STANDBY/ON STANDBY/ON MARK DEF ABC 1 2 3 GHI JKL MNO 4 5 6 PQRS TUV 7 8 9 10 0 +10 DISP/CHARA CLOCK/TIMER WXYZ A.P. SLEEP OFF ON SCREEN A.P. SLEEP OFF PLAY MODE REV.
English Turning On the Power To turn off the unit automatically (Auto Power Off) When you press one of the source selecting buttons, the unit automatically turns on (and starts playback if the source is ready). On the remote control: DVD SELECT MD TAPE FM/AM /AUX Using the Auto Power Off function, the unit automatically turns itself off if no sound comes in for more than 3 minutes except when FM or AM is selected as the source.
To select the tuner or external equipment as the source On the remote control: Press FM/AM/AUX. The unit automatically turns on (when the unit is in standby), and the last selected source appears in the main display.
English Reinforcing the Bass Sound Selecting the Sound Modes The richness and fullness of the bass sound is clearly maintained regardless of how low you set the volume —Active Hyper Bass Pro. • This function also affects the sound from headphones. • This function affect neither recording nor the signals output through the DVD OPTICAL DIGITAL OUT termminal. You can select one of four preset sound modes. • This function also affects the sound from headphones.
English Changing the Display Illumination To create your favorite colors To select the illumination color You can create two favorite colors and store them in memory as “MANUAL1” and “MANUAL2.” • There is a time limit in doing the following steps. If the unit exits from the color adjusting mode before you finish, start from step 1 again. You can set the illumination color to your preference.
English Adjusting the Audio Input Level 7 Adjusting the audio input level through the OPTICAL DIGITAL IN terminal If the sound from the component connected to this unit is too loud or is not loud enough when changing from another source to “AUX” or “AUX-DIGITAL” (without changing the volume level), you can change the audio input level through the AUX jacks or the OPTICAL DIGITAL IN terminal.
English Listening to FM and AM Broadcasts The buttons emphasized in the illustration below are used and explained in the following section (pages 25 and 26). Remote control MARK ABC STANDBY/ON DEF 1 2 3 GHI JKL MNO 4 5 6 PQRS TUV WXYZ 7 8 9 10 0 +10 MARK ABC DEF 1 2 3 GHI JKL MNO 4 5 6 PQRS TUV WXYZ 7 8 9 0 +10 DISP/CHARA CLOCK/TIMER A.P. SLEEP OFF 10 ON SCREEN PLAY MODE REV.
English Setting the AM Tuner Interval Spacing Some countries space AM stations 9 kHz apart, and some countries use 10 kHz spacing. When shipped, the built-in AM tuner is set to 9 kHz spacing. You can change it to 9 kHz or 10 kHz spacing. To stop during searching, press ¢ or 4 (or UP or DOWN on the main unit). When you repeatedly press ¢ or 4 (or UP or DOWN on the main unit) The frequency changes step by step.
English Presetting Stations You can preset 30 FM and 15 AM stations manually. In some cases, test frequencies have been already stored for the tuner since the factory examined the tuner preset function before shipment. This is not a malfunction. You can preset the stations you want into memory by following the presetting method. • There is a time limit in doing the following steps. If the setting is canceled before you finish, start from step 2 again.
English Playing Back Discs The buttons emphasized in the illustration below are used and explained in the following section (pages 28 to 39). DVD SVCD VCD Audio AnduioCD CD MP3 shows the types of discs the operation is available for. Remote control STANDBY/ON MARK ABC DEF 1 2 3 GHI JKL MNO 4 5 6 PQRS TUV WXYZ 7 8 9 MARK ABC DEF 1 2 3 GHI JKL 5 6 TUV WXYZ 7 8 9 10 0 +10 10 0 DVD COLOR LEVEL CLOCK/TIMER A.P. SLEEP OFF PLAY MODE REV.
English Loading a Disc IMPORTANT: Before performing any operations for DVD, SVCD and VCD, make sure of the following. • Check the connection with the TV. • Turn on the TV and select the correct input on the TV to view the pictures or on-screen menus/indications on the TV screen. • Select the correct color system. Available for: DVD SVCD VCD On-screen guide icons MP3 1 Press DVD 0 on the main unit.
English To go to another chapter DVD Basic Operations Available for: DVD • To play back a SVCD, VCD, or Audio CD, see page 30. • To play back an MP3 disc, see page 32. • Playback will stop when a disc menu appears on the TV screen. If a menu appears while playing, see “Playing Back by Using the Disc Menu” on page 34. Press 4 or ¢ during playback. • 4: Goes back to the beginning of the current or previous chapters. • ¢: Skips to the beginning of the next or succeeding chapters.
English Continued SVCD/VCD/Audio CD Basic Operations • Current disc information 1 1/2 1/2 ENGLISH 2 1: 2: 3: 4: Available for: 1/5 ENGLISH 3 • Disc playing information 3 CHAP. 2 TIME 1:33:33 BITRATE 3.3 Mbps 1 2 1: 2: 3: 4: 4 3 Audio AnduioCD CD VCD • To play back a DVD, see page 29. • To play back an MP3 disc, see page 32. • While playing a SVCD or VCD with the PBC function, the playback will stop when a disc menu appears.
English To stop play for a moment, press DVD #¥8 (or 8 on the remote control). While pausing, the elapsed playing time and the disc indicator flash on the display. • To start playback again, press DVD #¥8 again (or press DVD SELECT 3 on the remote control). To stop playing, press 7. • This unit can store the stop point, and when you start playback again by pressing DVD #¥8 (or DVD SELECT 3 on the remote control), playback starts from the position where you have stopped—Resume play.
MP3 Basic Operations Available for: Unavailable functions for MP3 disc MP3 • To play back a DVD, see page 29. • To play back a SVCD, VCD, or Audio CD, see page 30. About MP3 disc What is MP3? MP3 is an abbreviation of Motion Picture Experts Group 1 (or MPEG-1) Audio Layer 3. MP3 is simply a file format with a data compression. By using MP3 format, one CD-R or CD-RW can contain 10 times as much data volume as a regular CD can.
English To go to another group To show the on-screen indication On the remote control ONLY: You can show the following information on the TV while playing back a disc. Press GROUP SKIP 4 or GROUP SKIP ¢ while holding down SHIFT during playback. • GROUP SKIP 4: Goes back to the previous groups. • GROUP SKIP ¢: Skips to the beginning of the next or succeeding groups. On the remote control ONLY: To show the on-screen indication, press ON SCREEN while playing a MP3 disc.
On the main unit: Forward search To fast-forward the chapter or track, press and hold ¢ while playing a disc. • If you keep holding down the button for a certain period of time, the search speed increases. Reverse search To fast-reverse the chapter or track, press and hold 4 while playing a disc. • If you keep holding down the button for a certain period of time, the search speed increases. To go back to normal play, release the button.
English Repeating Playback PBC operation concept 7 Repeat play Available for: SVCD DVD VCD Audio AnduioCD CD MP3 You can repeat playback of disc’s contents as follows: – For DVD: You can repeat the current title or chapter. • The repeat play cannot be used on some DVD discs. • For DVD, you can select “REPEAT” only during playback. – For SVCD, VCD, or Audio CD: You can repeat a track or all tracks. • You can only use the repeat play on SVCD or VCD without the PBC function.
Ex.: During VCD playback. REPEAT A-B REPEAT TIME SEARCH PBC CALL REPEAT ALL ALL 1 7 A-B repeat play Available for: VCD CONTROL No indication (canceled) • ALL: All tracks on the disc or all tracks in the program will be repeated. • 1: Current track will be repeated. English For SVCD, VCD, or Audio CD: SVCD DVD VCD Audio AnduioCD CD While playing, you can select a portion you want to repeat.
English 5 Press the number buttons to enter a title, track, or Programming the Playing Order —Program Play Available for: SVCD DVD Audio AnduioCD CD VCD MP3 You can arrange the order of playback before you start playing. – For DVD: You can arrange the order in which the titles play. • The program play cannot be used on some DVD discs. – For SVCD, VCD, Audio CD: You can arrange the order in which the tracks play. – For MP3 disc: You can arrange the order in which the groups play.
To go to the next steps, press ¢. • You cannot go back to the previous steps by pressing 4. If your entry is ignored You have tried to program a title/track/group number that does not exist on the disc (for example, selecting track 14 on a disc that only has 12 tracks). Such entries are ignored. If the total playing time exceeds 100 minutes The total playing time in the main display will not be shown. (“– – : – –” will appear.) To check the programed contents On the TV: Press PLAY MODE.
English 5 Press DVD SELECT 3. Playing at Random—Random Play Available for: DVD SVCD VCD Audio AnduioCD CD MP3 You can play disc’s contents in random order. – For DVD: You can play the titles in random order. • The random play cannot be used on some DVD discs. – For SVCD, VCD, Audio CD: You can play the tracks in random order. – For MP3 disc: You can play the groups in random order. • You cannot perform the random play while the program play is activated. (See page 37.
English Playing Back MDs The buttons emphasized in the illustration below are used and explained in following section (pages 41 to 46). Remote control MARK ABC DEF 1 2 3 GHI JKL MNO 4 5 6 STANDBY/ON MARK ABC DEF 1 2 3 GHI PQRS TUV WXYZ 7 8 9 JKL MNO 4 5 6 PQRS TUV WXYZ 7 8 9 0 +10 CLOCK/TIMER A.P. SLEEP OFF 10 ON SCREEN PLAY MODE REV.
English Playing Back the Entire MD While the unit is pulling in the MD: • DO NOT press MD 0. • DO NOT close the electronic swing panel by force. 1 Press MD 0 on the main unit. The unit automatically turns on, the electronic swing panel slides upward, then the MD loading slot appears. • If an MD is already in the MD loading slot, it will be ejected. About the MD indicator An MD is loaded. 2 Insert an MD into the MD loading slot. During playback. During pause.
English Continued While stopped: On the main unit: Press and hold ¢ or 4. • ¢: Fast-forwards the track. • 4: Fast-reverses the track. 2*1 1 To go back to normal play, release the button. 4*2 3 To go to another track Press ¢ or 4 repeatedly. • ¢: Skips to the beginning of the next or succeeding tracks. • 4: Goes back to the beginning of the current or previous tracks.
English • ALL: – For normal play or the random play: Repeats all the tracks on the MD. – For the program play mode: Repeats the program. – For the group play mode: Repeats all the tracks in a group. indicator lights up on the display. The • When the program play is activated, the program entry display appears in the main display after a few seconds. (See step 5.) • Each time you press the button, play mode changes as follows: REPEAT PROGRAM Normal play • 1: Repeats one track.
English Playing at Random—Random Play If your entry is ignored You have tried to program a track that does not exist on the MD (for example, selecting track 14 on an MD that only has 12 tracks). Such entries are ignored. You can play MD’s contents in random order. • You cannot perform the random play while the program play (see page 43) or the group play (see page 45) is activated. On the remote control ONLY: If you try to program a 33rd step “MEMORY FULL” will appear in the main display.
English Playing Tracks in a Group—Group Play You can play back only tracks in a group. • To make or edit groups, see pages 66 to 74. • You cannot perform the group play while the program play (see page 43) or the random play (see page 44) is activated. On the remote control ONLY: 1 Load an MD including (a) groups. 2 Press MD 3/8, then 7. The source is changed to “MD” and playback is stopped. 3 Press PLAY MODE. To go to another track in the same group, press ¢ or 4 repeatedly.
You can search for the tracks by their titles and play them back. For details on assigning a title, see pages 80 to 82. On the remote control ONLY: 2) Press the character entry button for a character you want to enter. Ex.: • To enter an “A” or “a,” press ABC once. To enter a “B” or “b,” press ABC twice. To enter a “C” or “c,” press ABC three times. • To enter a symbol, press MARK repeatedly until the mark you want appears. Available symbols: 1 Load an MD. 2 Press MD 3/8, then 7.
English Playing Back Tapes The buttons emphasized in the illustration below are used and explained in the following section (page 48). Remote control STANDBY/ON MARK ABC DEF 1 2 3 GHI JKL DISP/CHARA MNO 4 5 6 PQRS TUV WXYZ 7 8 9 10 0 +10 CLOCK/TIMER A.P. SLEEP OFF PLAY MODE REV. MODE COLOR DVD ON SCREEN ZOOM LEVEL DIGEST SUB TITLE AUDIO TITLE SEARCH ANGLE LP: TOP MENU REV.
English To stop during play, press 7. Playing Back a Tape To fast-wind to the left, press 4. You can play back type I tapes. To fast-wind to the right, press ¢. 1 Push ) (PUSH OPEN). To remove the cassette, push ) (PUSH OPEN). The cassette holder opens. DO NOT push ) (PUSH OPEN) during tape play. ) (PUSH OPEN) To play both sides—Reverse mode You can set the deck to play just one side or both sides of a tape once, or both sides continuously.
English Special Disc Playback The buttons emphasized in the illustration below are used and explained in the following section (pages 50 to 55). DVD SVCD VCD Audio AnduioCD CD shows the types of discs the operation is available for. • The functions in this section do not work for MP3 discs.
IMPORTANT: Before performing any operations for DVD, SVCD and VCD, make sure of the following. • Check the connection with the TV. • Turn on the TV and select the correct input on the TV to view the pictures or on-screen menus/indications on the TV screen. • Select the correct color system.
English 3 Enter the playing time by pressing the number buttons (0 to 9). • The 10 button works to enter “0.” Ex.: To play back from the position of “0:23:45.” _:__:__ Press 0 « 0:__:__ Press 2 « 0:2_:__ Press 3 « Available for: DVD SVCD VCD You can view nine opening scenes of chapters or tracks at a time and select the desired scene from those displayed on the TV directly. • You cannot use this function while a SVCD or VCD is played back with the PBC function.
To show the previous page, press Cursor 2/3/5/∞ to select the left top scene, then press Cursor 2. English • You can also show other pages as follows: 2 Press Cursor 3/2 to select a view angle you want. • Each time you press the button, the view angle changes as follows: 1/3 1/3 2/3 3/3 To show the next page, press Cursor 2/3/5/∞ to select the right bottom scene, then press Cursor 3. 3 Press ENTER. Playback starts with the selected scene. Ex.: When the disc has 3 angle views.
English Selecting the Audio Language or Sound Available for: SVCD DVD VCD While playing a disc containing audio languages (sound tracks), you can select the language (sound) to listen to. On the remote control ONLY: The on-screen indication appears on the TV. ENGLISH Ex.: While a DVD which has 3 selections is played back. 2 Press Cursor 3/2 to select an audio language (sound) you want.
Available for: DVD SVCD VCD You can freeze a picture and advance the still picture frame by frame. Nine screens of the same pictures appear and is played frame-by-frame at normal speed in following cases • If you press and hold STROBE for more than 1 second during normal playback. • If you press DVD SELECT 3 after pressing and holding STROBE in step 2. On the remote control ONLY: Playing Back in Slow-Motion—Slow 1 Press 8 once during play. A still picture appears on the TV.
English Zooming in the Picture—Zoom Available for: DVD SVCD Enjoying Virtual Surround Sound —3D PHONIC VCD You can zoom a picture by 2 times. Available for: On the remote control ONLY: Using the 3D PHONIC function, you can get a simulated surround effect. • For SVCD or VCD, you can use the 3D PHONIC function only when the AUDIO setting is set to STEREO. (See page 53.) 1 Press ZOOM while holding down SHIFT. “ZOOM” appears on the TV.
English Recording The buttons emphasized in the illustration below are used and explained in the following section (pages 57 to 64). For recording operations, you primarily use the buttons on the main unit. DVD SVCD VCD Audio AnduioCD CD MP3 shows the types of discs the operation is available for. Main unit AUX REV.
English Before You Start Recording on an MD • It may be unlawful to record or play back copyrighted material without the consent of the copyright owner. • When you record onto a partially recorded MD, its contents are not erased or overwritten. The recording starts from the point following the last recorded track of the MD. If you want to record on such an MD from the beginning, you have to erase its contents first (see “Erasing All Tracks —ALL ERASE” on page 79).
English Stereo Long-Hour Recording (MDLP) On conventional MD recorders, 2 times long-hour recording on MDs has been possible only in monaural sound, but this unit allows for 2 times or 4 times longhour recording without losing stereo sound by the latest ATRAC3* techniques. * See “ATRAC (Adaptive TRansform Acoustic Coding)/ )” below. ATRAC3 ( With this feature, you can record on a single MD using different recording length modes—SP: Standard Play, LP2: 2 Times Long Play, LP4: 4 Times Long Play.
English Setting MD Recording Modes Before recording on MDs, set the recording length mode (SP/LP2/LP4), “LP:”-prefix addition mode, and the group recording mode. On the remote control ONLY: To set the MD recording length mode The MD recording length mode can be set and stored for each source. 1) Select the source to record. Recording a Disc onto an MD—Disc Synchronized Recording Using the disc synchronized recording method, you can start and stop disc play and MD recording at the same time.
Available for: English 7 From a DVD To record a single track during play or pause DVD Available for: • Analog recording method is used for DVD-to-MD recording. 1 Prepare a disc. SVCD VCD Audio AnduioCD CD • You can do this operation for SVCD or VCD only without the PBC function. On the main unit ONLY: After placing a disc, press DVD #/8 (or DVD SELECT 3 on the remote control), then 7 before going to the next step.
English Recording Other Sources onto an MD • Digital recording method is used for AUX-DIGITAL-toMD recording, while analog recording method is used for FM/AM/AUX-to-MD recording. Sound synchronized recording When recording from external equipment, recording starts automatically when the source sound comes into the unit, and stops automatically if no sound comes into the unit for more than 30 seconds. 4 Press ONE TOUCH MD REC on the main unit.
English Before You Start Recording on a Tape • It may be unlawful to record or play back copyrighted material without the consent of the copyright owner. • The recording level is automatically set correctly, so it is not affected by the volume level. Thus, during recording you can adjust the sound you are actually listening to without affecting the recording level. • While recording, you can hear sound mode effect and/or the AHB PRO (Active Hyper Bass Pro) effect through the speakers or headphones.
English 4 Press ONE TOUCH TAPE REC on the main unit. Recording onto a Tape You can use only type I tapes for recording. 1 Prepare the source to record. To record from a disc: 1) Load a disc. 2) Press DVD #/8 (or DVD SELECT 3 on the remote control), then 7 before going to the next step. • You can create a program (see page 37) or select the random play mode (see page 39) as you wish. To record from an MD: 1) Load an MD. 2) Press MD #/8, then 7 to change the source to “MD.
English Recording a Disc onto an MD and a Tape —Disc Synchronized Recording Available for: DVD SVCD VCD Audio AnduioCD CD When recording on an MD and a tape at the same time A 4-second blank before each track is not made on the tape. MP3 Using the disc synchronized recording method, you can start and stop disc play, MD and tape recordings at the same time. 1 Prepare a disc. After placing a disc, press DVD #/8 (or DVD SELECT 3 on the remote control), then 7 before going to the next step.
English Editing MDs The buttons emphasized in the illustration below are used and explained in the following section (pages 66 to 82). Remote control STANDBY/ON STANDBY/ON MARK ABC DEF 1 2 3 GHI JKL MNO 4 5 6 PQRS TUV WXYZ 7 8 9 DISP/CHARA 0 ABC DEF 1 2 3 GHI JKL MNO 4 5 6 PQRS TUV 7 8 9 10 0 +10 DISP/CHARA CLOCK/TIMER WXYZ TOP MENU A.P. SLEEP OFF CLOCK/TIMER ON SCREEN TOP MENU DIMMER MENU CHOICE ENTER +10 SET ENTER CANCEL RETURN SET DVD SELECT PREV.
English Guidance—MD Group Functions To add to the conventional MD editing functions (called the track editing functions in this manual), MD group functions help you to classify the tracks by making groups on your MD. Classifying the tracks on an MD MDLP enables you to record more tracks on a single MD than the conventional recording method. So, there are many tracks which have been recorded from the various sources—discs, FM, and so on—on your MD.
English Introducing Group Editing Functions The groups and tracks can be edited in many ways (the group editing functions and the track editing functions). From this page to page 74, the group editing functions are explained. For details of the track editing functions, see pages 75 to 79. Forming a group (FORM GR): Page 68 This function forms a series of tracks or a single track into a new group.
This function allows you to form a group from a series of tracks which do not belong to other groups. You can form a group with a single track. Once a new group is formed, the other groups are renumbered. • You can form up to 99 groups on a single MD. • To stop any time during the editing process before step 8, press MD GROUP TITLE/EDIT. On the remote control ONLY: In the following example, the process is explained from the very beginning—that is, inserting a disc.
English Adding a Track to a Group—ENTRY GR This function allows you to enter a track into a group. The track will be added as the last track in the selected group. The track numbers will be renumbered. • To stop any time during the editing process before step 8, press MD GROUP TITLE/EDIT. On the remote control ONLY: In the following example, the process is explained from the very beginning—that is, inserting a disc. You can also edit an MD during playback (in normal play mode).
This function allows you to divide one group into two separate groups. You cannot divide a group containing only a single track. When the original group has a title, both new groups are reassigned the same title as the original group. Once a new group is divided, the other groups are renumbered. • To stop any time during the editing process before step 7, press MD GROUP TITLE/EDIT. 5 Press ¢ or 4 to select the track as the dividing point.
English Joining Two Groups—JOIN GR This function allows you to join two adjacent groups into a single group. When the groups have their own titles, the title of the preceding group is reassigned to the joined group. Once two groups are joined, the other groups are renumbered. • To stop any time during the editing process before step 6, press MD GROUP TITLE/EDIT. On the remote control ONLY: In the following example, the process is explained from the very beginning—that is, inserting a disc.
This function allows you to move a group. Once a group is moved, the tracks and the other groups are renumbered. • To stop any time during the editing process before step 8, press MD GROUP TITLE/EDIT. English Moving a Group—MOVE GR 5 Press SET. • To cancel the setting, press CANCEL, then repeat from step 4. 6 Press GROUP SKIP ¢ or GROUP SKIP 4 On the remote control ONLY: In the following example, the process is explained from the very beginning—that is, inserting a disc.
English Ungrouping Tracks—UNGROUP This function allows you to dissolve a group. You cannot erase the tracks using this function. Once tracks are ungrouped, the other groups are renumbered. • To stop any time during the editing process before step 6, press MD GROUP TITLE/EDIT. On the remote control ONLY: In the following example, the process is explained from the very beginning—that is, inserting a disc. You can also edit an MD during playback (in normal play mode). 5 Press SET.
This function allows you to erase a group together with tracks in the group. You cannot recover the tracks in the erased group. Once a group is erased, the other tracks and groups are renumbered. • To stop any time during the editing process before step 6, press MD GROUP TITLE/EDIT. On the remote control ONLY: English Erasing Tracks in a Group—ERASE GR 4 Press GROUP SKIP ¢ or GROUP SKIP 4 while holding down SHIFT to select the group you want to erase. Ex.: When group 6 is selected. 5 Press SET.
English Introducing Track Editing Functions The groups and tracks can be edited in many ways (the group editing functions and the track editing functions). From this page to page 79, the track editing functions are explained. For details of the group editing functions, see pages 67 to 74. Dividing a track (DIVIDE): Page 76 This function divides a track by adding a track mark at the desired point in the middle or where you want to search for later.
This function allows you to divide one track into two separate tracks. It is useful, for example, when you want to add track marks at a certain point within a track or if you want to separate a recording. When the original track has a title, both new tracks are reassigned the same title as the original track. Once a track is divided, the other tracks are renumbered. • To stop any time during the editing process before step 8, press MD TITLE/EDIT.
English Joining Two Tracks—JOIN This function allows you to join two adjacent tracks into one track. When the tracks have their own titles, the title of the preceding track is reassigned to the newly joined track. Once two tracks are joined, the other tracks and/or the groups are renumbered. • To stop any time during the editing process before step 6, press MD TITLE/EDIT. On the remote control ONLY: In the following example, the process is explained from the very beginning—that is, inserting a disc.
This function allows you to move a track to the position you prefer. It is useful to change the order of the tracks as you like. Once a track is moved, the tracks and/or the groups are renumbered. • To stop any time during the editing process before step 8, press MD TITLE/EDIT. On the remote control ONLY: In the following example, the process is explained from the very beginning—that is, inserting a disc. You can also edit an MD during playback (in normal play mode).
English Erasing Tracks—ERASE This function allows you to erase unwanted tracks. You cannot recover the erased tracks. Once tracks are erased, the other tracks and/or groups are renumbered. You can erase up to 15 tracks at a time. • To stop any time during the editing process before step 8, press MD TITLE/EDIT. On the remote control ONLY: In the following example, the process is explained from the very beginning—that is, inserting a disc. You can also edit an MD during playback (in normal play mode).
Assigning Titles to an MD 1 Insert an MD you want to edit into the MD loading slot. You can assign a name to each MD, to each group and to each track using alphabetic characters (uppercase and lowercase), symbols and numerals. Once a title is assigned, it is displayed for your confirmation. • You cannot edit titles composed of more than 61 characters. About the number of characters entered for an MD The total number of characters that you can enter for an MD is 1792.
English 6 Press ENTER to finish the current title entry. 5 Enter characters. 1) Press DISP/CHARA to select the character set you want. • Each time you press the button, the character set changes as follows: Small letters & Symbols Capital letters & Symbols Numerals 2) Press the character entry button for a character you want to input. Ex.: • To enter an “A” or “a,” press ABC once. To enter a “B” or “b,” press ABC twice. To enter a “C” or “c,” press ABC three times.
English Changing the Title You can assign titles during play or recording • During playback: Entering a track title The MD recorder repeats playback of the current track until you press ENTER in step 6 on page 81. When you press ENTER, the next track will be played. Entering a disc title The MD recorder repeats playback of all tracks of the MD until you press ENTER in step 6 on page 81. When you press ENTER, the MD recorder enters the track title entry mode.
English Changing the DVD Initial Settings The buttons emphasized in the illustration below are used and explained in the following section (pages 84 to 87). Remote control STANDBY/ON MARK ABC DEF 1 2 3 GHI JKL MNO 4 5 6 PQRS TUV WXYZ 7 8 9 MARK ABC DEF 1 2 3 GHI JKL DISP/CHARA MNO 4 5 6 PQRS TUV WXYZ 7 8 9 10 0 +10 CLOCK/TIMER A.P. SLEEP OFF TOP MENU MENU CHOICE PLAY MODE REV.
Setting menu • LANGUAGE menu (see page 85) Basic Procedure The setting menu appears only when the selected source is the DVD player and the disc is not played back. • When an Audio CD or MP3 disc is loaded, you cannot show the setting menu. On the remote control ONLY: MENU LANGUAGE CHINESE AUDIO LANGUAGE CHINESE SUBTITLE CHINESE ON SCREEN LANGUAGE ENGLISH 1 Press CHOICE while holding down SHIFT. The LANGUAGE menu appears on the TV.
English Changing the Initial Language Settings Changing the Various Audio Settings On the LANGUAGE menu, you can select the following initial languages. On the AUDIO menu, you can change the following sound settings. MENU LANGUAGE CHINESE DIGITAL AUDIO OUTPUT AUDIO LANGUAGE CHINESE DOWN MIX SUBTITLE CHINESE COMPRESSION ON SCREEN LANGUAGE ENGLISH STREAM/PCM Lo / Ro EXIT EXIT PRESS PRESS KEY • MENU LANGUAGE: Select the initial language for the DVD disc menu.
English • COMPRESSION: • SCREEN SAVER: When listening to the sound with only Dolby Digital, you can produce a powerful sound even at a low volume level by compressing the dynamic range (difference between the maximum and minimum sound levels). Select the screen saver to prevent the TV monitor from burning out. (See page 28.) – Select “ON” when you want to apply the compression effect (useful late at night). – Select “OFF” when you want surround sound with its full dynamic range (no effect applied).
English Limitting Playback of DVD—Parental Lock Using this function, you can restrict playback of DVD containing violent scenes (and those not suitable for your family members). • This function is only possible for the DVDs containing such rating level information—Level 1 (most restrictive) to Level 8 (least restrictive). Setting the parental lock You can set the parental lock only when a DVD is loaded and playback is stopped. On the remote control ONLY: 1 Press ENTER while holding down 7.
English Using the Timers The buttons emphasized in the illustration below are used and explained in the following section (pages 89 to 92). Remote control STANDBY/ON DEF STANDBY/ON MARK ABC 3 DEF 1 2 3 GHI JKL MNO 4 5 6 PQRS TUV WXYZ 7 8 9 10 0 +10 DISP/CHARA MNO CLOCK/TIMER A.P. SLEEP OFF WXYZ PLAY MODE REV. MODE COLOR DVD ON SCREEN ZOOM LEVEL DIGEST SUB TITLE AUDIO TITLE SEARCH ANGLE LP: TOP MENU A.P. SLEEP OFF MENU CHOICE +10 REV.
English Three timers are available—Recording Timer, Daily Timer and Sleep Timer. • Before using these timers, make sure the built-in clock is set correctly (see page 17). • When using the tuner as the source, preset stations in advance (see page 26). 3 Select the source to record. 1) Press ¢ or 4 repeatedly to select the source. • Each time you press the button, the source changes as follows: FM AM AUX-DIGITAL Using the Recording Timer With the Recording Timer, you can make an unattended recording.
6 Set the timer-off time. 1) Press ¢ or 4 repeatedly to adjust the hour. You can adjust the hour using the number buttons. 2) Press SET. The minute digit starts flashing. 3) Press ¢ or 4 repeatedly to adjust the minute. You can adjust the minute using the number buttons. To turn on the Recording Timer again 1 Press CLOCK/TIMER repeatedly until “REC TIMER” appears in the main display. 2 Press SET repeatedly until the settings are shown in the main display for your confirmation.
English 3 Select the source to play back. 6 Adjust the volume level. 1) Press ¢ or 4 repeatedly to select the source. • Each time you press the button, the source changes as follows: FM AM DVD/CD AUX AUX-DIGITAL MD TAPE 1) Press ¢ or 4 repeatedly to adjust the volume level. • You can adjust the volume level to “– –” or within the range of 0 (silent) to 40 (maximum). • When you select “VOLUME – –,” the volume is set to the current volume level. • You can also use the source selecting buttons.
To sleep with the Sleep Timer and wake up with the Daily Timer With the Sleep Timer, you can fall asleep to your favorite music or radio program. • You can set the Sleep Timer when the unit is turned on. The unit turns off when the shut-off time comes (set by the Sleep Timer), and turns on when the timer-on time (set by the Daily Timer) comes. How the Sleep Timer actually works 1 2 The unit automatically turns off after the specified length of time passes.
English Using AV COMPU LINK Control System The AV COMPU LINK control system allows you to use JVC’s TV with simple operations. To use AV COMPU LINK control system, you need to connect this unit and a TV through the AV COMPU LINK terminals. AV COMPU LINK Connection Connect JVC video components with AV COMPU LINK jack by using a cord with monaural mini-plugs (not supplied). • You need to set “AV COMPULINK MODE” in the SYSTEM menu correctly to use AV COMPU LINK control system. (See page 86.
English Maintenance To get the best performance of the unit, keep your discs, tapes and mechanism clean. Handling MDs General Notes In general, you will have the best performance by keeping your discs, MDs and the mechanism clean. • Store discs and MDs in their cases, and keep them in cabinets or on shelves. • Keep the electronic swing panel closed when not in use. Cleaning the unit • Stains on the unit Should be wiped off with a soft cloth.
English Disc/MD Messages For discs: Message Signification NO DISC No disc is on the disc tray. Place a disc on the disc tray. You are trying to play back a CD-R/RW which has not been “finalized.” This is not a malfunction. You can play back “finalized” CD-R/RWs. The unit and disc Region Code number are incompatible. Change the disc. (See page 28.) ERROR REGION CODE ERROR Solution For MD: Message Signification Solution The disc is blank. Change the MD if you want to enjoy playback.
English Message Signification READ ERROR Solution The UTOC fails to be read. (See below.) Turn off the unit, then turn on it again. Digital copy of the 2nd generation is prohibited. SCMS CANNOT COPY You cannot make a digital recording from a duplicated CD-R/RW onto an MD. If you try to do so, the unit will automatically convert the digital signals to analog signals. You are trying to edit the track recorded Follow the instructions shown in the on the personal computer. main display. (Ex.
English Troubleshooting If you are having a problem with your unit, check this list for a possible solution before calling for service. If you cannot solve the problem from the hints given here, or the unit has been physically damaged, call a qualified person, such as your dealer, for service. Symptom Possible Cause Power does not come on. No sound is heard from the speakers. The power cord is not connected to an AC outlet. • Connections are incorrect or loose. • A pair of headphones is connected.
English Symptom Possible Cause No picture appears on the screen. • The video cord is not connected correctly. Action • Connect the video cord correctly. • You are using a prerecorded MD. • The MD is write-protected. Loaded MD cannot be ejected. • The main AC power cord is not plugged in. • The Disc Lock function is in use. Tape sound is at a very low level and the sound quality is degraded. The cassette holder does not open or close. Impossible to record on a tape.
English Table of Language Codes This table is used when you select an audio language or a subtitle language (see page 53) and when you select a language in the LANGUAGE menu (see page 85).
Table of Country/Area Codes English Continued This table is used when you set a country code for Parental Lock. (See page 87.
English Code LI LK LR LS LT LU LV LY MA MC MD MG MH ML MM MN MO MP MQ MR MS MT MU MV MW MX MY MZ NA NC NE NF NG NI NL NO NP NR NU NZ OM PA Country Liechtenstein Sri Lanka Liberia Lesotho Lithuania Luxembourg Latvia Libyan Arab Jamahiriya Morocco Monaco Moldova, Republic of Madagascar Marshall Islands Mali Myanmar Mongolia Macau Northern Mariana Islands Martinique Mauritania Montserrat Malta Mauritius Maldives Malawi Mexico Malaysia Mozambique Namibia New Caledonia Niger Norfolk Island Nigeria Nicaragua Ne
Design and specifications are subject to change without notice. Amplifier Section—CA-UXA10DVD Cassette deck Output Power (IEC 268-3): Frequency response: Normal (type I): Wow and flutter: Analog input AUX: 74 W (37 W + 37 W) at 6 Ω (10% THD) Sensitivity/Impedance (at 1 kHz) 500 mV/47 kΩ (at “LEVEL 1”) 200 mV/47 kΩ (at “LEVEL 2”) Digital input* OPTICAL DIGITAL IN: –21 dBm to –15 dBm (660 nm ±30 nm) * Corresponding to Linear PCM (with 32 kHz/44.
VICTOR COMPANY OF JAPAN, LIMITED EN, CS V © 2002 VICTOR COMPANY OF JAPAN, LIMITED UX-A10DVD[UB]COVER.pm6 2 J 02.9.