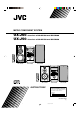
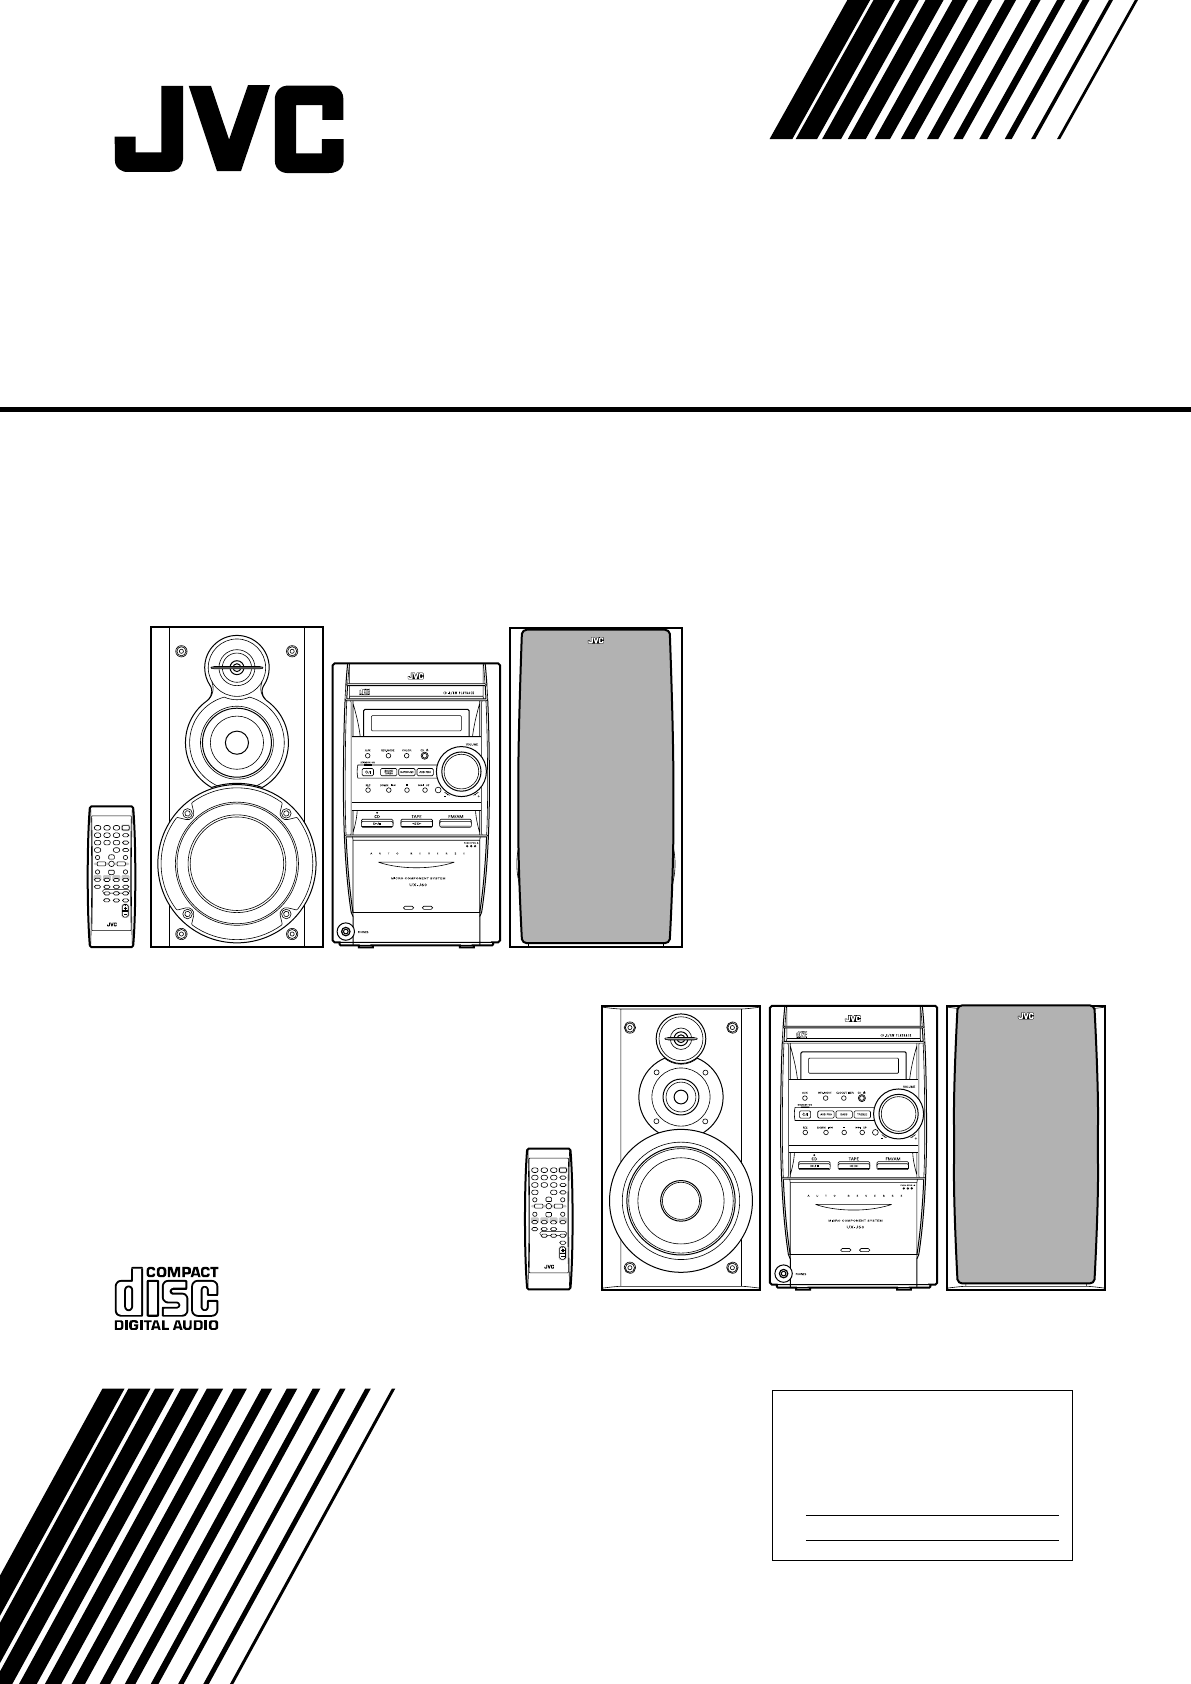
MICRO COMPONENT SYSTEM UX-J60— Consists of CA-UXJ60 and SP-UXJ60 UX-J50— Consists of CA-UXJ50 and SP-UXJ50 RM-SUXJ60U REMOTE CONTROL SP-UXJ60 CA-UXJ60 SP-UXJ60 RM - SUXJ50U REMOTE CONTROL SP-UXJ50 INSTRUCTIONS CA-UXJ50 SP-UXJ50 For Customer Use: Enter below the Model No. and Serial No. which are located either on the rear, bottom or side of the cabinet. Retain this information for future reference. Model No. Serial No. GVT0102-005B [A] Cover_UX-J60&50[A]ff.pm6 1 03.5.
Warnings, Cautions and Others CAUTION—STANDBY/ON button! Disconnect the mains plug to shut the power off completely (the STANDBY/ON lamp goes off). The STANDBY/ON button in any position does not disconnect the mains line. • When the unit is on standby, the STANDBY/ON lamp lights red. • When the unit is turned on, the STANDBY/ON lamp lights green. The power can be remote controlled. CAUTION To reduce the risk of electrical shocks, fire, etc.: 1. Do not remove screws, covers or cabinet. 2.
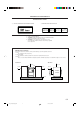
IMPORTANT FOR LASER PRODUCTS REPRODUCTION OF LABELS 1 CLASSIFICATION LABEL ON EXTERIOR SURFACE 2 WARNING LABEL INSIDE THE UNIT CAUTION: Invisible laser radiation when open and interlock failed or defeated. AVOID DIRECT EXPOSURE TO BEAM. (e) ADVARSEL: Usynlig laserstråling ved åbning, når sikkerhedsafbrydere er ude af funktion. Undgå udsættelse for stråling (d) VARNING: Osynlig laserstrålning när denna del är öppnad och spärren är urkopplad. Betrakta ej strålen.
Introduction We would like to thank you for purchasing one of our JVC products. Before operating this unit, read this manual carefully and thoroughly to obtain the best possible performance from your unit, and retain this manual for future reference. About This Manual This manual is organized as follows: • The manual mainly explains operations using the buttons on the remote control.
Contents Location of the Buttons and Control ..................................... 3 Front Panel ........................................................................................... 3 Remote Control .................................................................................... 5 Getting Started ........................................................................ 6 Supplied Accessories ............................................................................
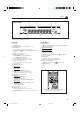
Location of the Buttons and Control Become familiar with the buttons and control on your unit. Front Panel Front Panel 1 w FOR UX-J50: 2 e 3 4 r 5 t 6 7 y 8 u 9 i MICRO COMPONENT SYSTEM UX-J60 p q 3 EN01-13_UX-J60&50[A]f.pm6 3 03.2.
Continued Display Window 1 2 3 [DAILY REC SLEEP]REC PRGM ST RANDOM ALL 5 6 4 SURROUND BASS MONO AHB 7 8 9 p See the pages in parentheses for details.
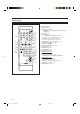
Remote Control See the pages in parentheses for details. STANDBY/ON 1 2 8 3 DISPLAY 1 4 5 6 CLOCK /TIMER 7 8 9 SLEEP 10 +10 UP BASS q w SET 6 7 p TREBLE 2 3 4 5 9 CANCEL DOWN e CD TAPE FM/AM AUX CD REV.
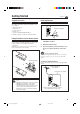
Getting Started Continued Supplied Accessories Connecting Antennas Make sure that you have all the following items. The number in parentheses indicates the quantity of each piece supplied. • AM loop antenna (1) • FM antenna (1) • Remote control (1) • Batteries (2) • Speaker cords (ONLY FOR UX-J60) (4) FM antenna A ENN ANT FM antenna (supplied) EXT P AM M LOO A 75 FM XIAL A CO If anything is missing, consult your dealer immediately.
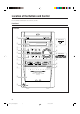
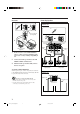
Connecting Speakers AM antenna 1 2 FOR UX-J60: 1 A ENN ANT EXT P AM M LOO A 75 FM XIAL A CO Vinyl-covered wire (not supplied) 2 3 3 Gray AM loop antenna (supplied) RIGHT Speaker cord LEFT MAIN SPEAKERS RIGHT LEFT Red Speaker cord SUBWOOFERS CAUTION: SPEAKER IMPEDANCE 6 -16 1 If the cords are covered with insulation, Black Blue remove a short section of insulation at the end of each cord by twisting and pulling it off.
1 If the cords are covered with insulation, remove a short section of insulation at the end of each cord by twisting and pulling it off. 2 Press and hold the clamp of the speaker terminal as illustrated. 3 Insert the end of the speaker cord into the terminal. Match the polarity between the unit and the speaker terminals: ª to ª and · to ·. 4 Release your finger from the clamp. Connecting Other Equipment To connect an audio equipment You can connect audio equipment—used only as a playback device.
Common Operations Setting the Clock To change the clock Before operating the unit any further, first set the unit’s clock. When you plug the AC power cord into the wall outlet, “0:00” starts flashing on the display. You can set the clock whether the unit is on or off. • There is a time limit in doing the following steps. If the setting is canceled before you finish, start over from step 1. • For UX-J50 only, you can also use CLOCK/TIMER on the unit for this operation. 1 Press CLOCK/TIMER.
Continued Adjusting the Volume Enjoying Sound Effects You can adjust the volume level only while the unit is turned on. The volume level can be adjusted between “VOL MIN” and “VOLUME 1” – “VOLUME 40 (VOL MAX).” You can adjust the sound by using various sound effect functions. • These functions only affect the playback sound, and do not affect your recording. On the remote control: Press VOLUME + to increase the volume or press VOLUME – to decrease it.
Selecting the Display Color (ONLY FOR UX-J60) To enjoy the heavy sound (ONLY FOR UX-J60) You can enjoy the heavy sound. The function boosts low and high frequency sounds—Sound Turbo. Press SOUND TURBO. • Each time you press the button, the Sound Turbo is turned on and off alternately. When it is turned on, the BASS indicator lights up on the display. SOUND TURBO You can select the display color (COLOR 1 – COLOR 5 and AUTO mode). • AUTO mode changes the color (COLOR 1 to COLOR 5) gradually.
Listening to FM and AM Broadcasts Tuning in to a Station 1 Press FM/AM to select the band. Continued Presetting Stations FM/AM The unit automatically turns on and tunes in to the previously received station—either FM or AM. • Each time you press the button, the band alternates between FM and AM. You can preset 30 FM and 15 AM stations. In some cases, test frequencies have been already memorized for the tuner since the factory examined the tuner preset function before shipment.
Tuning in to a Preset Station On the remote control ONLY: 1 Press FM/AM to select the band. FM/AM The unit automatically turns on and tunes in to the previously received station—either FM or AM. • Each time you press the button, the band alternates between FM and AM. 2 UP Press UP or DOWN to select a preset number. DOWN To tune in to a preset station directly using the number buttons On the remote control ONLY: Pressing the number button(s) allows you to select the preset number you want. Ex.
Playing Back Discs This unit has been designed to play back the following discs —CD, CD-R, and CD-RW. When playing a CD-R or CD-RW User-edited CD-Rs (CD-Recordable) and CD-RWs (CD-ReWritable) can be played only if they are already “finalized.” • Usually you can play back your original CD-Rs or CDRWs recorded in music CD format. However, sometimes they may not play depending on their characteristics or recording conditions. • Before playing CD-Rs or CD-RWs, read their instructions or cautions carefully.
Basic Disc Operations 2 To stop playing for a moment PRGM ST CD To resume playing, press CD 3/8 again. • If a program has been stored in memory, the program is called up. 3 To go to another track Press UP or DOWN to select the track number, then press SET. • You can select the track number directly using the number button(s). (See “To go to another track directly using the number buttons.”) Before or during play, press ¢ or 4 repeatedly.
Repeating Tracks—Repeat Play To modify the program On the remote control ONLY: Before or after playing, you can erase the last programed track by pressing CANCEL. • Each time you press the button, the last programed track is erased from the program. CANCEL To add tracks in the program before playing, simply select the track numbers you want to add by following step 3 of the programming procedure. To erase the program, press 7 before or after playing. • Disc ejection also erases the program.
Playing Back Tapes You can play back type I tapes. To stop playing, press 7. Playing Back a Tape 1 To fast-wind to the left or to the right, press ¢ or 4 while the tape is not running. The tape direction indicator (3 or 2) starts flashing rapidly on the display. Press PUSH OPEN 0 on the unit. PUSH OPEN To remove the cassette, press PUSH OPEN 0 on the unit. • If the tape is playing, stop it first. To play both sides—Reverse Mode 2 Put a cassette in with the exposed part of the tape down.
Recording Continued Recording on a Tape IMPORTANT: • It may be unlawful to record or play back copyrighted material without the consent of the copyright owner. • The recording level is automatically set correctly, so it is not affected by the other sound settings. Thus, during recording you can adjust the sound you are actually listening to without affecting the recording level. • If recordings you have made have excessive noise or static, the unit may be too close to a TV.
Disc Direct Recording One Track Recording Everything on the disc goes onto the tape in the order it is on the disc, or according to the order you have set in Program Play. This recording method is convenient when you record tracks while playing the disc. You can record just your favorite songs on the tape. On the unit ONLY: On the unit ONLY: 1 Put a recordable cassette in with the exposed part of the tape down. 1 Put a recordable cassette in with the exposed part of the tape down. 2 Load a disc.
Using the Timers Continued There are three timers available—Daily Timer, Recording Timer, and Sleep Timer. Before using the timers, you need to set the unit’s clock (see page 9). 2 Set the on-time when you want the unit to turn on. 1) Press UP or DOWN to set the hour, then press CLOCK/TIMER. 2) Press UP or DOWN to set the minute, then press CLOCK/TIMER. The unit enters off-time setting mode. Using Daily Timer and Recording Timer UP You can set the timer whether the unit is on or off.
5 Press UP or DOWN to set the volume level, then press CLOCK/TIMER. • You can select the volume level (“VOLUME – –” and “VOLUME 0” to “VOLUME 40”). If you select “VOLUME – –,” the volume is set to the previous level when the unit was turned off. • To turn off the volume while the Recording Timer (REC TUNER) is working, set the volume level “VOLUME 0.” The unit enters the clock setting mode. 6 Using Sleep Timer With the Sleep Timer, you can fall asleep to music.
Maintenance To get the best performance from the unit, keep your discs, tapes, and mechanism clean. Cleaning the unit Handling cassette tapes • Stains on the unit Should be wiped off with a soft cloth. If the unit is heavily stained, wipe it with a cloth soaked in water-diluted neutral detergent and wrung well, then wipe clean with a dry cloth. • If the tape is loose in its cassette, take up the slack by inserting a pencil in one of the reels and rotating.
Troubleshooting If you are having a problem with your unit, check this list for a possible solution before calling for service. If you cannot solve the problem from the hints given here, or the unit has been physically damaged, call a qualified person, such as your dealer, for service. Symptom No sound is heard. Cause Action • Connections are incorrect or loose. • Check all connections and make corrections. (See pages 6 – 8.) • Disconnect the headphones. • Headphones are connected.
Specifications Design and specifications are subject to change without notice.
VICTOR COMPANY OF JAPAN, LIMITED 0503MWMMDWJEM EN © 2003 VICTOR COMPANY OF JAPAN, LIMITED Cover_UX-J60&50[A]ff.pm6 2 03.5.