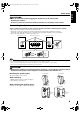
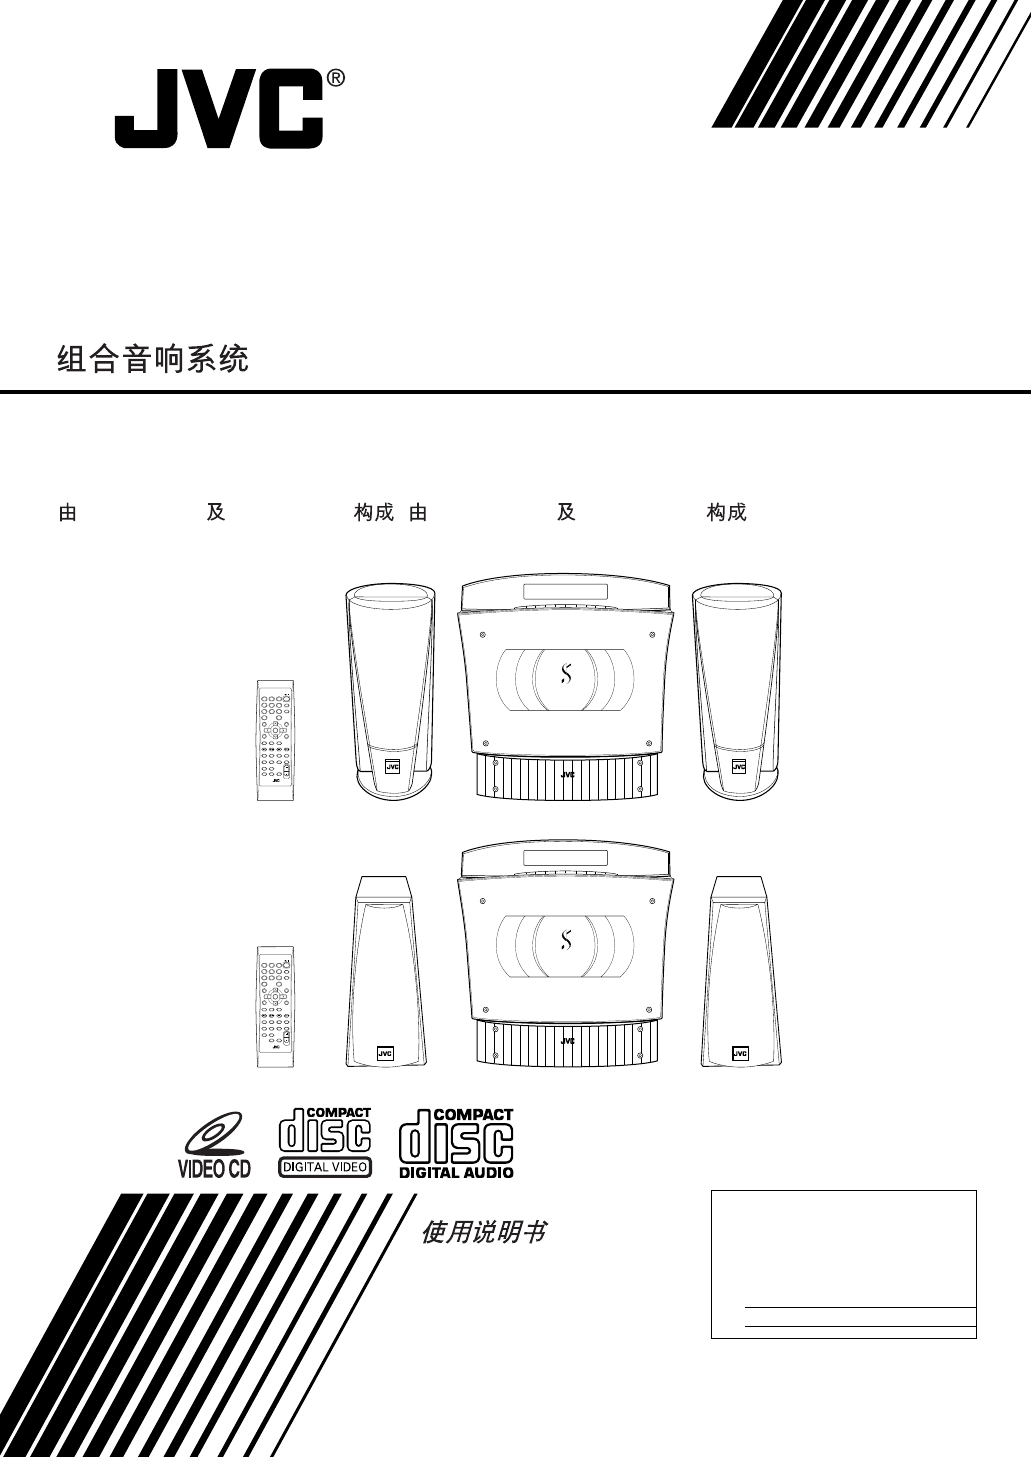
VS-DT68V-88V[UF]_Cover1.FM Page 1 Tuesday, May 28, 2002 1:59 PM COMPACT COMPONENT SYSTEM VS-DT88V/VS-DT68V Consists of CA-VSDT88V and SP-VSDT88V/Consists of CA-VSDT68V and SP-VSDT68V CA-VSDT88V SP-VSDT88V / CA-VSDT68V SP-VSDT68V COMPACT COMPONENT SYSTEM STANDBY/ON 1 2 3 FM/AM 4 5 6 7 8 9 MD/AUX 10 +10 MPX CANCEL VCD No. ( VCD No. 9 SET ON SCREEN PBC AHB PRO BASS PREV.
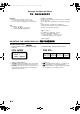
VS-DT68V-88V[US]_Warning.fm Page 1 Thursday, June 20, 2002 2:03 PM Warnings, Cautions and Others CAUTION To reduce the risk of electrical shocks, fire, etc.: 1. Do not remove screws, covers or cabinet. 2. Do not expose this appliance to rain or moisture. 注意 为了防止触电,火灾等危险: 1. 请勿擅自卸下螺丝钉,盖子或机壳。 2. 切勿让本机受雨淋或置潮湿环境中。 Caution — % switch! Disconnect the mains plug to shut the power off completely (the % goes off). The % switch in any position does not disconnect the mains line.
Page 2 Thursday, June 20, 2002 6:05 PM Caution: Proper Ventilation To avoid risk of electric shock and fire, and to prevent damage, locate the apparatus as follows: 1. Top: No obstructions and open spacing. 2. Sides/ Front/ Back: No obstructions should be placed in the areas shown by the dimensions below. 3. Bottom: Place on the level surface. Maintain an adequate air path for ventilation by placing on a stand with a height of 10 cm or more. English VS-DT68V-88V[US]_Warning.
English VS-DT68V-88V[UF]_EN.book Page 1 Wednesday, June 26, 2002 3:31 PM Introduction Thank you for purchasing the JVC Compact Component System. We hope it will be a valued addition to your home, giving you years of enjoyment. Be sure to read this instruction manual carefully before operating your new stereo system. In it you will find all the information you need to set up and use the system. If you have a query that is not answered by the manual, please contact your dealer.
VS-DT68V-88V[UF]_EN.book Page 2 Wednesday, June 26, 2002 3:31 PM English Table of Contents Getting Started ................................................................................................... 3 Accessories .........................................................................................................................................3 How to put Batteries in the Remote Control ......................................................................................
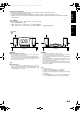
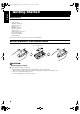
VS-DT68V-88V[UF]_EN.book Page 3 Wednesday, June 26, 2002 3:31 PM English Getting Started Accessories Make sure that you have all of the following items, which are supplied with the System. Power Cord (1) AM Loop Antenna (1) Remote Control (1) Batteries (2) FM Wire Antenna (1) Speaker Cords (2) Video Cord (1) Stand (1) (for Center Unit) Legs (2) (for Stand) Screw (1) (for Stand) Paper Pattern (1) If any of these items are missing, contact your dealer immediately.
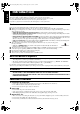
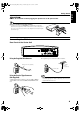
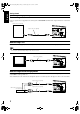
Getting Started CAUTION: • Make all connections before plugging the System into an AC power outlet. (Only if you install the Center Unit vertically) • To place the Center Unit vertically, the Stand and Legs must be attached. (See page 8.) To make connections, let the cords pass in the holes of the Stand as shown in the diagram before attaching the Stand and Legs. Connecting the FM Antenna Rear Panel of the Center Unit SPEAKERS VIDEO OUT ANTENNA FM (75 ) COAXIAL H V R L DISP.
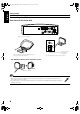
English VS-DT68V-88V[UF]_EN.book Page 5 Wednesday, June 26, 2002 3:31 PM Getting Started Connecting the AM Antenna Rear Panel of the Center Unit SPEAKERS VIDEO OUT ANTENNA FM (75 ) COAXIAL H V R L DISP.
Getting Started CAUTIONS: • Make all connections before plugging the System into an AC power outlet. • Handling the speakers As this is a precision instrument, handle it carefully so as to protect it from shocks. Connecting the Speakers These speakers are exclusively for this system. Using with other devices will damage the speakers. 1. Open each of the terminals to connect the speaker wire leads. 2. Connect the speaker cords between the Speaker terminals of the Unit and the terminals of the Speakers.
English VS-DT68V-88V[UF]_EN.book Page 7 Wednesday, June 26, 2002 3:31 PM Getting Started Connecting a Subwoofer Connect a signal cord (not supplied) between the System’s SUBWOOFER terminal and the input terminal of an external subwoofer.
Getting Started Connecting an MD Recorder, etc (Digital Output) Remove the cap and connect an optical digital cord (not supplied) between the System’s CD DIGITAL OUT terminal and the input terminal of the MD recorder, etc. You can record the digital output signal from the System’s CD Player to the MD recorder, etc. Cap MD recorder, etc.
English VS-DT68V-88V[UF]_EN.book Page 9 Wednesday, June 26, 2002 3:31 PM Getting Started Installing the Equipment on the Wall The Center Unit and Speakers can be attached to a wall. CAUTIONS: Attachment to a wall • The Center Unit weighs approximately 4.3 kg. When its buttons are operated, an additional force will be applied to it in the downward direction. Therefore, sufficient care must be taken when attaching to a wall to prevent any accidents caused by the Center Unit’s falling off the wall.
Getting Started Example of attachment (Speakers) (SP-VSDT68V only) The speakers can be attached to a wall. Attach a screw (not supplied) on the wall, then hook the speaker onto the screw. Wall • Do not place anything on top of the Center Unit. Doing so may cause the Center Unit to fall, causing malfunctioning and/or injury. • Do not climb onto the Center Unit or hang from it. Doing so may damage the Center Unit and/or cause injury.
English VS-DT68V-88V[UF]_EN.book Page 11 Wednesday, June 26, 2002 3:31 PM Getting Started Using the Remote Control The Remote Control makes it easy to use many of the functions of the System from a distance of up to 7 m away. The remote sensor at which you need to point the Remote Control differs depending on whether the Unit is placed vertically or horizontally.
VS-DT68V-88V[UF]_EN.book Page 12 Wednesday, June 26, 2002 3:31 PM English Basic Operations Panel Operation indicators STANDBY/ON 1 2 3 FM/AM 4 5 6 7 8 9 MD/AUX 10 % indicator +10 MPX CANCEL VCD No. SOURCE PREV. SELECT NEXT RETURN VOL VCD No. SET ON SCREEN PBC AHB PRO BASS DISPLAY COLOR (VS-DT88V only) AHB PRO BASS TREBLE CD SELECT HIGH LIGHT RETURN STILL REPEAT CLOCK /TIMER DIMMER SLEEP PLAY MODE FM MODE COLOR DISPLAY VOL +/– TREBLE PREV.
English VS-DT68V-88V[UF]_EN.book Page 13 Wednesday, June 26, 2002 3:31 PM Basic Operations Changing the Color (COLOR) (VS-DT88V only) (Using the Remote Control) You can change the color of the illumination on the Unit. 1 Press the % button to turn on the System. 2 Press the COLOR button. “RANDOM COLOR” appears. 3 Press the or button to select the setting of your choice. The color changes as follows: (Blue) (Red) RANDOM COLOR: The color changes randomly.
Basic Operations Reinforcing the Bass Sound (AHB PRO) Showing the Time (DISPLAY) (Using the Remote Control) You can reinforce the bass sound to maintain rich, full bass at low volume. To get the effect, press the AHB (Active Hyper Bass) PRO button. The “AHB PRO” indicator appears on the display. To cancel the effect, press the button again. The “AHB PRO” indicator goes out. (Using the Remote Control) You can show the current time on the display. To display the clock, press the DISPLAY button.
VS-DT68V-88V[UF]_EN.book Page 15 Wednesday, June 26, 2002 3:31 PM English Using the Tuner SOURCE STANDBY/ON Number Buttons 1 2 4 5 3 6 7 8 9 FM/AM FM/AM MD/AUX 10 +10 MPX CANCEL VCD No. SOURCE +10 SET PREV. SELECT NEXT RETURN VOL VCD No. SET ON SCREEN PBC PREV. FM MODE PREV. AHB PRO BASS TREBLE PREV.
Using the Tuner ● Auto Tuning If you press and hold the 4 PREV. or NEXT ¢ ( or ) button for one second or more, the frequency changes down, or up, automatically until a station is found. OR ● Preset Tuning using the Remote Control (Possible only after presetting stations) Select the desired preset number using the Number buttons on the Remote Control. (For the preset number more than 10, press the +10 button then the Number button.
VS-DT68V-88V[UF]_EN.book Page 17 Wednesday, June 26, 2002 3:31 PM English Using the CD Player PREV. Panel NEXT STANDBY/ON Number buttons 1 2 3 FM/AM 4 5 6 7 8 9 MD/AUX 10 SOURCE +10 MPX CANCEL VCD No. PREV. SELECT NEXT RETURN VOL +10 VCD No. SET ON SCREEN PBC PREV. CD SELECT REPEAT PLAY MODE AHB PRO BASS PREV.
Using the CD Player How are MP3 files recorded and played back? MP3 “tracks (files)” can be recorded in “groups” — folders or directories, in PC terminology. During recording, the tracks and groups can be arranged similarly to the tracks and folders/directories of computer data. “Root” is similar to the root of a tree. Every track and group can be linked to the root. In compliance with ISO 9660, the maximum allowable depth of nested directories — so called “hierarchy” — is eight (inclusive of the root).
Using the CD Player The Quickest Way to Start a CD is with the One Touch Operation ■ Press the CD SELECT 3¥8 button on the Remote Control. • The power is automatically turned on. If a CD is already inserted, it will start playing from the first track. • If no CD is inserted, “CD NO DISC” appears on the display and the CD Player remains in Stop mode. To Unload a CD (Using the Unit) Press the 0 button to unload a CD. The CD is unloaded automatically, then take out the CD.
Using the CD Player To Play MP3 Discs 1 To Select a Track or Passage within a Track Insert a disc. The Unit searches for the disc (it may take time), and the following information appears on the display. Group number blinks 2 Track number Select a track to start playing with. 1. Press the NEXT ¢ or 4 PREV. button to select the group you want, then press the CD SELECT 3¥8 button on the Remote Control (or the SELECT 3¥8 button on the Unit). The track number starts blinking. 2.
English VS-DT68V-88V[UF]_EN.book Page 21 Wednesday, June 26, 2002 3:31 PM Using the CD Player 5 Press the Number button to select the track to program. Random Play Each time you press the Number button, the selected track is added to the program. • For the track number more than 10, press the +10 button then the Number button. (Using the Remote Control) The tracks will play in random order when you use this mode. • To enter Random Play mode, stop playback first.
VS-DT68V-88V[UF]_EN.book Page 22 Wednesday, June 26, 2002 3:31 PM PREV. SELECT RETURN English Using the Video CD Player (Video CDs) Panel STANDBY/ON 1 2 4 5 3 6 7 8 9 FM/AM MD/AUX 10 +10 MPX MPX VCD No. CD SELECT PREV. VIDEO INTRO REPEAT PLAY MODE HIGHLIGHT SOURCE PREV. SELECT NEXT RETURN VOL CANCEL VCD No. VCD No. SET ON SCREEN PBC AHB PRO BASS SET VCD No. ON SCREEN TREBLE PREV.
English VS-DT68V-88V[UF]_EN.book Page 23 Wednesday, June 26, 2002 3:31 PM Using the Video CD Player (Video CDs) Playing Video CDs with PBC Function (Using the Remote Control) The System provides a Playback Control (PBC) function which utilizes a procedure (menu selection) programmed in a video CD. What is the Playback Control (PBC) function? The PBC function allows you to enjoy the following features: • Menu-Driven Play You can interact with the TV screen using a menu display to select and play an entry.
Using the Video CD Player (Video CDs) 1 2 3 1 Moving picture 1 2 1 2 3 1 2 2 Moving picture 3 Moving picture 1 2 Moving picture Menu screen Press & RETURN. 3 Moving picture Press & RETURN. To next screen Still picture Still picture Moving picture Moving picture To previous screen Press & RETURN. A selection menu appears when you start playing a video CD with the PBC function. The selection menu shows a list of numbers for selection.
English VS-DT68V-88V[UF]_EN.book Page 25 Wednesday, June 26, 2002 3:31 PM Using the Video CD Player (Video CDs) Various Functions to Enhance Your Enjoyment (Using the Remote Control) You can use the following features. Frame-by-Frame Playback Frame-by-Frame Playback is possible only when moving pictures (of the video CDs with or without the PBC function) are played. Viewing the Highlights of Video CDs You can view nine highlight scenes of the selected track on a video CD.
VS-DT68V-88V[UF]_EN.book Page 26 Wednesday, June 26, 2002 3:31 PM English Using External Equipment STANDBY/ON 1 2 3 FM/AM 4 5 6 7 8 9 MD/AUX 10 MD/AUX +10 MPX CANCEL VCD No. VCD No. SET ON SCREEN PBC AHB PRO BASS SOURCE TREBLE PREV. CD SELECT VIDEO INTRO HIGH LIGHT RETURN STILL REPEAT CLOCK /TIMER DIMMER SLEEP PLAY MODE FM MODE COLOR DISPLAY PREV.
VS-DT68V-88V[UF]_EN.book Page 27 Wednesday, June 26, 2002 3:31 PM English Using the Timers STANDBY/ON 1 2 3 FM/AM 4 5 6 7 8 9 MD/AUX 10 +10 MPX ON time, OFF time, Source, Volume CANCEL VCD No. VCD No. SET SET ON SCREEN PBC PREV. CLOCK /TIMER AHB PRO BASS PREV.
Using the Timers Setting the Daily Timer 2 1. Press the SET button. The hour digit of the OFF time blinks on the display. (The same time as the ON time will be automatically set.) (Using the Remote Control) Once you have set the Daily Timer, the timer will be activated at the same time every day. The Timer indicator ( ) on the display shows that the Daily Timer you have set is in effect. • When the Timer Indicator ( ) is displayed, the timer is activated.
English VS-DT68V-88V[UF]_EN.book Page 29 Wednesday, June 26, 2002 3:31 PM Using the Timers 6 Before turning off the System, prepare the music source selected in step 3. TUNER: Tune in to the desired station. CD: Insert a CD. (Playback will start from the first track at Timer on.) 7 Press the % button to turn off the System. In Standby mode, you can see the Timer indicator ( ) on the display.
VS-DT68V-88V[UF]_EN.book Page 30 Wednesday, June 26, 2002 3:31 PM English Care and Maintenance Handle your CDs carefully, and they will last a long time. General Notes Compact Discs In general, you will have the best performance by keeping your CDs and the mechanism clean. • Store CDs in their cases, and keep them in cabinets or on shelves. • Keep the System’s Panel closed when not in use. • Only CDs bearing these marks can be used with this System.
VS-DT68V-88V[UF]_EN.book Page 31 Wednesday, June 26, 2002 3:31 PM English Troubleshooting • If you are having a problem with your System, check this list for a possible solution before calling for service. Symptom No sound is heard. • If you cannot solve the problem from the hints given here, or the System has been physically damaged, call a qualified person, such as your dealer, for service. Possible Cause • Connections are incorrect, or loose. Action • Headphones are connected.
VS-DT68V-88V[UF]_EN.book Page 32 Wednesday, June 26, 2002 3:31 PM Amplifier Output Power 38 W (19 W + 19 W) at 4 Ω (Max.) Input Sensitivity/Impedance (1 kHz) MD/AUX IN 500 mV/47 kΩ Output Sensitivity/Impedance (1 kHz) MD/AUX OUT 500 mV/5 kΩ CD DIGITAL OUT –21 dBm - –15 dBm (Optical out) Speaker terminals 4 Ω - 16 Ω Subwoofer out 440 mV/6 kΩ Phones 16 Ω - 1 kΩ 0 - 15 mW/ch output into 32 Ω CD Player Signal-To-Noise Ratio Wow And Flutter Playback Disc MP3 recording format Max.
VS-DT68V-88V[UF]_Cover4.fm Page 1 Wednesday, June 26, 2002 4:31 PM VICTOR COMPANY OF JAPAN, LIMITED 生产组装:中日合资上海 JVC 电器有限公司 工厂地址:上海市浦东新区外高桥保税区日京路 68 号 Registered Trademark owned and licensed by VICTOR COMPANY OF JAPAN, LTD.