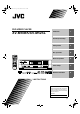
TV DISC SELECT Introduction 2 Preliminary knowledge 5 Getting started 13 Basic operations 20 Advanced operations 24 Initial settings 39 Additional information 46 DVD STANDBY/ON TV DVD 3D TV/VIDEO PHONIC CANCEL RETURN PLAY MODE TV1 TV2 TV3 1 2 3 TV4 TV5 TV6 4 5 6 TV7 TV8 TV9 7 8 9 TV -/-- TV0 MUTING 10 0 +10 ANGLE SUBTITLE AUDIO THEATER POSITION 3 0 DISC 3 DISC DISC 2 0 DISC 2
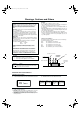
Warnings, Cautions and Others IMPORTANT for the U.K. DO NOT cut off the mains plug from this equipment. If the plug fitted is not suitable for the power points in your home or the cable is too short to reach a power point, then obtain an appropriate safety approved extension lead or consult your dealer. BE SURE to replace the fuse only with an identical approved type, as originally fitted.
Introduction Table of Contents Introduction Page 2 Features...............................................................................2 Supplied accessories..........................................................2 About this instruction manual ..........................................3 Notes on handling ..............................................................4 Preliminary knowledge Page 5 Names of parts and controls .....................
Introduction Features Supplied accessories Picture functions • Audio/video cable (x 1) 7 Strobe function 7 Digest function You can select the desired selection to be played from the opening scenes displayed on the TV screen.
Introduction About this instruction manual This instruction manual basically explains operations as follows: You can play titles or tracks on discs inserted in random order by using the Random function.
Introduction Introduction Notes on handling Important cautions Safety precautions Installation of the unit • Select a place which is level, dry and neither too hot nor too cold (between 5oC and 35oC, 41oF and 95oF). • Leave sufficient distance between the unit and the TV. • Do not use the player in a place subject to vibrations. Avoid moisture, water and dust Do not place the unit in moist or dusty places.
Preliminary knowledge Names of parts and controls Refer to the corresponding pages indicated in () for details.
Preliminary knowledge Remote control unit ! Infrared signal-emitting window @ TV STANDBY/ON button TV 1 DISC SELECT button 2 PLAY MODE button Preliminary knowledge 3 3D PHONIC button 4 Numeric buttons 5 ANGLE button DISC SELECT DVD STANDBY/ON TV DVD 3D TV/VIDEO PHONIC CANCEL RETURN PLAY MODE TV1 TV2 TV3 1 2 3 TV4 TV5 TV6 4 5 6 TV7 TV8 TV9 7 8 9 TV -/-- TV0 MUTING 10 0 +10 ANGLE SUBTITLE AUDIO THEATER POSITION DIGEST
Preliminary knowledge 2 PLAY MODE button (26, 30, 31, 32) Displays an on-screen display for controlling the advanced playback functions. 3 3D PHONIC button (36) Produces a simulated surround effect. 4 Numeric buttons (11) When the TV - DVD switch is set to DVD, these buttons are used to specify a disc, title, chapter or track number, as well as used to enter a time for the Time search function.
Preliminary knowledge Display window 1 Disc number indicator Shows the disc number being selected. 4 Disc indicators 2 Title/chapter/track indicators Displays title/chapter, or track number. 5 Function indicators 3D-PHONIC DISC TITLE 3 Time display Shows the cumulative or remaining time of the track or disc, or the total disc time. PROGRAM RANDOM REPEAT 1A-B RESUME THEATER CHAP.
! Preliminary knowledge Operational Principles On-screen displays The unit provides several on-screen displays. With some displays, you can set or select preferences or functions, while the others are display-only.
Preliminary knowledge Play mode displays Pressing the PLAY MODE button brings up the play mode display in which you can control playback functions. Different displays appear depending on the disc type and the unit’s status.
Preliminary knowledge On-screen guide icons During DVD VIDEO playback, you may see icons displayed over the picture. These have the following meanings. : Displayed at the beginning of a scene recorded from multiple angles. (See page 33.) : Displayed at the beginning of a scene recorded with multiple audio languages. (See page 35.) You can set the unit not to display on-screen icons above via the preference settings described on page 42.
Preliminary knowledge About discs Playable disc types Playable and non-playable disc types are as follows: Playable discs Preliminary knowledge DVD VIDEO Audio CD Video CD CD-R CD-RW The DVD VIDEO Logo is a trademark. • CD-R and CD-RW discs recorded with the Audio CD format can be played back, though some may not be played back because of the disc characteristics or recording condition.
Getting started Connections *In the following description, “TV” may be substituted with “monitor” or “projector.” *Before using the unit, you have to connect the unit to a TV and/or amplifier. Before making any connections • Do not connect the AC power cord until all other connections have been made. • Since different components often have different terminal names, carefully read the instructions supplied with the component you are going to connect.
Getting started To connect to a TV with the SCART connector You can enjoy using the unit by simply connecting it to your television set with a 21-pin SCART cable. To hear audio sound with better quality, connect the audio output to your audio equipment. SCART cable (not supplied) The unit VIDEO OUT VIDEO AV OUT AV S-VIDEO COMP.
Getting started 3 Keep holding down the 7 (STOP) button on the front panel. After a few more seconds, “R OUT” replaces “S OUT” in the display window. Now the RGB signal can be output when setting the COMP. - Y/C switch to “COMP.”. (Display window) 3D-PHONIC DISC TITLE CHAP. TRACK PROGRAM RANDOM REPEAT 1A-B RESUME THEATER DVD VCD EACH REMAIN • To make the S-VIDEO outputs, use the similar procedure.
Getting started To connect to audio equipment with a digital input You can enhance the sound quality by connecting either of the unit's DIGITAL OUT jacks (OPTICAL or COAXIAL) to the digital input of an amplifier, MD, etc. by using an optional digital cable. The digital audio signal from a disc is directly transferred.
Getting started Using the remote control unit Using the remote control, you can operate not only all the functions of the unit but also basic functions of your TV. To install batteries in the remote control unit The battery compartment is located on the back of the remote control unit. 1 Press down on the point shown by the arrow at the top of the compartment cover, and pull up the cover to open the compartment.
Getting started To use the remote control unit for TV operation You can operate your TV from the remote control unit. Setting the remote control signal for operating your TV.
Getting started The following buttons can be used for operating the TV: To use the CURSOR (CH–, CH+, VOL–, VOL+), TV/VIDEO - CANCEL and numeric buttons for TV control, set the TV - DVD switch to “TV”. TV DVD TV Turns the TV on or off. TV/VIDEO CANCEL TV1 1 Switches the TV input mode between TV and VIDEO. Selects the TV channels directry.
Basic operations In the following description, the buttons on the remote control unit are mainly used, however, you may use the corresponding buttons on the front panel of the unit if available.
Basic operations Basic playback Now you can play a disc. First, let’s enjoy simple playback according to following procedure. To start playback Method 1 Press 3 on the front panel or remote control unit. The unit starts playback from the selected disc indicated in the display window Method 2 DIGEST Press any of the DISC (1 through 3) buttons on the front panel. The unit starts playback of the disc corresponding to the DISC button you pressed.
Basic operations . To advance or reverse playback rapidly while monitoring 7 During playback From the Remote control unit Press 1 or ¡. Each press of 1 or ¡ increases the playback speed. You can select the speed among 2x, 5x, 10x, 20x and 60x the normal speed. Pressing 3 returns the unit to normal playback. From the Front panel Hold down 4 or ¢. Holding down ¢ advances playback rapidly, while holding down 4 reverses playback rapidly.
Basic operations To resume playback 7 While the disc you interrupt playback last time is still in the disc tray. Press 3. The unit starts playback from the position where you interrupted playback last time. • To clear the resume position memory Carry out one of the followings. *Take out the disc from the tray. *Press any one of the DISC (1 through 3) buttons on the front panel. *Press 7 while stopped.
Advanced operations When you use the functions described below while stopped, make sure that the desired disc number is selected (the selected disc number is shown in the display window). If it is not selected, press the appropriate DISC (1 - 3) button to start playback and then press 7. When controlling the unit using the CURSOR, TV/VIDEO - CANCEL or numeric buttons, make sure that the TV DVD TV - DVD switch is set to “DVD”.
Advanced operations number of the item. • See page 11 for details about how to use the numeric buttons. The unit starts playback of the selected item. You can return to the menu by pressing the RETURN button. When “NEXT” or “PREVIOUS” appears on the TV screen, the unit generally works as follows: • Pressing ¢ advances to the next page. • Pressing 4 returns to the previous page. * The method of the operation is different depending on the disc.
Advanced operations To locate a desired scene by specifying the chapter number [CHAP.SEARCH] If the current title of a DVD VIDEO disc being played is divided into chapters, you can skip to a desired chapter by specifying the chapter number using the on-screen display. NOTES • You can also locate a desired chapter directly by specifying the chapter number using the numeric buttons during playback (except when a menu is shown). See page 25.
Advanced operations 3 Use the numeric buttons (0 to 9) to enter the time. • When You can specify the elapsed time of the current title or track to set the location which you want to playback from. 4 Press ENTER. (for DVD VIDEO) (for Audio CD) DVD CONTROL CD CONTROL Also note that the time search function does not work during Video CD playback with the PBC function. CHAP. SEARCH Press PLAY MODE.
Advanced operations 2 Use CURSOR 5/∞/2/3 to select the desired scene. The selected scene is indicated by . If there are more than 9 scenes, the digest screen will have more than one page. In this case, pressing ¢ advances to the next page, while pressing 4 returns to the previous page. Special picture playback The unit provides special picture playback functions including Frame-by-frame, Strobe, Slow-motion and Zoom.
! Advanced operations To zoom a scene [ZOOM] • Pressing 8 when the nine still pictures is shown will advance to the next nine still pictures. • Pressing 3 when the nine still pictures is shown will advance pictures in normal playback speed. TV DISC SELECT 3D TV/VIDEO PHONIC CANCEL RETURN PLAY MODE • To cancel strobe play Press and hold 8 for more than 1 second.
Advanced operations Changing the playback order 5 Repeat steps 3 and 4. Up to 18 titles or tracks can be programmed. You may select the same title or track more than once. You can play titles or tracks on discs inserted in the desired order or in random order. To playback in the desired order [PROGRAM] You can play titles or tracks on discs inserted in the desired order by using the Program function.
Advanced operations To playback in random order [RANDOM] Repeat playback You can play titles or tracks on discs inserted in random order by using the Random function. You can repeat playback of the current selection or all disc contents (except DVD VIDEO). You can also repeat playback of a desired part.
Advanced operations • During Audio CD/Video CD playback (for Video CD) (for Audio CD) VCD CONTROL CD CONTROL REPEAT A-B REPEAT TIME SEARCH REPEAT A-B REPEAT TIME SEARCH PBC CALL REPEAT ALL REPEAT ALL To repeat a desired part [A-B REPEAT] TV DISC SELECT Selected repeat mode 1 Selected repeat mode PLAY MODE 3D TV/VIDEO PHONIC CANCEL RETURN TV1 REPEAT ALL (all track repeat) TV2 TV3 1 2 3 TV4 TV5 TV6 4 5 6 TV7 TV8 TV9 7 8 9 TV -/-
Advanced operations • To quit A-B repeat playback Press 7 . The unit stops playback and quits A-B repeat mode. • During playback, pressing ENTER when is pointed at [AB REPEAT] quits A-B repeat mode and continues playback. • You can also quit A-B repeat mode by pressing 4 or ¢.
Advanced operations To select a scene angle from the angle list display [ANGLE] TV DISC SELECT TV1 1 TV2 TV3 1 2 3 TV4 TV5 TV6 4 5 6 TV7 TV8 TV9 7 8 9 TV -/-- TV0 MUTING 10 0 ZOOM DIGEST NEXT ¢ 4 CLEAR 7 SELECT 3 8 CH+ ME 5 ENTER DISC SELECT VOL + ∞ CH OIC CHE D DVD STANDBY/ON TV DVD NU 5 5 VOL - TV ¡ 1 LE STROB E SLOW+ SLOW– TIT To select the subtitle language [SUBTITLE] +10 THEATER POSITION ANGLE S
Advanced operations NOTES • For DVD VIDEO, the selected language may be abbreviated on the TV screen. See “Appendix A: Table of languages and their abbreviations” at the end of this manual. • For Video CD Each time you press AUDIO or CURSOR 2/3, the playback audio changes as follows. • The Subtitle selection display will automatically disappear if you do not change the subtitle for 10 seconds.
Advanced operations Selecting the picture character Enjoying virtual surround sound You can select the picture character from among four options according to the source program, lighting condition of the room and/or personal preference. Using the 3D Phonic function, you can get a simulated surround effect from your stereo system.
Advanced operations • THEATER You can enjoy sound effects like in a major theater in Hollywood. % When you play a DVD VIDEO disc recorded in Dolby Digital which contains more than 3 channels, ACTION does not appear. Checking the status You can view the disc/time information, as well as the DVD functions status on the TV screen.
Advanced operations To check the DVD function status TV DISC SELECT DVD STANDBY/ON TV DVD TV1 TV2 TV3 1 2 3 TV4 TV5 TV6 4 5 6 TV7 TV8 TV9 7 8 9 TV -/-- TV0 MUTING 10 0 +10 ANGLE SUBTITLE AUDIO S PREVIOU 7 NEXT SELECT 3 CH+ 5 ENTER ME TV DISC SELECT OIC CHE PLAY MODE VOL + ∞ CH DVD STANDBY/ON TV DVD NU 3D TV/VIDEO PHONIC CANCEL RETURN 5 5 8 ¡ 1 VOL - STROB E SLOW+ SLOW– LE THEATER POSITION ¢ 4 CLEAR D
! Initial settings 3 Press CURSOR 2/3 to select the setting you Selecting preferences want. You can set various preferences for playback via four dedicated displays. • To turn off the preference display, press CHOICE or move to [EXIT] and press ENTER. • For details about each setting, see the following paragraphs: How to set preferences Note that you cannot bring up a preference display during playback or when an Audio CD is loaded in the tray.
Initial settings SUBTITLE AUDIO page You can select the default subtitle language to be displayed if it is contained on the disc.
Initial settings DOWN MIX To playback a DVD VIDEO disc recorded with surround multichannel audio correctly, the DOWN MIX setting must be properly made according to your audio system. Note that this setting affects the output signal from the AUDIO (both DIGITAL and ANALOG) output jacks when playing back a DVD VIDEO disc recorded with surround multichannel audio.
Initial settings ON SCREEN GUIDE The unit can display “onscreen guide” icons or characters on the picture, which show what is happening to the disc or the unit. SYSTEM page LANGUAGE AUDIO MONITOR TYPE SCREEN SAVER ON SCREEN GUIDE DISPLAY SYSTEM 4:3 LB MODE 2 EXIT PRESS AUTO STANDBY ON KEY LANGUAGE When the unit is stopped for more than 30 minutes or 60 minutes, the unit enters standby mode automatically.
Initial settings Limiting playback by children 4 While points [Set Level], use CURSOR 2/3 to select the parental lock level. PARENTAL LOCK GB Country Coce 1 Set Level This function restricts playback of DVD VIDEO discs which contain violent (and other) scenes according to the level set by the user.
Initial settings 4 To change the set level, use CURSOR 2/3 to To change the settings [PARENTAL LOCK] select the desired level while points [Set Level], and then press ENTER. moves to [PASSWORD]. You can change the Parental lock settings later.
Initial settings To temporarily release the Parental lock [PARENTAL LOCK] When you set the parental level strictly, some discs may not be played back at all. When you insert such a disc and try to play it, the following Parental Lock on-screen display appears on the TV screen, asking you whether you want the parental lock to be temporarily released or not.
Additional information Care and handling of discs How to handle discs When handling a disc, do not touch the surface of the disc. Since discs are made of plastic, they are easily damaged. If a disc gets dirty, dusty, scratched or warped, the images and sound will not be picked up correctly, and such a disc may cause the player to malfunction. Label side Do not damage the label side, stick paper to or use any adhesive on its surface.
Additional information Troubleshooting What appears to be a malfunction may not always be serious. Please go through the following list before requesting service. Symptom Possible case Remedy Power does not come on. Power plug is not inserted securely. Plug in securely. Too far from the unit. More closer to the unit. The tip of the remote unit is not pointed in the right direction.
Additional information Specifications General Readable discs: Video format: DVD VIDEO, Audio CD, Video CD PAL Other Power requirements: Power consumption: Mass: Dimensions (W x H x D): AC 230 V , 50 Hz 17 W (POWER ON), 3.1 W (STANDBY mode) 4.8 kg (10.6 lbs) 435 mm x 127 mm x 329 mm (17-3/16 inch x 5 inch x 13 inch) Video outputs 1.0 Vp-p (75 Ω) Y Output: C Output: 0.
! Additional information Appendix B:Country code list for parental lock AD AE AF AG AI AL AM AN AO AQ AR AS AT AU AW AZ BA BB BD BE BF BG BH BI BJ BM BN BO BR BS BT BV BW BY BZ CA CC Andorra United Arab Emirates Afghanistan Antigua and Barbuda Anguilla Albania Armenia Netherlands Antilles Angola Antarctica Argentina American Samoa Austria Australia Aruba Azerbaijan Bosnia and Barbados Bangladesh Belgium Burkina Faso Bulgaria Bahrain Burundi Benin Bermuda Brune
SAFETY INSTRUCTIONS “SOME DOS AND DON’TS ON THE SAFE USE OF EQUIPMENT” This equipment has been designed and manufactured to meet international safety standards but, like any electrical equipment, care must be taken if you are to obtain the best results and safety is to be assured. Do read the operating instructions before you attempt to use the equipment.