用户手册 User manual 冷藏室-冷冻 室 IKE3260-2-2T-CN Fridge-Freezer
目录 安全说明 操作 初次使用 日常使用 实用建议和提示 2 3 4 4 5 养护和清洁 6 如果……应该如何处理 7 技术数据 8 安装 8 环境注意事项 14 如有更改恕不另行通知 为确保您的安全及正确使用,安装和初次使 用本冰箱之前,请仔细通读本用户手册,包 括其中的提示以及警告。 为了避免不必要 的错误和意外,必须确保所有使用该冰箱的 人员完全清楚其操作和安全性能。 请保管 好说明书,搬迁或转售冰箱时,请一并附上 说明书,以便使用该冰箱的所有人都能够正 确了解冰箱的使用和安全信息。 为保障人的生命和财产安全,必须遵守这些 用户说明中的预防措施,因为制造商概不负 责疏忽导致的任何损失。 • 不要使用机械冰箱或任何人为措施加速 冷冻过程。 • 不要在制冷装置内使用任何其他电器装 置(例如冰激凌机),除非制造商认可此 用途。 • 不要损坏制冷回路。 • 本冰箱的制冷回路内含有制冷异丁烷 (R600a),这是一种与环境高度相容的天 然气,但可燃烧。 运输和安装冰箱期间,请确保没有损坏制 冷回路的组件。 如果制冷回路被损坏: – 避免明火并远离火源 – 让冰箱所在房间彻底通风 • 无论以任何方式改
日常使用 • 不要将热壶置于本冰箱的塑料部件上。 • 不要在本冰箱内存放可燃气体或液体,因 为它们可能会爆炸。 • 不要将食品放在后壁的出风口处。(如果 是无霜冰箱) • 冷冻食品一旦解冻后,就不宜再次冷冻。 • 存放包装好的冷冻食品时请遵守冷冻食 品制造商的说明。 • 必须严格遵守冰箱制造商的存放建议。 具体请参阅相关说明。 • 不要将碳酸饮料放入冷冻室内,因为这可 能导致饮料容器内产生压力,引起爆炸, 损坏本冰箱。 • 如果从冰箱直接取出冰棒就吃,可能导致 冻灼。 保养和清洁 • 进行维护之前,请关闭冰箱电源,然后将 电源插头从电源插座上拔下来。 • 不要使用金属制品清洁冰箱。 • 不要使用尖锐物品清除冰箱上的霜。 请 使用塑料铲。 • 经常检查冷藏室中的排水槽有无融霜水。 如果需要,请清洁排水槽。 如果排水槽堵 塞,水将聚集在冰箱的底部。 安装 重要事项! 对于电气连接,请严格遵循具体 段落中的说明。 • 建议等待至少四个小时后再连接冰箱,以 便油流回到压缩机中。 • 冰箱周围应该留有足够空间供空气流动, 否则,会导致冰箱过热。 为充分通风,请 按照相关说明进行安装。 • 尽可能将冰箱背
初次使用 清洁内部 初次使用冰箱之前,使用微温的水和中性肥 皂清洗冰箱内部以及所有内部附件,去除新 产品特有的味道,然后彻底干燥。 重要事项! 不要使用去污剂或磨砂粉,这会 损坏冰箱表面。 日常使用 冷冻新鲜食物 冷冻室适合冷冻新鲜食物和长期存放冷冻 及深度冷冻的食物。 冷冻新鲜食物无需更改中间设置。 不过,对于速冻操作,请将温度调节器转至 较高设置以获得最大冷冻度。 重要事项! 在这种情况下,冷藏室温度可能 低于 0°C。 如果出现这种情况,请将温度调 节器重置到较暖的设置。 将要冷冻的新鲜食物放到最上面的隔间中。 冷冻新鲜食品 冷冻室适合冷冻新鲜食物和长期存放冷冻 及深度冷冻的食物。 冷冻新鲜食物无需更改中间设置。 警告! 确保食物不会超过冰箱上部侧面 标识的装载限制(如适用) 重要事项! 如果发生意外解冻(例如因为电 源故障) ,如果断电时间比技术特征表中“上 升时间”下显示的时间值长,则解冻食品要尽 快食用,或立即烹饪后重新冷冻(待冷却 后) 。 解冻 深度冷冻或冷冻的食品,在使用之前,可以 放入冷藏室或室温下进行解冻,具体视操作 当时的可行性而定。 小块食品甚至可以从冷冻室取
安放门搁架 为了能够存放包装大小不同的食品,门搁架 高低可调。 请按以下步骤进行调整: 沿箭头所示方向缓缓拉出搁架,直到其完全 拉出,然后根据需要重新安放。 实用建议和提示 节能提示 • 不要经常打开冰箱门,若非绝对必要,也 不要打开过长时间。 • 如果在环境温度较高,且温度调节器设定 在较低的温度,而冰箱又装满了食品,那 么压缩机有可能会不停地运转而导致蒸 发器结霜或结冰。 如果发生这种情况,请 将温度调节器转向较高设置,以便进行自 动除霜和节省耗电量。 新鲜食品冷藏提示 如欲获得最佳性能: • 不要在冷藏室存放热食或挥发性液体 • 如果食品味道浓烈,请一定要盖上盖子或 包裹好 • 摆放好食物,使其周围空气可以自由流通 冷藏提示 实用提示: 肉(所有肉类): 装到保鲜袋中并放到蔬菜 抽屉上的玻璃搁架上。 安全起见,这种方式存放的食品最多只能保 存一、两天。 熟食、凉菜等等: 这些食物应该盖上盖,可 以放在任何搁架上。 水果和蔬菜: 这些食品应该彻底清洗并放在 随附的特定抽屉内。 黄油和奶酪: 这些食品应该放在特制的密封 容器内或裹在铝箔或塑料保鲜袋中,以最大 限度地排除空气。 奶瓶: 这
冷冻食品存放提示 为了获得最佳性能,您应该: • 确保商业冷冻食品在零售商处存放恰当; • 确保在尽可能短的时间内将冷冻食品从 食品店转到冷藏柜内; • 不要经常打开柜门,若非绝对必要,也不 要打开过长时间。 • 一旦解冻,食品很快就会变质,不宜再冷 冻。 • 不要超过食品生产商标示的存放时间。 养护和清洁 小心! 执行任何维护操作之前,先拔下 冰箱插头。 本冰箱的冷却装置中含有碳氢化合物; 因此,维护和充注工作必须由授权的技 术人员进行。 定期清洁 本设备必须要定期清洁: • 使用微温的水和中性肥皂清洁内部及附 件。 • 定期检查门密封条并擦抹清洁,确保其干 净无屑。 • 清洗并彻底干燥。 不得使用去污剂、磨砂粉、浓香型清洁产品 或抛光蜡产品清洁内部,因为这会损坏表面 并留下强烈气味。 使用刷子清洁冷凝器(黑色铁架)和冰箱背 后的压缩机。这会提高冰箱性能并节省耗 电量。 重要事项! 小心操作,不要损坏冷却系统。 很多厨房专用的表面清洁剂都含有可能浸 蚀/损害本冰箱塑料的化学成分。 因此,建 议在清洁本冰箱的外壳表面时,使用只加了 少许清洁剂的温水。 清洁之后,重新将冰箱连接至电源。 重要
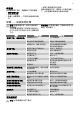
闲置期 当冰箱长期不用时,请遵循以下预防措施: • 断开冰箱电源 • 取出所有食品 • 除霜(如果需要),并清洁冰箱和所有配 件 • 冰箱门保持微开以防异味。 如果冰箱保持开机,请安排人员偶尔检查一 下,以防里面的食品因为断电而变质。 如果……应该如何处理 警告! 排除故障之前,请先从插座断开 电源插头。 只有具备资格的电工或有相当能力的人 员才可以进行本手册中未述之故障排除 工作。 问题 重要事项! 正常使用期间,可能会有响声(压 缩机、制冷循环) 。 可能的原因 冰箱不工作。 照明灯不亮。 冰箱电源未打开。 照明灯不亮。 压缩机不停运转。 解决办法 打开冰箱电源。 插头没有正确连接到插座。 将插头正确连接到插座。 冰箱没有电。 插座没有电压。 将别的电器连接到该插座。 联系具备资格的电工。 照明灯当前处于待命状态。 关闭门,然后打开。 照明灯有问题。 参阅“更换照明灯”。 温度设定不当。 设定一个较高的温度。 未正确关闭门。 参阅“关门”。 门打开过于频繁。 门打开时间不可过久。 食品温度过高。 等待食品的温度降至室温之后再 进行储存。 室温过高。
1. 同时,用手指按拉透明罩,并将其沿箭头 方向取下。 2. 将灯泡更换为相同功率和形状的、家用电 器专用的新灯泡。(最大功率请参见灯罩) 3. 重新装好灯罩。 4. 将插头连接到电源插座。 5. 打开柜门。确保照明灯亮起。 1 2 1 关闭冰箱门 1. 清洁冰箱门垫圈。 2. 如果需要,请调整柜门。请参阅“安装”。 3.
冰箱的门为右开。要想换为左开,请在安放 冰箱之前执行以下步骤: • 松开并卸下上销钉。 • 卸下上面的门。 • 取下定位片。 • 松开中间的铰链。 • 卸下下面的门。 • 松开并卸下下销钉。 在对边上: • 拧紧下方的销钉。 • 安上下面的门。 • 拧紧中间的铰链。 • 安上定位片。 • 安上上面的门。 • 拧紧上方的销钉。
通风要求 5 cm 冰箱后面必须通风良好。 min. 200 cm2 min.
调整冰箱在橱柜中的位置。 确保冰箱和橱柜前边之间的距离为 44 毫 米。 下铰链盖(在附件包中)可确保冰箱和厨 柜之间的距离准确。 确保冰箱和橱柜之间有 4 毫米的距离。 打开门。将下铰链盖安放到位。 4 mm 44 mm 使用 4 颗螺钉将冰箱固定到橱柜上。 I I 从铰链盖 (E) 上卸下正确部件。如果是右 铰链,确保卸下 DX 部件;如果是左铰链, 则卸下 SX 部件。
将护盖(C、D)安装到凸片和铰链孔上。 安装通风栅格 (B)。 将铰链盖 (E) 安装到铰链上。 C D E E B G 将冰箱侧面连接到橱柜壁上: 1. 松开部件 (G) 并将部件 (G) 移至橱柜 壁。 2. 重新拧紧部件 (G) 的螺钉。 3.
将部件 (Ha) 安装到橱柜门内壁上。 ca. 50 mm 90° 21 mm 90° ca.
取下托座并标记距门外边为 8 毫米的距 离,这是安装螺钉 (K) 的位置。 8 mm K Ha 重新将小方块放到导轨上,然后用随附的 螺钉将其固定。 通过调整部件 (Hb),对齐橱柜门和器具 门。 Hb 将部件 (Hd) 压到部件 (Hb) 上。 进行最后检查以确保: • 所有螺钉已拧紧。 • 封条已牢牢安装到机壳上。 • 门能够正常开关。 Hb Hd 环境注意事项 回收带有该标志 的材料。 把包装材料放 入适用的容器以循环利用。 帮助保护环境和人类健康,促进电器及电子 产品的废物利用。 请勿将带有该标志 的 电器与生活垃圾一起处理。 将产品退回到 您当地的回收处,或联系您所在城市的办事 处。
CONTENTS Safety instructions Operation First use Daily use Helpful hints and tips 15 17 17 18 19 Care and cleaning 20 What to do if… 21 Technical data 23 Installation 23 Environmental concerns 29 Subject to change without notice. SAFETY INSTRUCTIONS In the interest of your safety and to ensure the correct use, before installing and first using the appliance, read this user manual carefully, including its hints and warnings.
If the refrigerant circuit should become damaged: – avoid open flames and sources of ignition – thoroughly ventilate the room in which the appliance is situated • It is dangerous to alter the specifications or modify this product in any way. Any damage to the cord may cause a shortcircuit, fire and/or electric shock. Warning! Any electrical component (power cord, plug, compressor) must be replaced by a certified service agent or qualified service personnel to avoid hazard. • • • • 1.
• The appliance must not be located close to radiators or cookers. • Make sure that the mains plug is accessible after the installation of the appliance. • Connect to potable water supply only (If a water connection is foreseen). Service • Any electrical work required to do the servicing of the appliance should be carried out by a qualified electrician or competent person. • This product must be serviced by an authorized Service Centre, and only genuine spare parts must be used.
DAILY USE of the upper section (where applicable) Freezing fresh food The freezer compartment is suitable for freezing fresh food and storing frozen and deep-frozen food for a long time. To freeze fresh foods it is not necessary to change the medium setting. However, for a faster freezing operation, turn the temperature regulator toward higher settings to obtain the maximum coldness. Important! In this condition, the refrigerator compartment temperature might drop below 0°C.
Positioning the door shelves To permit storage of food packages of various sizes, the door shelves can be placed at different heights. To make these adjustments proceed as follows: gradually pull the shelf in the direction of the arrows until it comes free, then reposition as required. HELPFUL HINTS AND TIPS Hints for energy saving • Do not open the door frequently or leave it open longer than absolutely necessary.
• only freeze top quality, fresh and thoroughly cleaned, foodstuffs; • prepare food in small portions to enable it to be rapidly and completely frozen and to make it possible subsequently to thaw only the quantity required; • wrap up the food in aluminium foil or polythene and make sure that the packages are airtight; • do not allow fresh, unfrozen food to touch food which is already frozen, thus avoiding a rise in temperature of the latter; • lean foods store better and longer than fatty ones; salt red
Defrosting the refrigerator Frost is automatically eliminated from the evaporator of the refrigerator compartment every time the motor compressor stops, during normal use. The defrost water drains out through a drain hole into a special container at the back of the appliance, over the motor compressor, where it evaporates.
Important! There are some sounds during normal use (compressor, refrigerant circulation). Problem The appliance does not operate. The lamp does not operate. Possible cause Solution The appliance is switched off. Switch on the appliance. The mains plug is not connected to the mains socket correctly. Connect the mains plug to the mains socket correctly. The appliance has no power. There is no voltage in the mains socket. Connect a different electrical appliance to the mains socket.
1. At the same time, with the fingers expand up and down the transparent cover and unhook it in the direction of the arrows. 2. Replace the lamp with one of the same power and shape, specifically designed for household appliances. (the maximum power is shown on the light bulb cover). 3. Reassemble the lamp cover. 4. Connect the plug to the mains socket. 5. Open the door. Make sure that the light comes on. 1 2 1 Closing the door 1. Clean the door gaskets. 2. If necessary, adjust the door.
ance to a separate earth in compliance with current regulations, consulting a qualified electrician. The manufacturer declines all responsibility if the above safety precautions are not observed. This appliance complies with the E.E.C. Directives. Door reversibility The door of the appliance opens to the right. To open the door to the left, do these steps before you install the appliance. • Loosen and remove the upper pin. • Remove the upper door. • Remove the spacer. • Loosen the middle hinge.
Ventilation requirements 5 cm The airflow behind the appliance must be sufficient. min. 200 cm2 min. 200 cm2 Do the following steps: Installing the appliance Caution! Make sure that the mains cable can move freely. If necessary cut the adhesive sealing strip and apply it to the appliance as shown in figure.
2 Install the appliance in the niche. Push the appliance in the direction of the arrow (1) until the upper gap cover stops against the kitchen furniture. Push the appliance in the direction of the arrow (2) against the cupboard on the opposite side of the hinge. 1 Adjust the appliance in the niche. Make sure that the distance between the appliance and the cupboard front-edge is 44 mm.
Remove the correct part from the hinge cover (E). Make sure to remove the part DX, in the case of right hinge, SX in opposite case. Attach the covers (C, D) to the lugs and the hinge holes. Install the vent grille (B). Attach the hinge covers (E) to the hinge. C D E E B G H Connect the appliance laterally to the kitchen furniture sidewall: 1. Loosen the screws of the part (G) and move the part (G) till the furniture sidewall. 2. Tighten the screws of the part (G) again. 3.
Disconnect the parts (Ha), (Hb), (Hc) and (Hd). Install the part (Ha) on the inner side of the kitchen furniture door. ca. 50 mm 90° 21 mm 90° ca. 50 mm 21 mm Push the part (Hc) on the part (Ha). Ha Hc Open the appliance door and the kitchen furniture door at an angle of 90°. Insert the small square (Hb) into guide (Ha). Put together the appliance door and the furniture door and mark the holes.
Remove the brackets and mark a distance of 8 mm from the outer edge of the door where the nail must be fitted (K). 8 mm K Ha Place the small square on the guide again and fix it with the screws supplied. Align the kitchen furniture door and the appliance door by adjusting the part (Hb). Hb Press the part (Hd) on the part (Hb). Do a final check to make sure that: • All screws are tightened. • The sealing strip is attached tightly to the cabinet. • The door opens and closes correctly.
222365952-A-162013