Gebrauchs- und Montageanleitung Instructions for installation and use Instructions de montage et d’emploi Wichtig: Unbedingt lesen und aufbewahren! Important: Read these instructions carefully and then store them in a safe place Important: Lire attentivement et ranger soigneusemnt ce mode d’emploi Integrierte Kühl-Gefriergerät Integrated Fridge -Freezers Réfrigérateur - Congélateurs à intégrer Modell: IKE 187-8 p.
WARNUNGEN UND WICHTIGE HINWEISE Es ist sehr wichtig, daß diese Bedienungsanleitung mit dem betreffenden Gerät aufbewahrt wird. Sollte dieses Gerät verkauft bzw. einer anderen Person gegeben werden, so ist es nötig, die Anleitung beizufügen, damit der neue Besitzer über den Betrieb des Gerätes bzw. die entsprechenden Warnungen.
das im Motorkompressor enthaltene Öl in den Kältekreislauf abläuft. Man sollte mindestens 2 Std. warten, bevor das Gerät in Betrieb genommen wird, damit das Öl in den Kompressor zurückströmen Gebrauch • Die Haushaltskühl- und Gefriergeräte sind nur zur Einlagerung bzw. zum Einfrieren von Nahrungsmitteln bestimmt.
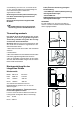
INHALT Warnungen und wichtige Hinweise . . . . . . . . . . . . . . . . . . . . . . . . . . . . . . . . . . . . . . . . . . . . . . . . . . .2 Hinweise zur Verpackungsentsorgung . . . . . . . . . . . . . . . . . . . . . . . . . . . . . . . . . . . . . . . . . . . . . . . .3 Gebrauch - Reinigung der Innenteile - Inbetriebnahme - Temperaturregelung - Richtig kühlen . . . . . . . - Einfrieren von frischen Lebensmitteln . . . . . . . . . . . . . . . . . . . . . . . . . . . . . . . . . . . . . . . . . . . . . . .
Aufbewahrung der Tiefkühlkost Eiswürfelbereitung Nach einem längeren Stillstand oder bei der ersten Inbetriebnahme des Gerätes muß vor der Einlagerung der Tiefkühlkost die höchste Stellung des Thermostatknopfes gewählt werden. Nach ca. 2 Std. kann dieser auf eine mittlere Stellung zurückgedreht werden. Das Gerät hat eine oder mehrere Eiswürfelschalen, welche mit Wasser aufgefüllt in das Gefrierfach gestellt werden.
Kontrolle der Feuchtigkeit In der Glasplatte ist eine Vorrichtung mit Schlitzen (verstellbar durch Schiebehebel) vorgesehen, mit der die Temperatur in der bzw. den Gemüseladen reguliert werden kann. Bei geschlossenen Schlitzen erzielt man eine wärmere Temperatur und höhere Feuchtigkeit. Bei geöffneten Schlitzen erzielt man eine kältere Temperatur und niedrigere Feuchtigkeit. PR271 TIPS Tips für das Kühlen • Die Lebensmittel in Alu- oder Polyäthylenfolien luftdicht verpacken.
WARTUNG Stillstandszeiten Vor jeder Reinigungsarbeit immer den Netzstecker aus der Steckdose ziehen. Bei längerem Stillstand des Gerätes, müssen Sie folgendermaßen vorgehen: Achtung den Stecker aus der Steckdose ziehen; Dieses Gerät enthält im Kältekreislauf Kohlenwasserstoff. Aus diesem Grund darf die Wartung und das Nachfüllen aussschließlich von autorisiertem Fachpersonal durchgeführt werden.
tropft. Verwenden Sie den dafür vorgesehenen Reiniger,der sich schon im Ablaufloch befindet.Die sich im Gefrierfach bildende Reifschicht soll, sobald diese eine Stärke von 4 mm erreicht hat, mit einem Plastikschaber abgekratzt werden. Während dieses Vorganges ist es nicht nötig, das Gerät auszuschalten und die Nahrungsmittel herauszunehmen. Wenn sich jedoch eine dicke Eisschicht bildet, muß man vollkommen abtauen. Um ein vollständiges Abtauen durchzuführen, geht man wie folgt vor: PR151 1.
einer Erdleitung versehen sein, so muß das Gerät an eine getrennte Erdleitung vorschriftsmäßig und unter Hinzuziehung eines Fachmanns angeschlossen werden. Die Erzeugerfirma lehnt jede Verantwortung ab, falls diese Unfallverhütungsvorschrift nicht beachtet wird. Dieses Gerät entspricht der folgende EWG Richtlinie: - 87/308 EWG vom 2.6.87 (DeutschlandAusführung) bzw. der ÖVE-Richtlinie Nr. F 61/84 (Österreich-Ausführung) bezüglich Funkentstörung.
Vergewissern Sie sich, dass unten zwischen dem Küchenmöbel und dem Rand des Geräts ein Abstand von 44 mm besteht. Die untere Scharnierabdeckung (im Zubehörbeutel) dient zur genauen Ausrichtung zwischen Küchenmöbel und Gerät. Darüber hinaus darf das Gerät das Netzkabel nicht quetschen. 1 m 44m E 2 Gerät mit den 4 beiliegenden Schrauben befestigen. I I Fugenabdeckprofil oben um die Winkeldicke ausschneiden und zwischen Gerät und Möbelseitenwand eindrücken.
Die Teile Ha, Hb, Hc, Hd abnehmen, wie in der Abb. gezeigt wird. Ha Hb Hc Hd PR266 Die Schiene (Ha) auf der Innenseite der Möbeltür oben und unten auflegen (siehe Abb.) und die Position der äußeren Bohrlöcher anzeichnen. Nachdem die Löcher gebohrt wurden, die Schiene mit den mitgelieferten Schrauben befestigen. ca. 50 mm 90° 21 m m 90° ca. 50 mm 21 m m Die Abdeckung (Hc) in die Schiene (Ha) eindrücken, bis sie einrastet. Ha Hc PR33 Gerätetür und Möbeltür auf ca. 90° öffnen.
Den Winkel wieder auf der Schiene anbringen und mit den mitgelieferten Schrauben befestigen. Für eine allfällig notwendige Ausrichtung der Möbeltür, den Spielraum der Langlöcher nutzen. Nach Beendigung der Arbeiten den einwandfreien Verschluß der Gerätetür überprüfen. Hb PR168 Die Abdeckung (Hd) in die Schiene (Hb) eindrücken, bis sie einrastet.
WARNINGS It is most important that this instruction book should be retained with the appliance for future reference. Should the appliance be sold or transferred to another owner, or should you move house and leave the appliance, always ensure that the book is supplied with the appliance in order that the new owner can be acquainted with the functioning of the appliance and the relevant warnings.
• Do not place carbonated or fizzy drinks in the freezer as it creates pressure on the container, which may cause it to explode, resulting in damage to the appliance. Installation • During normal operation, the condenser and compressor at the back of the appliance heat up considerably. For safety reasons, minimum ventilation must be as shown in the relevant Figure. Attention: keep ventilation openings clear of obstruction.
Temperature regulation Storage of frozen food The temperature is automatically regulated and can be increased to achieve a higher temperature (warmer) by rotating the thermostat knob toward lower settings or reduced (colder) rotating the knob towards higher settings. When first starting-up or after a period out of use, before putting the products in the compartment let the appliance run for at least two hours on the coldest setting, then turn the thermostat knob to the normal operating position.
Movable shelves The walls of the refrigerator are equipped with a series of runners so that the shelves can be positioned as desired. D338 Positioning the door shelves To permit storage of food packages of various sizes, the door shelves can be placed at different heights. To make these adjustments proceed as follows: Gradually pull the shelf in the direction of the arrows until it comes free, then reposition as required.
Hints for freezing To help you make the most of the freezing process, here are some important hints: • the maximum quantity of food which can be frozen in 24 hrs. is shown on the rating plate; • the freezing process takes 24 hours.
Interior light The light bulb inside the refrigerator compartment can be reached as follows: - unscrew the light cover securing screw. - unhook the moving part as shown in the figure. If the light does not come on when the door is open, check that it is screwed into place properly. If it still does not light up, change the bulb. The rating is shown on the light bulb cover.
CUSTOMER SERVICE AND SPARE PARTS If the appliance is not functioning properly, check that: • the plug is firmly in the wall socket and the mains power switch is on; • there is an electricity supply (find out by plugging in another appliance); • the thermostat knob is in the correct position. • If there are water drops on the bottom of the cabinet, check that the defrost water drain opening is not obstructed (see “Defrosting” section).
For safety reasons, minimum ventilation must be as shown in Fig. 540 50 Attention: keep ventilation openings clear of obstruction. 3 It is necessary that the niche is provided with a conduct of ventilation having the following dimensions: Depth 50 mm 2 Width 1 540 mm PR01 Make sure that a distance of 44 mm is maintained in the lower part between the kitchen furniture and the border of the appliance.
Apply covers (C-D) on joint cover lugs and into hinge holes. Snap vent grille (B) and hinge covers(E) into position. D C E E Separate parts Ha, Hb,Hc, Hd as shown in the figure. B Ha Hb Hc Hd PR266 Place guide (Ha) on the inside part of the furniture door, up and down as shown in the figure and mark the position of external holes. After having drilled holes, fix the guide with the screws supplied. ca. 50 mm 90° 21 m m 90° ca. 50 mm 21 m m Fix cover (Hc) on guide (Ha) until it clips into place.
8mm Remove the brackets and mark a distance of 8 mm from the outer edge of the door where the nail must be fitted (K). K Ha Place the small square on the guide again and fix it with the screws supplied. Should the lining up of the furniture door be necessary, use the clearance of slots. At the end of operations, it is necessary to check if the door of the furniture closes properly. Hb PR168 Fix cover (Hd) on guide (Hb) until it clips into place.
AVERTISSEMENTS ET CONSEILS IMPORTANTS Il est très important que cette notice d’utilisation soit gardée avec l’appareil pour toute future consultation. Si cet appareil devait être vendu ou transféré à une autre personne, assurez-vous que la notice d’utilisation suive l’appareil, de façon à ce que le nouvel utilisateur puisse être informé du fonctionnement de celui-ci et des avertissements relatifs.
+10°C et +32°C (Classe SN); La classe d’appartenance est indiquée sur la plaque signalétique. ATTENTION: En dehors des températures ambiantes indiquées par la classe climatique d’appartenance de ce produit, il est obligatoire de respecter les indications suivantes: lorsque la température ambiante descend sous la valeur minimum, la température de conservation du compartiment congélateur peut ne pas être garantie; il est donc conseillé de consommer les produits que ce dernier contient au plus vite.
SOMMAIRE Avertissements et conseils importants . . . . . . . . . . . . . . . . . . . . . . . . . . . . . . . . . . . . . . . . . . . . . .23 Renseignements pour l’élimination des matériaux d’emballage . . . . . . . . . . . . . . . . . . . . . . . . . .24 Utilisation - Nettoyage - Mise en service - Réglage de la température - Réfrigération - Congélation .
Conservation des produits surgelés A la première mise en fonctionnement ou après un arrêt prolongé faites fonctionner l’appareil pendant deux heures au moins, avec le bouton du thermostat sur la position de froid maximum. Ramenez ensuite le thermostat sur une position moyenne. Attention En cas de coupure de courant abstenez-vous d’ouvrir la porte. Si l’interruption est de courte durée (jusqu’à 6-8 heures) et si le congélateur est rempli, il n’y a aucun risque d’altération pour les aliments.
CONSEILS Conseils pour la réfrigeration • évitez de placer des produits à congeler en contact avec des denrées déjà entreposées, pour éviter d'en élever la température; • les aliments maigres se conservent mieux et plus longtemps que les gras; le sel réduit la durée de conservation; • ne consommez pas les bâtonnets glacés toute de suite après les avoir sortis du congélateur.
Nettoyage N’utilisez jamais d’objets métalliques pour nettoyer l’appareil; vous risquez de l’endommager. Nettoyez périodiquement l’intérieur de votre appareil avec de l’eau tiède et du bicarbonate de soude. Rincez et séchez soigneusement. Dépoussiérez le condenseur situé à l'arrière de l'appareil à l'aide d'une brosse ou d'un aspirateur. Une accumulation de poussière risquerait de diminuer le rendement de l'appareil.
3. maintenez la porte ouverte; placez un récipient sur la premire clayette du réfrigérateur, à l’endroit qui correspond à l’ouverture de vidange, et retirez le bouchon, comme l’illustre la figure. 4. épongez et séchez soigneusement les parois et le fond; 5. ramenez le bouton du thermostat sur la position désirée ou rebranchez l’appareil. 6. Après 2-3 heures de fonctionnement l’appareil est à nouveau prêt à la con-servation des produits surgelés.
Réversibilité des portes L’appareil est livré avec l’ouverture à droite. Pour changer le sens d’ouverture de la porte suivez les indications ci-dessous avant l’installation. 1. Dévissez le pivot supérieur et enlevez l’entretoise 2. Dégagez la porte 3. Dévissez le pivot inférieur avec une clé et repositionnez-le sur le côté opposé. 4. Remettez la porte en place, insérez la pièce d’écartement et revissez le pivot supérieur sur le côté opposé.
Appliquez le joint à pression, entre l’appareil et le meuble. D724 Sur le cache plastique (E), qui sert à recouvrir la charnière et le pivot, retirez la pièce indiquée, comme illustré. Cette opération est facilitée par la présence d'une rainure, à l'intérieur du cache charnière, qui facilite le retrait de cette pièce. "Retirez la pièce marquée d'un DX, si le pivot est inséré dans la charnière droite, ou la pièce marquée d'un SX si le pivot est inséré dans la charnière gauche.
Fixer par encliquetage le couvercle (Hc) sur la glissière (Ha). Ha Hc PR33 Ouvrir la porte de l’appareil et celle du meuble à 90° environ. Introduire l’équerre (Hb) dans la glissière (Ha). Tenir ensemble la porte de l’appareil et celle du meuble et marquer la position des trous comme l’indique la figure. 8mm Ha Hb PR167 Enlever les équerres et marquer à 8 mm du bord extérieur de la porte avec le clou (K). 8mm K Ha Remettre l’équerre en place sur la glissière et fixer avec les vis fournies.
Réversibilité de la porte 180° 33
KÜPPERSBUSCH HAUSGERÄTE AG Postfach 10 01 32, D-45801 Gelsenkirchen, Küppersbuschstr. 16, D-45883 Gelsenkirchen Telefon: (02 09) 4 01-0, Telefax: (02 09) 4 01-3 03 www.kueppersbusch.de Küppersbusch Ges. m. b. H. Eitnergasse 13, 1231 Wien, Telefon: 01 / 8 66 80-0, Telefax: 01 / 8 66 80 72 www.kueppersbusch.at · e-Mail: verkauf@kueppersbusch.