
operation manual


– 7
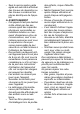
몇 CAUTION
Pointer to a possibly dangerous
situation, which can lead to mi-
nor injuries.
ATTENTION
Pointer to a possibly dangerous
situation, which can lead to
property damage.
Illustrations on fold-out page!
These operating instructions de-
scribe the multi-purpose vacuum
cleaners listed on the front cover.
The illustrations show the maximum equipment;
depending on the model, there are differences in
equipment and supplied accessories.
When unpacking the product, make sure that no acces-
sories are missing and that none of the package con-
tents have been damaged. If you detect any transport
damages please contact your dealer.
included in the scope of delivery
possible accessories
Illustration
To connect the suction hose during vacuuming.
Illustration
Position I: Suction or blowing
Position 0: Appliance is switched off
Illustration
Position I: Suction or blowing
Position II: Automatic vacuuming with connected
electric tool
Position 0: Appliance and the connected electric
tool are switched off
Note: Observe the maximum connected load (see
Chapter "Technical data").
Illustration
To connect an electric tool.
To carry the appliance or to remove the appliance
head after unlocking.
Illustration
To store the mains cable.
Illustration
Connect the suction hose to the blower connection,
this will activate the blower function.
Illustration
Pull out to open, push in to lock.
Illustration
To rest the floor nozzle during work interruptions.
Illustration
The accessories compartment allows the storage
of suction pipes and suction nozzles on the appli-
ance.
Illustration
The steering rollers are located in the compartment
when the appliance is delivered. These must be at-
tached prior to starting up the appliance.
Note: Do not use a filter bag for wet vacuuming!
Illustration
Recommendation: To vacuum fine dust, use the
filter bag.
Illustration
The cartridge filter must always be installed - with
wet and dry vacuuming.
Note: Let the wet cartridge filter dry prior to using it for
dry vacuuming.
Illustration
Push the suction hose into the connection on the
appliance, it snaps in place.
In order to disconnect it, push down with your
thumb and pull the suction hose out.
Note: Accessories, such as suction brushes (optional)
can be directly attached to the connecting piece and
thus connected to the suction hose.
For convenient working even in tight spaces.
The removable handle can be attached between the ac-
cessories and the suction hose if necessary.
See position 14.
Description of the Appliance
Suction hose connection
ON/OFF switch for appliance
(without built-in socket)
ON/OFF switch for appliance
(with built-in socket)
Machine socket
Carrying handle
Cable hook
Blowing connection
Container closure
Parking position
Accessory mount
Steering roller
Filter bag
Cartridge filter
Suction hose with connecting piece
12 EN