Meridian TM-400™ User’s Guide Motorized Turntable for Rotational Object Photography
Copyright Information Copyright © 2000 Kaidan, Inc. All Rights Reserved. First Edition, September 2000. KiWi is a trademark of Kaidan, Inc. Other products mentioned herein may be trademarks of their respective companies. Patents Pending. Information in this manual is subject to change without notice and does not represent a commitment on the part of Kaidan.
Chapter 1 Assembling the TM-400 STEP A: UNPACKING THE BOXES The components are detailed below. Please make sure that all parts are included. Examine the parts for any signs of shipping damage. In the event of shipping damage, immediately contact Kaidan, or your local distributor to process claims. If any items are missing or you notice any damage, call Kaidan at 215-364-1778, between the hours of 10:00 am and 6:00 PM, Mon-Fri, EST.
TM-400 Hardware List Hardware Package Qty. 99-1069 1/2-13 Jam Nuts 99-1070 1/2 Split Lock Washers 99-1071 1.5 ODx.
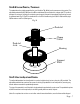
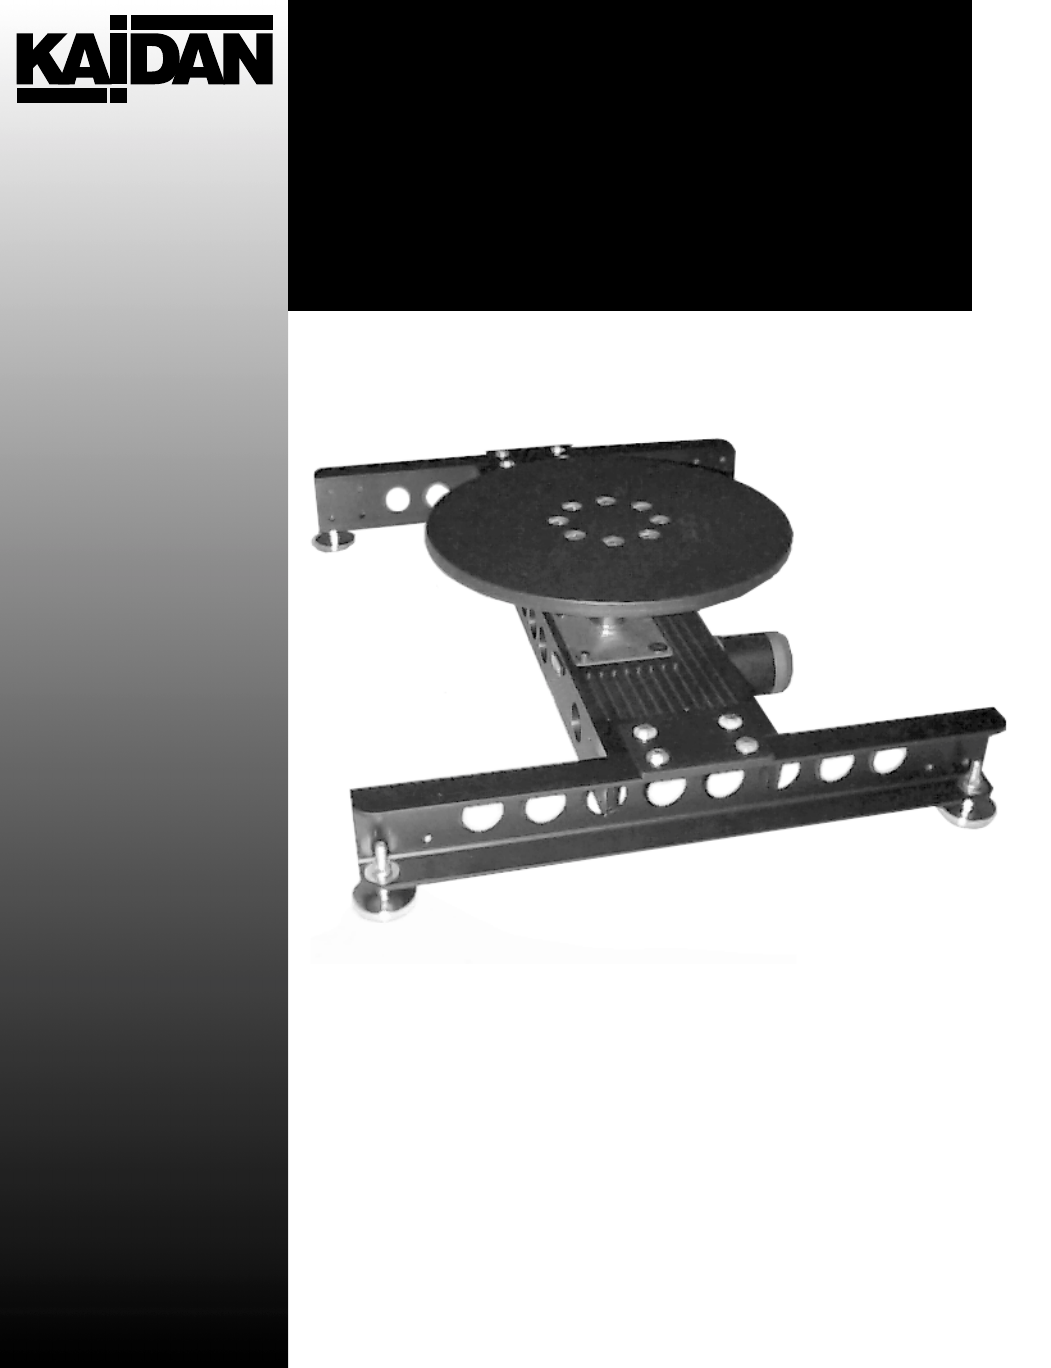
Chapter 1 STEP B:IDENTIFYING THE MERIDIAN TM-400 COMPONENTS.
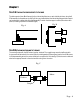
Chapter 1 STEP C: ATTACHING THE SIDE SUPPORTS TO THE BASE The side supports (Item #2) will accept the four industrial glides, two on each side. Attach them using the 1/ 2” flat washers, lock washers and nuts(Fig A). Once you have attached the industrial glides, each side support can be attached to either side of the base assembly. To attach the side supports use the 3/8 socket screws (Item 6) including a 3/8 flat & lockwashers(Fig B). Fig. B Fig.
STEP E: ATTACHING PEDESTAL / TURNTABLES The pedestal and turntable assemblies for your Meridian TM-400 all use the same mounting system. The adjustable pedestal (14, 16, 17, 18, 19) and the 18”turntable base(20) are fitted with a clamp collar. The collar is designed to rest upon the large thrust bearing and support plate, which are placed “free floating” around the pedestal axle.
Kaidan Warranty and Return Policy Limited Warranty In the event of a defect in materials or workmanship, Kaidan will repair the product with new or rebuilt parts for a period of three-hundred and sixty five (365) days from the date of original purchase. Such work will be performed free of charge. Follow the Product Return Procedure, Item D below. Likewise, any software purchased from Kaidan also comes with a one year warranty if your disc or media is defective or damaged.
A Appendix A: Troubleshooting eMCee™ THE EMCEE SOFTWARE DOES NOT RECOGNIZE THE CONTROLLER? The error message that the controller is not responding or that it is not a known controller indicates a “break” in the serial communications between eMCee and the hardware controller. Before troubleshooting the eMCee software, please make sure that all your connections between the computer and the hardware controller are properly setup.
The eMCee software controls Kaidan hardware via a serial interface and in order for eMCee to function properly it must be able to gain solitary control of the serial port being used. System Extensions that monitor the serial ports for activity will deny eMCee solitary control of the serial port. Extensions like 3rd party print drivers or Palm Pilot’s Hot Sync that are constantly running, will prevent eMCee accessing the serial port.
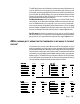
MDT-19 X-Axis Y-Axis Steps per Rev 14165* 0 Intial Velocity 100 0 Slew Velocity 300 0 Ramp Slope 15 0 Move Speeds 300 0 Step Resolution Full 0 *Note - This value has been calibrated specifically for your unit, you will find this value on the underside of the unit.
36" TURNTABLE ASSEMBLY INSTRUCTIONS 3/8-16x2.25lg. hex bolt Flat Washer (8) 36" Turntable 18" Turntable Wing Nut (4) IN ORDER TO USE THE 36" TURNTABLE, IT MUST BE BOLTED TO THE 18" TURNTABLE AS SHOWN ABOVE IN FOUR PLACES, USING THE (4)3/8-16 X 2.25 LG. HEX BOLT, (8)3/8" SAE WASHERS AND (4) 3/8" WING NUTS.