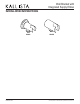
00% Silicone Sealant Record your model number. 1 Slide the wall plate onto the shower arm. Apply sealant tape. 1333673-2-C CAUTION: Risk of product damage. To avoid plugging the showerhead spray outlets, use thread sealant tape on the shower arm threads. Do not use thread sealant compound (pipe dope). 2 Install the arm. Tighten with a clean strap wrench. CAUTION: Risk of scalding. KALLISTA low-flow showerheads are designed for use with compatible KALLISTA valves.
Questions? Problems? For additional assistance, please contact KALLISTA's Customer Service Department at 1-888-4-KALLISTA (1-888-452-5547) or kallista.com.
Handshower, Hose & Handshower Accessories INSTALLATION INSTRUCTIONS P21650, P21660, P24452, P24453, P24454, P24456, P24743, P24745, P24746, P24761, P24843 1188577-2-F ©2014 KALLISTA 1 of 5 Questions? Problems? For additional assistance, please contact KALLISTA’s Customer Service Department at 1-888-4-KALLISTA (1-888-452-5547) or kallista.
Handshower, Hose & Handshower Accessories INSTALLATION INSTRUCTIONS THANK YOU FOR CHOOSING KALLISTA We appreciate your commitment to KALLISTA quality products. Please take a moment to review this manual before you install your KALLISTA product. If you encounter any installation or performance problems, please do not hesitate to contact us at the phone number listed at the bottom of the page. BEFORE YOU BEGIN WARNING: Risk of scalding. High water temperature can cause severe burns.
Handshower, Hose & Handshower Accessories INSTALLATION INSTRUCTIONS TOOLS AND MATERIALS Pencil Tape Measure Drill Level Assorted Screwdrivers Hex Wrench Thread Sealant Adjustable Wrench Pipe Wrench . 1. INSTALL THE SUPPLY ELBOW (P24452) Shower Ell Adapter O-Ring Supply Elbow Apply thread sealant tape. Install a temporary nipple into the shower ell. Run water through the system to flush out dirt and debris. Remove the temporary nipple from the shower ell.
Handshower, Hose & Handshower Accessories INSTALLATION INSTRUCTIONS 2. INSTALL THE FIXED WALL BRACKET (P24453) Drill holes using a 5/16" bit. Anchor 13/16" (21 mm) Fixed Wall Bracket Screw Press and hold legs together. Determine the location for the fixed wall bracket. Mark the hole locations for the wall anchors. Drill the holes and install the wall anchors. Attach the fixed wall bracket to the wall with the screws. 3.
Handshower, Hose & Handshower Accessories INSTALLATION INSTRUCTIONS 4. INSTALL THE OPTIONAL SLIDEBAR (P24456) Cap Setscrew O-Ring Coupling Tube Drill a 5/16" hole for the anchor. Escutcheon Handshower Bracket Anchor Sleeve Hub Screw Coupling O-Ring Setscrew Cap 1188577-2-E 5 of 5 Determine the location for the slidebar. Mark the hole locations for the wall anchors. Drill the holes and install the wall anchors. Attach the escutcheons, sleeves, and hubs with the screws.
Wall Bracket with Integrated Supply Elbow INSTALLATION INSTRUCTIONS P21651 1230883-2-B 1 of 3 KALLISTA ©2015 P21652 Questions? Problems? For additional assistance, please contact KALLISTA’s Customer Service Department at 1-888-4-KALLISTA (1-888-452-5547) or kallista.com.
Wall Bracket with Integrated Supply Elbow INSTALLATION INSTRUCTIONS THANK YOU FOR CHOOSING KALLISTA We appreciate your commitment to KALLISTA quality products. Please take a moment to review this manual before you install your KALLISTA product. If you encounter any installation or performance problems, please do not hesitate to contact us at the phone number listed at the bottom of the page. BEFORE YOU BEGIN NOTE: Plumbing codes may require a vacuum breaker be installed in-line to handshowers.
Wall Bracket with Integrated Supply Elbow INSTALLATION INSTRUCTIONS 1. INSTALL THE PIPE NIPPLE 11/16" (17 mm) Beyond Finished Wall 1/2" NPT Nipple Apply sealant tape. 3/8" (10 mm) Max 1-5/8" (41 mm) Max Apply sealant tape to one end of a 1/2” NPT nipple. Install the nipple to extend 11/16″ (17 mm) beyond the finished wall. Ensure the gap between the nipple and finished wall is no more than 3/8” (10 mm). 2. INSTALL THE WALL BRACKET Wall Bracket Apply sealant tape.
Thermostatic Valve Trim INSTALLATION INSTRUCTIONS P23052-CR, P23052-LV, P23122-LV, P23222-RK, P23222-LV, P24022-CL, P24022-CR, P24022-KL, P24022-RB, P24022-RL, P24122-CR, P24122-LV, P24129-CR, P24129-LV, P24421-CR, P24421-LV, P24422-CR, P24422-LV, P24522-LV, P24522-TT, P24622-CR, P24622-LV, P24722-LV 1048650-2-K 1 of 6 KALLISTA ©2014 Questions? Problems? For additional assistance, please contact KALLISTA’s Customer Service Department at 1-888-4-KALLISTA (1-888-452-5547) or kallista.com.
Thermostatic Valve Trim INSTALLATION INSTRUCTIONS THANK YOU FOR CHOOSING KALLISTA We appreciate your commitment to KALLISTA quality products. Please take a moment to review this manual before you install your KALLISTA product. If you encounter any installation or performance problems, please do not hesitate to contact us at the phone number listed at the bottom of the page. BEFORE YOU BEGIN Please read all instructions before you begin.
Thermostatic Valve Trim INSTALLATION INSTRUCTIONS 1. INSTALL THE VALVE STEM ADAPTER Select the correct valve stem adapter and screw. Spline Adapter Valve Stem Adapter NOTE: Check the finished wall surface as related to the graphics on the plaster guard. Select the correct length valve stem adapter and screw for your application. Refer to the information stamped on the plaster guard to verify the wall thickness.
Thermostatic Valve Trim INSTALLATION INSTRUCTIONS 2. ADJUST THE HANDLE ASSEMBLY Spline Adapter Valve Stem Adapter Handle Assembly Ensure the valve stem adapter is lightly placed over the spline adapter. Place the handle assembly over the valve stem adapter. Turn the handle clockwise until the stop is contacted. The valve will be in the full cold position. The handle should be between 9 and 10 o’clock positions. To adjust the position of the handle, refer to the alignment instructions below.
Thermostatic Valve Trim INSTALLATION INSTRUCTIONS 3. INSTALL THE FRONT PLATE Verify the seal covers the wall opening. Stud Nut 7/16" (11 mm) MAX Screw Valve Stem Adapter Ensure the valve stem adapter is firmly pressed onto the valve stem. Secure the valve stem adapter to the valve with the correct length screw, as selected in the “Install the Valve Stem Adapter” section of this guide. Thread the two studs into the threaded holes of the valve. Place the front plate assembly over the studs.
Thermostatic Valve Trim INSTALLATION INSTRUCTIONS 4. INSTALL THE TRIM All other Trim P24722-LV Trim Escutcheon Adapter Ring Front of Adapter Ring Escutcheon Setscrew NOTE: If installing the P24722-LV trim, proceed to the “For P24722-LV” section below. Place the escutcheon on the wall with the drain notch located downward in the 6 o’clock position. Thread the handle assembly onto the hub of the front plate assembly to secure the escutcheon in place.
Volume Control Valve Trim INSTALLATION INSTRUCTIONS P23013-CR, P23013-LV, P23123-LV, P23223-RK, P23223-LV, P24113-CR, P24113-LV, P24118-CR, P24118-LV, P24423-CR, P24423-LV, P24523-TT, P24623-CR, P24623-LV, P24723-LV 1072177-2-G 1 of 6 KALLISTA ©2014 Questions? Problems? For additional assistance, please contact KALLISTA’s Customer Service Department at 1-888-4-KALLISTA (1-888-452-5547) or kallista.com.
Volume Control Valve Trim INSTALLATION INSTRUCTIONS THANK YOU FOR CHOOSING KALLISTA We appreciate your commitment to KALLISTA quality products. Please take a moment to review this manual before you install your KALLISTA product. If you encounter any installation or performance problems, please do not hesitate to contact us at the phone number listed at the bottom of the page. BEFORE YOU BEGIN Please read all instructions before you begin.
Volume Control Valve Trim INSTALLATION INSTRUCTIONS 1. INSTALL THE VALVE STEM ADAPTER Select the correct valve stem adapter and screw. Spline Adapter Valve Stem Adapter NOTE: Check the finished wall surface as related to the graphics on the plaster guard. Select the correct length valve stem adapter and screw for your application. Refer to the information stamped on the plaster guard to verify the wall thickness.
Volume Control Valve Trim INSTALLATION INSTRUCTIONS 2. ADJUST THE HANDLE ASSEMBLY Spline Adapter Valve Stem Adapter Handle Assembly Ensure the valve stem adapter is lightly placed over the spline adapter. Place the handle assembly over the valve stem adapter. Turn the handle counterclockwise until the valve is fully closed. The handle should be in the vertical, 6 o’clock position. Remove the handle assembly and set aside.
Volume Control Valve Trim INSTALLATION INSTRUCTIONS 3. INSTALL THE FRONT PLATE Verify the seal covers the wall opening. Screw Screw Valve Stem Adapter Ensure the valve stem adapter is firmly pressed onto the valve stem. Secure the valve stem adapter to the valve with the correct length screw, as selected in the “Install the Valve Stem Adapter” section of this guide. Align the holes on the front plate assembly and the valve. NOTE: Be sure to select the correct length screw for your application.
Volume Control Valve Trim INSTALLATION INSTRUCTIONS 4. INSTALL THE TRIM All other Trim P24723-LV Trim Escutcheon Adapter Ring Escutcheon Setscrew Front of Adapter Ring NOTE: If installing the P24723-LV trim, proceed to the “For P24723-LV” section below. Place the escutcheon on the wall with the drain notch located downward in the 6 o’clock position. Thread the handle assembly onto the hub of the front plate assembly to secure the escutcheon in place.
Homeowners Guide Kallista Products Français, page “Français-1” Español, página “Español-1” 1057788-5-B
Thank You For Choosing Kallista Thank you for choosing Kallista. Your Kallista product combines exceptional performance with timeless classic elegance that will satisfy you for years to come. The dependability and beauty of your Kallista product will surpass your highest expectations. Please take a few minutes to study this Homeowners Guide. Pay special attention to the care and cleaning and warranty information.
Five-Year Limited Warranty (cont.) Kallista’s products are warranted to be free of defects in material and workmanship for five years from the date of installation. Kallista will, at its election, repair, replace, or make appropriate adjustment where Kallista inspection discloses any such defects occurring in normal usage within five (5) years after installation. Kallista is not responsible for removal or installation costs. Use of in-tank toilet cleaners will void the warranty.
Guide du propriétaire Produits Kallista Merci d’avoir choisi Kallista Merci d’avoir choisi Kallista. Votre produit Kallista combine une performance exceptionnelle avec une élégance classique inégalable qui vous satisferont pour les années à venir. La fiabilité et la beauté de votre produit Kallista surpasseront vos plus grandes espérances. Veuillez prendre s’il vous plaît quelques minutes pour consulter ce guide du propriétaire.
Nettoyer le produit Kallista (cont.) contacter le Service Clientèle Kallista au 1-888-4-KALLISTA (1-888-452-5547). Garantie Limitée de cinq ans Tous les produits Kallista sont couverts sous une garantie Kallista de cinq ans à moins qu’autrement indiqué.* Les produits Kallista sont garantis contre tout défaut matériel et de fabrication pour cinq ans à partir de la date de l’installation.
Guía del usuario Productos Kallista Gracias por elegir los productos Kallista Gracias por elegir los productos Kallista. Su producto Kallista combina el funcionamiento excepcional con la clásica elegancia perdurable que le satisfacerán por muchos años. La fiabilidad y belleza de su producto Kallista sobrepasarán sus mayores expectativas. Dedique unos minutos para leer esta Guía del usuario. Preste especial atención a la información sobre el cuidado y limpieza, y la garantía.
Limpieza de su producto Kallista: (cont.) comuníquese con el departamento de servicio al cliente de Kallista al 1-888-4-KALLISTA (1-888-452-5547). Garantía limitada de cinco años Todos los productos Kallista tienen una garantía de cinco años de Kallista, a menos que se indique lo contrario.* Se garantiza que los productos Kallista están libres de defectos de material y mano de obra por cinco años a partir de la fecha de instalación.
USA/Canada: 1-888-4-KALLISTA Fax: 1-888-272-3094 kallista.
3-way Transfer Valve Trim INSTALLATION INSTRUCTIONS P23083-CR, P23083-LV, P23183-LV, P23283-RK, P23283-LV, P24183-CR, P24183-LV, P24184-CR, P24184-LV, P24483-CR, P24483-LV, P24583-TT, P24683-CR, P24683-LV, P24724-LV 1091608-2-G 1 of 6 KALLISTA ©2014 Questions? Problems? For additional assistance, please contact KALLISTA’s Customer Service Department at 1-888-4-KALLISTA (1-888-452-5547) or kallista.com.
3-way Transfer Valve Trim INSTALLATION INSTRUCTIONS THANK YOU FOR CHOOSING KALLISTA We appreciate your commitment to KALLISTA quality products. Please take a moment to review this manual before you install your KALLISTA product. If you encounter any installation or performance problems, please do not hesitate to contact us at the phone number listed at the bottom of the page. BEFORE YOU BEGIN Please read all instructions before you begin.
3-way Transfer Valve Trim INSTALLATION INSTRUCTIONS 1. INSTALL THE VALVE STEM ADAPTER Select the correct valve stem adapter and screw. Spline Adapter Valve Stem Adapter NOTE: Check the finished wall surface as related to the graphics on the plaster guard. Select the correct length valve stem adapter and screw for your application. Refer to the information stamped on the plaster guard to verify the wall thickness.
3-way Transfer Valve Trim INSTALLATION INSTRUCTIONS 2. ADJUST THE HANDLE ASSEMBLY Accessory "B" Accessory "A" Accessory "C" Spline Adapter Mixed Water Supply Valve Stem Adapter Handle Assembly "A" Combined "A" and "C" Combined "A" and "B" "C" "B" Combined "B" and "C" NOTE: Valve Operation. Water will flow from a single shower accessory when the control knob detent lines up with any of the large detents on the escutcheon.
3-way Transfer Valve Trim INSTALLATION INSTRUCTIONS 3. INSTALL THE FRONT PLATE Verify the seal covers the wall opening. Screw Screw Valve Stem Adapter Ensure the valve stem adapter is firmly pressed onto the valve stem. Secure the valve stem adapter to the valve with the correct length screw, as selected in the “Install the Valve Stem Adapter” section of this guide. Align the holes on the front plate assembly and the valve. NOTE: Be sure to select the correct length screw for your application.
3-way Transfer Valve Trim INSTALLATION INSTRUCTIONS 4. INSTALL THE TRIM All other Trim P24724-LV Trim Escutcheon Adapter Ring Escutcheon Setscrew Front of Adapter Ring NOTE: If installing the P24724-LV trim, proceed to the “For P24724-LV” section below. Place the escutcheon on the wall with the drain notch located downward in the 6 o’clock position. Thread the handle assembly onto the hub of the front plate assembly to secure the escutcheon in place.
Installation Guide Three-Way Transfer Valve P29513, P29514 1091987-2-B
Thank You For Choosing Kallista We appreciate your commitment to KALLISTA quality products. Please take a moment to review this manual before you install your KALLISTA product. If you encounter any installation or performance problems, please do not hesitate to contact us from within the USA or Canada at 1-888-4-KALLISTA (1-888-452-5547).
Before You Begin (cont.) Inspect the waste and supply tubing; replace if necessary. KALLISTA reserves the right to make revisions in the design of products without notice, as specified in the Price Book.
Plaster Guard Max Finished Wall 2-3/4" (70 mm) 3-7/8" (98 mm) Mixed Water Supply 3/4" Copper Tubing or Piping Min Finished Wall 1. Prepare the Site Provide a 2-7/8″ (73 mm) to 3-1/8″ (79 mm) diameter hole in the wall material for the plaster guard. 2. Route and Connect the Water Supply Route the 3/4″ mixed water supply line to the transfer valve location. Apply thread sealant to the inlet port threads and connect the water supply to the transfer valve inlet.
Accessory #1 Water Line Accessory #2 Water Line Mixed Water Supply 3/4" Copper Tubing or Piping 3. Two-Way Installations IMPORTANT! Do not plug any outlets on this transfer valve. The transfer valve is not intended to be used as a shut-off valve. If less than three accessories will be installed, connect the unused transfer valve port to one of the accessories. All outlet ports must be connected to an accessory, even if one accessory is connected to two transfer valve outlet ports.
Accessory Water Lines 1/2" Copper Tubing or Piping Mixed Water Supply 3/4" Copper Tubing or Piping 4. Three-Way Installations Install 1/2″ copper tubing or 1/2″ piping for all accessories. Securely fasten the piping and outlet ells to the framing. Install temporary 1/2″ nipples in the outlet ells so they extend a minimum of 2″ (51 mm) beyond the finished wall. Turn on the water supply to the transfer valve and check the transfer valve for proper operation and leakage.
1091987-2-B
USA/Canada: 1-888-4-KALLISTA Fax: 1-888-272-3094 kallista.