
Installation Sheet

Thank You For Choosing Kallista
We appreciate your commitment to KALLISTA quality products. Please
take a moment to review this manual before you install your
KALLISTA product. If you encounter any installation or performance
problems, please do not hesitate to contact us from within the USA or
Canada at 1-888-4-KALLISTA (1-888-452-5547).
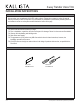
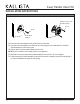
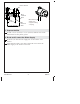
Tools and Materials
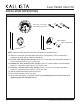
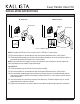
Before You Begin
IMPORTANT! Risk of product damage. Do not apply direct heat
to the transfer valve body. Excessive heat will damage the plastic
valve components and plaster guard.
Observe all local plumbing and building codes.
Do not remove the plaster guard from the transfer valve until
instructed to do so.
A mixed water supply is required for this transfer valve.
Do not plug any outlets on this transfer valve. The transfer valve
is not intended to be used as a shut-off valve.
If less than three accessories will be installed, connect the unused
transfer valve port to one of the accessories. All outlet ports must
be connected to an accessory, even if one accessory is connected
to two transfer valve outlet ports.
Carefully plan the installation before beginning. Carefully read
the entire instructions. Component location, spacing, and
situational requirements can vary.
Shut off the main water supply.
Plus:
• 1/2" Piping or Copper
Tubing for Outlets
• 3/4" Piping or Copper
Tubing for Inlets
Tubing
Cutter
Solder
Thread
Sealant Propane Torch
Bladed
Screwdriver
Adjustable
Wrench
1091987-2-B 2 Kallista