
Use and Care Manual


Copies of the I/B. Please reproduce them without any changes
except under special instruction from Team International USA.
The pages must be reproduced and folded in order to obtain
a booklet A5 (+/- 148.5 mm width x 210 mm height). When
folding, make sure you keep the good numbering when you
turn the pages of the I/B. Don’t change the page numbering.
Keep the language integrity. Print only what is inside the frame.
7 VC 42475 - 160909
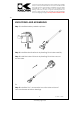
Assembly page 7/32
Fax +1 305 430 9692
2. Charge on base
Place the base on a flat, horizontal, stable surface that is not
exposed to direct sunlight or humidity, and far from any heat
source.
Remove the rubber cover on the base to access the charging
pins on top of the charging station.
Make sure the appliance is set to off, and all the accessories are
removed.
Plug the charger into the side of the base, and then plug it into a
wall socket.
Place the battery into the charging base, making sure that the
connection pins on the base are straight and not crooked. The
battery should insert perfectly into the base
The LED light on the base lights up red, and will start blinking, to
show that the battery is charging.
When the battery is fully charged, the LED indicator light should
glow solid red (it will no longer blink).
Note: To remove the battery from the base, simply press the 2
buttons on each side of the battery and lift it out from its cradle.
Note: We recommend keeping your appliance always in charge
when not in use, this way it will keep a full charge and will always be
ready for use w hen you need it.