
Operation Manual


22 | EN
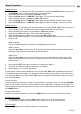
Cabinet overhang Washer Cabinet bottom
Equal to or longer
than cabinet over-
hang
Selected screws which
meet minimum, but do not
exceed maximum length
Step 5
Insert screws from inside the cabinet. The washers must be used on metal cabinets, and on wood
cabinets if you did not countersink the drilled holes. Position washers, at side down, and place
screws into the holes.
If your cabinet does not have an overhang, go to Step 7.
Step 6
Hold screw heads down while you push the selected spacers onto the screws under the cabinet.
Be sure to push up spacers until they fully nested (if more then one is in used).
Step 7
Align radio under the screws. Hold the screw holes in the top of the clock radio against the mounting
screws and partially tighten the screws.
Do not fully tighten until all 3 screws have been started (the top front edge of the clock radio should
clear the overhang.).
First Installation
Power Supply
• Connect the AC plug into a suitable wall outlet. Make sure that the output power of the wall outlet
matches the required power supply as indicated on the unit.
Inserting backup batteries (not included):
1. Open the battery compartment cover.
2. Insert 2 batteries “AAA” 1.5V into the battery compartment. These batteries keep at short power
outages the clock and the data stored in the processor, but will not be shown in the display.
Please observe the correct polarity marked inside the battery compartment (“+” and “-”).
3. Place the cover again onto the battery compartment and press it carefully until it snaps in.
Notes:
• If the unit is not in use for a longer period of time, take out the batteries and disconnect the AC
plug.
• If the batteries are low on power, the backup function might not work.