
User Manual


– 10
ATTENTION
When the work is finished, always rinse the appliance
through with the cleaning station and fresh water. This
is the best way of cleaning the appliance. It prevents the
build-up of dirt and bacteria or unpleasant odours.
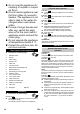
Illustration
Switch off the appliance; press the on/off button to
do so.
Illustration
Place the appliance in the cleaning station.
For the rinsing process, fill the fresh water tank with
cold or lukewarm tap water to completely remove
detergent residue from the suction ducts and slits
on the suction head.
Insert the fresh water container into the appliance.
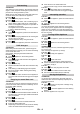
Illustration
Remove the waste water tank and empty it.
See Chapter "Emptying the waste water tank".
Fill the measuring cup with 200 ml water.
Fill the cleaning station with water.
If necessary, add appropriate KÄRCHER cleaning
agents for the rinsing procedure.
To switch on the appliance press the on/off switch.
Allow the appliance to run for 30-60 seconds until
the water is completely drawn out of the cleaning
station.
The rinsing procedure is now complete.
Note
The longer the appliance is switched on, the less resid-
ual moisture is left over in the cleaning rollers.
Switch off the appliance; press the on/off button to
do so.
If there is still water in the fresh water tank, remove
the fresh water tank and empty it.
Illustration
Empty the waste water tank.
See Chapter "Emptying the waste water tank".
If there is still water in the fresh cleaning station,
empty it.
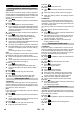
Illustration
Disconnect the main plug from the socket.
Illustration
Wind the mains cable around the cable clips.
Secure the mains cable with the cable clip.
ATTENTION
The fresh and waste water tanks must be emptied be-
fore the appliance is set down on the ground for roller
removal. This prevents any fluids from leaking out of the
tank when it is laid on the ground.
Note
In the case of heavy contamination, clean the cleaning
rollers separately.
Illustration
Switch off the appliance; press the on/off button to
do so.
If there is still water in the fresh water tank, remove
the fresh water tank and empty it.
Illustration
Disconnect the main plug from the socket.
Empty the fresh water reservoir.
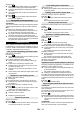
Illustration
Empty the waste water tank.
Illustration
Twist out the cleaning rollers from the recessed
grip.
Clean the cleaning rollers under running water.
or
Wash the cleaning rollers in the washing machine
up to 60°C.
ATTENTION
Do not use any soft detergents when cleaning in the
washing machine. This avoids causing damage to the
microfibres. It also preserves the high performance lev-
els of the cleaning rollers.
The cleaning rollers are not suitable for the tumble dry-
er.
After cleaning, allow the rollers to air-dry.
Illustration
Screw the cleaning rollers onto the threaded rod up
to the mechanical stop.
Pay attention to the colour-codes on the inside of
the roller and roller holder on the appliance (e.g.
blue should match up with blue).
After the installation, check to ensure that the
cleaning rollers sit snugly.
ATTENTION
In the case of heavy contamination or if parts such as
stones or splinters get into the suction head, it will need
to be cleaned. While the appliance is working, these
parts will cause a rattling noise or will block up the suc-
tion ducts, diminishing suction performance.
Illustration
Switch off the appliance; press the on/off button to
do so.
Illustration
Disconnect the main plug from the socket.
Illustration
Remove the cleaning rollers.
See "Cleaning the rollers".
Illustration
Press the suction head lock.
Take off the suction head lid.
Clean the suction head lid under running water.
If necessary, remove particle deposits from the
suction ducts and slits in the suction head lid.
Clean the suction head with a damp cloth.
Fix the suction head lid onto the suction head.
Illustration
Screw the cleaning rollers onto the threaded rod up
to the mechanical stop.
See "Cleaning the rollers".
ATTENTION
Regularly clean the waste water tank to prevent block-
age to the separator with dust and dirt or to prevent dirt
from building up in the tank.
Illustration
Switch off the appliance; press the on/off button to
do so.
Illustration
Place the appliance in the cleaning station.
Illustration
until
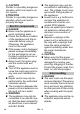
Care and maintenance
Cleaning appliance with rinsing process
Cleaning the rollers
Cleaning the suction head
Clean the waste water tank
18 EN