
Operating instructions

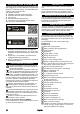
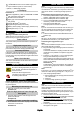


Table Of Contents
- Inhalt
- Allgemeine Hinweise
- KÄRCHER Home & Garden App
- Umweltschutz
- Bestimmungsgemäße Verwendung
- Zubehör und Ersatzteile
- Lieferumfang
- Gerätebeschreibung
- Sicherheitseinrichtungen
- Symbole auf dem Gerät
- Montage
- Erstinbetriebnahme
- Inbetriebnahme
- Betrieb
- Transport
- Lagerung
- Pflege und Wartung
- Hilfe bei Störungen
- Garantie
- Technische Daten
- EU-Konformitätserklärung
- Contents
- General notes
- KÄRCHER Home & Garden app
- Environmental protection
- Intended use
- Accessories and spare parts
- Scope of delivery
- Description of the device
- Safety devices
- Symbols on the device
- Assembly
- Initial Start-Up
- Initial startup
- Operation
- Transport
- Storage
- Care and service
- Troubleshooting guide
- Warranty
- Technical data
- EU Declaration of Conformity
- Contenu
- Remarques générales
- KÄRCHER Home & Garden App
- Protection de l'environnement
- Utilisation conforme
- Accessoires et pièces de rechange
- Etendue de livraison
- Description de l'appareil
- Dispositifs de sécurité
- Symboles sur l'appareil
- Montage
- Première mise en service
- Mise en service
- Fonctionnement
- Transport
- Stockage
- Entretien et maintenance
- Dépannage en cas de pannes
- Garantie
- Caractéristiques techniques
- Déclaration de conformité UE
- Indice
- Avvertenze generali
- App KÄRCHER Home & Garden
- Tutela dell’ambiente
- Impiego conforme alle disposizioni
- Accessori e ricambi
- Volume di fornitura
- Descrizione dell’apparecchio
- Dispositivi di sicurezza
- Simboli riportati sull’apparecchio
- Montaggio
- Prima messa in funzione
- Messa in funzione
- Esercizio
- Trasporto
- Stoccaggio
- Cura e manutenzione
- Guida alla risoluzione dei guasti
- Garanzia
- Dati tecnici
- Dichiarazione di conformità UE
- Inhoud
- Algemene instructies
- KÄRCHER Home & Garden App
- Milieubescherming
- Reglementair gebruik
- Toebehoren en reserveonderdelen
- Leveringsomvang
- Beschrijving apparaat
- Veiligheidsinrichtingen
- Symbolen op het apparaat
- Montage
- Eerste inbedrijfstelling
- Inbedrijfstelling
- Werking
- Vervoer
- Opslag
- Onderhoud
- Hulp bij storingen
- Garantie
- Technische gegevens
- EU-conformiteitsverklaring
- Índice de contenidos
- Avisos generales
- KÄRCHER Home & Garden App
- Protección del medio ambiente
- Uso previsto
- Accesorios y recambios
- Volumen de suministro
- Descripción del equipo
- Dispositivos de seguridad
- Símbolos en el equipo
- Montaje
- Primera puesta en marcha
- Puesta en funcionamiento
- Funcionamiento
- Transporte
- Almacenamiento
- Conservación y mantenimiento
- Ayuda en caso de avería
- Garantía
- Datos técnicos
- Declaración de conformidad UE
- Índice
- Indicações gerais
- Aplicação KÄRCHER Home & Garden
- Protecção do meio ambiente
- Utilização adequada
- Acessórios e peças sobressalentes
- Volume do fornecimento
- Descrição do aparelho
- Unidades de segurança
- Símbolos no aparelho
- Montagem
- Primeiro arranque
- Arranque
- Operação
- Transporte
- Armazenamento
- Conservação e manutenção
- Ajuda em caso de avarias
- Garantia
- Dados técnicos
- Declaração de conformidade UE
- Indhold
- Generelle henvisninger
- KÄRCHER Home & Garden App
- Miljøbeskyttelse
- Korrekt anvendelse
- Tilbehør og reservedele
- Leveringsomfang
- Beskrivelse af maskinen
- Sikkerhedsanordninger
- Symboler på maskinen
- Montering
- Første ibrugtagning
- Ibrugtagning
- Drift
- Transport
- Opbevaring
- Pleje og vedligeholdelse
- Hjælp ved fejl
- Garanti
- Tekniske data
- EU-overensstemmelseserklæring
- Indhold
- Generelle merknader
- KÄRCHER Home & Garden-app
- Miljøvern
- Forskriftsmessig bruk
- Tilbehør og reservedeler
- Leveringsomfang
- Beskrivelse av apparatet
- Sikkerhetsinnretninger
- Symboler på apparatet
- Montering
- Første gangs bruk
- Igangsetting
- Bruk
- Transport
- Lagring
- Stell og vedlikehold
- Utbedring av feil
- Garanti
- Tekniske data
- EU-samsvarserklæring
- Innehåll
- Allmän information
- KÄRCHER Home & Garden-app
- Miljöskydd
- Ändamålsenlig användning
- Tillbehör och reservdelar
- Leveransens omfattning
- Beskrivning av maskinen
- Säkerhetsanordningar
- Symboler på maskinen
- Montering
- Första idrifttagningen
- Idrifttagning
- Drift
- Transport
- Förvaring
- Skötsel och underhåll
- Hjälp vid störningar
- Garanti
- Tekniska data
- EU-försäkran om överensstämmelse
- Sisältö
- Yleisiä ohjeita
- KÄRCHER Home & Garden App
- Ympäristönsuojelu
- Määräystenmukainen käyttö
- Lisävarusteet ja varaosat
- Toimituksen sisältö
- Laitekuvaus
- Turvalaitteet
- Laitteessa olevat symbolit
- Asennus
- Ensimmäinen käyttöönotto
- Käyttöönotto
- Käyttö
- Kuljetus
- Varastointi
- Hoito ja huolto
- Ohjeet häiriötilanteissa
- Takuu
- Tekniset tiedot
- EU-vaatimustenmukaisuusvakuutus
- Περιεχόμενα
- Γενικές υποδείξεις
- KÄRCHER Home & Garden App
- Προστασία του περιβάλλοντος
- Ενδεδειγμένη χρήση
- Παρελκόμενα και ανταλλακτικά
- Παραδοτέος εξοπλισμός
- Περιγραφή συσκευής
- Συστήματα ασφαλείας
- Σύμβολα επάνω στη συσκευή
- Τοποθέτηση
- Θέση σε λειτουργία για πρώτη φορά
- Έναρξη χρήσης
- Λειτουργία
- Μεταφορά
- Αποθήκευση
- Φροντίδα και συντήρηση
- Αντιμετώπιση βλαβών
- Εγγύηση
- Τεχνικά στοιχεία
- Δήλωση συμμόρφωσης EΕ
- İçindekiler
- Genel uyarılar
- KÄRCHER Home & Garden Uygulaması
- Çevre koruma
- Amaca uygun kullanım
- Aksesuarlar ve yedek parçalar
- Teslimat kapsamı
- Cihaz açıklaması
- Güvenlik tertibatları
- Cihazdaki simgeler
- Montaj
- İlk Çalıştırma
- İşletime alma
- İşletim
- Taşıma
- Depolama
- Bakım ve periyodik bakım
- Arızalarda yardım
- Garanti
- Teknik bilgiler
- AB Uygunluk Beyanı
- Содержание
- Общие указания
- KÄRCHER Home & Garden App
- Защита окружающей среды
- Использование по назначению
- Принадлежности и запасные части
- Комплект поставки
- Описание устройства
- Предохранительные устройства
- Символы на устройстве
- Монтаж
- Первый ввод в эксплуатацию
- Ввод в эксплуатацию
- Эксплуатация
- Транспортировка
- Хранение
- Уход и техническое обслуживание
- Помощь при неисправностях
- Гарантия
- Технические характеристики
- Декларация о соответствии стандартам ЕС
- Tartalom
- Általános utasítások
- KÄRCHER Home & Garden alkalmazás
- Környezetvédelem
- Rendeltetésszerű alkalmazás
- Tartozékok és pótalkatrészek
- Szállított tartozékok
- A készülék leírása
- Biztonsági berendezések
- Szimbólumok a készüléken
- Szerelés
- Első üzembe helyezés
- Üzembe helyezés
- Üzemeltetés
- Szállítás
- Tárolás
- Ápolás és karbantartás
- Segítség üzemzavarok esetén
- Garancia
- Műszaki adatok
- EU-megfelelőségi nyilatkozat
- Obsah
- Obecné pokyny
- Aplikace KÄRCHER Home & Garden
- Ochrana životního prostředí
- Použití ke stanovenému účelu
- Příslušenství a náhradní díly
- Rozsah dodávky
- Popis přístroje
- Bezpečnostní mechanismy
- Symboly na přístroji
- Montáž
- První uvedení do provozu
- Uvedení do provozu
- Provoz
- Přeprava
- Skladování
- Péče a údržba
- Pomoc při poruchách
- Záruka
- Technické údaje
- EU prohlášení o shodě
- Kazalo
- Splošna navodila
- Aplikacija KÄRCHER Home & Garden
- Zaščita okolja
- Namenska uporaba
- Pribor in nadomestni deli
- Obseg dobave
- Opis naprave
- Varnostne naprave
- Simboli na napravi
- Montaža
- Prvi zagon
- Zagon
- Obratovanje
- Transport
- Skladiščenje
- Nega in vzdrževanje
- Pomoč pri motnjah
- Garancija
- Tehnični podatki
- Izjava EU o skladnosti
- Spis treści
- Wskazówki ogólne
- Aplikacja KÄRCHER Home & Garden App
- Ochrona środowiska
- Zastosowanie zgodne z przeznaczeniem
- Akcesoria i części zamienne
- Zakres dostawy
- Opis urządzenia
- Urządzenia zabezpieczające
- Symbole na urządzeniu
- Montaż
- Pierwsze uruchomienie
- Uruchamianie
- Eksploatacja
- Transport
- Składowanie
- Czyszczenie i konserwacja
- Usuwanie usterek
- Gwarancja
- Dane techniczne
- Deklaracja zgodności UE
- Cuprins
- Indicații generale
- KÄRCHER Home & Garden App
- Protecţia mediului
- Utilizarea conform destinaţiei
- Accesorii şi piese de schimb
- Set de livrare
- Descrierea aparatului
- Dispozitive de siguranţă
- Simboluri pe aparat
- Montajul
- Prima punere în funcțiune
- Punerea în funcțiune
- Funcţionare
- Transport
- Depozitarea
- Îngrijirea şi întreţinerea
- Remedierea defecţiunilor
- Garanţie
- Date tehnice
- Declaraţie de conformitate UE
- Obsah
- Všeobecné upozornenia
- KÄRCHER Home & Garden App
- Ochrana životného prostredia
- Používanie v súlade s účelom
- Príslušenstvo a náhradné diely
- Rozsah dodávky
- Popis prístroja
- Bezpečnostné zariadenia
- Symboly na prístroji
- Montáž
- Prvé uvedenie do prevádzky
- Uvedenie do prevádzky
- Prevádzka
- Preprava
- Skladovanie
- Ošetrovanie a údržba
- Pomoc pri poruchách
- Záruka
- Technické údaje
- EÚ vyhlásenie o zhode
- Sadržaj
- Opće napomene
- Aplikacija KÄRCHER Home & Garden
- Zaštita okoliša
- Namjenska uporaba
- Pribor i zamjenski dijelovi
- Sadržaj isporuke
- Opis uređaja
- Sigurnosni uređaji
- Simboli na uređaju
- Montaža
- Prvo puštanje u rad
- Puštanje u pogon
- Rad
- Transport
- Skladištenje
- Njega i održavanje
- Pomoć u slučaju smetnji
- Jamstvo
- Tehnički podaci
- EU izjava o sukladnosti
- Sadržaj
- Opšte napomene
- KÄRCHER Home & Garden aplikacija
- Zaštita životne sredine
- Namenska upotreba
- Pribor i rezervni delovi
- Obim isporuke
- Opis uređaja
- Sigurnosni uređaji
- Simboli na uređaju
- Montaža
- Prvo puštanje u rad
- Puštanje u pogon
- Rad
- Transport
- Skladištenje
- Nega i održavanje
- Pomoć u slučaju smetnje
- Garancija
- Tehnički podaci
- EU izjava o usklađenosti
- Съдържание
- Общи указания
- Приложение KÄRCHER Home & Garden
- Защита на околната среда
- Употреба по предназначение
- Аксесоари и резервни части
- Обхват на доставка
- Описание на уреда
- Предпазни устройства
- Символи върху уреда
- Монтаж
- Първоначално пускане в експлоатация
- Пускане в експлоатация
- Експлоатация
- Транспортиране
- Съхранение
- Грижа и поддръжка
- Помощ при повреди
- Гаранция
- Технически данни
- Декларация за съответствие на ЕС
- Sisukord
- Üldised juhised
- KÄRCHER Home & Garden App
- Keskkonnakaitse
- Sihtotstarbeline kasutamine
- Lisavarustus ja varuosad
- Tarnekomplekt
- Seadme kirjeldus
- Ohutusseadised
- Seadmel olevad sümbolid
- Montaaž
- Esmane käikuvõtmine
- Käikuvõtmine
- Käitamine
- Transport
- Ladustamine
- Hooldus ja jooksevremont
- Abi rikete korral
- Garantii
- Tehnilised andmed
- EL vastavusdeklaratsioon
- Saturs
- Vispārīgas norādes
- KÄRCHER Home & Garden lietotne
- Apkārtējās vides aizsardzība
- Noteikumiem atbilstoša lietošana
- Piederumi un rezerves daļas
- Piegādes komplekts
- Ierīces apraksts
- Drošības ierīces
- Simboli uz ierīces
- Montāža
- Ekspluatācijas uzsākšana
- Ekspluatācijas uzsākšana
- Ekspluatācija
- Transportēšana
- Uzglabāšana
- Kopšana un apkope
- Palīdzība traucējumu gadījumā
- Garantija
- Tehniskie dati
- ES atbilstības deklarācija
- Turinys
- Bendrosios nuorodos
- „KÄRCHER Home & Garden“ programa
- Aplinkos apsauga
- Naudojimas laikantis nurodymų
- Priedai ir atsarginės dalys
- Komplektacija
- Prietaiso aprašymas
- Saugos įtaisai
- Simboliai ant prietaiso
- Montavimas
- Pirmasis parengimas eksploatuoti
- Eksploatavimo pradžia
- Eksploatavimas
- Transportavimas
- Laikymas
- Techninė priežiūra ir eksploatacinės parengties užtikrinimas
- „Pagalba trikčių atveju“
- Garantija
- Techniniai duomenys
- ES atitikties deklaracija
- Мазмұны
- Жалпы нұсқаулар
- KÄRCHER Үй және бақша қосымшасы
- Қоршаған ортаны қорғау
- Бұйымды мақсатына сәйкес қолдану
- Керек-жарақ және қосалқы бөлшектер
- Жеткізілім жинағы
- Құрылғының сипаттамасы
- Қорғаныс құрал-жабдықтары
- Құрылғыдағы белгілер
- Орнату
- Бастапқы іске қосу
- Пайдалануға енгізу
- Пайдалану
- Тасымалдау
- Сақтау
- Күтім және техникалық қызмет көрсету
- Ақаулар кезіндегі көмек
- Кепілдік
- Техникалық мағлұматтар
- ЕО стандарттарына сәйкестігі туралы декларация

16 English
5. Insert the high-pressure hose into the high-pressure
gun until it audibly latches into place.
Note
Take care to ensure the correct alignment of the nipple.
Illustration H
6. Check for a secure connection by pulling on the
high-pressure hose.
7. Plug the mains plug into a mains socket.
Water supply
For the connection values, see the type plate or chapter
Technical data.
Observe the water distribution company regulations.
ATTENTION
Damage through contaminated water
Contamination in the water can damage the pump and
the accessories.
KÄRCHER recommends using the KÄRCHER water fil-
ter for protection(special accessory, order number
4.730-059).
Connection to the water line
ATTENTION
Hose coupling with Aquastop on the water connec-
tion of the device
Damage to the pump
Never use a hose coupling with Aquastop on the water
connection of the device.
You can use an Aquastop coupling on the tap.
1. Plug the garden hose onto the water connection
coupling.
2. Connect the garden hose to the water line.
3. Open the water tap fully.
Illustration I
Sucking water from open containers
When used with the KÄRCHER suction hose with check
valve (special accessory, order number 2.643-100) this
high-pressure cleaner is suitable for sucking up surface
water, e.g. from rain barrels or ponds (for the maximum
suction height see chapter Technical data).
The water connection coupling is not required for vacu-
uming operation.
1. Fill the suction hose with water.
2. Screw the suction hose onto the device water con-
nection and hang it in a water source (e.g. water
butt).
Vent the device
1. Switch the device on "I/ON".
2. Unlock the lever of the high-pressure gun.
3. Press the lever of the high-pressure gun.
The device switches on.
4. Allow the device for run a maximum of 2 minutes un-
til the water escaping from the high-pressure gun is
free of air bubbles.
5. Release the lever of the high-pressure gun.
6. Lock the lever of the high-pressure gun.
Operation
ATTENTION
Pump running dry
Damage to the device
If pressure does not build up in the device after 2 min-
utes then switch the device off and proceed according
to the instructions in chapter Troubleshooting guide.
Smart Control System
The "+/-" buttons on the high-pressure gun can be used
to select the pressure and detergent dosing levels. The
spray type can be changed by turning the 3-in-1 multi jet
spray lance.
Note
The sensitivity of materials can vary greatly depending
on age and condition. The recommendations are there-
fore not binding.
High-pressure operation
ATTENTION
Damage to painted or sensitive surfaces
Surfaces can be damaged when the jet is too close to
the surface or an unsuitable spray lance is used.
Maintain a minimum spray distance of 30 cm when
cleaning painted surfaces.
Flat jet nozzle
Pressure
level
Display Recommended for e.g.
Stone terraces, asphalt,
metal surfaces, garden
utensils (wheelbarrow,
spade, etc.)
Cars / motorcycles, brick
surfaces, plastered
walls, plastic furniture
Wooden surfaces, bicy-
cle, sandstone surfaces,
rattan furniture
Dirt grinder
Pressure
level
Display Recommended for e.g.
For particularly stubborn
dirt on stone terraces,
asphalt, metal surfaces,
garden utensils (wheel-
barrow, spade, etc.)
Detergent nozzle
Pressure
level
Display Recommended for e.g.
Operation with deter-
gent. Dosing the deter-
gent concentration as
needed