WD 5 Premium WD 6 P Premium Operating Instructions Before first use of the unit read these operating instructions and act in accordance with them.
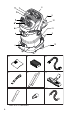
8 9 10 * 11 9 12 13 14 15 16 17 18 19 20 21* 22 * * WD 6 P Premium 2
. 4.
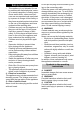
G H H2 4 G
Contents General notes . . . . . . . . . . . . . Safety instructions. . . . . . . . . . Description of the Appliance . . Operation . . . . . . . . . . . . . . . . Care and maintenance . . . . . . Troubleshooting . . . . . . . . . . . Customer Service . . . . . . . . . . Technical specifications . . . . .
Safety instructions – This appliance is not intended for use by persons with limited physical, sensory or mental capacities or lacking experience and/or skills, unless such persons are accompanied and supervised by a person in charge of their safety or they have received precise instructions on the use of this appliance and have understood the resulting risks.
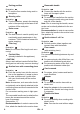
Blowing connection Description of the Appliance Illustrations on fold-out page! These operating instructions describe the multi-purpose vacuum cleaners listed on the front cover. The illustrations show the maximum equipment; depending on the model, there are differences in equipment and supplied accessories. When unpacking the product, make sure that no accessories are missing and that none of the package contents have been damaged. If you detect any transport damages please contact your dealer.
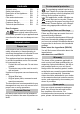
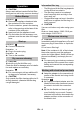
Parking position Removable handle Illustration To rest the floor nozzle during work interruptions. Steering roller Illustration Turn the container, press in the steering roller in the openings at the base of the container till the end-point. Drain screw Illustration The drain screw is used to quickly and comfortably empty wastewater in the container. Tilt the container forward for easier emptying.
Information filter bag Operation 몇 CAUTION Always work with an inserted flat fold filter during wet as well as dry vacuum cleaning! Before Startup Illustration Remove the appliance head and take the contents out of the container. Turn the container, press in the steering roller in the openings at the base of the container till the end-point. Insert and lock the appliance head. Clip the holder for the accessory compartment onto the rear side of the appliance.
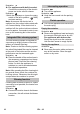
Illustration For appliances with built-in socket: Connect the mains plug of the electric power tool to the vacuum cleaner. Illustration -Switch the appliance on (move the rotary switch to the left to position MAX) and start working. Note: As soon as the electric tool is switched on, the suction turbine starts with a 0.5 second delay. If the electric tool is switched off, the suction turbine continues to run for approx. 5 seconds in order to vacuum up the remaining dirt in the suction hose.
Care and maintenance Troubleshooting DANGER Turn off the appliance and remove the mains plug prior to any care and maintenance work. Repair works may only be performed by the authorised customer service. 몇 WARNING Do not use abrasives, glass or universal cleaners! Never immerse the appliance in water. Clean the appliance and accessory parts made of plastic with a commercial plastic cleaner. If required, rinse the container and accessories with water properly and dry them before reuse.
Technical specifications Mains voltage Frequency Output Pnom Max.
www.kaercher.com/dealersearch Alfred Kärcher SE & Co. KG Alfred-Kärcher-Str. 28-40 71364 Winnenden (Germany) Tel.