
Manual


3
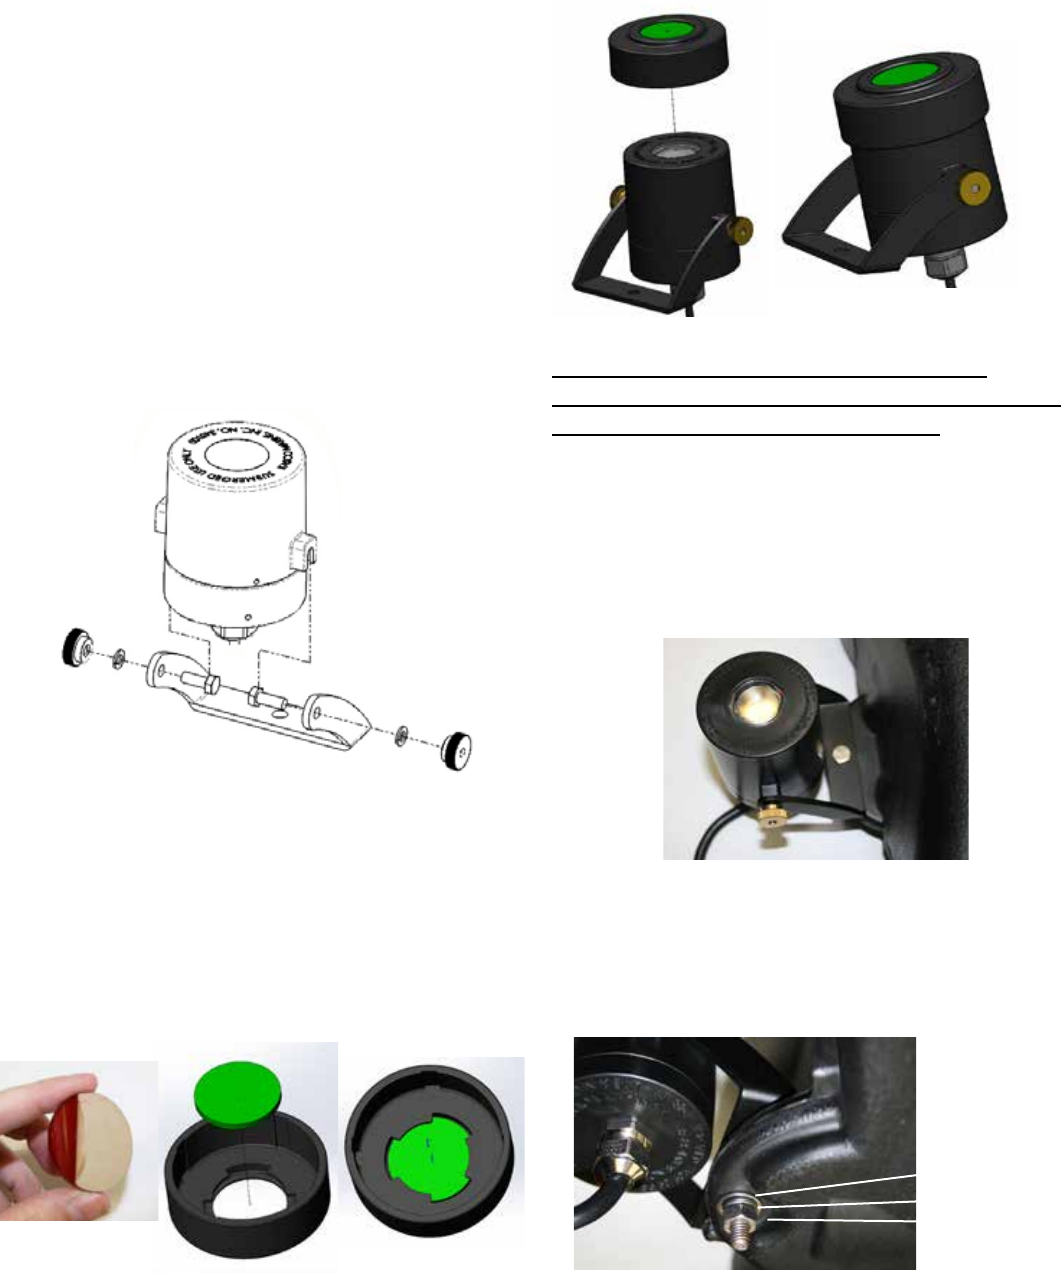
3. Place rubber caps over the light xtures as shown.
Ensure the rubber cap is seated all the way down onto
the xture housing. If this is not on a new light kit,
make sure the xture and lens are clean before install-
ing the rubber cap.
Fig 3
Instructions for mounting lights on model:
2400VFX, 3400VFX, 3400HVFX, 3400J, 3400HJ,
4400VFX, 4400HVFX, 4400J, 4400HJ
4. Insert the 1/4” x 1-3/8” bolt into the light xture
bracket. Align the light xture bracket to the oat
tab by placing the bolt through the light mounting
hole (light xture bracket is on top of the oat tab) as
shown in Figure 4.
Fig 4
5. Install the 1/4” Flat Washer, 1/4” Lock Washer
and 1/4” Nut against the underside of the oat tab as
shown in Figure 5. Tighten the nut until snug using
the 7/16” Wrench.
Fig 5
at washer
lock washer
1/4” nut
LED6125
• A. Includes two (2) sets of LED3125 (see parts
included in LED3125
• B. Lower oat brackets (6)
• C. 3/8” washers (3)
TOOLS & SUPPLIES NEEDED
• A. Two 7/16” Wrenches (or one wrench & a 7/16
socket with driver)
• B. Diagonal Pliers or Cutter for Nylon Zip Ties
LED3125 Assembly Instructions
For ease of assembly, make sure the Aerating Fountain
is completely assembled. Place the assembly upright.
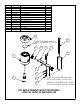
1. Install the mounting brackets to the light xtures by
tting the head of the #10 screw into the tabs on each
side of the xture. Tighten the thumb screws on each
side hand tight only.
Fig 1
Installing Color Lenses:
If you desire to change to one of the color choices
instead of the standard white light, follow these steps.
2. Unpeel the protective backing from both sides of
the colored lens on the color of your choice. Place the
lens inside the rubber cap making sure the 3 aps are
holding the lens in place. Do this for all 3 lenses.
Fig 2