
User guide


11
INSTALLING AND REMOVING KASPERSKY
ANTI-VIRUS
The Kaspersky Anti-Virus installation package includes the installation assistant and the uninstallation assistant.
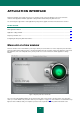
To install Kaspersky Anti-Virus on your computer,
run the installation file (*.dmg) and select Anti-Virus Installation.
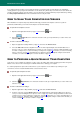
The installation assistant is a sequence of steps. You can switch between them using the Continue (go to the next
step of installation) and Go Back (go one step back) buttons. Let us take a closer look at the steps of installation:
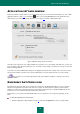
1. Reading important information.
Please read the information about the application you are installing and make sure that your computer
meets the system requirements specified. To print the information, click the Print button. To save the
information as a text file, click the Save button.
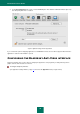
2. Reading License Agreement.
Please thoroughly read through the License Agreement for using Kaspersky Anti-Virus between you and
Kaspersky Lab. The text of the agreement is available in several languages.
To print the text of the agreement, click the Print button. To save the agreement as a text file, click
the Save button.
If you accept all the terms of the agreement, click the Continue button and confirm that you accept the
terms of license agreement in the window that opens. Kaspersky Anti-Virus installation will continue.
To return to the text of the license agreement, click the Read license button.
If the Disagree option is selected, installation will be interrupted.
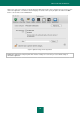
3. Change install location.
This window contains the information about the disk, on which the application is to be installed, and the free
disk space needed for the installation.
If default settings of the installation meet your requirements, click the Install button and enter the
administrator's password to confirm the installation.
You can edit the default installation settings. To do this, click the Edit installation folder button and specify
another disk. To switch to custom installation of Kaspersky Anti-Virus, click the Preferences button.
4. Selecting installation type.
This step of the installation assistant will appear if the custom installation option is selected. You will be
offered to specify which application components should be installed on your computer.
Virus scan. Scan of objects from the user defined scan scopes. Please note that this component will
be unconditionally installed.
File Anti-Virus. Real-time scan of all objects being opened, executed or saved.
Finder Contextual Menu. Scan of objects displayed in Finder. Scan is started from the object
contextual menu.