
User guide


U S E R G U I D E
54
Step 3. Selecting troubleshooting actions
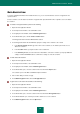
All damage found during the previous step is grouped on the basis of the type of danger it poses. For each
damage group, Kaspersky Lab recommends a sequence of actions to repair the damage. There are three
groups of actions:
Strongly recommended actions eliminate problems posing a serious security threat. You are advised to
perform all actions in this group.
Recommended actions eliminate problems presenting a potential threat. You are also advised to perform all
actions in this group.
Additional actions repair system damage which does not pose a current threat, but may pose a danger to
the computer's security in the future.
To view the actions within a group, click the + icon to the left of the group name.
To make the Wizard perform a certain action, check the box to the left of the corresponding action description.
By default, the Wizard performs all recommended and strongly recommended actions. If you do not wish to
perform a certain action, uncheck the box next to it.
It is strongly recommended not to uncheck the boxes selected by default because doing so will leave your
computer vulnerable to threats.
Having defined the set of actions, which the Wizard will perform, click the Next button.
Step 4. Problems elimination
The Wizard will perform the actions selected during the previous step. The elimination of problems may take
some time. Once the troubleshooting is complete, the Wizard will automatically proceed to the next step.
Step 5. Closing the Wizard
Click the Finish button to close the Wizard.
HOW TO CREATE BACKUP COPIES OF YOUR DATA
The most common way to protect important data from being lost is to regularly back it up. Kaspersky Small Office
Security can automatically make regular scheduled backup copies of selected data in the specified storage area. You
can also make one-off backup copies.
Before you can start working, you should create a backup storage on the selected drive. The backup copies of required
files will be created in this storage. After that, you can configure backup tasks (choose files, for which backup tasks
should be created, configure startup schedule and other backup conditions).
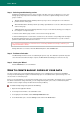
To create a backup storage area, please do the following:
1. Open the main application window.
2. In the left part of the window, select the Tools section.
3. In the right part of the window, click the Backup and Restore button.
4. In the window that opens, select the Storage section and click the Create button.