
User guide


R E S O L V I N G T Y P I C A L T A S K S
55
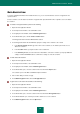
5. Backup Storage Creation Wizard will be launched. Let us take a closer look at the wizard's steps:
a. In the left part of the Drive window, select the type of data storage medium which will be used as a backup
storage.
To ensure data security, we recommend that you create backup storages on removable disk drives.
b. In the Protection window, set a password to protect data against unauthorized access (if necessary).
c. In the File versions window, set a limit on the number of file versions which may coexist within the storage,
and specify the time interval for storing backup copies (if necessary).
d. In the Summary window, enter the name for the new storage and confirm the storage creation with the
settings you have specified.
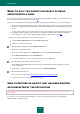
To back up objects, please do the following:
1. Open the main application window.
2. In the left part of the window, select the Tools section.
3. In the right part of the window, click the Backup and Restore button.
4. In the window that opens, select the Backup section and click the Create button.
5. The Backup Task Creation Wizard will be launched. Let us take a closer look at the wizard's steps:
a. In the Content window, select the objects for which backup copies will be created.
b. In the Storage window, select the storage in which backup copies of files will be created.
c. In the Schedule window, specify the conditions for running the task.
If you want to make a one-off backup copy, uncheck the Run by schedule box.
d. Enter the name of the new task and click the Finish button in the Summary window.
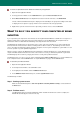
To restore the data of the backup copy, please do the following:
1. Open the main application window.
2. In the left part of the window, select the Tools section.
3. In the right part of the window, click the Backup and Restore button.
4. In the window that opens, select the Restore section.
5. Select the storage where the required backup copies are located and click the Restore button.
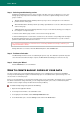
6. In the top part of the Restore data from storage window, select an archive (set of data saved during a task) in
the dropdown list.
7. Select the files that need to be restored. To do this, check the boxes next to the required files in the list. To
select all files, click the Select all button in the bottom part of the list. Click the Restore button in the top part of
the window.
8. In the Restore window that opens, select the location to save restored files and the condition of saving if files'
names coincide. Click the Restore button.
The most recent versions of the selected files will be restored.