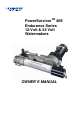
TM PowerSurvivor 40E Endurance Series 12-Volt & 24 Volt Watermakers OWNER`S MANUAL
Thank you… for purchasing a Katadyn PowerSurvivor 40E watermaker. It was built to rigorous specifications and designed to produce potable freshwater from clean seawater using minimal power. It is simple to install and operate and, with reasonable care and maintenance, can be expected to provide years of useful service. Please… before installing or operating your watermaker, take the short time needed to read this User’s Manual in its entirety.
Table of Contents System Description .............................................................................................................2 Product Specifications ........................................................................................................3 Energy Recovery .................................................................................................................4 Installation............................................................................................
System Description The Katadyn PowerSurvivor 40E watermaker system has several components. Refer to the System Diagram (Figure A-1) in the Appendix for an overview of the components of the system and their interconnections. Motor/Drive/Pump/Membrane Assembly: At the heart of the watermaker system is a high-pressure, positive-displacement pump. The pump is powered by a reliable 12 (or 24) VDC electric motor.
Product Specifications Power Requirements: VDC* Construction: Rate of Water Production: 4 amps @ 12 VDC; 3 amps @ 24 316 Stainless Steel Pump Housing 1.5 U.S. gal./hr. (5.6 liters/hr.) ±15% @ 13.8 VDC Feed Water Flow Rate: 15 U.S. gal./hr. (56 liters/hr.) Pump Weight: 25 lbs. (11.3 kg.) Pump Height: 6" (15.2 cm.) Pump Length: 17.5" (44.5 cm.) Pump Width: 16" (40.5 cm.) Prefilter Housing Dimensions: 12" x 6" (30 cm. x 15 cm.) * The electric current requirement is an average figure.
Energy Recovery The technology behind Katadyn reverse osmosis watermakers Reverse osmosis desalination was first developed over three decades ago. It was a major breakthrough in desalting technology, but the original process required a lot of power. By recovering 90% of the energy lost in conventional reverse osmosis systems, we’ve made small desalinators practical, so you can have freshwater when and where you need it.
Installation Do it right the first time and reap the rewards The PowerSurvivor 40E watermaker utilizes a low-volume, high-pressure, positive displacement pump. Unlike the centrifugal pumps found in some systems, a positive displacement pump is self-priming. It can also draw water when mounted several feet above the waterline of a vessel. Thus, the watermaker may be installed in almost any location and orientation. The most important part of a good installation is proper planning.
Plan Ahead for Manual Operation The PowerSurvivor 40E watermaker was never intended to be part of a vessel’s “Abandon Ship” equipment. Its capability for manual operation is useful when normal ship’s power is unavailable. If you perform a typical installation, it is unlikely that you would have time to remove the watermaker when abandoning ship. Katadyn produces other desalinators that are specifically designed to be part of your survival equipment.
2. Connect Electrical Power to Pump: To provide 12 (or 24) VDC electric power to the motor, use a minimum of 16 gauge stranded copper wire. We recommend 14 gauge (or larger) wire for distances over 20 feet. Tinned, stranded copper wire is preferred for marine installations and is available in most marine hardware stores. Figure 4 shows a typical electrical power configuration. Basic Electrical Diagram Fuse and Circuit Breaker: 12 V = 10 A 24 V = 10 A Terminal Strip white red 3.
5. Install Reject Brine Plumbing: The reject brine water can be teed into an existing scupper or sink drain hose for draining overboard. Use the 3/8" reinforced hose and supplied hose clamps. A tee of the correct size will have to be supplied. Alternatively, a dedicated thruhull may be installed at a convenient location. In this case, we recommend that a seacock be installed at the thru-hull. 6.
Using your Watermaker Watermakers like to be run often Just like its predecessor, the PowerSurvivor 35, the PowerSurvivor 40E watermaker can be operated in either manual or powered mode. This dual-purpose feature of the watermaker has its roots in our original products, which were designed as military-quality survival equipment.
Startup and Run: Turn on the electric power to the watermaker. If there is air in the seawater intake plumbing, the pump may require several minutes to draw up enough water to fill the hoses, prefilter housing, pump and membrane housing. Since the pump is self-priming, there is no need to prime the system prior to running. Shortly after the hoses and prefilter housing have filled with seawater, reject brine water should start discharging from the pump.
Manual Operation Manual operation of the PowerSurvivor 40E is useful if the ship’s electric power supply fails. Use the following instructions to convert your watermaker to manual operation: 1. Jog run the watermaker and stop it when the piston has traveled the maximum distance away from the pump, toward the drive assembly. 2. If necessary, disconnect the seawater intake, reject brine, and product freshwater hoses (Figure 5) and move the watermaker to a location convenient for manual operation. 3.
9. Operate the pump handle back and forth through its full range of travel in both directions. Pump at a rate of approximately one complete cycle every two seconds (one second in each direction). This is about the same rate at which the pump is driven by the motor during powered operation. Do not pump too fast! 10. To return the watermaker to powered operation, reverse the above procedure.
Maintenance and Service A little love goes a long way We’ve worked hard to design a product that is simple to operate and maintain. However, regular attention to the few maintenance requirements of this equipment is critically important. This section of the Owner’s Manual describes both the routine and the long-term maintenance requirements of the PowerSurvivor 40E.
Prefilter Maintenance Background: Maintaining a healthy watermaker largely involves taking proper care of the prefilter assembly and seawater intake plumbing. Failure to do so is the most common cause of the two most frequent types of watermaker “failure” we hear about: (1) producing diminished or no freshwater output, or (2) producing “bad-smelling” product freshwater.
4. If the watermaker will not be used within the next three days, treat it with membrane preservative (see Membrane Storage below). 5. Tie a line through the center of the dirty filter element and, if underway, tow it behind the vessel for a few minutes. If the vessel is anchored, hang the dirty filter over the side of the boat so that it is underwater, and jerk it up and down a few times to dislodge the contaminants. 6. Dry the filter element thoroughly, preferably in the sun.
3. Mix two spoonful (approximately 20 grams, or 1% by weight) of dry Membrane Preservative chemical with the water in the container and stir until completely dissolved. 4. Use your product 3-way valve (or move the product water output hose) to be sure that any water flowing from the product freshwater output is properly discarded. 5. Turn the lever on the prefilter 3-way valve to the alternate intake position.
1. Lift the lever on the cleaning valve on the pump to place it in its “clean” or “up” position (see Figure 12). 2. Discard any dirty seawater in the prefilter assembly. Clean the housing and install a clean filter. 3. Fill a clean plastic container or bucket with one gallon (approximately 4 liters) of clean water. Freshwater is preferable, but clean seawater may be used if freshwater is not available. (Caution: Never use chlorinated freshwater. This may damage the membrane.) 4.
Seal Replacement After approximately every 1000 hours of use, the watermaker should be partially disassembled, cleaned, and lubricated with non-petroleum silicon grease. At that time, the seals should be inspected and replaced, as required. The standard Repair Seal Kit (included in the Extended Cruising Kit (see Kits and Accessories) is available from Katadyn and most marine retail stores. It includes a complete set of replacement seals and other components for all user-serviceable parts of the watermaker.
Disassembly: 1. Before beginning disassembly, run the watermaker and stop it when the piston shaft is at its 2. 3. 4. 5. 6. farthest point of travel away from the pump (i.e., toward the drive assembly). This provides enough room for sliding the rubber boot toward the pump in Step 3. Disconnect the pump from the drive assembly by first removing the two hex nuts and 5" socket head cap screws from the check valve plate, using the 1/2" open-end wrench and 1/4" allen wrench.
7. From the side of the pump back plate that contained the large o-ring, insert a round drift of slightly smaller diameter than the hole for the piston shaft. (Note: a small socket on an extension or a wooden dowel makes a suitable drift). Tap the drift with a mallet to drive the two backup washers, two piston shaft seals and the piston shaft bushing out of the pump back body. See Figure R-4. 8. Remove the remaining two 3/4" socket head cap screws from the check valve plate using a 1/4" allen wrench.
Reassembly: Before you begin reassembly of the watermaker, clean all parts using clean, lint-free rags. At this time, all parts should be carefully inspected for wear or damage. Use a 10x magnifier or loupe to examine the seals, o-rings and other small parts. Stubborn rust stains and other deposits on metal parts can be cleaned with a soft-metal wire brush (e.g., stainless steel or brass). Do not use polishes, cleaning compounds containing abrasive materials, or regular steel wire brushes.
4. Refer to Figure R-4. Slide one of the white backup washers over the piston shaft and press it into its bore in the pump back plate. Next, slide one of the two black rubber piston shaft seals over the piston shaft and work it into the bore on top of the backup washer. Note that the shaft seals are flared out on one side. It is important that the flared (wider) side should be down, facing the shaft bore. Install the second piston shaft seal in exactly the same way.
7. Replace the two large o-rings (8012947) and the two smaller o-rings (8013006) on the membrane tube plug with new o-rings from the RSK. Insert the small end of the membrane tube plug into the exposed hole in the membrane element (which should have been left installed in the membrane housing) and press the tube plug into the membrane housing as far as it will go. The ridge on the outside of the tube plug should be flush against the end of the membrane housing. 8.
Troubleshooting Flowchart Use the flow chart below to diagnose and solve the most common problems associated with use of the PowerSurvivor 40E watermaker. The information in this chart is a distillation of the experience of many users, our field representatives, and customer support staff. Use it first if you encounter a problem. If the problem persists, our Customer Support department is ready to help.
Appendix A collection of useful information for the Katadyn watermaker owner Glossary Membrane Preservative a chemical used to inhibit biological growth in the reverse osmosis membrane during storage or extended periods of non-use. Filter a device which removes suspended solids from a fluid stream. A filter is not the same as a reverse osmosis membrane. Micron a metric unit of measurement equal to one thousandth of a millimeter, or one millionth of a meter.
Diagrams 26
27
28
29
Kits & Accessories Preventive Maintenance Package Part # 8012607 An expanded cruise kit which includes all components of the Extended Cruise Kit, plus a Silt Reduction Kit. This kit is strongly recommended for extended cruising and variable water conditions. Silt Reduction Kit Part # 8012859 This kit is intended to protect the high pressure pump and reverse osmosis membrane from excessive exposure to silt and other suspended particulates.
Service Log Date Preserved Membrane Cleaned Membrane 31 Other Service
WARRANTY LIMITED WARRANTY FOR POWERSURVIVOR™ 40E WATERMAKER THIS LIMITED WARRANTY AND THE REMEDY PROVIDED HEREIN ARE EXCLUSIVE AND IN LIEU OF ALL OTHER EXPRESS WARRANTIES AND, UNLESS STATED HEREIN, ANY STATEMENTS OR REPRESENTATIONS MADE BY OTHER PERSON OR FIRM ARE VOID. THE DURATION OF ANY IMPLIED WARRANTIES OF MERCHANTABILITY OR FITNESS FOR A PARTICULAR PURPOSE SHALL BE LIMITED TO THE DURATION OF THE EXPRESS LIMITED WARRANTY. NEITHER KATADYN NORTH AMERICA, INC.
Katadyn North America 6325 Sandburg Road Minneapolis MN 55427, USA Phone: 800-755-6701 Fax: 800-548-0406 www.katadyn.com marine@katadyn.com Katadyn Products Inc. Birkenweg 4 8304 Wallisellen Switzerland Phone: +41-1-839-2111 Fax: +41-1-830-7942 www.katadyn.ch info@katadyn.