
Operating instructions


31
Connection and setup
When selecting the
satellites, make sure that
your reception position
is aligned to the desired
satellite!
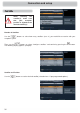
Satellite and Position
Use the
buttons to set the desired satellite (selection from 17 pre-programmed options).
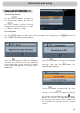
LNB Type (settings)
Use the
buttons to select the LNB
type used in your system. The selections
available are “Universal” and “user-
defi ned” (the selection “Wideband” is
required only for single-cable feed systems
such as the UAS 481 from Kathrein).
Universal and Wideband:
No further input is required, since all necessary frequency ranges are covered by a Universal/
Wideband LNB.
user-defi ned:
If you choose not to use a Universal or Wideband LNB, you must here set the frequency ranges for
which your LNB was confi gured.
Use the
buttons to select the frequency range to be changed (low, high or limit frequency).
Use the
buttons or the number keys to set the exact frequency for which your LNB was confi gured.
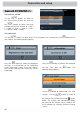
Test transponder
To check whether the settings that you have made are correct, use the
buttons to move to the
“Test transponder” fi eld. Use the
buttons to select the required transponder from the various
ones listed. If your settings are correct, you will see at the top right of the screen the live signal of a
channel from the currently selected transponder.
If you are not receiving a signal, check your settings again and if necessary call for expert help.
When you have fi nished confi guring the satellite, press the
$
(green) button. The receiver then
automatically calls up the selection menu for the channel search. Continue the fi rst installation by
selecting “Execute Channel search”.