
User manual


Table Of Contents
- Table of contents
- KeContact P20/P30 EU Benutzerhandbuch
- KeContact P20/P30 EU User manual
- KeContact P20/P30 EU Manuel d'utilisation
- KeContact P20/P30 EU - Funzioni di autorizzazione
- Manual de usuario de KeContact P20/P30 EU
- KeContact P20/P30 EU brugerhåndbog
- Manual do utilizador KeContact P20/P30 EU
- KeContact P20/P30 EU gebruikershandboek
- KeContact P20/P30 EU brukerhåndbok
- KeContact P20/P30 EU-användarhandbok
- KeContact P20/P30 EU -käyttäjäkäsikirja
- KeContact P20/P30 EU Podręcznik dla użytkownika
- Εγχειρίδιο χρήστη KeContact P20/P30 EU
- KeContact P20/P30 EU kullanıcı el kitabı
- KeContact P20/P30 EU 用户手册
Using the charging station
23/200
2 Using the charging station
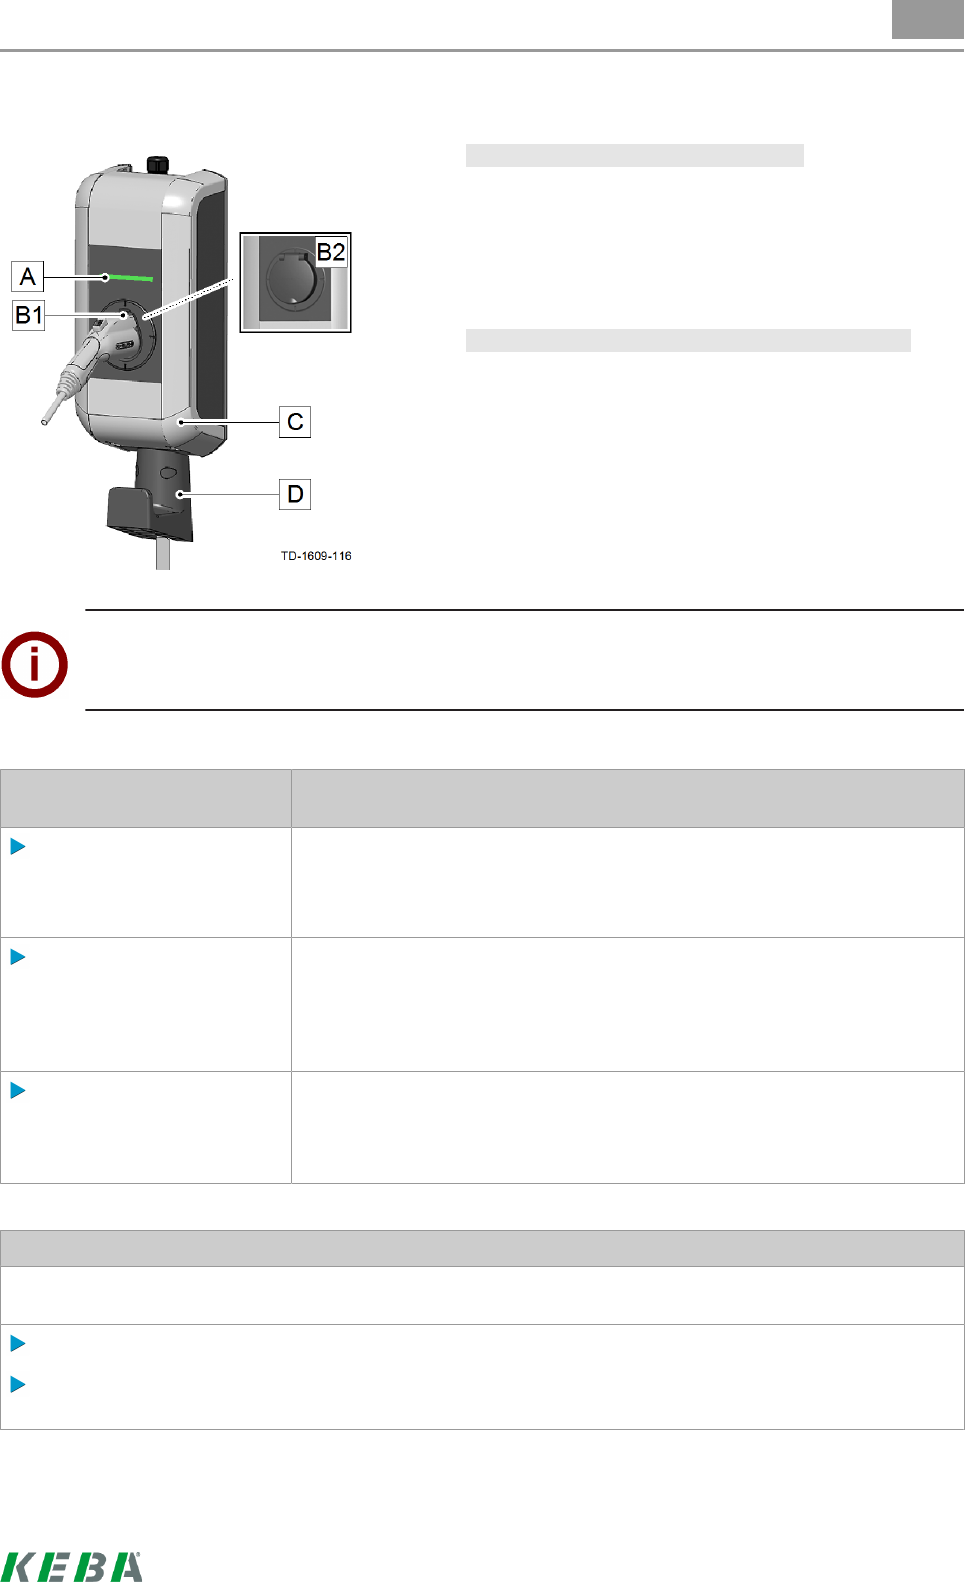
Typical version with charging cable
[A]…Status LED
[B1]…Parking bay for charging connector
[B2]…Standard socket (variants possible)
[C]…Housing cover
[D]…Hanger for charging cable
Storing the charging connector/charging cable
If no charging procedure is being performed, the charg-
ing connector can be plugged into the parking bay [B1]
for safe storage.
The charging cable can be coiled up and placed on the
hanger [D].
Note
Depending on the design of the charging station, the parking bay may deviate from the one shown.
Starting the charging proce-
dure
Status LED
The charging cable is nei-
ther plugged into to the ve-
hicle nor the charging sta-
tion.
The charging station must be ready for operation, the status LED flashes
green slowly every 3 seconds ("Ready for operation").
Device with standard
socket:
Plug the charging cable
into the charging station
first.
The status LED lights up orange ("Wait for locking") while the system at-
tempts to mechanically lock the plug. After successful locking, the status
LED flashes green again slowly every 3 seconds.
Now plug the charging ca-
ble into the vehicle.
After the self-test (orange), the status LED lights up green continuously
("Ready for charging").
The charging procedure can be started from the vehicle from this point in
time; the status LED then flashes green ("Charging procedure").
Ending the charging procedure
The charging procedure is ended by unplugging the charging cable at the vehicle. For details, please refer
to the instructions of the vehicle manufacturer.
Disconnect the charging cable from the vehicle ("Wait for unplugging").
Unplug the charging cable at the charging station resp. stow the charging cable on the provided holder
on the device.
en