
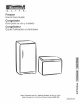
Manual


This Owner's Guide provides specific operating instructions
for your model. Use the freezer only as instructed in this
Owner's Guide. Before starting the freezer, follow these
important first steps,
iNSTALLATiON
• Choose a place that is near a grounded electrical outlet.
Do Not use an extension cord or an adapter plug.
• For the most efficient operation, the freezer should be
located where surrounding temperatures will not exceed
110°F (43°C). Temperatures of 32°F (0°C) and below will
NOT affect freezer operation. Additional compressor
heaters are not recommended.
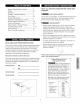
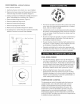
o Allow space around the unit for good air circulation.
Leave a 3 inch (75 mm) space on all sides of the freezer
for adequate circulation.
imm)
3" Cz5_)
Hnsf_HHation
(?5 ram)
NOTE: The exterior walls of the freezer may become quite
warm as the compressor works to transfer heat from the
inside. Temperatures as much as 30 ° F warmer than room
temperature can be expected. For this reason it is particu-
larly important in hotter climates to allow enough space for
air circulation around your freezer.
LEVEMNG
The freezer must have all bottom corners resting firmly on
a solid floor. The floor must be strong enough to support a
fully loaded freezer. NOTE: it is Very Important for your
freezer to be level in order to function properly, if the
freezer is not leveled during installation, the door may be
misaligned and not close or seal properly, causing cooling,
frost, or moisture problems.
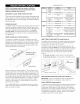
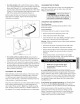
To Level Upright Models:
After discarding crating screws and wood base, use a
carpenter's level to level the freezer from front:to-back.
Adjust the plastic leveling feet in front, V2bubble higher, so
that the door closes easily when left halfway open.
Plastic
Leveling Feet
Discard Th_n_g Screws
And (2) Wood Bases
%
Unpacking and Leveling ==Upright Models
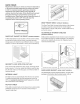
To Levet Chest ModeJs:
If needed, add metal or wood shims between foot pads and
floor.
CLEANING
Wash any removable parts, the freezer interior, and
exterior with mild detergent and warm water. Wipe dry.
Do not use harsh cteaners on these surfaces.
Do not use razor blades or other sharp instruments,
which can scratch the appliance surface when removing
adhesive labels. Any glue left from the tape can be
removed with a mixture of warm water and mild deter-
gent, or touch the residue with the sticky side of tape
already removed. Do not remove the seriaJ plate.
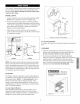
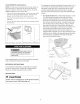
_To almowdoor to
close and seal properly, DO NOT let
food packages extend past the front
of shemves.
Sheff Front