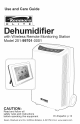
Use and Care Guide Dehumidifier with Wireless Remote Monitoring Station Model 251-99701-0001 CAUTION'. Read and follow all safety rules and instructions before operating this equipment En Espa_ol: p.13 Sears, Roebuck and Co. Hoffman Estates, IL 60179 U.S.A. www.sears.
Warranty ...................................................... 2 Package Contents ...................................... 2 Safety Instructions ...................................... 3 Installation .................................................. 4 Electrical Requirements ............................. 4 Key Features .............................................. 5 Control Panel ............................................. 6 Dehumidifier Set-Up ................................
iMPORTANT CAUTIONS FOR USING YOUR DEHUMiDiFiER. To reduce the risk of fire, electrical shock, injury, or damage to the dehumidifier, these safety precautions must be followed: • Do not place the power cord near a heater. • Do not use an electrical outlet near flammable or combustible materials such as gasoline, propane, paint thinners, etc. • Do not disassemble or modify dehumidifier parts or components. It may cause electric shock and failure. • Plug in the power cord properly.
OBSERVE ALLLOCAL CODES AND ORDINANCES. DO NOT, UNDER ANY CIRCUMSTANCES, REMOVE THE POWER SUPPLY CORD GROUND PRONG. ELECTRICAL GROUND IS REQUIRED ON THIS APPLIANCE. A 115-VOLT 60Hz, AC ONLY, 15A FUSED AND PROPERLY GROUNDED ELECTRICAL SUPPLY IS REQUIRED. A time delay fuse or time delay circuit breaker is recommended. Use a dedicated circuit serving only this appliance. RECOMMENDED GROUNDING METHOD For your personal safety, this appliance must be grounded.
CHOOSING THE PROPER LOCATION Use the dehumidifier: • in the basement to help prevent moisture damage. • in the kitchen, laundry room, bathroom, and spa/exercise areas that have excessive moisture. AUTOMATIC SHUT OFF When the bucket is full, or when the bucket is not in the proper position, the Bucket Full light goes on and the unit automatically shuts off. • to prevent moisture damage anywhere books or valuables are stored.
®® ® ®® POWER ON/OFF (1) Pressing button once turns the dehumidifier "ON" and pressing it again turns the dehumidifier "OFF." When the unit is turned on, it operates automatically in COMFORT (3) mode. AUTO wilt appear in display windows (7/8). In this setting, humidity level and temperature are balanced for normal comfort. At low temperatures higher humidity will feet more comfortable so the unit will run tess frequently.
OPTION 1, EMPTYING MANUALLY 1. Pull out the bucket, grasping upper and lower handles. 2. Carry the bucket by grasping the inside handle of the bucket. 3. After emptying the bucket, replace the bucket in the dehumidifier. NOTE: Dehumidifier will not work when the BUCKET FULL light is on or without the bucket properly placed in the unit. OPTION 3, PUMP DRAIN 1. Remove the PUMP DRAIN CAP by turning clockwise (Reverse thread). (Fig. 1) 2.
CLEANING THE EXTERIOR WARNING • Disconnect power supply cord from receptacle before performing any maintenance. Clean the exterior using a soft brush or dry towel. But do not spray water directly on the exterior. i CLEANING THE BUCKET Pull the bucket out. Lift off bucket cover. (Fig.1) Clean the inside d bucket every week using mild detergent in order to block buildup d mold and bacteria. (Fig.2) Fig.3 CLEANING FILTERS Fig.4 SIDE GRILLS AND AiR 1.
Classification Spec Model DIV 251-99701-0001 Remark Power Supply Moisture Capacity AC 115V/60(Hz) 70 Pints Control Type Electronic Refrigerant Humidity Display R-22/8.82 oz. Humidity Setting: 35%-70% Display Range: 20%-90% 250g 5% Increments 1% Increments. Current Humidity. Temperature Display Display Range: Lo, 36-99°F, Hi Display Range: Lo, 2-37°C, Hi 1° F Increments. Current Temp. 1° C Increments. Current Temp.
Before calling forservice, trythesuggestions below toseewhether youcansolveyour problem without outside PROBLEMS Dehumidifier CHECK POINT does not work when pressing the POWER ON button. Dehumidifier is operating, but the dehumidification function does not work. Loud noise and/ or vibration operation. help.
! will reduce the range to 165 feet, and the second walt will reduce the range to 87 feet. Factoring in the 10-foot room, this leaves a maximum of 77 feet of remaining signal range. Passing up through the floor has now reduced the effective range to 38 feet. The remote monitoring station is a receiver with a receiving range d only 330 feet in open air with no obstructions. Actual receiving range will vary depending on what is in the path d the signal transmitted from the dehumidifier unit.
f AM 09:O0 OPERATING BUCKET SET @ @ PUMP TEMPERATURE 7 L[ @® Q HUMIDITY 2gC co J SETTING PREFERENCES SENSOR ICON (1) flashes, indicating signal is being received from the main unit. If no signal is being received, the icon will not appear. Press SET (11) once and hold down for 3 seconds to enter the "Setting Mode." SET HOUR OF DAY (4) Press SET (11) a second time. Hour will begin flashing. Then press + (13) or -(12) OO to set the hour 1-12AM or 1-12 PM.
Guia de Uso y Cuidados E L | T Deshurnidif cador con Estacion Remota Inalambrica de Monitorizacion Modelo 251=99701=0001 ADVERTENCIA: Lea y siga todas las reglas de seguridad e instrucciones antes de operar este equipo. Sears, Roebuck and Co. Hoffman Estates, IL 60179 U.S.A. www.sears.
Contenido det Paquete ............................ 14 Garantia ................................................... 15 Instrucciones de Seguridad ..................... 16 Requisitos Electricos ............................... 17 Instalaci6n ............................................... 18 Caracteristicas Principales ...................... 19 Especificaciones det Producto ................. 19 Panel de Control ...................................... 20 Configuraci6n det Deshumidificador ........
Garantia Limitada Kenmore Elite Cuando sea instalado, operado y mantenido segQn todas las instrucciones proveidas con et producto, si este etectrodomestico falla debido aun defecto en materiales y manufactura dentro de 1 afio despues de ta fecha de compra, ttame al 1-800-4-MYHOME ®para concertar ta reparaci6n gratis. Si et sistema refrigerante setlado esta defectuoso dentro det periodo de los 5 aries desde ta fecha de compra, tlame al 1-800-4-MY-HOME ® para concertar una reparaci6n gratis.
ADVERTENCiAS IMPORTANTES PARA EL USO DE SU DESHUMIDIFICADOR. Para reducir el riesgo de incendio, descarga elg=ctrica,lesi6n, o daSo al deshumidificador, se deben de seguir estas precauciones de seguridad: • No cotocar el cable de alimentaci6n cerca de una estufa. • No usar un enchufe etectrico que este cerca de materiates inflamables o combustibles como gasolina, propano, disolventes, etc. • No desmonte ni modifique pares o componentes det deshumidificador.
OBSERVAR TODOS LOS CODIGOS Y Este etectrodomestico tiene un cable de alimentaci6n con una clavija de tres patitlas con toma de tierra. Para minimizar una posible descarga etectrica, et cable debe estar enchufado en un enchufe etectrico con toma de tierra apropiado que cumpla con ta _ltima edici6n del C6digo Electrico Nacional y todos los c6digos y ordenanzas locales. ORDENANZAS. NO QUITE, BAJO NINGUNA CIRCUNSTANCIA, LA PATILLA DE TOMA DE TIERRA DEL CABLE DE ALIMENTACION.
• Instale etdeshumidificador sobreun seguira funcionando paradeshetar las bobinas. suetonivetado suficientemente fuerte parasostener launidad consucubeta UBICAClON ADECUADA DEL ltenadeagua. DESHUMIDIFICADOR • Paraunmejorrendimiento, dejeunespa- Utitice etdeshumidificador: ciodealmenos 12-18pulgadas acada paraayudar aevitardaSos ladodelaunidad parapermitir unabuena • enuns6tano circulaci6n deaire. porhumedad.
ASA ................. DRENAJE PANEL DECONTROL DE GRAVEDAD DRENAJE DE BOMBA PARRILLA LATERAL CUBETA RUEDECILLA FILTRO DE ............ ADMISION DE AIRE Clasificacion Modeto Suministro de Energia Capacidad de Humedad Tipo de Control Refrigerante Visualizador de Humedad Visualizador de Temperatura Espec DIV 251-99701-0001 Comentario CA 115V/60 (Hz) 70 Pintas Periodo de 24 horas Etectr6nico R-22/8.82 onzas.
® ¢ ® ®® ® POWER ON/OFF (1) Si pulsa et bot6n una vez se enciende et deshumidificador, "ON", y si 1ovuelve a pulsar se apaga et deshumidificador, "OFF". ® ® ®® ® manualmente et nivet deseado de humedad, utitizando tas teclas con tas flechas de humedad (9) hacia arriba o abajo _. Se hacen los cambios por incrementos de un 5%; et rango de ajustes es et 35% al 70%. Se ve et NIVEL DE HUMEDAD en et viualizador (8). Cuando la unidad esta encendida, opera automaticamente en modo COMFORT (3).
OPCION 1, VACIAR MANUALMENTEE 1. Tire de la cubeta agarrando las asas superior e inferior. 2. Lleva la cubeta agarrando et asa interior de la cubeta. \ 3. Despues de vaciar ta cubeta, coloque de nuevo ta cubeta en et deshumidificador. NOTA: El deshumidificador no funcionara cuando ta luz de advertencia de cubeta tlena (BUCKET FULL) esta encendida o cuando la cubeta no ha sido colocada en la unidad de forma adecuada. OPCION 2, MANGUERA DE DRENAJE DE GRAVEDAD (No Se Incluye La Manguera de Jardin) 1.
OPCION 3,DRENAJr= DEBOMBA 1.QuiteLaTAPAde DRENAJE deta BOMBA, girando endirecci6n delas agujas detretoj(Enrosque alreves) (Figura 1) 2. QuitelaTAPAdet orificio dedrenaje, tirando haciafueramientras este presionando etenganche haciadentro. (Figura 2) 3.Introduzca tamanguera de¼pulgada proveida, enetorificio detaTAPA de DRENAJE. (Figura 3) 4. Introduzca etfinaldelamanguera dentro detorificio dedrenaje (Figura 4); acontinuaci6n enrosque taTAPA de DRENAJE enlaunidad denuevo (Figura 5).
LIMPIEZA DEL EXTERIOR ADVERTENClA Desconecte etcabledealimentaci6n delreceptaculo antesdeefectuar alg_n mantenimiento. Limpie el exterior con un cepitlo suave o toatta seca. Pero no aplique agua con un atomizador directamente sobre et exterior. i LIMPIEZA DE LA CUBETA Fig.3 Saque la cubeta det la unidad. Quite ta tapa de ta cubeta. (Figura 1) Limpie et interior de la cubeta con detergente suave cada semana para bloquear la acumulaci6n de moho y bacterias.
Antesdellamar paraunservicio tecnico, intente lassiguientes sugerencias paravetsi puede solucionar su problema PROBLEMAS sin ayuda ajena. POSIBLESCAUSAS SOLUCIONES El deshumidificador no funciona cuando &Esta enchufado el cable de alimentaci6n en un enchufe de tres Enchufe de forma segura el cable de alimentaci6n en un enchufe de tres se aprieta el bot6n POWER ON. paletas con toma de tierra? paletas con toma de tierra.
La estaci6n de monitorizacidn remota es un receptor con un tango de recepci6n de solamente 330 pies al aire libe sin ninguna obstrucci6n. Et tango de recepci6n real variara dependiendo de to que este en la trayectoria de ta serial transmitida por ta unidad deshumidificadora. Cada obstrucci6n (tejado. paredes, techos, arboles macizos, etc.) va a cortar et tango de sefiales a la mitad.
Setup Guide Introduzca tas pitas en et monitor. Despues de que las pitas sean insertadas, la Estaci6n de Monitorizaci6n empezara a recibir datos de seSal det deshumidificador: temperatura, humedad, etc. deberian de estar expuestos en la pantalta det monitor. Revise et deshumidificador para averiguar si esta funcionando correctamente, si esto no pasa despues de 2 minutos. Quite las pilas del monitor, espere un minuto y vuetva a ponertas. 7 © AM 09:00 BUCKET PUMP AUTO HUMIDITY 211Z 12121 o .
CONFIGURAR PREFERENCIAS Presione SET (11) una vez y mantenga presionado durante 3 segundos para entrar en "Setting Mode". CONFIGURAR NORA DEL DiA (4) Presione SET (11) una segunda vez. "Hour" empezara a centetlear. A continuaci6n presione + (13) o- (12) OO para fijar la hora 1-12 a.m. o 1-12 p.m. CONFIGURAR MINUTOS (4) Presione SET (11) una tercera vez. "Minutes" empezara a parpadear. Utitice OO para fijar los minutos 00-59. RELOJ DE 24 HORAS (4) Presione SET (11) una cuarta vez.
Your Home For expert troubleshooting and home solutions advice: anagel hom÷ www,managemyhome,com For repair - in your home - of all major brand appliances, lawn and garden equipment, or heating and cooling systems, no matter who made it, no matter who sold it ! For the replacement parts, accessories and owner's manuals that you need to do-it-yourself. For Sears professional installation of home appliances and items like garage door openers and water heaters.