Use & Care Guide Manual de Usa y Cuidado Guide d'Utisafion et d'Enfrefien English / Espa_ol / French Models/Modelos/Mod_Jes: 795.7248 _ Kenmore Elifeo @ MFL62184470 Sears Brancls Hoffman Management Estates, iL 60179 Corporation U.S.A. www._enmore.co_ wvv%v.sea Sears Toronto, rs.com Canada Inc. Ontario, Canada w_/w_.sears.
Warranty ............................................................................. 3 Protection Agreements important .............................................. 4 Safety instructions Electrical & Grounding ........................... 5-7 Requirements ..............7 Parts and Features ....................................................... 8 Refrigerator Installation .............................. 9-18 Unpacking Your Refrigerator Installation .......................... 9 .................
REFRIGERATOR WARRANTY ® /' l(enmore Elite Limited Warranty When this appliance is installed, operated and maintained according to all supplied instructions,the following warranty coverage applies. To arrange for warranty service, call 1-800-4-MY-HOME® (1-800-469-4663). • One Year Limited Warranty on Appllance For one year from the date of purchase, free repair will be provided if any non-consumable part of this appliance fails due to defects in material or workmanship.
Master Power surge protectionagainst electrical to power fluctuations. Protection Agreements Congratulations on making a smart purchase. Your new Kenmore Elite ® product is designed and manufactured for years of dependable operation. But like all products, it may require preventive maintenance or repair from time to time. That's when having a Master Protection Agreement can save you money and aggravation. Rental reimbursement if repair of your covered product takes longer than promised.
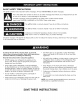
BASIC SAFETY PRECAUTIONS This guide contains many important safety messages. Always read and obey all safety messages. This is the safety alert symbol. It alerts you to safety messages that inform you of hazards that can kill or hurt you or others, or cause damage to the product. All safety messages will be preceded by the safety alert symbol and the hazard signal word DANGER, WARNING or CAUTION. These words mean: You wlll be killed or seriously injured if you do not follow instructions.
Before replacing a burned-out or broken light bulb, unplug the refrigerator or turn off power at the circuit breaker or fuse box in order to avoid contact with a live wire filament. (A burned-out light bulb may break when being replaced, exposing the wire filament.) DO NOT touch the automatic ice making mechanism while the refrigerator is plugged in. NOTE: Some models have LED interior lighting and service should be performed by a qualified technician. ...
Your old refrigerator may have a cooling system that used CFCs or HCFCs (chlorofluorocarbons or hydrochtorofluorocarbons). CFCs and HCFCs are believed to harm stratospheric ozone if released to the atmosphere. Other refrigerants may also cause harm to the environment if released to the atmosphere. if you are throwing away your old refrigerator, make sure the refrigerant is removed for proper disposal by a qualified technician.
Use this page to become more familiar with the parts and features of your refrigerator. NOTE: This guide covers several different models. The refrigerator you have purchased may have some or all of the items listed below. The locations of the features shown below may not match your model.
Excessive Weight Hazard: Use two or more refrigerator. other people Failure to move and to do so can result install Excessive Weight Hazard: the in back or injury. UNPACKING Your refrigerator is heavy. When moving the refrigerator for cleaning or service, be sure to protect the floor. Always pull the refrigerator straight out when moving it. Do not wiggle or walk the refrigerator when trying to move it, as floor damage could occur.
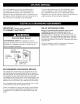
PRIOR TO USE iNSTALLATiON 1. Clean your refrigerator dust that accumulated thoroughly and wipe off all during shipping. (continued) To avoid noise and vibration, the unit must be leveled and installed on a solidly constructed floor. If required, adjust the leveling legs to compensate for unevenness of the floor. The front shoutd be slightly higher than the rear to aid in door closing. Leveling legs can be turned easily by tipping the cabinet slightly.
NOTE: Removing the doors is always recommended when it is necessary to move the refrigerator opening, if it is necessary to remove the handles, follow the directions below. HOW TO REMOVE REFRIGERATOR DOOR HANDLES NOTE: Handle appearance illustrations on this page. Mounting Fasteners may vary from the Set Screw Removing Refrigerator Handles Loosen the set screws with a 3/32 in. Alien wrench and remove the handle. NOTE: if the handle mounting fasteners need to be tightened or removed, use a 1/4 in.
NOTE: Removing the doors is always recommended when it is necessary to move the refrigerator opening, if it is necessary to remove the handles, follow the directions below. HOW TO REMOVE FREEZER DOOR HANDLES NOTE: Handle appearance on this page. may vary from the illustrations Removing Freezer Drawer Handles Loosen the set screws located on the lower side of the handle with a 1/8in. Alien wrench and remove the handle. NOTE: If the handle mounting fasteners need to be tightened or removed, use a 1/4 in.
REMOVING AND REPLACING REFRIGERATOR DOORS _, CAUTION: Before you begin, remove food and bins from the doors. (2) Excessive Weight Hazard: Use two or more people to remove and install the refrigerator doors. Failure to do so can result in back or other injury. (3)\ (8) Electrical Shock Hazard 1. Open the door. Remove the top hinge cover screw (1). Lift up the cover (2). Disconnect the electrical supply to the refrigerator before installing. Failure to do so could result in serious injury or death. 2.
Reinstalllng the Refrigerator Door Right Door Left Door 1. Lower the door onto the middle 1. Lower the door onto the middle 2. Fit the top hinge (4) over the hinge lever latch (5) and into place. Rotate the lever (3) counterclockwise to secure the hinge. hinge pin (10). 2. Fit the top hinge (7) over the hinge lever latch (8) and into place. Rotate the lever (6) clockwise to secure the hinge. 3. Install the grounding wire harnesses (4). hinge pin (9). 3.
HOW TO REMOVE THE CUSTOMCHILL DRAWER HOW TO iNSTALL THE CUSTOMCHILL DRAWER TM 1. Pull the drawer open to full extension. Remove the basket by lifting the basket from the rail system. TM 1. Grasp the door on each side and lower it into place on the rail system. NOTE : Before removing the CustomChill TM drawer, it must be disconnected from the temperature control. 2.
HOW TO REMOVE THE FREEZER DRAWER . WARNING: Remove the middle drawer by pulling the drawer out to full extension. Lift the front of the drawer up, then pull it straight out. * Use two or more people to remove and install the freezer drawer. Failure to do so can result in back or other injury. " Do not sit or stand on the freezer drawer. " To prevent accidental entrapment or suffocation, keep children and pets away from the drawer. Do not leave the drawer open.
HOW TO iNSTALL THE FREEZER DRAWER 1. Pull out both rails simultaneously extended. . Insert the top pullout drawer into the frame, and push the drawer back into place until you hear a click. until both rails are fully . 2. Grasp the drawer on each side and hook the drawer supports into the rail tabs located on both sides. CAUTION: Do not hold the handle when removing or replacing the drawer. The handle may come off, causing personal injury.
LEVELING AND DOOR ALIGNMENT After installing, plug the refrigerator's power cord into a 3-prong grounded outlet and push the refrigerator into the final position. Open both doors again and check to make sure that they close easily. If the doors do not close easily, tilt the refrigerator slightly more to the rear by turning both leveling legs to the left. It may take several more turns, and you should turn both leveling legs the same amount.
SETTING THE CONTROLS Temperature The Refrigerator Temp Control ranges from 33°F to 46°F (I°C to 8°C). Press the Refrigerator Temp button to cycle through the available temperature settings one increment at a time. The Freezer Temp Control range is from =6°F to 8°F (-21°C to -13°C). Press the Freezer Temp button to cycle through the available temperature settings one increment at a time. NOTE: When changing control settings, wait 24 hours before making additional adjustments.
Accent Light/Light Air Filter This light has three settings: On, Off: and Auto. If the light is set to the Auto mode, the Accent Light will automatically turn on and off: according to the brightness of the room, as detected by the light sensor. The Air Filter helps remove odors from the refrigerator. The Air Filter has two settings, Auto and MAX. In Auto mode, the Air Filter will cycle on and off in increments of ten minutes on and one hundred and ten minutes of.
Door Alarm Demo Mode (For Store Use Only) The Demo Mode disables all cooling in the refrigerator and freezer sections to conserve energy while on display in a retail store. When activated, OFF will display on the control panel. When power is connected to the refrigerator, the door alarm is initially set to ON. When you press the Door Alarm button, the display will change to OFF and the Door Alarm function will deactivate.
IN=DOOR ICE BIN 2. To remove the in=door ice bin, grip the front handle, slightly lift the lower part, and slowly pull out the bin as shown. A, CAUTION Keep hands and tools out of the ice compartment door and dispenser chute. Failure to do so may result in damage or personal injury. The icemaker will stop producing ice when the in-door ice bin is full. If you need more ice, empty the ice bin into the extra ice bin in the freezer compartment.
AUTOMATIC ICEMAKER Ice is made in the automatic icemaker and sent to the dispenser. The icemaker will produce 70-210 cubes in a 24-hour period, depending on freezer compartment temperature, room temperature, number of door openings and other operating conditions. Personal Injury Hazard DO NOT place fingers or hands on the automatic ice making mechanism while the refrigerator is plugged in. It takes about 12 to 24 hours for a newly installed refrigerator to begin making ice.
AUTOMATIC ICEMAKER (continued) ACAUTION WHEN YOU SHOULD SET THE ICEMAKER POWER SWITCH TO OFF (O) The first ice and water dispensed may include particles or odor from the water supply line or the water tank. Throw away the first few batches of ice. This is also necessary if the refrigerator has not been used for a long time. with water. If the power switch is in the ON (I) position, it will buzz even if it has not yet been hooked up to water. To stop the buzzing, move the power switch to OFF (O).
FOOD STORAGE GUIDE Wrap or store food in the refrigerator in airtight and moisture-proof material unless otherwise noted. This prevents food odor and taste transfer throughout the refrigerator. For dated products, check date code to ensure freshness. items Butter STORING FROZEN FOOD NOTE: Check a freezer guide or a reliable cookbook for further information about preparing food for freezing or food storage times. Freezing Your freezer will not quick-freeze a targe quantity of food.
REFRIGERATOR SECTION WATER DISPENSER WARNING: Do not put your fingers up the ice chute opening. Doing so can result in severe injury. To dispense cold water, push on the dispenser switch with a glass. A_, CAUTION" crystal glasses. China or crystal can break. NOTE: The dispenser is equipped with a light that turns on when the dispenser pad is engaged. Dispenser Do not dispense ice into fine china or Switch Push Some dripping may occur after dispensing.
REFRIGERATOR SHELVES To relnstall a shelf--Tilt the front of the shelf up and guide the shelf hooks into the slots at a desired height. Then, lower the front of the shelf so that the hooks drop into the slots. The shelves in your refrigerator are adjustable to meet your individual storage needs. Your model may have glass or wire shelves. Adjusting the shelves to fit items of different heights will make flnding the exact item you want easier.
HUMiDiTY CONTROLLED CRISPER The crispers provide fresher tasting fruit and vegetables letting you easily controt humidity inside the drawer. To remove the glass 1. Lift up the glass under the crisper cover. 2. Putt the glass up and out. by NOTE: Pantry drawer You can control the amount of humidity in the moisturesealed crispers by adjusting the control to any setting between VEGETABLES and FRUIT. * VEGETABLES keeps moist air in the crisper for best storage of fresh, leafy vegetables.
REMOVING THE CONVENIENCE BIN LID REPLACING 1. Open the lid about half way C_. THE AiR FILTER it is recommended 2. Lift the lid up and putt out C)" • • that you replace the air filter: Approximately every six months. When the CHANGE AIR FILTER light turns on. ................ ) 1. Remove the Old Filter Turn the filter cover to the left to detach it from the refrigerator wall. The filter is located on the inside of the filter cover.
FREEZER SECTION PULLOUT DRAWERS CUSTOMCHILL Top Drawer TM DRAWER I. To remove, putt the drawer out to full extension. On the left rail, use a fiat blade screwdriver to push in on the tab to release the drawer from the rail, as shown below. Once the left side is loose, push the tab on the right side with your finger to release the drawen Lift the front of the drawer up, then putt it straight out.
Middle Drawer DURABASE 1. To remove, putt the drawer out to full extension. Lift the front of the drawer up, then putt it straight out. 1. To remove the Durabase, push it to the back as much as possible. Tilt up the front of the Durabase and putt straight out. 2. To replace, insert the Durabase in the rail assembly. 2. To replace, slightly tilt up the front of the drawer, insert the drawer into the frame, and push it back into place.
WATER FILTER NOTE : This refrigerator 2. Replace with a new water filter. does not require a filter bypass plug when the filter is not in place. Insert the new filter into the filter head and rotate it It is recommended clockwise until the arrow on the new filter lines up with that you replace the water filter: the arrow on the filter head. Swing the filter back into * * Approximately every six months. When the water filter indicator turns on. * * When the water dispenser output decreases.
Performance Data Sheet The concentration of the indicated substances in water entering the system was reduced to a concentration less than or equal to the permissible limit for water leaving the system as specified in NSF/ANSI Standard 42 and Standard .53. System tested and certified by NSF International reduction of substances listed below. Contaminant Reduction Chlorine Taste and Odor Nominal Particulate Class I,, Average NSF specified Challenge Infiuent Concentration 2.0 mg/L 2.
Application Guidelines/Water Supply Parameters Service Flow 0.5 gpm (1.9 lpm) Water Supply Potable Water Water Pressure 20-120 psi (138 - 827 kPa) Water Temperature To reduce the risk associated with ingestion of contaminants: Do not use with water that is microbiologlcally unsafe or of unknown quality without adequate disinfection before and after of the system. Systems certified for cyst reduction may be used on disinfected water that may contain filterable cysts.
NSF RECOGNIZES MCM Co., Ltd, Republicof Korea AS COMPLYINGWITH NSF/ANS142, 53 AND ALL APPLICABLER£QUIREMENTS, PRODUCTS APPEARffNGIN Tt-_ NSF OFFICIAL LISTING AP&; AUTHONZED TO BEAR TIM NSF MARK, ('e_tific,lt ollpgoNm'n Accredited bythe AmericaTl Nationa! SiaadardsInsoarte Certil_catioA Pl_gram Accredited by_he StandardsCo_nsil ofCanada Tais certificateis the propertyofNSF [nternatlox:ai and rrlustbe returneduponrequest. For lhemostcurrental_dcomp/eleinfom_a{ion, please accessNSF'swebsite(www.
INSIDE WALLS (allow the freezer to warm the cloth wlll not stick) up so To help remove odors, you can wash the inside of the refrigerator with a mixture of baking soda and warm water. Mix 2 tablespoons of baking soda to 1 quart of water (26 g soda to 1 liter water.) Be sure the baking soda is completely dissolved so it does not scratch the surfaces of the refrigerator. Explosion Hazard Use non-flammable in fire, explosion, _,CAUTION: While cleaning do not spray water. cleaner.
LIGHT BULB REPLACEMENT WHEN YOU MOVE When you are moving your refrigerator to a new home, follow these steps to prepare it for the move. Electrical Shock 1. Remove all food from the refrigerator frozen food in dry ice. Hazard Before replacing a Compartment Lamp, either unplug the refrigerator or turn off power at the circuit breaker or fuse box. 2. Unplug the refrigerator. 3. Clean, wipe and dry thoroughly. 4.
BEFORE YOU BEGIN WHAT YOU WILL NEED This water line installation is not covered by the refrigerator warranty. Follow these instructions carefully to minimize the risk of expensive water damage. * Copper Tubing, 1/4 in. outer diameter, to connect the refrigerator to the water supply. Be sure both ends of the tubing are cut square.
iNSTALLATiON iNSTRUCTiONS 5. TIGHTEN Install the shutoff valve on the nearest frequently drinking water line. THE PIPE CLAMP Tighten the clamp begins to swell. used screws NOTE: Do not overtighten 1. SHUT OFF THE MAIN WATER SUPPLY Turn on the nearest faucet to relieve the pressure on the line. the clamp washer or you may crush the tubing. Washer ,-------inlet 2.
8. FLUSH OUT THE TUBING Turn the main water supply on and flush out the tubing until the water is clear. 10. TURN THE WATER ON AT THE SHUTOFF VALVE Tighten any connections that leak. Shut the water o_ at the water valve after about one quart of water has been flushed through the tubing. 9. CONNECT THE TUBING TO THE REFRIGERATOR NOTE: Before making the connection to the refrigerator, be sure that the refrigerator power cord is not plugged into the wall outlet. 1.
Before conducting troubleshooting, make sure that the following Service Flow 0.5 gpm (1.9 lpm) Water Supply Potable Water Water Pressure 20-120 psi (138 - 827 kPa) Operating Ambient Temperature Limits 55OF _ 110OF Electrical basic requirements are met. 115 Volts, 60 Hz, AC only, and fused at 15 or 20 amperes. Ratings COOLI NG Demo Mode allows the lights and control display to work normally while disabling cooling to save energy while on the showroom floor.
COOLING Refrigerator or Freezer section is too Refrigerator warm. Air vents are blocked. Rearrange items to allow air to flow throughout the compartment. Refer to the Airflow diagram in the Using Your Refrigerator section. Doors are opened often or for long periods of time. When the doors are opened often or for long periods of time, warm, humid air enters the compartment. This raises the temperature and moisture level within the compartment.
COOLING/ICE &WATER Food is freezing in the refrigerator Food with high water content was placed near an air vent. Rearrange items with high water content away from air vents. compartment. Refrigerator incorrectly, temperature If the temperature is too cold, adjust the control one increment at a time and wait for the temperature to stabilize. Refrigerator location, is installed Frost or ice crystals form on frozen food (outside of package).
iCE & WATER !iiii Iili !i Icemaker is not making enough ice (continued). Dispensing water slowly. Doors are opened often or for long periods of time. If the doors of the unit are opened often, ambient air will warm the refrigerator which will prevent the unit from maintaining the set temperature. Lowering the refrigerator temperature can help, as well as not opening the doors as frequently. Doors are not closed completely. If the doors are not properly closed, ice production will be affected.
iCE & WATER i!! iii Icemaker is not making ice. water. i! i iii il il il il il il il Solut o.s il iiii_ ii_ _iiil i_ i_i ililili iiiii!_iiiiiiiiiii il il !i ! ii il il ili!i !i !i ii i ii iiiii iiill i Refrigerator was recently installed or icemaker recently connected. it may take up to 24 hours for each compartment to reach the desired temperature and for the icemaker to begin making ice. Icemaker Locate the icemaker ON/OFF it is in the ON (I) position. not turned on.
iCE & WATER Ice has bad taste or odor. Water supply contains minerals such as sulfur. A water filter may need to be installed to eliminate taste and odor problems. NOTE: In some cases, a filter may not help. It may not be possible to remove all minerals / odor / taste in all water supplies. Icemaker was recently installed. Ice has been stored for too long. Ice that has been stored for too long will shrink, become cloudy, and may develop a stale taste. Throw away old ice and make a new supply.
NOISE Clicking The defrost control will click when the automatic defrost cycle begins and ends. The thermostat control (or refrigerator control on some models) will also click when cycling on and ofF. Normal Operation Rattling Rattling noises may come from the flow of refrigerant, the water line on the back of the unit, or items stored on top of or around the refrigerator. Normal Operation Refrigerator the floor, Floor is weak or uneven or leveling legs need to be adjusted.
PARTS & FEATURES Doors will not close correctly or pop Food packages open. open. Ice bin, crisper cover, pans, shelves, door bins, or baskets are out of position. Push bins all the way in and put crisper cover, pans, shetves and baskets into their correct positions. See the Using Your Refrigerator section for more information. The doors were removed during product installation and not properly replaced.
Kenmore Connect TM 3. Hold the mouthpiece of your phone in front of the speaker that is located on the right hinge of the refrigerator door, when instructed to do so by the call center. (On some models) Should you experience any problems with your refrigerator, it has the capability of transmitting data via your telephone to the Kenmore Connect TM Team. This gives you the capability of directly to our trained specialists.
Your Home For troubleshooting, product manuals and expert advice: managemylife www.managemylife.com For repair - in your home - of all major brand appliances, lawn and garden equipment, or heating and cooling systems, no matter who made it, no matter who sold it! For the replacement parts, accessories and owner's manuals that you need to do-it-yourself. For Sears professional installation of home appliances and items like garage door openers and water heaters.