Owner's Manual and Installation Instructions One-Speed AUTOMATIC WASHERS with Water Temperature Control IMPORTANT: Read and follow all safety and operating instructions before first use of this product. Sears, Roebuck and Co., Hoffman Estates, IL 60179 U.S.A. Sears Canada Inc., Toronto, Ontario, Canada M5B 2B8 8530512 PRINTED IN U.S.A. www.sears.com www.
BEFORE USING 2 KENMORE AUTOMATIC WASHER WARRANTY 3 WASHER SAFETY 4 INSTALLATION 6 REQUIREMENTS INSTALLATION INSTRUCTIONS 10 WASHER USE 14 LAUNDRY TIPS 22 WASHER CARE 24 TROUBLESHOOTING 25 WE SERVICE WHAT WE SELL 29 Please read this manual. It will help you install and operate your new Kenmore washer in the most economical way. For more information about the care and operation of Kenmore appliances, call your nearest Sears store.
Limited Lifetime Warranty on White Porcelain Basket For the lifetime of the washer from the date of purchase, Sears will replace the white porcelain wash basket if it chips or rusts due to defective material or workmanship. After the first year, you will be charged for labor. Limited 10-Year Warranty on Plastic Tub* For the second through tenth year from the date of purchase, Sears will replace the plastic tub if it is defective in material or workmanship.
Your safety and the safety of others are very important. We have provided many importantsafety messages in this manual and on your appliance. Always read and obey all safety messages. This is the safety alert symbol. This symbol alerts you to potential hazards that can kill or hurt you and others. All safety messages willfollow the safety alert symbol and either the word "DANGER" or "WARNING." These words mean: You can be killed or seriously Injured If you don't Immedlatel£ follow instructions.
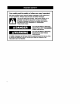
IMPORTANT SAFETY INSTRUCTIONS WARNING: To reduce the risk of fire, electric shock, or injury to persons when using your washer, follow basic precautions, including the following: • Read all instructions before using the washer. • Do not wash articles that have been previously cleaned in, washed in, soaked in, or spotted with gasoline, dry-cleaning solvents, other flammable or explosive substances as they give off vapors that could ignite or explode.
Tools and Parts Alternate Assemble the necessary tools and supplies before beginning the washer installation. The parts supplied are in the washer basket. Tools needed for connecting the drain hose and water inlet hoses: • Pliers that open to 1_8 in. (3.95 cm) • Flashlight (optional) Parts supplied: OO OO 4 5 1. Drain hose 2. Silver, double-wire hose clamp (for the bottom of the drain hose) 3. Yellow, single-wire hose clamp (for the top of the drain hose) 4. Water inlet hoses (2) 5.
Location Requirements Selecting the proper location for your washer improves performance and minimizes noise and possible washer "walk." Your washer can be installed in a basement, laundry room, closet, or recessed area. (See "Drain System.") Proper installation is your responsibility. You will need: • A water heater set to deliver 120°F (49°C) water to the washer. • A grounded electrical outlet located within 4 ft (1.2 m) of where the power cord is attached to the back of the washer.
Drain System The washer can be installed using the standpipe drain system (floor or wall), the laundry tub drain system, or the floor drain system. Select the drain hose installation method you need. (See "Alternate Parts.") Floor drain system (view 2) The floor drain system requires a siphon break that may be purchased separately. (See "Alternate Parts.") The siphon break must be a minimum of 28 in. (71 cm) from the bottom of the washer. Additional hoses might be needed.
• To minimize possible shock hazard, the cord must be plugged into a mating, 3 prong, ground-type outlet, grounded in accordance with local codes and ordinances. If a mating outlet is net available, it is the personal responsibility and obligation of the customer to have the properly grounded outlet installed by a qualified electrician. • If codes permit and a separate ground wire is used, it is recommended that a qualified electrician determine that the ground path is adequate.
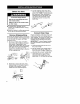
Before You Start 3. Cut the shipping strap about 16 in. (40 cm) from plug end. Look for the words "CUT HERE." Discard end with the cotter pins. Slide remainder of shipping strap from the power cord. You will use the remainder of the shipping strap later to secure the drain hose. • To prevent floor damage, set the washer onto cardboard before moving across floor. • Move the washer to within approximately 3 ft (90 cm) of the final location.
4. Open clamp. Twist hose back and forth while pushing down onto drain connector at the bottom of the washer. Continue until hose contacts the ribbed stop on the cabinet. Y • For floor drain installation, see kit number required under "Alternate Parts." Connect 5. Place clamp over area marked "CLAMP." Release clamp. 0 1/4" rnm) 1. 2. & 4. Inlet Hoses 1. Insert new flat washers (supplied) into each end of the inlet hoses. Firmly seat the washers in the couplings.
Clear the water lines 5. Run water through both faucets and inlet hoses, into a bucket or laundry tub, to get rid of particles in the water lines that might clog the inlet valve screens. Connect the inlet hoses to the washer 6. Attach the hose with the red coupling to the HOT water (bottom) inlet valve. Attaching the red coupling first makes it easier to tighten connection with pliers. Screw on coupling by hand until seated on the washer.
4. Tiltthewasher backandremove the woodblock.Gently lowerthewasher tothefloor. 5. Slideto final location. 6. Check the levelness of the washer by placing a level on the top edges of the washer; first side-to-side, then front-to-back. 3. Check to be sure you have all of your tools. 4. Check to be sure that the yellow shipping strap was removed from the back of the washer and used to secure the drain hose. 5. Dispose/recycle all packaging materials. 6. Check to be sure the water faucets are on. 7.
To get the maximum cleaning and fabric care from your washer, please read and follow these instructions. NOTE: The drawings in this section show the basic features of all models covered by this manual. Refer to the supplied "Feature Sheet" for your washer's particular features. Fire Hazard Never place items in the washer that are dampened with gasoline or other flammable fluids. No washer can completely remove oil. Do not dry anything that has ever had any type of oil on it (including cooking oils).
LID INSTRUCTIONS These instructions are found under the lid of your washer. Add measured detergent to the washer basket. Make the selections for these washer controls. 1. SELECT & ADJUST • WATER LEVEL Adjust to load size. • WASH / RINSE TEMP ....... Selection is based on type of fabric and soil. 2. SELECT CYCLE Choose more time for heavily soiled loads and less time for lightly soiled loads. 3. PULL TIMER TO START ..... Lid must be closed to complete cycle.
T STARTING YOUR WASHER 1. Add measured detergent directly into washer basket. Then place a load of sorted clothes in the washer. 2. Close washer lid. 3. Set WATER LEVEL Control O based on the size of your wash load. 4. Set the WATER TEMPERATURE Control 0. 5. Push Knob cycle fabric 16 STOPPING/RESTARTING YOUR WASHER • To stop the washer at any time, push the Cycle Selector Control (Timer) Knob in _. • Pull the knob out to restart. the Cycle Selector Control (Timer) _ in and tum to the right.
SET WATER LEVEL CONTROL This control gives you the flexibility to save water when washing small loads. SET WATER TEMPERATURE CONTROL Your washer lets you select a wash water setting based on the type of load you are washing. • All rinses are cold to save energy. Your washer lets you select a water setting based on the size of your wash load. Clothes should move freely and roll toward the agitator. COLD WARM COLD • HOT • For a small load of clothes, select SMALL LOAD.
HEAVY DUTY Usethis cycleto getupto 14 minutes of washtimeforsturdy orheavily soiled loads. SETTING YOUR CYCLE SELECTOR (TIMER) CONTROL Use this control to choose the agitation time and to start the washer. GENTLE • For heaW soil and sturdy fabrics, use the full time. Use this cycle for cleaning lightly to moderately soiled delicate items and washable knits. The cycle features a periodic agitation and soak. • For light soil and delicate fabrics, use less time.
RINSE AND SPIN SPIN ONLY When using extra detergent for heavily soiled clothes, or washing special-care items, you may find an extra rinse and spin is needed. 1. Set WATER LEVEL Control. A drain and spin may help shorten drying times for some heavy fabrics or specialcare items by removing excess water. 2. Set WATER TEMPERATURE 2. Pull the Cycle Selector Control (Timer) Knob out to start washer. Control. 3. Set the Cycle Selector Control (Timer) Knob to a RINSE setting. 1.
UNDERSTANDING WHAT HAPPENS IN EACH CYCLE PERMANENT HEAVY DUTY PRESS Fill to select;d level GENTLE Fill to _ level selected selected level Fill to Wash select;d time Wash selected time Partial Drain Pause Agitate Soak no spin Drain Agitate Spin cool down Fill for Wash no spin Drain selected Fill level to Spin Rinse no spin Drain - F_ Spin selected Fill tolevel no spin Drain - Rinse Spin Fill to select;d no spin Drain - level Off Rinse _' I Drain - I no spin Spin SOAK Off s
STRAIGHT VANE AGITATOR This agitator is found in Kenmore large capacity washers. Its design is well-suited to handle your everyday loads. DUAL ACTION ®AGITATOR (On some models) Kenmore's DUAL ACTION ® Agitator gives you flexible fabric care for even your largest loads. The best cleaning action in your washer takes place at the bottom where the agitator vanes move back and forth to flex the fabric, loosening the soil.
PREPARING CLOTHES FOR WASHING i Im=vma_" ;_[:.]i[:_ J'l" Follow these recommendations to help you prolong the life of your garments. • Close zippers, snaps, and hooks to avoid snagging other items. Remove pins, buckles, and other hard objects to avoid scratching the washer interior. Remove non-washable trim and omaments. • Empty pockets and turn them inside-out. • Turn down cuffs; brush away lint and dirt. • Turn synthetic knits inside-out to avoid pilling. • Tie strings and sashes so they will not tangle.
LOADING • Reduce washtimebyusinga lower waterlevelsetting. Loads withonlya fewsmallitemsneedlesswashtime. Proper loading of your washer contributes to proper cleaning and fabric care and reduces machine noise. • Drop items into washer loosely. Fill to the top of the basket (top row of holes). Do not wrap items around the agitator. Items should move easily through wash water for best cleaning and wrinkle-free results. Items should sink and reappear later.
CLEANING YOUR WASHER Exterior Wipe up detergent, bleach, and other spills with a soft, damp cloth or sponge as they occur. Occasionally wipe the outside of the washer to keep it looking like new. WINTER STORAGE OR MOVING CARE Install and store your washer where it will not freeze. Because some water may stay in the hoses, freezing can damage your washer. If storing or moving your washer during freezing weather, winterize it. Do not put sharp or metal objects in your washer. They can damage the finish.
Most laundering problems are easily solved if you understand the cause, Check these lists for common laundry and washer problems, If you need further assistance, see the back cover. Problem Possible Cause Solution Washer Leaks Household plumbing is leaking. Repair plumbing. Inlet hoses not tight. Tighten hoses (see "Installation Instructions"). Inlet hose washers not properly seated. Reseat washers (see "Installation Instructions"). Drain hose not properly clamped or is oft.
Problem Possible Cause Solution Won't Drain/ Won't Spin/ Wet Loads Low voltage or using an extension cord. Check electrical source or call electrician. Do not use extension cords. (cont.) Cold rinses. Cold rinses leave loads wetter than warm rinses. This is normal. Continues to Fill/ Continues to Drain/ Cycle Stuck Drain hose is less than 39 in. (99 cm) above floor. Raise the drain hose (see "Installation Requirements"). Drain hose fits tightly into standpipe.
Problem Possible Cause Solution Machine Stops Power cord not plugged in. PIug into a grounded 3 prong outlet. No power at plug. Check electrical source or call electrician. Fuse blown or circuit breaker open. Replace fuse or reset circuit breaker. If problemcontinues, call electrician. Using an extension cord. Do not use extension cords. Timer is not lined up. Turn timerto the right slightly and pull to start. Timer knob not pulled out. Set and pull out knob. Machine is overloaded.
Problem Possible Cause Solution Tearing Overloading. Improper use of washer, Loads should move freely during wash. Wash smaller loads or increasewater level. Improper use of chlorine bleach. Undiluted bleach will damage fabrics. Do not pour chlorine bleach directly on load. Wipe up bleach spills. Sharp items not removed from pockets;fasteners not fastened. Clean out pockets before washing. Zip zippers before washing.
Your purchase has added value because you can depend on Sears Home Central ®,for service. With over 12,000 trained repair specialists and access to over 4.2 million parts and accessories, we have the tools, parts, knowledge and skills to ensure our pledge: We Service What We Sell. Sears Maintenance Agreements Your Kenmore ® appliance is designed, manufactured and tested to provide years of dependable operation. Yet any major appliance may require service from time to time.
Manual del propietario e Instrucciones de instalacibn ® LAVADORAS AUTOMATICAS con una velocidad y control de temperatura del agua IMPORTANTE: Lea y siga todas las instrucciones de seguridad y de modo de empleo antes de usar este producto por primera vez Sears, Roebuck and Co., Hoffman Estates, IL 60179 U.S.A. Sears Canada Inc., Toronto, Ontario, Canada M5B 2B8 8530512 IMPRESO EN LOS EEUU www.sears.com www, sears.
ANTES DE USAR 2 GARANTiA DE LA LAVADORA AUTOMATICA SEGURIDAD KENMORE DE LA LAVADORA 4 REQUISITOS DE INSTALACI(_N INSTRUCCIONES 3 6 DE INSTALACI(_N 10 USO DE SU LAVADORA 15 SUGERENCIAS 23 DE LAVANDERIA CUIDADO DE SU LAVADORA 25 SOLUCI(_N DE PROBLEMAS 26 REPARAMOS 31 LO QUE VENDEMOS Sirvase leer este manual, pues le facilitarA la instalaci6n y el funcienamiento de su nueva lavadera Kenmore de la manera mAs ecen6mica.
Garantfa Limitada de Vida 0til Para la Canasta de Porcelana Blanca Durante la vida L_tilde la lavadora, a part# de la fecha de compra, Sears reemplazarA la canasta de lavado en porcelana blanca si _,stase desportillara u oxidara como resultado de defectos de material o de fabricaci6n. Despues del primer a_o, usted ser_. responsable de los gastos de mano de obra.
Su seguridad y la seguridad de los demds es muy importante. Hemos incluidomuchos mensajes importantesde seguridaden este manual yen su elec[rodomdstico.Lea y obedezcasiempretodos los mensajesde seguridad. Este es el sfmbolode advertenciade seguridad.Este sfmbolole llama la atenci6nsobrepeligrospotencialesque puedenocasionarla muerte o una lesi6na ustedy a los demds.Todos los mensajes de seguridadirdna continuaci6n del sfmbolode advertenciade seguridady de la palabra "PELIGRO" o "ADVERTENCIA".
INSTRUCCIONES IMPORTANTES DE SEGURIDAD ADVERTENClA: Para reducir el riesgo de incendio, choque electrico o lesiones a personas al usar su lavadora, siga las precauciones b_sicas, incluyendo las siguientes: • Lea todas las instrucciones antes de usar la lavadora.
Herramientas y piezas ReL_nalas herramientas y materiales necesarios antes de comenzar la instalaciSn de la lavadora. Las piezas que vienen con la lavadora estAn en la canasta de la misma. Herramientas necesarias para conectar la manguera de desag6e y las mangueras de entrada del agua: • Alicates que se abran a 1_ pulg. (3.95 cm) • Linterna (opcional) Piezas proporcionadas: 4 S Piezas alternativas Las piezas enumeradas se pueden adquirir en su tienda Sears o en el Centro de Servicio Sears m_.
Si tiene: Tendrd que comprar: Una manguera de desagQe demasiado larga Juego de mangueras, Pieza No. 285442 Pelusa que obstruye el desagee Protector de desagee, Pieza No. 367031 Requisitos Instalaci6n en un drea empotrada o en un cl6set Las dimensiones que se ilustran son para el espacio permitido que se recomienda, a excepciSn de las aberturas de ventilaciSn de la puerta del clSset. Las dimensiones ilustradas para las aberturas de ventilaciSn de la puerta del clSset son las minimas permitidas.
Sistema de desagLie Se puede instalar la lavadora usando el sistema de desagQe de tubo vertical (piso o pared), el sistema de desagiie en un lavabo o el sistema de desagQe en el piso. Elija el sistema de instalaci6n de la manguera que necesite. (Vea "Piezas alternativas".) Sistema de desagiJe en un lavabo (ilustraci6n 1) El lavabo debe tener una capacidad minima de 20 gal. (76 L). La parte superior del lavabo debe estar a 39 pulg. (99 cm) de altura cuando menos sobre el piso y no podrA estar a m_.
• Parareducir laposibilidad dechoques el_,ctricos, elcabledealimentaci6n INSTRUCCIONES PARA debeenchufarse a uncontacto de LA CONEXION ATIERRA pared equivalente de3 viasconconex- Para una lavadora conectada a i6natierra,deacuerdo contodoslos tierra con cable el6ctrico: c6digos y reglamentos locales. Sino sedispone deuntomacorriente equiv- Esta lavadora debe conectarse a tierra.
Antes de empezar Peligro de Peso Excesivo Use dos o mds personas para mover e instalar la lavadora. 3. Corte el fleje de embalaje a unas 16 pulg. (40 cm) del extreme del enchufe. Ffjese en las palabras "CUT HERE". Descarte el extreme que tiene las chavetas. Deslice el resto del fieD de embalaje para separarle del cable el_,ctrice. Va a usar el resto del fieD de embalaje despu_,s para asegurar la manguera de desagL_e.
4. Abra la abrazadera. Tuerza la manguera hacia atrAs y hacia adelante al tiempo que la empuja hacia el conector de desagt3e que esta en la parte inferior de la lavadora. ContinUe hasta que la manguera toque el tope estriado en el gabinete. Para evitar que el agua de desagL_e vuelva a la lavadora: • • 5. Coloque la abrazadera en el Area marcada "CLAMP". Suelte la abrazadera. • No enderece el extreme en forma de gancho de la manguera de desagL)e.
4. Usando los alicates, apriete los acoplamientos dos tercios de vuelta adicionaL 7. Conecte la manguera con el acoplamiento azul a lavalvula de admisi6n del agua FRIA (superior). Atomille el acoplamiento con la mano hasta que se asiente en la arandela. Usando los a]icates, apriete los acoplamientos dos temios de vuelta adicional. NOTA: No los apriete demasiado ya que podrfa daSar las vMvulas. NOTA: No los apriete demasiado ya que podria daSar las vMvulas. Limpie las tuberias del agua 5.
4. Enrolle la manguera de desagl3e a la pata del lavadero o al tubo vertical con el lazo del fleje. (Vea la ilustraci6n.) 6. Revise la nivelaci6n de la lavadora colocando un nivel en los bordes superiores de la lavadora; en primer lugar de lado a lado y luego de frente hacia arras. Si los grifos de la lavadora y el tubo vertical de desagL)e estan empotrados, ponga el extremo en forma de gancho de la manguera de desagQe en el tubo vertical.
Complete la instalaci6n 1. Revise los requisites el6ctdcos. Asegurese de tenet el suministro el6ctdco debido y el metodo de conexi6n a tierra recomendado. (Vea "Requisitos el6ct dcos".) 2. Revise para cerciorarse de que todas las piezas ya esten instaladas. Si hay una pieza extra, vuelva atr_.s cada paso para ver cu_.l de ellos omiti6. 3. Revise para cerciorarse de que tenga todas las herramientas. 4.
Para obtener la limpieza y cuidado 6ptimos de los tejidos con su lavadora, le rogamos lea y siga estas instrucciones. NOTA : Los grAficos de esta secci6n muestran las caracteristicas bAsicas de todos los modelos cubiertos por este manual. Consulte la "Hoja de caracterfsticas" que se adjunta para las funciones especfficas de su lavadora. Peligro de Incendio Nunca coloque en la lavadora artfculos que estdn humedecidos con gasolina o cualquier otro liquido inflamable.
Antiperspirantes, desodorantes ApEque el area afectada con una pasta de amoniaco y blanqueador no decolorante y deje reposar unos 30 minutos. Lave con el agua mas caliente que el tejido pueda resistir. Pasto Sangre Enjuague de inmediato o remoje en agua fria con detergente unos 30 minutos. Enjuague. Frote las manchas restantes con detergente. Enjuague a fondo. Lave.
PUESTA EN MARCHA LAVADORA DE LA 1. A_ada una medida de detergente directamente en la canasta de la lavadora. Luego coloque una carga de ropa seleccionada en la lavadora. 2. Cierre Ia tapa de la lavadora. 6. Jale la perilla de Control del Selector de Ciclos _ (temporizador). El indicador girara a medida que el ciclo avanza. La perilla no rotara. COMO DETENER Y VOLVER A PONER EN MARCHA LA LAVADORA 3. Fije el Control de WATER LEVEL (Nivel del Agua) segQn el volumen de Ia carga de ropa para lavar.
Fije el CONTROL DE NIVEL DEL AGUA Fije el CONTROL DE TEMPERATURA DEL AGUA Su iavadora le permite seleccionar el ajuste Este control le brinda la flexibilidad de ahorrar agua cuando lave peque_as cargas de ropa. Su lavadora le permite seleccionar el ajuste del agua segL_nel tamaSo de su carga de lavado. La ropa debe moverse libremente y rotar hacia el agitador. • Para cargas de ropa pequeSas, selecclone SMALL LOAD (Carga pequeSa). • Para cargas de ropa voluminosas, seleccione LARGE LOAD (Carga voluminosa).
Pare fijar el CONTROL DEL SELECTOR DE CICLOS HEAVY DUTY (LAVADO PESADO) Use este ciclo pare la mayoria de las cargas de lavado pare obtener 14 minutos de tiempo de Iavado. Use este control pare seleccionar el tiempo de agitaci6n y pare poner la lavadora en funcionamiento. GENTLE • Pare los tejidos sumamente sucios y prendas fuertes, use el tiempo completo. (DELICADO) Use este ciclo pare laver prendas delicadas y tejidos Iavables, que contengan suciedad entre ligera a moderada.
ENJUAGUE S(3LO Y EXPRIMIDO AI usar detergente adicional para la ropa muy sucia, o para lavar prendas que requieren un cuidado especial, puede ser que usted necesite un nuevo ciclo de enjuague y exprimido. 1. Fije el WATER LEVEL (Control de Nivel dei agua). 2. Fije el WATER TEMPERATURE de Temperatura del Agua). (Control 3. Fije Ia perilla del Control del Selector de Ciclos (temporizador) en una posici6n de enjuague (RINSE).
PARA ENTENDER LO QUE SUCEDE EN CADA CICLO PERMANENT PRESS (PLANCHADO PERMANENTE) Llena hasta el cionado nivel selec- HEAVY DUTY (LAVADO PESADO) _ L]ena hasta _l-v_wl _ GENTLE (TEJIDOS DELICADOS) el nivel • seleccionado Llena hasta el _ Lava durante el tiempo seleccionado Lava durante el tiempo seleccionado cionado nivel selecAgitaci6n Remojo Escurre sin Agitaci6n enfdamiento seleccionado klena hasta _ _ Agitacidn exprimir Escurre sin Enjuaga Exp_me exprimir Escurre sin exprimir Expdme niv
AGITADOR DE ASPAS RECTAS Este agitador se encuentra en Ias lavadoras Kenmore de gran capacidad. Su diseSo es apropiado para ecuparse de sus faenas cotidianas de lavado. AGITADOR DE DUAL ACTION® (en algunos modelos) El agitador DUAL ACTION _, exclusive de Kenmore, le brinda un cuidado flexible de los tejidos incluso para las cargas de ropa m_s voluminosas.
PREPARACI(_N LAVAR DE LA ROPA PARA Siga estas recomendaciones para ayudarle a prolongar la vida de sus prendas. • Cierre los zipers, broches de presi6n y corchetes para evitar que enganchen otras prendas. Quite alfileres, hebillas y dem_.s objetos duros para evitar que rayen el interior de la lavadora. Quite todo adorno y omamento que no sea lavable. • Vacie los bolsillos y vu61valos al reves. • Doble los puSos y limpie con un cepillo la pelusa y la suciedad.
C(_MO CARGAR LA LAVADORA La carga adecuada de la lavadora contribuye a la limpieza y al cuidado apropiado de los tejidos y reduce el ruido producido por la lavadora. • Coloque las prendas en la lavadora de manera suelta. Llene la lavadora hasta el tope de la canasta (la hilera mAs alta de agujeros). No envuelva la ropa airededor del agitador. Las prendas deben moverse con facilidad en el agua de lavado para Iograr mejores resultados de limpieza y evitar la formaci6n de arrugas en las prendas.
LIMPIEZA DE SU LAVADORA Exterior Limpie todo resto de detergente, blanqueador u otros derrames con un paRo o una esponja tan pronto 6s|os ocurran. De vez en cuando, limpie el exterior de la lavadora para que se yea como nueva. No coloque objetos puntiagudos o me|alicos en su lavadora, ya que pueden daRar el acabado. Examine el contenido de todos los bolsillos para detectar alfileres, clips, monedas, pemos, tuercas, etc. No deje es|os objetos sobre la lavadora despues de vaciar los bolsillos.
La mayor parte de los problemas relacionados con el lavado de ropa se solucionan con facilidad si usted entiende la causa de los mismos. Examine estas listas para identificar los problemas comunes deI lavado y el funcionamiento de su lavadora. Si necesita ayuda adicional, refierase a la contratapa. 26 Problema Causa La lavadora pierde agua El sistema de tuberias de la casa tiene perdidas de agua. probable Soluci6n Repare ia plomeria de la casa. Las mangueras de entrada estan flojas.
Problema Causa La lavadora no escurre/ no exprime/ Bajo voltaje, o se esta empleando un cable el_ctrico de extensi6n, Revise la fuente de eiectricidad o ilame a un electricista. No use cables electricos de extensi6n. Cargas (cont.) Enjuagues frfos. Los enjuagues con agua fria dejan ias cargas mas mojadas que los enjuagues con agua tibia. Esto es normal. ContinUa Ilenando/ continua escurriendo/ciclo La manguera de desag0e esta a una distancia menor de 39 pulg. (99 cm) del piso.
Problema Causa La lavadora se detiene El cable el6ctrico no esta enchufado, Conecte a un contacto de pared de conexi6n a tierra de 3 terminales. El enchufe no tiene corriente electrica, Revise la fuente de electricidad o Ilame a un eteclricista. Fusible quemado o el cortacircuitos esta abierto, Reemplace et fusible o ajusle el cortacircuitos. Si el problema contint_a, Ilame a un electdcista. Se estA utilizando un cable electrico de extensi6n. No use cables el_ctricos de extensi6n.
Problema Causa Pelusas en la Selecci6n indebida de las Separe las prendas que sueltan pelusa de las carga prendas, prendas que atraen pelusa y por color. Sobrecarga. La pelusa puede quedarse atrapada en la carga si la lavadora estA sobrecargada. Lave cargas mAs pequehas. Papel o papel facial en los bolsillos. Vacie los bolsi]los antes del lavado. No hay suficiente detergente. Use suficiente detergente para retener la pelusa en el agua. El detergente no se disuelve.
Problema Causa Prendas arrugadas No se sac6 la carga de inmediato, Descargue la lavadora tan pronto termine el ciclo de lavado. Ciclo equivocado para los tejidos que se est_n lavando, Use enjuagues con agua fria y ciclos con velocidades lentas de exprimido para reducir las arrugas en las prendas. Sobrecarga. Las cargas de ropa deben poder moverse libremenle durante el lavado. Lave cargas mAs pequeSas. Las mangueras estAn invertidas.
Sucompra adquiere unnuevo valor yaqueusted puede confiar enSears HomeCentral ®para obtener servicio dereparaci6n. Conmdts de12,000 especialistas capacitados enreparaciones yacceso amasde4.2millones depiezas derepuesto yaccesorios, contamos conlas herramientas, piezas, conocimiento yladestreza para aseguramos decumplir nuestra promesadeque:Reparamos Ioquevendemos.
32
Manuel de I'utilisateur et instructions d'installation ® LAVEUSES AUTOMATIQUES une vitesse et commande de la tempdrature de reau IMPORTANT : Life et observer routes ]es instructions de s_curit6 et d'utilisation avant la premiere utilisation de cet appareil. Sears, Roebuck and Co., Hoffman Estates, IL 60179 U.S.A. Sears Canada Inc., Toronto, Ontario, Canada M5B 2B8 8530512 IMPRIME AUX F_TATS-UNIS www.sears.com www.sears.
AVANT L'UTILISATION 2 GARANTIE DE LA LAVEUSE AUTOMATIQUE KENMORE 3 SECURITE DE LA LAVEUSE 4 EXIGENCES D'INSTALLATION 6 INSTRUCTIONS D'INSTALLATION FONCTIONNEMENT 10 DE LA LAVEUSE 15 CONSEILS POUR LE LAVAGE 23 ENTRETIEN DE LA LAVEUSE 25 DEPANNAGE 26 NOUS ASSURONS LE SERVICE DE NOS PRODUITS Veuillez lire ce manuel qui vous aidera & installer et & faire fonctionner votre nouvelle laveuse Kenmore de la maniere la plus 6conomique.
Garantie limitde b vie sur le panier en porcelaine blanche Pendant la vie de la laveuse, & compter de la date d'achat, Sears remplacera le panier de lavage en porcelaine blanche s'il survient des 6clats ou de la rouille attribuables & des vices de mat6riau ou de fabrication. Apr&,s un an, les frais de main-d'oeuvre vous seront factur6s.
Votre securit6 et celle des autres est tres importante. Nous donnons de nombreux messages de s6curit6 importants dans ce manuel et sur votre appareil m6nager. Assurez-vous de toujours lire tousles messages de s6curite et de vous y conformer. Voici le symbole d'alerte de s6curit6. Ce symbole d'alerte de securite vous signale les dangers potentiels de decks et de blessures graves & vous et & d'autres. Tousles messages de s6curit6 suivront le symbole d'alerte de securite et le mot "DANGER" ou "AVERTISSEMENT".
IMPORTANTES INSTRUCTIONS DE SI_CURITI_ AVERTISSEMENT : Pour r_,duire les risques d'incendie, de choc _,lectrique ou de blessures lots de I'utilisation de la laveuse, suivre les precautions fondamentales dont les suivantes : • Life toutes les instructions avant d'utiliser la laveuse.
Outillage Autres pi_ces et pi_ces Rassembler les outils et pieces n_,cessaires avant d'entreprendre I'installation de la laveuse. Les pieces foumies se trouvent dans le panier de la laveuse. Outillage n_cessaire pour le raccordement du tuyau de vidange et des tuyaux d'arriv_e d'eau : • Pince, ouverture & 1_6 po (3,95 cm) • Lampe de poche (option) Pibces foumies : Les pieces mentionnees sont disponibles de votre magasin Sears local ou du centre de service Sears.
Exigences de I'emplacement d'installation La selection de I'emplacement appropri_, pour la laveuse permettra d'optimiser sa performance et de minimiser le bruit et les risques de d_,placement de la laveuse. Installation dans un encastrement ou un placard Les dimensions indiqu_es ci-apres sont pour I'espacement recemmand6 autorise, sauf les passages d'air d'une porte de placard. Les dimensions indiquees pour les passages d'air d'une porte de placard sont les espacements minimaux requis.
Systbme de vidange Le tuyau de vidange de la laveuse peut 6tre raccorde & une canalisation d'evacuation (mur ou plancher), ou bien on peut rejeter I'eau de vidange dans un bac de buanderie ou un siphon de plancher. S61ectionner la m6thode appropriee d'installation du tuyau de vidange. (Voir "Autres pi&,ces".) I_vier de buanderie (illustration 1) La capacite de 1'6vier dolt 6tre d'au moins 20 gal (76 L). Le sommet de 1'6vier (point de raccordement) dolt _,tre situe entre 39 po (99 cm) (min.
• Pour minimiser le risque de choc 61ectrique, on dolt brancher le cordon d'alimentation sur une prise de courant murale de configuration correspondante (3 aiv6oles) reli6e & ]a terre conformement aux codes et r&,glements Iocaux. Si une prise de configuration correspondante n'est pas disponible, c'est au client qu'incombent la responsabilit6 et I'obligation personnelles de faire installer par un 61ectricien qualifi6 une prise ad6quatement reli6e & la terre.
Avant de commencer Risque du poids excessif Utiliser deux ou plus de personnes pour d6placer et installer la laveuse. 3. Couper la sangle d'exp6dition & 16 po (40 cm) environ de I'extr6mite de la prise. Rechercher les mots "CUT HERE" (couper ici). Jeter I'extr_,mit6 contenant les goupilles. D6gager le reste de la sangle de la prise electrique. Utiliser plus tard le reste de la sangle d'exp6dition pour arrimer le tuyau de vidange.
4. Ouvrirlabride.Tourner letuyaudans Pour emp_cher I'eau de vidange de unsensetdansI'autre touten refluer dans la laveuse : engageant I'extr_,mit6 dutuyaude • Ne pas redresser I'extr_,mit6 en col de vidange surle raccord devidange situeaubasdelalaveuse.Poursuivrecygne du tuyau de vidange ni forcer I'exc_,dent de tuyau darts le tuyau de I'operation jusqu'& cequeletuyau rejet & I'egout. Le tuyau de vidange soiten contact avec la but_,e devrait 6tre bien immobilis_,, tout en nervur_,e de la caisse.
4. Terminer le serrage des raccords deux tiers de tour - avec une pince. REMARQUE : Ne pas serrer excessivement, pour ne pas endommager les composants. Purger les canalisations d'eau 5. Faire ceuler de I'eau par les deux rebinets et les tuyaux d'arrivee d'eau, dans un seau ou un 6vier de buanderie, pour ejecter routes les particules solides presentes dans la canalisation qui pourraient obstruer les tamis & I'entree de la laveuse. 7. V_rifier s'il y a des fuites 8.
4. Fixer le tuyau de vidange au pied de I'_,vier de buanderie ou au tuyau rigide de rejet a 1'6gout, avec I'attache de fixation. (Voir I'illustratien.) 6. V_,rifier I'aplomb de la laveuse en plagant un niveau sur le bord de la table, transversalement, puis dans le sens avant arriere. Si les robinets d'eau et le tuyau rigide de rejet & I'_,gout sont places en retrait, intreduire I'extr6mit_, en col de cygne du tuyau de vidange dans le tuyau rigide de rejet & I'_,geut.
Installation complbte 1. Consulter les sp_,cifications de I'installation _,lectrique. Verifier que la tension electrique disponible est correcte et que la prise de courant est convenablement reli_,e & la terre. (Voir "Installation _,lectrique".) 2. V_,rifier que routes les pieces sont maintenant insta]l_,es. S'il reste des pi&,ces, etudier attentivement la description de chaque _,tape pour identifier quelle etape a _,t6 omise. Brancher sur une prise b 3 alv6oles reli_e b la terre. 3.
Pour obtenir le meiileur rendement de nettoyage et d'entretien des tissus, lire les instructions qui suivent et s'y conformer. REMARQUE : Les dessins dans cette section montrent les principales caracteristiques de tousles modeles couverts par ce manuel. Se r6f_,rer & la "Feuille de caract_,ristiques" pour des caract_,ristiques particulieres & votre laveuse. Risque d'incendie Ne jamais mettre des articles humectds d'essence ou d'autres fluides inflammables dens la laveuse.
INSTRUCTIONS SOUS LE COUVERCLE Ces instructions sont donn_,essous le couvercle de vetre laveuse. | ,I _ lit liTf Ajouter la quantit6 mesuree de d6tergent dans la cuve de la laveuse. 1. S#LECTION ET Faire les s6lections pour ces commandes RC:GLAGE de laveuse. • WATER LEVEL __ (NIVEAU D'EAU) R6gler en fonction de la grosseur de la charge. • WASH/RINSE TEMP .......... (TEMPERATURE DE LAVAGE/RIN?AGE) Ajuster selon le type de tissu et de salet6. 2. CHOISlR LE PROGRAMME 3.
MISE EN MARCHE LAVEUSE 1. Ajouter dans la ensuite dans la DE LA directement le detergent mesure cuve de la laveuse. Placer une charge de v6tements tries laveuse. 2. Fermer le couvemle de la laveuse. 3. Regler la commande de WATER LEVEL (niveau d'eau) Q en fonction de la taille de la charge & laver. 4. Regler la commande de WATER TEMPERATURE (temperature de I'eau) @. WATER LEVEL WATER T_ERATU_E 5. Pousser le bouton de s61ection des programmes (minuterie) (_ et le tourner vers la droite.
WATER LEVEL (COMMANDE NIVEAU D'EAU) DU Ce rdglage vous donne la flexibilit_ pour _conomiser reau Iors du lavage de petites charges. La laveuse vous permet de choisir un r_,glage du niveau d'eau en fonction de la taille de la charge & laver. Les v6tements doivent pouvoir se deplacer librement et tourner autour de I'agitateur. • Pour une petite charge de v_,tements, choisir SMALL LOAD (petite charge).
BOUTON DE SE_LECTION DES PROGRAMMES (MINUTERIE) Utiliser ce programme pour choisir la dur6e d'agitation et mettre la laveuse en marche. • Pour la salet_, intense et les tissus robustes, utiliser la duree compl&,te. • Pour les salet_,s I_,g6res et les tissus delicats, utiliser moins de temps. PERMANENT PRESS(PRESSAGE PERMANENT) Le programme PERMANENT PRESS comporte un rin_:age _ aspersion refroidissant qui r_duit le froissement en comparaison avec les autres programmes.
RINSE AND SPIN (RIN_AGE ET ESSORAGE) ESSORAGE SEULEMENT Lors de I'utilisation d'un suppl_,ment de detergent pour les v6tements tres sales, ou Iors du lavago d'articles n_,cessitant des soins sp_,ciaux, vous d_,couvrirez peut-_,tre qu'un ringage et un essorage supplementaires s'imposent. 1. R_,gler la commande de WATER LEVEL (niveau d'eau). 2. R_,gler la commande de WATER TEMPERATURE (temp_,rature de I'eau). 3. R_,gler le bouton de s_,lection des programmes (minuterie) au reglage RINOAGE. 4.
COMPRE_HENSION DES PROGRAMMES PERMANENT PRESS (PRESSAGE PERMANENT) Remplissage jusqu'au niveau HEAVY DUTY (SERVICE RIGOUREUX) GENTLE (ARTICLES DELICATS) Remplissage s_lectionn6 ju_lu'au niveau _ _. s61ec;onne Lavage duree s61ectionn6e Lavage dur6e s_,lectionn6e Agitation Vidange sans essorage partielle Vidange, Remplissage jusqu'au nweau s61ectionn_, I±1 ---_ Essorage IZI.
AGITATEUR .& PALES DROITES BRUITS NORMALEMENT PAR LA LAVEUSE On trouve cet agitateur sur les laveuses Kenmore de grande capacit& Sa forme se pr@e bien aux lavages usuels. Votre nouvelle laveuse emet peut-6tre certains bruits que n'_,mettait pas votre ancienne laveuse. Comme vous n'6tes pas habitue & ces bruits, ils vous causent peut-6tre des soucis. Nous d_,crivons ci-dessous quelques-uns des bruits normalement _,mis par la laveuse et leurs causes.
PRE_PARATION DU LINGE POUR LE LAVAGE Observer les recommandations cidessous pour vous aider & prolonger la vie de vos v_tements. • Fermer les fermetures & glissi&,re, boutons-pression et agrafes pour eviter d'accrocher d'autres articles. Enlever 6pingles, boucles et autres objets durs pour 6viter d'6gratigner I'int6rieur de la laveuse. Enlever les garnitures et ornements non lavables. TRI • S6parer les articles tres sales des articles 16g@ement sales, m6me si on pouvait normalement les laver ensemble.
CHARGEMENT • R6duire la dur_,e de lavage en utilisant un niveau d'eau plus bas. Une charge qui ne contient que quelques petits articles se lave plus rapidement. Un chargement correct de la laveuse optimise le nettoyage et I'entretien du linge en plus de r6duire le niveau de bruit de la laveuse. • Introduire les articles dans la laveuse sans les tasser. Remplir jusqu'au sommet du panier (rangee sup_,rieure d'orifices). Ne pas enrouler les articles laver autour de I'agitateur.
NETTOYAGE DE LA LAVEUSE Ext_rieur Essuyer imm6diatement les r_,sidus de detergent, I'eau de Javel, et autres produits renvers6s, avec une 6ponge ou un linge doux humide. Essuyer occasionnellement les surfaces extemes de la laveuse pour maintenir son aspect d'appareil neuf. Ne pas introduire d'objets m6talliques ou ac_,r_,sdans la laveuse. De tels objets peuvent endommager la finition.
On peut facilement rdsoudre la plupart des probl_mes de lavage si on en connait la cause. Etudier la liste suivante des probl_mes qui peuvent survenir et leurs causes. Pour avoir de plus amples renseignements, voir la derni_re page. Probl_me Cause possible Solution Fuites d'eau Fuites des circuits de plomberiede la maison. R_,parer les circuits. Tuyaux d'alimentation mal serr_,s, Serrer les tuyaux (voir "Instructions d'installation"). Joints des tuyaux d'alimentation incorrectement plac_,s.
Problbme D_ficiencee de vidange/ essoragel linge mouill_ (suite) Cause possible Tension electrique insuffisante ou utilisation d'un cordon de rallonge, Rin£age & I'eau froide. Solution V_rifier la source _lectrique ou faire venir un electricien. Ne pas utiliser un cordon de rallonge. Le linge est plus mouille apres un dngage & I'eau froide qu'apres un dn£age & I'eau tiede. Ceci est normal. Pae d'interruption du Le tuyau d'evacuation est place & mcins de 39 po (99 cm) au-dessus du sol.
Problbme La laveuse s'arr6te Cause possible Cordon d'alimentation non branche, Solution Brancher sur une prise & 3 alv6oles reli6e a la terre. Prise de courant non aliment6e, V6rifier le circuit 61ectrique eu faire venir un electricien. Fusible grill6 ou disjoncteur ouvert, Remplacer le fusible grill6 ou fermer le disjoncteur. Si le probl&,me persiste, faire venir un electricien. Utilisation d'un cordon de rallonge, Ne pas utiliser de cordon de rallonge.
Problbme Cause Presence de charpie sur le linge Tri incorrect du linge. Trier le linge : separer les articles g6nerateurs de charpie des articles capteurs de charpie et par couleur. Chargement excessif. La charpie peut rester emprisonnee dans la charge en cas de chargement excessif. Laver de plus petites charges. Residu de papier ou mouchoirs de papier dans les poches. Vider les poches avant le lavage.
Problbme Cause Linge froiss_ Dechargement laveuse, possible Mauvais programme le linge _. laver, Linge emm_l_ 3O Solution tardif de la pour Decharger la laveuse des qu'elle s'arr_,te. Utiliser le rin(;age _ I'eau froide et les programmes avec essorage a basse vitesse pour r_,duire le froissement. Charge excessive. Le linge dolt pouvoir se d_,placer librement pendant le lavage. Laver de plus petites charges. Tuyaux invers_,s.
Votre achat a plus de valeur parce que vous pouvez compter sur Sears Home CentraP pour le service. Avec plus de 12 0go specialistes formes et I'acces & plus de 4,2 millions de pi&,ces et accessoires, nous avons les outils et les pieces ainsi que les connaissances et competences pour remplir cette promesse que nous vous faisons : Nous assurons le service de nos produits.
32
33
Forrepairof majorbrandappliancesin your own home... www.sears.