27-Inch Wide - Extra Large Capacity Plus LAUNDRY CENTER Washer- Gas Dryer f CENTRO DE LAVANDERIA de 27 pulg. (69 cm) de ancho - Capacidad extra grande "Plus" Lavadora - Secadora a gas c_oUs,o )_''_' ............... ( l \ 8530260 Sears Roebuck and Co., Hoffman Estates, IL 60179 U.S.A. www.sears.
TABLE OF CONTENTS WARRANTY WARRANTY .................................................................................... 2 WASHER/DRYER SAFETY ............................................................ 3 INSTALLATION INSTRUCTIONS .................................................. Tools and Parts ............................................................................ Alternate Parts .............................................................................. 5 5 5 Location Requirements ....
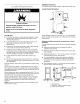
WASHER/DRYER SAFETY Your safety and the safety of others are very important. We have provided many important safety messages in this manual and on your appliance. Always read and obey all safety messages. This symbol alerts you to potential hazards that can kill or hurt you and others. All follow the safety alert symbol and either the word "DANGER" or Thissafety is themessages safety alertwillsymbol. "WARNING.
IMPORTANT SAFETY INSTRUCTIONS WARNING: To reduce the risk of fire, electric shock, or injury to persons when using the washer/dryer, follow basic precautions, including the following: Read all instructions before using the washer/dryer. Do not place items exposed to cooking oils in your dryer. Items contaminated with cooking oils may contribute to a chemical reaction that could cause a load to catch fire.
INSTALLATION INSTRUCTIONS Check that you have everything necessary for correct installation. Proper installation is your responsibility. Tools needed • 8 in. or lOin. adjustable wrench (for gas connections) • Knife • Safety glasses • Flat-blade screwdriver • Duct tape • Adjustable wrench that opens to 1 in. (2.5 cm) or 9/16in. open-end wrench (for adjusting dryer feet) • Pipe-joint compound resistant to L.
Installation Clearances t_,,_[X_I!;_ _ 1 The location must be large enough to fully open the dryer door. Laundry Center Dimensions Explosion Hazard Keep flammable materials and vapors, such as gasoline, away from dryer. Failure to do so can result in death, explosion, or fire. (81.9 cm)_ You will need • A location that allows for proper exhaust installation. A gas laundry center must be exhausted to the outdoors. See "Venting Requirements.
Mobile Home-Additional InstallaUon Requirements This laundry center is suitable for mobile home installations. The installation must conform to the Manufactured Home Construction and Safety Standard, Title 24 CFR, Part 3280 (formerly the Federal Standard for Mobile Home Construction and Safety, Title 24, HUD Part 280). Mobile home installations require: • Metal exhaust system hardware which is available for purchase from your local Sears store or Sears Service Center.
% ,,,_ ,1' ._.+_,.. _ _+_/_'_i7 _:_d_ 5 , )_#:_:_;_ _'_,;;_ Gas Supply Line • _/2in. IPS pipe is recommended • % in. approved tubing is acceptable for lengths under 20 ft (6.1 m) if local codes and gas supplier permit. • Lengths over 20 ft (6.1 m) should use larger tubing. • Must include V8 in. NPT plugged tapping, immediately upstream of the gas supply connection to the dryer (see illustration). • Gas supply line coupling (94 cm) from the floor. must be 34 (86.4 cm) to 37 in.
Burner Input Requirements: Elevations up to 10,000 feet (3,048 meters): • Do not exhaust the dryer into any gas vent, chimney, wall, ceiling, or a concealed space of a building. • • Do not use an exhaust hood with a magnetic latch. • Do not install flexible metal vent in enclosed walls, ceilings or floors. • Do not use screws or other fastening devices that extend into the interior of the vent to secure vent.
a L,eve ng Legs ,.31]I ._I._I I{] +' Install the front leveling feet 1. Prop up the front of the laundry center about 4 in. (10.2 cm) with a wood block or similar object• The block needs to support the weight of the laundry center. 2. To prevent floor damage, set laundry center onto cardboard before moving across floor. Move laundry center close to its final location. 1. Do not cut yellow strap.
3. Open clamp. Twist hose back and forth while pushing onto drain connector on the side of the laundry center. Continue until hose contacts the ribbed stops on the cabinet. (,ol w ec: :he/se _% 1, = _ , _ _ 2, ,_ _ i_ _ Hoses _ Insert a new flat washer (supplied) into each end of the inlet hoses. Firmly seat the washers in the couplings. 1 2 1. Coupling 2, Washer Connect the inlet hoses to the water faucets Make sure the washer basket is empty. 4.
Connect 6. the inlet hoses to the washer Attach the hose with the blue coupling to the cold water (top) inlet valve. Screw on coupling by hand until seated on the washer. 1. Move the laundry center to its final location and remove any cardboard used to move the laundry center. 2. Locate the remaining piece of shipping strap (see "Remove Shipping Strap"). Shipping Strap 1. Cold water inlet valve (blue) 2. Hot water inlet valve (red) 7.
Optional exhaust installations This laundry center can be converted to exhaust out the right or left side. To convert the laundry center, use Side Exhaust Kit Part Number 279823. If your laundry center was previously exhausted from the right or left side, it can be converted to rear exhaust by using standard offset connections. To cover the hole in the side, one of the following plugs can be added: Alternate installations for close clearances Venting systems come in many varieties.
Special provisions for mobile home installations The exhaust vent must be securely fastened to a noncombustible portion of the mobile home structure. Do not use screws or other fastening devices that extend into the interior of the vent to secure vent. The angled hood style (shown following) is acceptable. 2.5" See the exhaust vent length chart that matches your hood type for the maximum vent lengths you can use. Exhaust systems longer than specified will: 3. • Shorten the life of the dryer.
Properly leveling your laundry center prevents excessive noise and vibration. 1. Check the levelness of the laundry center by placing a level on the top edge of the washer, first side-to-side, then frontto-back. 1. Remove the red cap from the flexible gas connector. 2. Remove the 1/2in. NPT adapter from the flexible gas connector, (it will be necessary to use two adjustable wrenches). 3. Install the adapter on the 1/2in. rigid gas supply pipe using pipe-joint compound. 2 _ ::::::@ 2.
1. Using a 4 in. (10.2 cm) clamp, connect vent to exhaust outlet in laundry center. If connecting to existing vent, make sure the vent is clean. The vent must fit over the exhaust outlet and inside the exhaust hood. Make sure the vent is secured to exhaust hood with a 4 in. (10.2 cm) clamp. 2. Move laundry center into final position. Do not crush or kink vent. Make sure laundry center is level. 1. Check to be sure all parts are now installed.
WASHER USE f HEAVY DUTY NORMAL SHORT WA1ERTEMP WATER LEVEL COW MEDIUM LOAD _ REeULAR / W_qM HAND WASHABLES ,SHOm" DEUEATE _W_qM CC_e PERMANENTPRESS 3. Fire Hazard Never place items in the washer that are dampened with gasoline or other flammable fluids. No washer can completely remove oil. Do not dry anything that has ever had any type of oil on it (including cooking oils). Pour measured liquid chlorine bleach into the liquid chlorine bleach dispenser, if needed.
6. Turn the WATER LEVEL selector knob to the correct setting for your wash load and the type of fabric being washed, 8. WAllER LEVEL Push in the Cycle Control knob and turn it clockwise to the wash cycle you want. Pull out the Cycle Control knob to start the washer. To stop or restart your washer: MEDIUM LOAD • Choose a load size that allows the load to move freely for best fabric care. See "Loading.
Permanent Press Select up to 9 minutes of wash time. Wash combines fast and slow speed agitation and slow spin speeds to reduce wrinkling. • The Permanent Press cycle includes a load cooling process that reduces wrinkling. • When the timer reaches Pause, the washer will drain and pause for approximately 2 minutes while some of the wash water is drained and replaced with rinse water. NOTE: The washer pauses briefly throughout pauses are normal for washer operation. WASH each cycle, These RINSE 1.
LAUNDRY TIPS Preparing clothes for washing Follow these recommendations to help you prolong the life of your garments. • Close zippers, snaps, and hooks to avoid snagging other items. Remove pins, buckles, and other hard objects to avoid scratching the washer interior. Remove non-washable trim and ornaments. • Empty pockets and turn them inside out. • Turn down cuffs, brush away lint and dirt. • Turn synthetic knits inside out to avoid pilling. • Tie strings and sashes so they will not tangle.
DRYER USE PUSHTO PERMANENT PRESS STARTDRYER NORMAL _1_'_1_ SO TIMED DRY "_' LESSDRY _ONA_L _°°_ _,_LS,s_L" OFF O 0 ON H,_._ NORMAl_ DRY MOREDRY 40 ! 30 LOWH_T KNIT/ LL_ DRY NORMALDRY MORE DRY 10 120 AIR DRY Before using your dryer, wipe the dryer drum with a damp cloth to remove dust from storing and shipping. 1. Check the lint screen, clean if needed. See "Cleaning the Lint Screen." 2. Load clothes loosely into the dryer and close the door, Do not pack the dryer.
To restart your dryer 1. Close the door. 2. 3. Select a new cycle and temperature (if desired). Press the PUSH TO START DRYER button. WR/NK_E6L_R0 # NORMAL _ so "RMEDDRY USS DRY Load clothes loosely into the dryer. Do not pack the dryer. Allow space for clothes to tumble freely. The following chart shows examples of balanced loads that would allow for proper tumbling.
Air Dry Use the Air Dry cycle for items that require drying without heat such as rubber, plastic and heat sensitive fabrics. This chart shows examples of items that can be dried using an air cycle. Type of Load 20 - 30 Plastic - Shower curtains, tablecloths 20 - 30 Rubber-backed 40 - 50 Olefin, polypropylene, sheer nylon NOTE: Check the lint screen and remove any lint accumulated from items dried on the rack.
To wash Replace inlet hoses after 5 years of use to reduce the risk of hose failure. Periodically inspect and replace inlet hoses if bulges, kinks, cuts, wear, or leaks are found. 1. Roll lint off the screen with your fingers. 2. Wet both sides of lint screen with hot water. 3. Wet a nylon brush with hot water and liquid detergent. Scrub lint screen with the brush to remove residue buildup. When replacing your inlet hoses, mark the date of replacement on the label with a permanent marker.
......... ss .......... _/_ ,,,__ _,, Install and store your laundry center where it will not freeze. Because some water may stay in the hoses, freezing can damage your laundry center. If storing or moving your laundry center during freezing weather, winterize it. Non-use or vacation care Operate your laundry center only when you are at home. If you will be on vacation or not using your laundry center for an extended period of time, you should: • Unplug laundry center or disconnect power.
Washer won't drain or spin TROUBLESHOOTING WASHER First try the solutions suggested the cost of a service call... here and possibly avoid Washer won't fill, rinse or agitate • Is the drain hose clogged, or the end of the drain hose more than 96 in. (2.4 m) above the floor?. See the Installation Instructions for proper installation of drain hose. • Is the lid open? The lid must be closed during operation. • Is there excessive sudsing? Always measure detergent. Follow manufacturer's directions.
Washer basket is crooked • Was the washer basket pulled forward during loading? The wash load should be balanced and not overloaded. Push the basket to the center before starting wash. • Is the load balanced and the laundry center level? The wash load should be balanced and not overloaded. Stains on load • Dilute fabric softener and add to the rinse portion of a cycle only. Do not drip fabric softener on clothes. The laundry center must be level.
Garment • • Was a cold rinse water used? Was the load very wet? Expect longer drying times with items rinsed in cold water and with items that hold moisture (cottons). • Is the load too large and heavy to dry quickly? Separate the load to tumble freely. damage Checkthe following: Were sharp items removed from pockets before washing? Empty pockets, zip zippers, snap or hook fasteners before washing.
Items shrinking • Wasthe dryer overloaded? Dry smaller loads that can tumble freely. • Did the load overdry? Check the manufacturer's care label. Match dryer setting to load type (see "Drying, Cycle and Temperature Tips"). Loads are wrinkled • Was the load removed • Wasthe dryer overloaded? Dry smaller loads that can tumble freely. • Did the load overdry? Check the manufacturer's care label. Match dryer setting to load type (see "Drying, Cycle and Temperature Tips").
For repairof major brand appliances in your own home... nomatter who made it, no matter whosoldit! !!!!!!!!!!!!!! !!!!!!!!!!!!!! %iiiiiiiii_! 1-800-4-MY-HOM E® Anytime, dayornight (1-800-469-4663) (U.S.A. and Canada) iiiiiiiiiiiiii www.sears.com www.sears.ca For repair of carry-in products like vacuums, lawn equipment, and electronics, call for the locationof your nearest Sears Parts and Repair Center. .............. 1-800-488-1222 Anytime, dayornight (U.S.A. only) www.sears.