27” (69 cm) Wide LAUNDRY CENTER Washer - Dryer Electric Dryer Use and Care Guide CENTRO DE LAVANDERÍA de 27" (69 cm) de ancho Lavadora - Secadora eléctrica Manual de Uso y Cuidado Models/Modelos P/N 134809700A (0703) Sears, Roebuck and Co., Hoffman Estates, IL 60179 U.S.A. 1 www.sears.
TABLE OF CONTENTS Important Safety Instructions..............................................................................................................................2-4 Washing Procedures...........................................................................................................................................5-6 Stain Removal.........................................................................................................................................................
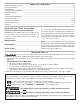
Grounding type GAS LAUNDRY wall receptacle Grounding type wall receptacle CENTERS: Do not use or mix liquid chlorine bleach with other household chemicals such as toilet cleaners, rust removers, acid or products containing ammonia. These mixtures can produce dangerous fumes which can cause serious injury or death. Do not Do not under under any any circumstances circumstances cut, cut, remove, remove, or bypass or bypass the thegrounding groundingprong prong from fromthis thisplug plug.
Important Safety Instructions Con't • Do not obstruct the flow of ventilating air. Do not stack or place laundry or throw rugs against the front or back of the laundry center. • Do not spray any type of aerosol into, on or near laundry center at any time. • Do not use fabric softeners or products to eliminate static unless recommended by the manufacturer of the fabric softener or product.
Washing Procedures • • • Follow the guidelines below for preparing the wash load. Read the Washer Operating Instructions for operating your specific model. Always read and follow fabric care and laundry product labels. To reduce the risk of fire, electrical shock, or injury to persons, read Important Safety Instructions before operating this washer. Sort laundry into loads that can be washed together. Empty pockets. 1. Sort laundry into loads that can be washed together.
Washing Procedures con't Do not load items above top of agitator vanes in wash tub. 6. Add laundry load to washer. • Dry load level should not be higher than the top of agitator vanes. Do not overload the washer. • Do not put items on top of agitator or wrap them around it. Load items evenly. • Combine large and small items in a load. Load large items first. Large items should not be more than half the total wash load. • When washing a single heavy item, add 1 or 2 towels to balance the load. 7.
Safe Stain Removal Procedures Stain Removal To reduce the risk of fire, electrical shock, or serious injury to persons or property, comply with the basic warnings listed in Important Safety Instructions and those listed below. • • • • Do not combine stain removal products. • • Follow fabric care label instructions. STAIN Read and comply with all instructions on stain removal products. Keep products in their original labeled containers and out of children's reach. Thoroughly wash any utensil used.
Common W ashing Pr oblems Washing Problems Many washing problems involve poor soil and stain removal, residues of lint and scum, and fabric damage. For satisfactory washing results, follow these suggestions provided by The Soap and Detergent Association. PROBLEM POSSIBLE CAUSES SOLUTIONS PREVENTIVE MEASURES Blue stains •Detergent or liquid fabric softener did not dissolve or disperse. •If caused by detergent, mix 1 cup (240 ml) white vinegar with 1 quart (.95 L) water in a plastic container.
Drying Procedures • Follow the guidelines below for preparing the load for drying. • Read the Dryer Operating Instructions for operating your specific model. • Always read and follow fabric care labels and laundry product labels. To reduce the risk of fire, electrical shock, or serious injury to persons or property, comply with the basic warnings listed in Important Safety Instructions and those listed below. 1. Prepare items for drying. Follow fabric care label instructions.
Cycle Signal Control (some models) When the Cycle Signal Control is ON, a signal will sound at the end of each cycle and during the Press Saver setting (some models). The volume is adjustable on some models. Features Drum Light (some models) A drum light will come on whenever the door is opened to illuminate the dryer drum during loading and unloading. Closing the door turns off the light. Drying Rack (some models) Use the drying rack to dry items which should not be tumble dried. 1.
Care and Cleaning To reduce risk of fire or serious injury to persons or property, comply with the basic warnings listed in Important Safety Instructions and those listed below. • Before cleaning the washer or dryer interior, unplug the electrical power cord to avoid electrical shock hazards. • Do not use any type spray cleanser when cleaning dryer interior. Hazardous fumes or electrical shock could occur. Inside the Washer Clean lint screen after every load.
Winterizing Instructions If the laundry center is stored in an area where freezing can occur or moved in freezing temperatures, follow these winterizing instructions to prevent damage to the laundry center: Follow Winterizing Instructions for cold weather care. 1. 2. 3. 4. 5. 6. 7. 8. Turn off water supply faucets. Disconnect hoses from water supply and drain water from hoses. Plug electrical cord into a properly grounded electrical outlet.
OCCURRENCE POSSIBLE CAUSE SOLUTION WASHER - OPERATING (continued) Cycle selector is not in correct position. Move indicator clockwise slightly. Pull out knob. Motor is overheated. Washer motor will stop if it becomes overheated. It will automatically restart after a cool down period of up to 30 minutes (if washer has not been manually turned off). Washer won't spin. Lid is not completely closed. Close lid completely. Safety lid lock must not be broken. Residue left in tub. Heavily soiled items.
OCCURRENCE POSSIBLE CAUSE SOLUTION Electrical power cord is not securely plugged in or plug may be loose. Make sure the plug fits tightly in wall outlet. House fuse blown or circuit breaker tripped. Reset circuit breaker or replace fuse. DRYER Dryer does not start. Make sure electrical line is not overloaded and the dryer is on a separate circuit. Dryer runs but won't heat. Drying cycle takes too long, outside of the dryer feels too hot or smells hot. Thermal limiter tripped.
Kenmore Appliance Warranty One Year Limited Warranty ® When installed, operated and maintained according to all instructions supplied with the product, if this appliance fails due ® to a defect in material or workmanship within one year from the date of purchase, call 1-800-4-MY-HOME® (1-800-469-4663) to arrange for free repair. If this appliance is used for other than private family purposes, this warranty applies for only 90 days from the date of purchase.