® Freezer Use & Care Guide Congelador Gufa para su uso y cuidado Cong_lateur Guide d'utilisation et d'entretien \ "TI Z ,0 Sears, Roebuck Sears Canada, and Co., Hoffman inc., Toronto, Estates, Ontario, IL 60179 Canada U.S.A. M5B 2B8 www.sears.
Record Serial/Model Important Safety Numbers Instructions ............ 2 ............... Kenmore Appliance Warranty .............. Protection Agreements ........................ First Steps ........................................... Energy Saving Tips .............................. Setting the Temperature Control .......... 2-3 3 4 5-6 6 6-7 Freezer Optional Features ................... 7-9 Care and Cleaning ............................... 10-11 Power Failure / Freezer Failure ............
ELECTRICAL iNFORMATiON These guidelines must be followed to ensure that safety mechanisms in the design of this freezer will operate properly. • • • Refer to the serialplate for correct electrical rating. The power cord of the appiiance is equipped with a three prong plug for your protection against shock hazards. It must be plugged directly into a properly groundedthree prong receptacle, protected with a 15 amp timedelay fuse or circuit breaker.
Master Protection Agreements Congratulations on making a smart purchase. Your new Kenmore _product is designed and manufactured for years of dependable operation. But like all products, it may require preventive maintenance or repair from time to time. That's when having a Master Protection Agreement can save you money and aggravation. The Master Protection Agreement also helps extend the life of your new product.
ThisUse&CareGuideprovidesspecificoperating instructions foryourmodel.Usethefreezeronlyas instructedinthisUse&CareGuide.Beforestartingthe freezer,follow theseimportant first steps. iNSTALLATiON • Plastic Choose a place that is near a grounded electrical outlet. Do Not use an extension cord or an adapter plug. • For the most efficient operation, the freezer should be located where surrounding temperatures will not exceed 110°F (43°C). Temperatures of 32°F (0°C) and below will NOT affect freezer operation.
DOOR REMOVAL TEMPERATURE (NON-ELECTRONIC MODELS) If door must be removed: 1. Gently lay freezer on its back, on a rug or blanket. 2. Remove two base screws and base panel. 3. Remove bottom hinge screws. 4. Remove plastic top hinge cover. 5. Remove screws from top hinge. 6. Remove top hinge from cabinet. 7. Remove door and bottom hinge from cabinet. 8. To replace door, reverse the above order and securely tighten all screws to prevent hinge slippage.
When the freezer is initially plugged in, the red "Hi TEMP" indicator will be on and the buzzer will sound. The indicator light will stay on until the freezer temperature is below 23°R To silence the buzzer, press the ALARM RESET button. BLUE DEFROST BUTTON (SOME CHEST MODELS) iMPORTANT: It is time to defrost and clean the freezer when the blue defrost button is completely covered with frost.
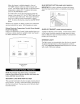
TILT=OUT SHELF ADJUSTABLE This shelf is located inside on the freezer door and provides additional storage space. To access an item, tilt top of "basket" shelf down. (SOME UPRIGHT MODELS) Tilt-Out ADJUSTABLE DOOR INTERIOR SHELVES Multi-position adjustable interior shelves can be moved to any position for larger or smaller packages. The shipping spacers that stabilize the shelves for shipping may be removed and discarded.
SHELF BOOKEND (SOME Glass Shelf Bookend UPRIGHT MODELS) Use these handy bookends to keep the boxed items stored neatly in your freezer. To adjust location, simply slide where desired. CHEST DiViDER (SOME CHEST MODELS) Use these clever dividers to custom-arrange a variety of different-sized storage bins in the bottom of your chest freezer.
To Defrost Chest Models with Defrost Drain: Place a shallow pan or the Divider/Drain Pan (if equipped) beneath the drain outlet. Pull out the outside drain plug (see figure 2). A r/2inch garden hose adapter can be used to drain the freezer directly into a floor drain (see figure 3). If your model is not equipped with an adapter, one can be purchased at most hardware stores. Pull out the drain plug inside the freezer (see figure 4). Defrost water will drain out.
CLEANING THE OUTSIDE Wash the cabinet with warm water and mild liquid detergent. Rinse well and wipe dry with a clean soft cloth. Replace parts and food. if leaving the freezer door open while on vacation, make certain that children cannot get into the freezer and become entrapped. VACATION AND MOVING TiPS Short Vacations: • Leave the freezer operating during vacations of less than three weeks.
TROUBLESHOOTING GUIDE PROBLEM FREEZER Before calling for service, review this list. It may save you time and expense. This list includes common occurences that are not the result of defective workmanship or materials in this appliance. CAUSE CORRECTION DOES NOT RUN Freezer does not run. Freezer runs too much or toe long. ,, Freezer is plugged into a circuit that has a ground fault interrupt. ,, Temperature control is in the OFF position. ,, Freezer may not be plugged in, or plug may be loose.
PROBLEM SOUND AND NOISE l CAUSE l CORRECTION (Cont.) Popping or cracking sound when compressor comes on. ,, Metal parts undergo expansion and contraction, as in hot water pipes. ,, This is normal. Sound will level off or disappear as freezer continues to run. Bubbling or gurgling like water boiling, ,, Refrigerant (used to cool freezer) is circulating throughout the system. ,, This is normal. Vibrating sound, WATER/MOISTURE/FROST Moisture forms freezer walls. forms on ouside of freezer.