Use & Care Guide Manual de Uso y Cuidado Kenmore ® CROSSOVER MAX Vacuum Cleaner TM Aspiradora Model/Modelo: 125.31220610 Vacuum Cleaner Help Line: 1-877-531-7321 8:00am-5:00pm EST, M-F Sears Brands Management Corporation www.kenmore.com www.sears.
TABLE OF CONTENTS Before Using Your New Vacuum Cleaner .................................................................................. 2 Packing List ....................................................................................................................................... 2 Kenmore Vacuum Cleaner Warranty .......................................................................................... 3 Important Safety Instructions...................................................................
KENMORE VACUUM CLEANER WARRANTY KENMORE LIMITED WARRANTY FOR ONE YEAR from the date of sale this product is warranted against defects in material or workmanship when it is assembled, operated and maintained according to all supplied instructions. WITH PROOF OF SALE, a defective appliance will be replaced free of charge. For warranty coverage details to obtain free replacement, visit the web page: www.kenmore.com/warranty.
IMPORTANT SAFETY INSTRUCTIONS Read all instructions in this guide before assembling or using your vacuum cleaner. WARNING: Your safety is important to us. To reduce the risk of re, electrical shock, injury to persons or damage when using your vacuum cleaner, follow basic safety precautions including the following: Use your vacuum cleaner only as described in this manual. only with Sears recommended attachments. Disconnect electrical supply before servicing or cleaning out the brush area.
PARTS AND FEATURES It is important to know your vacuum cleaner’s parts and features to assure its proper and safe use. Review these before using your vacuum cleaner. REPLACEMENT PARTS Part Part No. Exhaust Filter 20-60512* Primary Filter KC44KDMTZ000 Belt KC28SEDCZ000 To order a replacement part call 1-844-553-6667 or visit www.searspartsdirect.com * Available online at www.sears.com NOTE: Detailed illustrations and listings of all vacuum cleaner parts are also available at searspartsdirect.
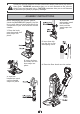
Please pay special attention to these hazard alert boxes, and follow any instructions given. WARNING statements alert you to such hazards as re, electric shock, burns and personal injury. CAUTION statements alert you to such hazards as personal injury and/or property damage. ASSEMBLY INSTRUCTIONS Before assembling the vacuum cleaner, 4. nsert the telescoping wand ' brush until the wand snaps into place.
. Push wand forward until the telescoping wand snaps in place. POWER CORD - WRAPPING WARNING Electrical Shock and Personal Injury Hazard Wrapping the cord too tightly puts stress on the cord and can cause cord damage. A damaged cord is an electrical shock hazard and could cause personal injury or damage. 1. Make sure that upper cord hook is in upright position as shown. 2. Wrap power cord loosely around cord hooks.
OPERATING INSTRUCTIONS CAUTION Moving parts! To reduce the risk of personal injury, DO NOT touch the agitator when vacuum cleaner is on. Contacting the agitator while it is rotating can cut, bruise or cause other injuries. Always turn and unplug from electrical outlet before servicing. Use caution when operating near children. POWER CORD - RELEASE & USE 4. Plug the polarized power cord into a 120 Volt outlet located ne ' r. 1.
OPERATION MODES UPRIGHT MODE CROSSOVER MODE 1. Release the handle by placing foot on the nozzle and pull back to change handle position. 1. Place vacuum cleaner in the upright position. 2. Press the ON/OFF button to turn the vacuum cleaner on or o . NOTE: The agitator does not rotate when the vacuum cleaner is in the upright position. 2. Press and hold body release. 3. % = of nozzle. When using the vacuum cleaner on bare ' s, press the BARE FLOOR selector to # $ r.
FLOOR BRUSH MODE USING ATTACHMENTS ON HANDLE 1. Press WAND RELEASE button. 1. Place the vacuum cleaner in the upright locked position. 2. Pull back to release w > ' brush. 3. Lift w ' # %rom vacuum cleaner. 2. Remove the handle from the wand by pressing the HANDLE RELEASE button. 3. Slide attachment collar over open end % 9 attachments as needed. See ATTACHMENT USE TABLE (page 11).
ATTACHMENTS COMBINATION TOOL TELESCOPING WAND The combination tool can be attached to either the handle or the telescoping wand. Slide the collar of the tool over the open end of the handle or wand. The wand length is adjustable and requires no assembly. To adjust, grip collar and slide to desired position. revice tool mode for cleaning in tight spaces such as furniture, between cushions, and stairs. See ATTACHMENT USE TABLE (page 11).
PERFORMANCE/SAFETY FEATURES MOTOR PROTECTION SYSTEM THERMAL PROTECTOR BY-PASS VALVE This vacuum cleaner has a thermal protector which automatically trips to protect the vacuum cleaner suction motor. % $ "rev 'ow of air to the motor, the thermal protector turns # y. This allows the motor to cool in order to prevent possible damage to the vacuum cleaner. This vacuum cleaner has a By-Pass Valve which prevents motor overheating and damage.
AGITATOR RESET SUCTION CONTROL The agitator has built-in protection against motor damage should the $ [ 9 % $ ows down or stops, the agitator overload protector # $ r. The vacuum cleaner suction motor will continue to run. The suction control allows you to change vacuum cleaner suction for di erent fabric and carpet weight. To correct problem: T# # " #$ vacuum cleaner, remove obstruction, then press the A\ TATOR RESET button.
VACUUM CLEANER CARE Always follow all safety precautions when performing maintenance to the vacuum cleaner. WARNING Electrical Shock And Personal Injury Hazard Disconnect electrical supply before servicing or cleaning the vacuum cleaner. Failure to do so could result in electrical shock or personal injury from vacuum cleaner suddenly starting. CLEANING EXTERIOR AND ATTACHMENTS 1. T# # " #$ vacuum cleaner. DO NOT drip water on vacuum cleaner. CAUTION 2.
EMPTYING DUST CUP WARNING Always unplug power cord from electrical outlet before performing any service on vacuum cleaner. TO REMOVE DUST CUP 1. Lift dust cup handle located at the top of the dust cup. TO EMPTY DUST CUP 1. Raise dust cup handle to the vertical position. 2. Hold dust cup over a trash container. 3. Press the dust cup latch downward to release the door. The door will swing open and the debris will fall into the trash container. 4.
TO REINSTALL DUST CUP 1. Place dust cup back into vacuum cleaner by inserting tilting back with the dust cup handle raised. 2. Lower the dust cup handle to lock dust cup in place. A noticeable “click” should be heard.
PRE-FILTER CLEANING The pr ] ed inside the dust cup. Check the pr ] %requently and clean when dirty. 1. Remove the dust cup as outlined in the EMPTYING DUST CUP (page 15). NOTE: Make sure dust cup is free of debris before opening. 2. Rotate dust cup lid assembly counterclockwise as indicated on the lid and lift o . To Reinstall: 1. Align the slots on the pre > alignment tabs inside dust cup lid assembly. Tabs Slots 2. Rotate pr ] as shown to lock in place. 3.
PRIMARY FILTER CLEANING The primar= located inside the dust cup lid. To Reinstall: 1. Place the primar= # cup lid. recommended to clean the primary > water at least once a month. Check the primar= frequently and clean when dirty. NOTE: When the cle $ % longer restores vacuum cleaner suction to full power, r " r. 1. Remove the dust cup as outlined in the EMPTYING DUST CUP (page 15). 2. Pull the dust cup lid latch and open the lid.
HEPA MEDIA EXHAUST FILTER EXHAUST FILTER The e{ # # replaced when it becomes dirty. The timing between replacement intervals will depend on the use conditions the vacuum cleaner is exposed to9 | # ecked when emptying the dust cup. | CANNOT be washed as it will lose its dust trapping ability. 4. Replace the e{ # over by placing bottom tab into the slot. 1. Remove e{ # over by pulling the release tab on the cover and rotating out from vacuum cleaner. 5.
BELT CHANGING WARNING Always unplug power cord from electrical outlet before performing maintenance to the vacuum cleaner. 6. Loop new belt around motor shaft and agitator. . Reinstall agitator back into nozzle by placing end caps into grooves. Replace belt whenever a burning rubber smell caused by excessive slippage occurs. 1. Lay vacuum cle ' > #" }} ' t. 2. Release lower plate by rotating the lower plate latches to the UNLOCK " 9 % ower plate. 8.
AGITATOR CLEANING NOZZLE To maintain ~ cleaning, the agitator must be kept free of carpet r, string, or hair build-up. After every 7 to 10 uses, unplug and turn vacuum cleaner over and check agitator for and hair build-up. scissors to remove any build-up entangled around the agitator. PET HANDIMATE® Cut any carpet pile and lint entangled around agitator with a pair of scissors.
REMOVING CLOGS TO REMOVE CLOG FROM HOSE Frequently check air path to make sure it is free of obstructions. TO REMOVE CLOG FROM PET HANDIMATE® CAUTION To reduce the risk of injury from moving parts, remove Pet HandiMate® from vacuum hose or wand before servicing. 1. Press WAND RELEASE button. 2. Pull back to release w > ' brush. 3. Lift w ' # %rom vacuum cleaner. Frequently check air path to make sure it is free of obstructions. 4.
TROUBLESHOOTING Revie> ] ]yourself solutions for minor performance problems. Any service needed, other than maintenance describe ! Care Guide, should be performed by @# ed service agent. WARNING Disconnect electrical supply before performing maintenance to the vacuum cleaner. Failure to do so could result in electrical shock or personal injury. PROBLEM Vacuum cleaner won’t run. POSSIBLE CAUSE 1. " #$$ed at wall outlet. 2. Tripped circuit breaker or blown fuse. 3.
PROBLEM Pet HandiMate® will not run when attached. Pet HandiMate®: Poor job of dirt pick-up. POSSIBLE CAUSE POSSIBLE SOLUTION 1. Carpet pile entangled around agitator. 1. Clean agitator. 2. Worn or broken belt. 2. Not a serviceable item, replace Pet HandiMate®. 1. Carpet pile entangled around agitator. 2. Worn or broken belt. 1. Clean agitator. Problem with vacuum cleaner. 4. Open suction control. 5. Hole in vacuum hose. - 24 - 2. Not a serviceable item, replace Pet HandiMate®. 3.
TABLA DE CONTENIDO Antes de usar su aspiradora nueva.............................................................................................. 1 Lista de embalaje ............................................................................................................................. 1 Garantía de la aspiradora de Kenmore...................................................................................... 2 Instrucciones importantes de seguridad .....................................................
GARANTÍA DE LA ASPIRADORA DE KENMORE DURANTE un año a partir de la fecha de compra este producto está garantizado contra defectos de materiales o mano de obra cuando se es ensamblado correctamente, operado y mantenido según las instrucciones suministradas. CON LA PRUEBA DE COMPRA, el aparato defectuoso será remplazado sin costo. Para los detalles de la cobertura de garantía, para obtener el reemplazo gratuito, visite la página web: www.kenmore.com/warranty.
INSTRUCCIONES IMPORTANTES DE SEGURIDAD Lea todas las instrucciones en este manual antes de armar o usar su aspiradora. ADVERTENCIA: Su seguridad es muy importante para nosotros. Para reducir el riesgo de incendio, choque eléctrico, lesión corporal o daños al utilizar su aspiradora, actúe de acuerdo con las precauciones básicas de seguridad, entre ellas: Use su aspiradora solamente como se describe en este manual. Use solamente con accesorios recomendados por Sears.
PIEZAS Y CARACTERÍSTICAS Es importante concer las piezas y características de su aspiradora para asegurar su uso adecuado y seguro. Examínelas antes de usar su aspiradora. PARTES DE REEMPLAZO Parte Pieza No. Filtro de escape 20-60512* Filtro primario KC44KDMTZ000 Correa KC28SEDCZ000 Para or ros de reemplazo llamando al 1-844-553-6667 or visitar ww.searspar tsdirect.com *Disponible en la página www.sears.
Por favor ponga atención especial a los cuadros que le alertaran de posibles peligros Advertencia: Este información le alertará de peligro de fuego, choques eléctricos, quemadas y lesiones. Cuidado: Este información le alertara de peligros como lesiones y daños de propiedad. INSTRUCTIONS DE ENSAMBLE Antes de armar la aspiradora, revise la LISTA DE EMBALAJE (pág 1). Use esta lista para v @# recibido todos los componentes de su nueva aspiradora Kenmore.
. Empuje el extensión hacia adelante hasta que el tubo telescópico encaje en su lugar. CORDÓN ELÉCTRICO ENROLLADO ADVERTENCIA Choque eléctrico y Peligro de daños personales Enrollar el cordón muy apretado pone estrés en el cordón y puede causar que este se dañe. Un cordón dañado es un peligro de choque eléctrico y puede causar daños personales. " Asegúrese de que el sujetador superior del cordón de liberación rápida se encuentre en posición hacia arriba.
INSTRUCCIONES DE OPERACIÓN CUIDADO ¡Partes en movimiento! Para reducir el riesgo de daños corporales, no toque el agitador cuando la aspiradora está encendida. El tocar el agitador mientras que está girando puede cortar, contusionar o causar otras lesiones. Siempre desconecte del tomacorriente antes de dar mantenimiento. Tenga cuidado al aspirar cerca de niños. CORDÓN ELÉCTRICO - LIBERACIÓN Y USO " Gire el sujetador del cordón hacia abajo para liberar el cordón eléctrico. 4.
MODALIDADES DE OPERACIÓN MODALIDAD VERTICAL LIBERACIÓN DE MODALIDAD DE CRUCE " Coloque su pie izquierdo en la boquilla de la aspiradora. Jale hacia atrás el manija para desenganchar el manija. " Colocar la aspiradora en posición vertical. 2. Para encender o apagar la aspiradora, presionar la interruptor de encendido/ apagado. NOTA: El agitador no girará cuando la aspiradora está en posición vertical. 2. Presione y sostenga el cuerpo de la aspiradora. 3.
MODALIDAD CEPILLO PARA PISOS USANDO ACCESORIOS EN EL MANIJA " Pulse el botón de WAND RELEASE. " Colocar la aspiradora en posición vertical. 2. Tire hacia atrás para liberar la extensión del cepillo de piso. 2. Retire la manija de la extensión pulsando el botón de HANDLE RELEASE. 3. Levante extensión y cepillo piso de la aspiradora. 3. Deslice el anillo de sujeción sobre el extremo abierto de la manija. Use los accesorios de acuerdo a como los necesite.
ACCESORIOS COMBINATION TOOL TUBO TELESCÓPICO La herramienta de combinación puede utilizarse en la manija o el tubo de extensión telescópico. Deslice el anillo de sujeción sobre el extremo abierto de la manija or el tubo. Utilice la herramienta de combinación en el modo de herramienta para hendiduras para limpieza en espacios reducidos, tales como muebles, entre cojines y escaleras. Ver la tabla de USO DE LOS ACCESORIOS (pág 10).
CARACTERÍSTICAS DE RENDIMIENTO/SEGURIDAD SISTEMA DE PROTECCIÓN DE MOTOR PROTECTOR TERMAL VÁLVULA DE ESCAPE Esta aspiradora tiene un protector termal que se ajusta automáticamente para proteger a la aspiradora del sobrecalentamiento. Si una obstrucción " '#[ re al motor, el protector termal apaga el motor automáticamente para permitir que el % evitar posibles daños a la aspiradora.
BOTÓN DE BELT RESET CONTROL DE ASPIRATIÓN El motor del agitador tiene una protección incorporada contra daño del motor en caso de que el agitador se bloquee. Si el agitador se pone lento o se detiene, el protector de sobrecarga del agitador apaga el motor del agitador. El motor de succión continuará funcionando. El control de aspiración le permite cambiar la potencia de aspiración de la aspiradora dependiendo del grosor de la tela o alfombra.
CUIDADO DE LA ASPIRADORA Siga siempre todas las instrucciones de seguridad antes de efectuar el mantenimiento a su aspiradora. ADVERTENCIA Peligro de choque eléctrico o lesión corporal Desconecte la unidad antes de efectuar el mantenimiento a su aspiradora. De lo contrario podría producirse un choque eléctrico o causar lesión corporal si la aspiradora arranca de manera imprevista. LIMPIEZA DEL EXTERIOR Y DE LOS ACCESORIOS " Desconecte el cordón eléctrico de la clavija de la pared.
VACIAR EL CONTENEDOR DE POLVO ADVERTENCIA Siempre desconecte el cordón électrico antes de reparar alguna parte de la aspiradora. PARA REMOVER EL CONTENEDOR DE POLVO " Levante la manija ubicada al tope del contenedor de polvo. PARA VACIAR EL CONTENEDOR DE POLVO . Gire la manija del cubo de la basura a la posición vertical. 2. Sostenga el canasto de polvo sobre un recipiente de basura. 3.
PARA REINSTALAR EL CONTENEDOR DE POLVO " Ponga el canasto del polvo de vuelta en la aspiradora insertando primero el fondo é inclinando hacia atrás con la manija del contenedor de polvo levantada. 2. Baje la manija del contenedor de polvo para trabar el contenedor en su lugar. Un "clic" fácil de notar será escuchado.
LIMPIEZA DEL PRE-FILTRO El pr ] ro se encuentra dentro del contenedor de polvo. Inspeccione con frecuencia el pr ] ro y límpielo si está sucio. Para reinstalar: " Alinee la ranura del pr ] ro con la lengüeta localizada dentro del contenedor de polvo. " Retirar el contenedor de polvo. Vea PARA REMOVER EL CONTENEDOR DE POLVO (pág 14). Langüetas Ranuras NOTA: Vacié el contenedor de polvo. 2.
LIMPIEZA DEL FILTRO PRIMARIO ro primario se encuentra dentro de la tapa del contenedor de basura. Para remplazar: " P ro primario dentro de la tapa del contenedor de polvo. Es re " ro con agua fría por lo menos una vez al mes. Re ro primario y limpiarlo cuando sea necesario. Filtro primario lavable NOTA: Una vez que haya limpiado el ro, y la aspiradora no alcanza la potencia máxima de succión, necesitará re " } ro.
FILTRO DE ESCAPE FILTRO DE ESCAPE ro de escape se debe reemplazar cuando este sucio. El tiempo de reemplazo depende de las condiciones de uso9 ro de escape de debe de revisas cada ves que se cambie la bolsa. ro de escape no puede ser lavado, perdería su capacidad de atrapar el polvo. 4. Para reinstale la cubier ro de escape insertando la lengüeta en la ranura. " Presione hacia abajo el seguro de la cubier ro de escape y jale hacia afuera para remover la tapa. 5.
CAMBIO DE LA CORREA " Coloque la nueva correa en el eje del motor y el agitador. ADVERTENCIA Peligro de choque eléctrico o lesión corporal . Coloque el agitador en las ranuras de la boquilla. Desconecte la unidad antes de efectuar el mantenimiento a su aspiradora. Remplace la correa cuando huela a llanta quemada esto causado por el excesivo resbalamiento de la correa. " Recostar la aspiradora con la parte de atrás hacia arriba y la boquilla plana. 2.
LIMPIEZA DEL AGITADOR BOQUILLA Para un aspirado e, el agitador deber ser mantenido libre de ras de alfombra, hilos, o acumulación de pelo. Luego de 7 a 10 usos, desenchufe y dé vuelta a la aspiradora y revise el agitador para ver si tiene acumulación de hilos, ras o pelo. Use tijeras para sacar cualquier acumulación atorada alrededor del agitador. PET HANDIMATE® Corte con unas tijeras el pelo de alfombra y la pelusa envueltos en el agitador.
REMOVER LAS OBSTRUCCIÓNES PARA REMOVER LA OBSTRUCCIÓNES DE LA MANGUERA Chequee frecuentemente el pasaje de aire para estar seguro de que está libre de obstrucciones. 1. Pulse el botón de WAND RELEASE. PARA REMOVER LA OBSTRUCCIÓN DEL PET HANDIMATE® ADVERTENCIA Para reducir el riesgo de daños personales quite el Pet Handi Mate de la manguera u el tubo antés de quitar los residunos. 2. Tire hacia atrás para liberar la extensión del cepillo de piso.
RECONOCIMIENTO DE PROBLEMAS Revise este recuadro para encontrar soluciones a problemas que puede corregir usted mismo. Cualquier otro servicio debe ser realizado por SEARS u otro agente de servicio o. ADVERTENCIA Peligro de choque eléctrico Desconecte la aspiradora antes de efectuar el mantenimiento a su aspiradora. De lo contrario podría producirse un choque eléctrico o causar lesión corporal. PROBLEMA CAUSA POSIBLE La aspiradora no . Está desconectada. enciende 2.
PROBLEMA CAUSA POSIBLE El Pet HandiMate® " Pila de la alfombra enredada no funciona alrededor del agitador. cuando està instalado. 2. Correa desgastada o rota. No recoge bien la basura. " Pila de la alfombra enredada alrededor del agitador. 2. Correa desgastada o rota. 3. Problema con la aspiradora. 4. Control de aspiración abierto. 5. Perforaciones en la manguera de aspiración. - 23 - SOLUCIÓN POSIBLE " Limpie el agitador. 2. Esta pieza no se puede arreglar.
@ [ \@ ] ^ K@ [ \@[ ]