Use & Care Guide Manual de Uso y Cuidado English/Espa_ol I(enmore icrowave Oven 0°9 Cuo Fto, 900 Watts Homo de Microondas 09Pl_(._(ul%co 900Vatios 405°730923 ] @,,,,,, %Bi'll'e / IIB_a_:_:_ 40,5o730993 405o730933] ] @,,,,,, IIBI_@/ Bbsg_ @,,,,,, S'lk_isless S'lkee_//\_sero _noxi_Sable/B_@g_o Customer Assistance / Asistencia al Cliente 1 -800-842-1289 Sears Brands Management Corporation Hoffman Estates, IL 60179 U.S.A. www.kenmore.com www.sears.com www.kmart.
PRECAUTIONS TO AVOID POSSIBLE EXPOSURE TO EXCESSIVE MICROWAVE ENERGY (a) Do not attempt harmful with (b) (c) to operate exposure the safety Do not place residue Do not operate the oven object between to accumulate the door (1)DOOR door open since this can not to defeat result oven closes the oven front and and the door or allow soil or surfaces. if it is damaged.
iMPORTANT SAFETY iNSTRUCTiONS WA R N IN G To reduce the r,sk of bums, e,eor shock, re, ,nju c to persons or exposure to excessive microwave safety 1. Read all instructions before precautions, oven energy 8. using the appliance. 2. Read and TIONS follow the specific: TO AVOID "PRECAU- POSSIBLE EXPOSURE TO EXCESSIVE MICROWAVE found on page when using your appliance, Use this appliance onlyfor uses as described in this manual. chemicals in this appliance.
20.Liquids, such aswater, coffee, orteaareabletobeoverheated beyond theboiling point without appearing tobeboiling. Visible bubbling orboiling when thecontainer is removed fromthemicrowave oven isnotalways present. THIS COULD RESULT IN VERY HOT LIQUIDS SUDDENLY BOILING OVER WHEN THE CONTAINER IS DISTURBED OR A SPOON OR OTHER i) Do not overheat ii) Stir the liquid both before UTENSIL IS INSERTED INTO THE LIQUID. the liquid.
1.Ashort power-supply cord isprovided toreduce therisks resulting frombecoming entangled in ortripping overalonger cord. 2.Longer cord sets orextension cords areavailable andmaybeused ifcareisexercised in their use. 3.Ifalong cord sets orextension cordisused: i) The marked electrical rating ofthecord setorextension marked electrical rating ofthecord setorextension cordshould beatleast asgreat astheelectrical rating oftheappliance. ii)Theextension cord must beagrounding-type 3-wire cord.
Materials you Utensils can use in microwave Aluminum foil Shielding meat only. Small or poultry smooth to prevent close to oven walls. oven walls. Browning dish Follow Dinnerware Glassware only. cracked or chipped Always remove cooking resistant Heat-resistant oven Paper plates while Paper Use to cover Parchment of if foil is too I inch (2.5cm) The bottom of browning the turntable. Incorrect manufacturer's may away from dish must be usage instructions.
SETTINGUP YOUR OVEN Names Remove o{ Oven the oven and Your oven Glass comes with Parts and Accessories all materials from the following accessories: tray the carton and oven cavity. 1 Turntable ring 1 Instruction Manual 1 A E D C G B A) Control B) Turntable shaft C) Turntable ring D) Glass panel tray E) Observation F) Oven G) Safety Turntable window Door interlock system installation Hub (underside) a. b. Never c.
Countertop installation Remove all packing Examine the oven dents or broken material and accessories. for any damage such as door. Do not install if oven is Cabinet: Remove any on the microwave damaged. protective film found oven cabinet Do not remove the light brown that is attached to the oven surface. Mica cover cavity to protect the magnetron. installation 1. Select a level surface that provide enough open space for the intake and/or outlet vents.
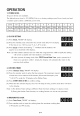
OPERATION ControlPanel and Features (5) (6) (1) Ti me Cook (2) Ti me Defrost (3) Power Level (4) Clock (s)Quick Touch Presets: Popcorn, Potato, Pizza, Frozen (6) Number Pads: 0 - 9 (7) Weight Defrost (8) Kitchen Timer (9) STOP Cancel Hold cooking, press 3 sec: once to stop Before oven; cooking starts, press twice (10) Memory Function (11) START ADD 30 SEC (12) Display Window EN-8 press to stop Vegetable, to clear oven all Beverage, Dinner previous settings. and clear all settings.
OPERATION 1. POWERLEVEL 10 power levels The default a number are power pad available. level is 10 (100%). to select a different Prior power to or during cooking, press Power Level pad and level. Level 10 9 8 7 6 5 4 3 2 1 0 Power 100% 90% 80% 70% 60% 50% 40% 30% 20% 10% 0% Display PLIO PL9 PL8 PL7 PL6 PL5 PL4 PL3 PL2 PL1 PLO 2.
(3)Press Power Press pads level; PL1 0 will 1 through LEVEL table display. 9 to select This is the a different default power level if desired. power level of 1 00%. See the POWER above. (4) Press STARTADD 30 SECt_ start cooking. Example: To cook the food with a. Press Time Cook, b. Press "1,5, 0, 0" in order c. Press Power then 1 ) In the process no operation level level, microwave power for 15 minutes. displays. for 15:00 press "5" to appear to select in the display.
7. TIME DEFROSTFUNCTION (1) Press Time Defrost, (2) Press number microwave Power power will display. pads to input defrosting (3) The default press "dEF2" Level power once, and time. The time is power level PL3 will display; range 3. if you is between want then press 00:01 to change and 99:99. the power the number level. STARTADD 30 SEC to (4) Press start defrosting. The remaining cooking time will be displayed. 8. POPCORN a) Press Popcorn "1.75", repeatedly "3.
12. DINNER PLATE a) Press Dinner display, Plate "9.0", b) Press START cooking repeatedly "12.0", ADD until the number "18.0" oz will display 30 SEC to cook, oven you wish appears in the in order. beeps once. Oven beeps 5 times when is finished. 13, PIZZA a) Press Pizza repeatedly until the number you wish appears in the display, "4.0", "8.0", "14.0" b) Press oz will display STARTADD 30 SEC to cooking cook, in order. oven beeps once. Oven beeps 5 times when is finished.
15. MULTI-STAGE COOKING At most 2 stages can be set for cooking. set to be the first Note:Quick Touch Example: saved 80% If one stage Presets Power as memory cannot Level be used in multi-stage for 5 minutes followed d. Press Time Level Cook e. Press Power once, then again, Level then press again, "1 ", "0", "0" Power then press first If you 0 Memory Level for 10 minutes; and "0" "6" to choose 60% Oven stage do not want to save as the first a particular step.
Maintenance Troubleshooting Check your problem by using the chart microwave oven still assistance: 800-842-1289. TROUBLE does not work will not start and try the solutions contact the following POSSIBLE CAUSE a. Electrical Oven below properly, cord for oven is oven c. Check in a. Use were or sparking and try instructions. microwave-safe cookwa used. Arcing re only. b. Do not operate b. The oven is operated when c. Clean food remains with oven empty. empty. c.
PRECAUCIONES PARA EVITAR POSIBLE EXPOSICION A EXCESIVA ENERG|A DE MICROONDAS (a) No intente puede operar causar Es importante (b) No ubicar ni permitir este homo una exposici6n no ning6n que daffina quebrar objeto residuos con la puerta a u obstruir entre los la pared de suciedad abierta energia cierres frontal ya que esto de microondas. de del o limpiadores seguridad. horno y la puerta se acumulen en los bordes.
INSTRUCCIONES DE SEGURIDAD IMPORTANTE$ ADVERTENCIA e,f,ndered0c,r e,r,es0o de seprodu 0ec(]n m(]dur(]s0 un(] desc(]rg(] et_ctric(]_ un incendio_ lesiones o exposiciones (] I(] energi(] microond(]s excesiv(] (]t momento de us(it este etectrodom_sfico, sig(] I(]s siguientes prec(]uciones de segurid(]d basic(is: 1. Lea rod(is ufitiz(]r I(]s instrucciones antes de por ejempto fr(]scos de vidrio, explot(]r pot Io que no deben en este horno. el etectrodom_sfico. 2.
] 9. Esta a plJcaci6n se dedica solamente para el usoprivado y dornestic_ 20. Los lJquidos, tales como et agua, caf6 o t6 pueden sobrecatentarse m6s all6 del punto de ebullid6n sin parecer haber hervido. El burbujeo o hervido visible de un redpiente al momento de sacarlo det homo de microondas no siempre est6 presente.
1.Uncabledeabastecimiento cortoreduce losriesgos derivados deenredarse o tropezarse conuncablemaslargo. 2.Cordones m_slargos ocables dem_sextensi6n est_n disponibles y pueden ser serutilizados siseejerce etcuidado ensuuso. 3.Siseutilizauncord6n largooconjuntos decables deextensi6n: i) Laclasificaci6n el_ctrica detjuego decables o laclasificaci6n el_ctrica de lasextensiones dejuegos decables oextensiones decables deben seral menos tangrande como laclasificaci6n el_ctrica delaparato.
Materiales que se pueden Observaciones L6mina de aluminio usar en el horno a microondas Solamente como protecci6n. Peque_as piezas lisas pueden ser usadas para cubrir partes delgadas de came o potlo para prevenir sobre cocci6n. Puede ocurrir que se formen arcos si el film est6 muy cerca de las paredes det horno. El film debe paredes del horno. Bandeja doradora Elementos para estar por Io menos a 2,5 cm de distancia de las Siga las instrucciones del fabricante.
PREPARANDOSU HORNO A MICROONDAS Nombres Retire de las partes et homo Su homo viene Bandeja de vidrio Anillo los materiales con los siguientes de su caja y de la cavidad del horno.
Previo a la instalacion Retire todo accesorJos. el material Examine el horno algL_n da_o como desviada o rota. de embalaje para descubrir ser abolladuras y los si este fiene o la puerta Instalaci6n 1. GabJnete:Quite todo el film protector que encuentre en la superficie del gabinete. No quite la tapa de Mica color marron claro adherida dentro de la cavidad del homo, ya que esta sirve para proteger la v,_lvula magnetron.
FUNCIONAMIENTO Panel de corttrol y funciortes (12) (5) (6) (1) Tiempo (2) Descong (3) Nivel (4) Reloj (5) Botbn de toca r,'_pida: Plato de comida (6) Teclas (7) Descong (8) Temporizador (9) STOP Cancelar todos los ajustes.
OPERACION 1. Nivel de potencia 10 Niveles de potencia disponibles El nivel de potencia por defecto es 10 (100%). Antes de o durante cocinar, Potencia y las teclas de nOmeros para elegir distinto nivel de potencia. Nivel Potencia 10 9 8 7 6 5 4 100% 90% 80% 70% 60% 50% 40% Aparato 2. PL10 A.juste de (1) Presione (2) Pulsar PL7 se mostrar6 actual Pulsar Reloj brillar y los Nota: PL8 PL6 PL5 PL4 3 2 1 0 30% 20% 10% 0% PL1 PL0 PL3 PL2 "00:00".
Ejemplo: paracocinar losalimentos con50% a. Presione Tiempo De Coccion, "00:00" de potencia de microondas por minutos. se indicar('_. b. Pulsar "1, 5, 0, 0" para que 15:00 aparezca en la pantalla. c. Presione Nivel De votencia una vez, luego presione "5" para de microonda. seleccionar el 50% d. Presione START A,_adir 30 segundos para empezar a cocinar.
8. Popcorn a) Presione Popcorn la pantalla, Por ejemplo, presione la cocci6n 9. Papas a) Presione Papas pantalla, b) 10. "3.0", veces "3.5" Popcorn STARTA_adir 30 b) Presione cuando Pulsar Pulsar Pulsar repetidas "1.75", hasta una vez, segundos "1.75" para repetidas "3 veces " aparecer6 hasta que STARTA_adir 30 segundos para Bebida a) Presione emite en se indicar6.
13. a) Pizza Presione Pizza "4.0", b) Presione la cocci6n 14. Funci6n (1) Pulsar 0 Memoria puede para seleccionar guarda como ajustar cocinar, la memoria memoria muestre b. Presione aparezca en la pantalla, et horno emite cinco sonidos cuando del procedimiento 1-3. La pantalla Nivel Si presiona e. Si desea procedimiento empezar. aparezca Un m_ximo en la de dos etapas procedimiento.
(1) Pulsar 0 MemorJa tres veces, en la pantalla se muestra (2) Pulsar Tiempo De Coccion una vez, y luego tiempo de cocci6n de la primera etapa. (3) Pulsar Nivel De Potencia de cocci6n (4) de PulsarTiempo (5) de cocci6n Pulsar Nivel de de otra "8" para vez, y luego segunda De Potencia cocci6n y luego 3.
MANTENIMIENTO Iocalizaci6n de defectos Fsta guJa de mantenimiento y probtemas ha sido desarrollada para que el usuario pueda referirse a ella en caso de que atg0n problema se presente con el aparato. Usted debe revisar esta guia antes de Ilamar a servicio t_cnico y determinar que Io que esta presentado el homo no sea posible resotverto por medio de estas instrucciones. PROBLEMA Et horno no da inicio POSIBLE a los procesos Chispeo o contacto met61ico a)Et cable conectado.
KENMORE ONE YEAR LIMITED WARRANTY If this product fails due to a defect in material or workmanship within one year from the date of purchase, return it with proof of purchase to any Sears store or other Kenmore outlet in the United States for free replacement. This warranty does not cover the oven cavity light bulb, which is an expendable the warranty part that can wear out from normal use within period. This warranty is void if this product is ever used for other than private household purposes.