
Manual
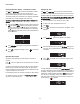
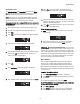
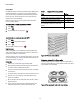
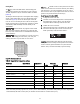

Table Of Contents
- KENMORE LIMITED WARRANTY
- Before setting oven controls
- Oven Controls
- Minimum & maximum control settings
- Setting the Clock
- Changing between 12 or 24 hour time of day display
- Setting Continuous Bake or 12 Hour Energy Saving
- Setting Oven Timer
- To Set Add 1 Minute Feature
- Setting the Oven Lockout
- Setting Silent Control Operation
- Setting Temperature display -- Fahrenheit or Celsius
- Operating Oven Lights
- Setting Cook Time
- Setting Delay Start
- Warm & Hold™
- Setting Bake
- Setting Broil
- Setting Convection Bake
- Setting Convection Roast
- Setting Convection Convert feature
- Setting the Slow Cook feature
- Cooking and Preparation tips for Slow Cook
- Restoring factory default settings
- Adjusting Oven Temperature
- Setting the Sabbath Feature (for use on Jewish Sabbath and Holidays)
- Self-Cleaning Operation
- Self-Cleaning Oven
- To Start the Self-Clean Cycle
- Stopping or Interrupting a Self-Cleaning Cycle
- Care and Cleaning
- Before You Call

13
Oven Controls
Setting Delay Start
The Bake, Cook Time, and Delay Start keys control the Delay
Start feature. The automatic timer of the Delay Start will turn
the oven on and off at the time you select in advance.
Note: If the clock is set for normal 12 hour display mode the
Delayed Time Bake or Delayed Timed Convection Bake cycle
can not be set to start more than 12 hours in advance.
To program the oven for a delayed BAKE start time and to shut
off automatically (example: baking at 350°F for 30 minutes and
starting at 5:30)
1. Be sure that the clock is set with the correct time of day.
2. Arrange oven rack(s) and place the food in the oven.
3. Press Bake
4. Press . The actual oven temperature will be displayed.
5. Press Cook Time.. Dashes will appear in the display.
6. Enter the desired baking time by using the numeric keypad
and pressing 3 0. Note: Baking time can be set from 1
minute to 11 hours and 59 minutes..
7. Press .
8. Press Delay Start. Dashes will appear in the display.
9. Enter the desired start time using the numeric keypad 5 3 0.
10. Press . The current time of day will appear in the
display. The set temperature will also show in the display.
11. When the desired start time is reached, the oven icon will
appear in the display and the oven will start to bake at the
previously selected temperature.
12. Press when baking is finished or at any time to cancel
the Delayed Time Bake feature.
When the bake time runs out:
1. END will appear in the display and the oven will turn off
automatically.
2. The control will beep 3 times. The control will continue to
beep 3 times every 30 seconds until STOP is pressed.
FOOD POISONING HAZARD. Do not let food
sit for more than one hour before or after cooking. Doing so can
result in food poisoning or sickness. Foods that can easily spoil
such as milk, eggs, fish, meat or poultry, should be chilled in the
refrigerator first. Even when chilled, they should not stand in the
oven for more than 1 hour before cooking begins, and should
be removed promptly when finished cooking
Warm & Hold™
Warm & Hold will keep cooked foods warm and ready for
serving for up to 3 hours after cooking has finished. After 3
hours the Warm & Hold will shut off automatically. Warm &
Hold should only be used with foods that are already at serving
temperatures. Warm & Hold will maintain the oven temperature
at 170° F (77°C).
Example - To set Warm & Hold:
1. Press Warm & Hold. HLd will appear in the display.
2. Press START. Warm & Hold will automatically turn off after
3 hours.
To turn Warm & Hold off at any time press STOP.
To set Warm & Hold to turn on automatically once a bake time
is set or while the oven is baking:
3. Press Warm & Hold.
4. Press START. The oven is now set to turn on automatically
after the Timed Bake or Delay Start Bake has finished.