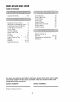
Single 24" Built-In Gas Wall Oven Horno b Gas de Pared de 24" de Una Unidad Tipo "Built-In" Empotrado Models, Modelos 911.30I68, 30169 t 229C4020P125-1 (SR-10347) Sears, Roebuck and Co., Hoffman Estates, IL 60179 U.S.A. www, sears.
BUILT-INGASWALLOVEN Table of Contents Appliance Safety .............. Oven Bottom 3-5 ........................... I9 Oven Light Bulb ................. Oven Racks ................... Oven Door Control Panel .............. Broiler Pan and Grid ........... Oven Interior ............................ Broiler Drawer ................. 19 20 20 21 21 21 21 ......... Features of Your Oven ........... 6 Removal of Packaging Tape. 6 Traditional Oven Functions .......7 Timed Oven Functions ..........
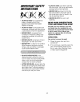
IMPORTANTSAFETYINSTRUCTIONS SAVE THESE INSTRUCTIONS Read all instructions before using this appliance. When using gas or electrical appliances, basic safety precautions should be followed, including the following: ,111111,111,1,111 , H information manual WARNING L.P. BURNER ADJUSTMENTS in this is not followed exactly, a fire, explosion, or gas leak may result causing property damage, personal i _ injury, or death. If you intend to use Liquefied Petroleum Gas (bottled gas) all LP.
iMPORTANTSAFETY iNSTRUCTIONS IMPORTANT SAFETY • TEACH CHILDREN not to play with controls or any part of the appliance and not to sit, climb or stand on fine oven door, or any other parts of the appliance NOTICE! The California Safe Drinking and Toxic Enforcement Act ° NEVER WEAR loose-fitting when using your appliance Water requires the governor of California to publish a list of substances known to the state to cause birth • NEVER USE a towel or other bulky cloth as a pothotder,, Make sure the poth
IMPORTANTSAFETY INSTRUCTIONS • ALWAYS USE care when opening the oven door Let hot air and steam escape before • NEVER moving USE aluminum foods foil to line the oven bottom Improper use of foil could start a fire, or result in the risk of electrical shock, • NEVER KEEP combustible READ THIS • NEVER HEAT unopened food containers Pressure buildup can cause the container to burst and drippings • NEVER water on a grease fire; it will only spread the flames.
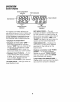
OPERATION FEATURESOF YOUR24" GASBUlLT-IN WALLOVEN Oven Control Clock Pad Oven Light Switch Oven Vent Grille Automatic Oven Light Switch Oven Rac Oven Light Model and Serial Number Removable Oven Racks Removable Oven Bottom Removable Oven Door Removable Broiler Drawer Broiler Pan & Grid Located Inside Broiler Drawer To remove the adhesive left from packaging tape, use household dishwashing liquid, mineral oil or cooking oil.. With a soft cloth, rub into the area and allow to soak.
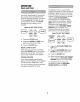
OPERATION OvenControl,Clockand Timer ,r,lLJ J 'U Z 0 , @ @@ @ @@ TEMP HOUR MIH Your new touch pad control will allow you to set various functions with ease,, Below are the different types of functions and a description of each.
OPERATION ControlDisplay Oven Temperature Indicator "ON" Indicators ..... \, 'o"""o"o'q ,oo-OOT I DELAY BAKE CLEAN _ BROIL\LOC, KED.,.
OPERATION Clock and Timer The Kitchen Timer The clock is used to time cooking processes or other household activities. It does not control the oven It can be set for up to 9 hours and 59 minutes It wilt count down in minutes until the LAST 60 SECONDS is must be set for the correct time of day before a delayed oven function can work property, The time of day cannot be changed during a timed oven function, but can be changed during a bake or broil function reached then the control will beep once.
OPERATION If you would like to return the 6- second beep, repeat steps above until the display shows your choice and press the START pad.
OPERATION OvenCookingTips Opening the door often to check foods will cause heat loss and poor baking results It is normal to have some odor when using your oven for the first time., To help eliminate this odor, ventilate the room by opening a window or using a vent hood.
OPERATION OvenCooking Tips(cont.) FLAT COOKIE SHEETS, without sides, allow air to circulate all around the cookies for even browning The Oven Temperature Sensor at the back of the oven continuously senses and controls the temperature inside the oven To keep a constant set temperature, the burner will cycle (turn on and off during cooking).
OPERATION Your oven has four (4) rack positions The top position is only a guide. It cannot be used as a rack position OvenCooking Tips(cont.) Guide You may feel that your new oven cooks differently than the oven it replaced. We recommend that you use your new oven a few weeks to become more __ 3-2-1-- familiar with it, following the times given in your recipes as a guide..
OPERATION Baking To set the oven to turn on at a later 0 time of day, cook for a specific amount of time and turn off automatically 1. Press the BAKE pad 1. Press the TEMP UP and/or DOWN arrow 2_ TEMP pads to set the oven temperature you prefer to use @ . @ press CLEAR/OFF hen the baking is finished pad pad Press the TEMP UP and/or DOWN arrow pads to set the oven temperature you prefer to use TEMP Press the START pad 4. Press the BAKE 3.
OPERATION The US,= Department of Agriculture recommends to cook meat and Broiling poultry thoroughly--meat to at least an INTERNAL temperature of 160°F and poultry to at least an INTERNAL temperature of 180°F Cooking to these temperatures usually protects against food-borne illness, Broiling is cooking by direct heat from the broiler burner The oven door should remain closed during broiling The closer you place foods to the broil burner, the faster foods brown on the outside yet remain red to pink
OPERATION Broiling(cont.) la. Press the BROIL pad, (This automatically set HI BroiL) lb° While the set indicator is flashing in the display, press the BROIL pad again if you prefer to use Lo Broil Use Lo Broil to cook foods After placing food on the broiler pan, slide the pan into the proper rack position in the dower broiling compartment Be sure the sump (grease well) in the pan is to the front of the oven such as poultry or thick cuts of meat thoroughly without over-browning them.
OPERATION SettingSpecialFeatures Your new touch pad control has additional features that you may choose to use, After making your selection, if you want to change the setting, follow the steps until the display shows your choice Your oven control lm 2. The control is automatically set to turn off the oven after 12 hours baking or 3 hours broiling should you forget and leave the oven on If you want to remove this feature: 1.
OPERATION SettingSpecialFeatures(cont.) Your new control has a cook and hold feature for timed cooking only that will keep hot cooked foods warm up to 3 hours after the timed cooking is finished To activate this feature: Your control is set to use the 12-hour 1. Press and hold, at the same time, the BAKE and BROIL pads for 3 seconds, until the display shows "SF." clock If you prefer to use the 24-hour Military Time clock or black out the display: 1.
CAREANDCLEANING RemovableParts electrical power to the AUTION: Disconnect oven at the main circuit breaker or fuse box _ before attempting to replace the oven light bulb. Do not touch a hot light bulb with wet hands or a wet cloth° Wait until the bulb has Unlock _ The oven bottom may be removed for cleaning heavy spillovers or to reach the oven burner, cooled and use a dry cloth.
CAREAND CLEANING Removable Parts(cont.) Broil Stop Position CLEANING MATERIALS = Dishwashing detergent ° Warm water • Scouring pad or soap-filled wool pad steel Hinge Bompin TO REMOVE Rack Guide __ 1. Open the door to the broil stop position 2. Grasp the door at each side and lift up and off the hinges DO NOT LIFT DOOR BY THE HANDLE. TO REMOVE 1. 2.
CAREAND CLEANING Cleaning TO CLEAN CLEANING For everyday cleaning, use glass cleaner and a paper towel For stubborn soil, use paste of baking soda and water Rinse thoroughly, MATERIALS • Dishwashing • Warm water • Soft cloth detergent Do not use abrasive cleaners, industrial cleaners, or bleach. CLEANING MATERIALS * Soft abrasive . Sponge CLEANING • Soap-filled • Commercial scrubber Do not use hard, abrasive cleaners, industrial cleaners, or bleach.
BEFORECALLING FORSERVICE To save you time and money, before making a service call, check the list below for any problem you may feel you have with the performance of your oven If the problem is something you cannot fix, use the Consumer Service Numbers located at the back of this manual When making any calls, have the Model No., Serial No., Repair Parts List, Use and Care Manual, and the Date of Purchase available.
BEFORECALLING FORSERVICE PROBLEM i POSSIBLE CAUSE POSSIBLE SOLUTION i iiiiiiii Oven temperature seems inaccurate. Oven control calibration Oven light does not work. a. Light switch position b. Oven light bulb loose or burned is in off See the temperature adjustment instructions following this section, a. Check switch setting, b. Check bulb, or replace out, , Foods do not broil a. rack smokes. Oven burners do not work. III i .................
"DO-IT-YOURSELF" TEMPERATURE ADJUSTMENT = You may feel that your new oven cooks differently than the oven it replaced We recommend that you use your new oven a few weeks to become more familiar with it, following the times given recipes as a guide Press and hold down both the BAKE and BROIL pads for 3 seconds, until the + display in your 2_ If you think your new oven is too hot (burning foods) or not hot enough (foods are undercooked), you can adjust the temperature yourself The appearance and textur
NOTES 25
NOTES 27
BUILT-IN WALLOVENWARRANTY fFuLL ONE-YEAR WARRANTY ON ALL PARTS tf, within one year from the date of installation, any part fails to function property due to a defect in material or workmanship, Sears will repair or replace it, at our option, free of charge. if this product is subjected to other than private family warranty is effective foi only 90 days WARRANTY SERVICE IS AVAILABLE BY CONTACTING SEARS SERVICE CENTER IN THE UNITED STATES.
HORNOA GASEMPOTRADO indice Seguridad en el uso de1 homo .................................. Fondo del homo ...................... 46 Foco de ta luz del homo .............46 Parrillas removibles det homo ....47 Puerta removible del horno ....... 47 Panel de control ......................... 48 Cacerofa y parrilla para asar a la parrilla ............................ 48 Interior del homo ....................... 48 Fondo del asador a la parrilla removibte .......................
INSTRUCCIONES DESEGURIDAD IMPORTANTES GUARDE ESTAS INSTRUCCIONES Lea todas las instrucciones antes de usar este aparato. Cuando use aparatos a gas o el_ctricos, se deberian seguir precauciones de seguridad, incluyendo Io siguiente: i, r Si la informaci6n en este ;IADVERTENCIA!! manual no se sigue exactamente, podria : resultar un incendio, una explosiSn, : o un escape de gas que causen da;5o i a la propiedad, heridas personales, : o muerte. .!.i i ADVERTENCIA AJUSTE A LOS DE QUEMADORES GAS LP.
INSTRUCCIONES IMPORTANTESPARASU SEGURIDAD ENSEi_IE A LOS NII_IOS a no jugar con los controfes o cualquier parte del homo No sentarse, subirse o pararse sobre la puerta del homo NUNCA USE ropa suelta cuando use el homo ;ADVERTENCIA DE SEGURIDAD IMPORTANTE! I NUNCA USE una loatla u otro pare abultado como agarraderas y asegurese que ta agarradera este seca Las agarraderas humedas podrian causar quemaduras por vapor Mantenga las toallas y los pahos para pfatos, agarraderas y otros patios a una distancia pru
INSTRUCCIONES IMPORTANTES PARASU SEGURIDAD SIEMPRE TENGA CUIDADO cuando abra ]a puerta del horno Deje que el aire catiente y et vapor escapen antes de mover los alimentos NUNCA USE papel de afuminio para forrar el rondo del homo,, E] uso inadecuado del papel de aluminio podria resultar en un gofpe de corriente o en un incendio • NUNCA OBSTRUYA ta abertura de [a ventilaci6n del homo, • SlEMPRE MANTENGA el homo despejada de cosas que se podfian quemar (gasolina y otros vapores o I_quidos inflamables) ;LEA
OPERACION CARACTERISTICAS DESU HORNOA GASEMPOTRADODE 24" Control del homo Reloj Interruptor para la luz dei horno Ventilaci6n y rejilla del homo Interruptor autom_tico para la luz Guias para del horno Luz del homo ! Ubicaci6n de nt_mero de modelo y serie Parrillas removibles del homo Fondo del homo removible Puerta removible del homo Caj6n del asador removible Cacerola y parrilla para asar ubicada dentro det caj6n asador Para sacar el residuo del adhesivo de la cinta de empaque, use detergente liq
OPERACION Control Del Homo, Reloj y CronSmetro f @ @@ @ @@ TEMP HOUR TIMED OVEH KtTCHEH TIMER MIH Su nuevo control de homo a botones te permitira programar las varias funciones con facitidad,, M&s abajo est_n los diferenles tipos de funciones y la descripci6n de cada uno ,,,,J @@ HOUR MIN @@ HORNEAR -- Cocina los atimentos en el horno tradicional a una temperatura que vada de 170_F a 550°F ASAR A LA PARRILLA -- Asa los atimentos en ALTO a 550°F o en BAJO a 450°F a cafor directo del elemento super
OPERACION Panel de Control Indicador de temperatura __ \ fs ,--,,-, Indicadores encendido de .,4"
OPERACION Reloj y CronSmetro El cron6metro de la cocina se usa para medir el tiempo de los procesos para cocinar u otras actividades del hogar No controfa el homo Se puede programar hasta 9 horas y 59 minutos Contar_ hacia atr_s en minutos hasta que ttegue a los ULTIMOS 60 SEGUNDOS, entonces el control sonar_ una vez Cuando la cuenta Itegue a CERO, el control sonar& 3 veces seguido de un sonido cada 6 segundos hasta que el botSn KITCHEN TIMER ONIOFF se empuje El sonido de cada 6 segundos se puede eliminar p
OPERACION Si desea regresar a los tonos de 6 segundos, repita los pasos de arriba hasta que el dial muestre su selecci6n y empuje el bot6n PARA EL COMIENZO (START) ControlDelHomo, Relojy CronSmetro TONO DE ATENClON -- Este tono sonar& si hace un error u omite algo mientras programa una funciOn del homo El nuevo control tiene una serie de tonos que sonaran a tiempos diferentes Estos tonos pueden sonar mientras usted programa una funci6n del horno, o al final de una funciOn del homo Tambi6n le avisar_ si
OPERACION ConsejosPara Cocinar en el Homo Si abre la puerta frecuentemente para mirar los afimentos causara una p6rdida de calory causara malos resultados cuando hornee Es normal sentir un poco de olor cuando use su homo por primera vez Para ayudar a eliminar este otor, ventile la habitaci6n abriendo una ventana o usando una campana de ventilaci6n.
OPERACiON ConsejosPara Cocinar en el Homo LAS BANDEJAS BAJAS, sin tados, para galtetas permiten que e! aire circute alrededor de las galletas para que se doren en forma pareja. El Sensor de Temperatura del Homo en la parte trasera del homo mide y controla continuamente la temperatura dentro del homo Para mantener una temperatura programada constante, los quemadores har&n un ciclo de encendido (se prenden y se apagan durante la cocci6n).
OPERACION ConsejosPara Cocinar en el Homo (cont.
OPERACION CSmoHornear Para programar que el homo se encienda a una hora posterior def dia, cocine pot una cantidad de tiempo especifica y se apague aui.om_ticamente.. 1. Empuje el boi6n BAKE 1, Empuje e! bot6n BAKE . TEMP @ Empuje los botones con las flechas TEMP, para programar la temperatura del homo que desea usar.. @ @ TEMP 3, Empuje el bot6n START 4_ . Empuje e! botOn OVEN COOKING TIME .
OPERACION El Deparlamento de Agricuitura de los Estados Unidos recomienda cocinar la came y las ayes comptetamente--la came a un cafor tNTERNO de por lo menos t60°F y ias ayes a un calor INTERNO de por (o menos 180°F El cocinar a estas temperaturas generalmente protege contra enfermedades causadas por los alimentos.
OPERACION CSmoAsar A La Parrilla la. Empuje et bot6n BROIL. (Esto autom_ticamente programa ASADO en HI-ALTO). lb. Mientras el indicador de programa pestaSea en el dial, empuje nuevamente el bot6n BROIL si prefiere asar en BAJO (LO) Ase en LO (BAJO) para cocinar bien alimentos tales como aves o cortes de came gruesos sin que se doren dernasiado, 2. 3.
OPERACION CSmoSeleccionar Programas Especiales Su nuevo control a botones tiene caracterfsticas adicionales que usted podria usar Despu6s de hacer su selecci6n, si usted desea cambiar ef programa, siga los pasos tqasta que el dial muestre su setecci6n El control del homo estA programado para la selecci6n de temperaturas en Fahrenheit La mayoria de las recetas se dan usando la escala Fahrenheit Usted puede cambiar esto y usar una selecci6n en Centigrados El controt se programa automaticamente para apagarse
OPERACION CSmoSeleccionar ProgramasEspeciales Su nuevo control tiene una funci6n para cocinar y mantener ta temperatura para cocinar autom_ticamente solamente que mantendra los alimentos tibios hasta 3 horas despues que el cocinado automAtico haya terminado Para activar esta funci6n: Su control est& programado para usar el reloj en 12 horas Si usted prefiere usar Hora Militar de 24 horas o poner et dial en blanco, se hace asi: Empuje y sujete, a la rnisma vez, los botones BAKE y BROIL por 3 segundos, hast
CUIDADOYLIMPIEZA PartesRemovibles r ,tt_,,,t,,,t • Usted debe desconectar el RECAUCION: poder el_ctrico hacia el horno en el interruptor principal del circuito o en la caja de los fusibles antes de tratar de reemplazar los focos de la luz del homo.
CUIDADOYLIMPIEZA PartesRemovib/es (cont.) Posici6n de tope para asar a la parrilla MATERIALES DE LIMPIEZA • Detergente para platos • Agua tibia • Lanas para fregar o lanitla de acero con jab6n Bisagra PARA SACAR 1. Abra ta puerta hasta la posici6n para asar a la parrilla, de la parrilla __ 2. Tome la puerta de cada lado, levantela y saquela de las bisagras, NO LEVANTE LA PUERTA DE LA MANILLA. COMO SACAR i, 1. Tire las parriltas hasta la posici6n de tope 2.
CUIDADOYLIMPIEZA Limpieza PARA LIMPIAR Para limpieza diaria, use un iimpiador para vidrios y una toalla de papel Para suciedad pesada, use una pasta de soda para hornear y agua Enjuague bien, MATERIALES DE LIMPIEZA • Detergente liquido para pla!os . Agua tibia • Patio suave No use limpiadores abrasivos limpiadores industriales, o blanquedores (cloro).
ANTESDELLAMARPARAUNSERVICIO Para ahorrar tiempo y dinero, antes de llamar para un servicio, revise la lista de m_s abajo para cuatquier problema que usted crea que tiene con el funcionamiento de su homo Si el probfema es atgo que usted no puede reparar, use tos Numeros de Servicio para el Consumidor que se encuentran al final de este manual Cuando haga un Ilamado, tenga disponible el n_mero de modeio, n_mero de serie, lista de partes para reparaciones, manual de uso y cuidado y la fecha de compra.
ANTESDELLAMARPARAUNSERVICIO PROBLEMA POSIBLE CAUSA POSIBLE SOLUCION Calibracidn del control del homo, Yea la instrucciones para ajustar la temperatura que siguen esta secci6n I'1 La temperatura del homo no parece estar exacta. , i I iii La luz del homo no funciona IIUl!lll!!llU! a, El interruptor de la tuz a. est_ apagado b, El foco de ta luz del homo estA suelto o quemado Revise o reemptace el foco de la fuz a. Posici6n incorrecta de a. la parrifla b.
AJUSTESDE TEMPERATURA "HAGALOSUSTEDMISMO" Usted podria pensar que su nuevo homo cocina diferentemente at homo que reernpIaz6 Recomendamos que use su homo nuevo unas pocas semanas para que se familiarice con el, siguiendo los tiempos que se dan en tas recetas como una guia + Si cree que su nuevo homo est& funcionando demasiado caliente (quema la comida) o no calienta Io suficiente (la comida no queda bien cocida) usted mismo puede ajustar la temperatura La apariencia y la textura de los alimentos son mejor
NOTAS 52
NOTAS 53
NOTAS 54
GARANTIA DELHORNO DEPAREDEMPOTRADO UN AI_O COMPLETO DE GARANTIA PARA TODAS Si, dentro de un a_o de la fecha de instalaci6n, funcionar adecuadamente debido a un defecto mano, Sears la repararA o reemplazar_, Si este producto es sometido garant[a de arriba es efectiva LAS PARTES cualquier parte deja de en el material o la obra de a nuestra opci6n, sin costo a un uso que no sea el familiar por sotamente 90 dias privado, la EL SERVICIO DE GARANTIA ESTA DlSPONIBLE PONIENDOSE EN CONTACTO CON EL CENT
For repair of major brand appliances in your own home... no matter who made it, no matter who sold it! 1-800-4-MY-HOME sMAnytime, dayornight .... (1-800-469-4663) : ii www.sears.com :; .......................................................................................... !?i;: To bring in products such as vacuums, lawn equipment and electronics for repair, callfor the location of your nearest Sears Parts & Repair Center 1-800-488-1222 Anytime, ..... dayor night :: www,sears.