Double 27" Built-In Wall Oven Use & C_re Guide Homo de Pared Empotrado Doble de 27" Gu_a para el Uso y Cuidado Models, Modelos 911.47722, It I 47724, 47729 J I•, ., i- • 229C4020P306-2 (SR-10495-2) 20P306-2ENv01 I Sears, Roebuck and Co., Hoffman Estates, IL 60179 U.S.A. www.sears.
DOUBLEBUILT-INWALLOVEN Tableof Contents Oven Safety .......................... 3-4 Self-Cleaning Cycle (Upper Oven) ................... 20-21 Control Panel .......................... 22 Broiler Pan and Grid ............... 22 Oven Interior - Self-Cleaning (Upper Oven) ......................... 22 Oven Interior - Conventional (Lower Oven) .......................... 22 Oven Light Bulb ...................... 23 Oven Racks ............................ 23 Oven Door ..............................
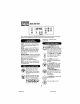
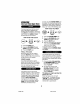
IMPORTANT SAFETYINSTRUCTIONS SAVE THESE INSTRUCTIONS Read aU Instructions before using this appliance. When using gas or electrical appliances, basic safety precautions should be followed, including the following: • NEVER USE a towel or other bulky cloth as a potholder Make sure the potholder is dry. Moist potholders could cause steam burns. DO NOT let petholders touch hot surfaces. • ALWAYS KEEP the oven area free To ensure safety for yourself, family from things that will burn.
IMPORTANT SAFETY INSTRUCTIONS • DO ROTtouch heatingelements,surfaces nearthemor interiorovensurfaces.These maybe hot enoughto causeburns even thoughthey aredark in color.
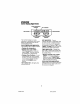
OPERATION FEATURESOF YOURWALLOVER Self-Clean Automatic LowerOven Contml UpperOvsn Contml Automatic Oven ;witch Broil Element (both ovens) _ Oven Light (upper oven only) Broiler Pan and Grid -- Self-Cleaning Model & Serial Number Location- (upper oven) Removable Self-Cleaning Door Gasket (upper oven) (both ovens) Oven Rack Guides (both Ovens) Oven VentJ LocsUon _(behind grille, both ovens) Removable Oven Racks {both ovens) Bake (both ovens) To remove the adhesive left from packaging tape, use
OPERATION OvenControl,Clockand Timer (UpperOven) @ ® ®® ®®@ Your new touch pad oven control will allow you to set various functions with ease. Below are the different types of functions and a description of each. automatically,at the end of the cooking time. BAKE- Cooks foods in the traditional oven witha temperature rangeof 170°F to 550_F. BROIL- Cooksfoods at 550°F HI broil or 450°FLO broil from the direct heatof the upper element.
OPERATION ControlDisplay(UpperOven) Oven Temperature Indicator "On" Indlcator Sat Indicator -- Timed Oven Function Indicator Indicator Oven Function Indicator The Control Display is an easy reference for using your even control. Below are descriptions of how the Control Display works. OVEN TEMPERATURE INDICATOR This indicator has a multiple purpose. • Displays the temperature • Displays error code "ERR" If the oven temperature indicator flashes "ERR", then you have set an invalid time or temperature.
OPERATION Clockand Timer(UpperOven) seconds until the KITCHEN TIMER pad is pressed. The 6-second beep can be removed for future cycles if desired. For directions on removing this continuous beep, see Tones on the following page. The clock must be set for the correct time of day before a delayed oven function can work properly. The time of day cannot be changed during a timed even function, but can be changed during a bake or broil function. HOW TO SET THE TIMER 1. Pressthe KITCHEN TIMER pad. 2.
If you would like to return the 6-second beep, repeat steps above until the display shows your choice and press the START pad A'n'ENTION TONE - This tone wil! sound if you make an error or an oversight is made while setting an oven function OPERATION OvenControl, Clockand Timer (Upper Oven) Your new control has a series of tones that will sound at different times.
OPERATION OvenCookingTips Opening the door often to check foods will cause heat loss and poor baking results it is normal to have some odor when using your oven for the first time To hetp eliminate this odor, ventilate the room by opening a window or using a vent hood Preheating is bringing the oven temperature up to the temperature you will be using during baking. Let the oven preheat thoroughly when recipes calt for preheating. IMPORTANT: Never cover the oven bottom or oven rack with aluminum foil.
OPERATION OvenCookingTips The low temperature zone of your oven (between 170°F and 2CO°F)is available to keep hot cooked foods warm. However, foods should not be kept at these temperatures longer than 2 hours. The Oven Temperature Sensor at the back of the oven continuously senses and controls the temperature inside the oven. To keep a constant set temperature, the elements will cycle (turn on and off during cooking).
OPERATION OvenCookingTips_aking and Broiling (Lower Oven) °,,'f?h, The oven racks are designed with stops, a convenience as well as a safety precaution. The guides have a bump to prevent the racks from tilting when racks are pulled out of the oven. This design allows the racks to be inserted in only one way. 2. When baking is complete, turn OVEN CONTROL knob to OFF. 1. Open lower oven door to the broil stop position.
OPERATION Baking& Roasting (UpperOven) To set the oven to turn on at a later time of day, cook for a specific amount of time and turn off automatically. BAKE pad. 1. Press the (_ (_ TEMP 1. Press the BAKE pad 2, and/or Press the TEMParrow UP DOWN pads to set the oven temperature prefer to use you TEMP 3. START Pressthepad <_ 2. Press the TEMP UP and/or DOWN arrow pads to set the oven temperature you prefer to use. Press the OVEN COOKING TIME pad. ®®4.
OPERATION Broiling(BothOvens) The closer you place foods to the broil element, the faster foods brown on the outside yet remain red to pink _nthe center Broiling is cooking by direct heat from the upper element. The oven door should remain open to the broil stop position during broiling Ij Moving meats away from the element will allow the meat to cook to the center while browning on the outside. Cook side 1 at least 2 minutes longer than side 2.
OPERATION 2. Setting Special Features (Upper Oven) (a) Press the BROIL and OVEN COOKING TIME pads at the same time The control display will show the degrees sign and _,F- Your new touch pad control has additional features that you may choose to use. After making your selection, if you want to change the setting, follow the steps until the display shows your choice, (b) Press the BROIL and OVEN COOKING TIME pads at the same time again This will change "F" (Fahrenheit) to "C" (Celsius), 3.
OPERATION Ov#ing SpecialFeatures (UpperOven) This special feature will allow you to change the speed; #1 means speed of change is slow up to #5 which means speed of change is fast. To set the speed you prefer, follow these steps: t.
OPERATION Setting Special Features (UpperOvea) (_4. No signal will be gtven. Touch the BAKE pad. (_) 5. temperature The preset starting will "[EMP automatically be set to 350°F. thepads UP or OOWNTap arrow to (Designed for use on the Jewish Sabbath and Holidays.
G OPERATION Setting Special Features (Upper Oven) @ TEMP HOW TO SET FOR TIMED BAKING/ ROASTING-IMMEDIATE START AND AUTOMATIC STOP NOTE: To understand how the oven control works, practice using regular (non-Sabbath) Immediate Start and Automatic Stop before entering the Sabbath mode Make sure the clock shows the correct time of day and the oven is off To adjust the oven temperature, touch the BAKE pad and tap the UP or DOWN arrow pads to increase or decrease the temperature in 5° increments.
OPERATION Setting Special Features (Upper Oven) HOW TO EXIT THE SABBATH FEATURE ® ® 1. Touch the CLEAR/OFF pad. 2. If the oven is cooking, wait for a random delay period of approximately 30 seconds to 1 minute, until only m is in the display. 3. Touch and hold both the BAKE and BROIL pads, at the same time, until the display shows "SF." 4. Tap the DELAY START TIME pad until "12 Shdn" or "no shdn" appears in the display. "12 Shdn" indicates that the oven will automatically turn off after 12 hours.
CARE AND CLEANING Self-Cleaning Cycle (UpperOven) The door gasket is designed to have a 5'-6' gap at the bottom of the door. This allows for proper air circulation. OoorPanel Gasket 1. Remove the broiler pan and grid, utensils and any foil that may be in the oven. 2. If your oven is equipped with nickel oven racks, they should be removed. If your oven is equipped with gray porcelain-coated oven racks, they may stay in the oven during the self-clean cycle 3.
CAREANg CLEANING Self-CleaningCycle (UpperOven) After the cycle, you may notice some white ash in the oven. Just wipe it up with a damp cloth or sponge. If white spots remain, scrub them with a soap-filled steel wool pad. Be sure to rinse thoroughly. These are usually deposits of salt that cannot be removed during the cycle. The Clean Cycle, including cooldown time, offers preset optTonsof 3, 4 or 5 hours,but you may changethis to any tTmebetween3 and 5 hours.
TO CLEAN CAREANDCLEANING Cleaning inside the oven after each use will make clean-up easier. For heavy soil, if a commercial oven cleaner is used, follow the label directions carefully Do not get any cleaner on the temperature sensor Rinse well after cleaning. b CLEANING MATERIALS • Dishwashing detergent • Warm water • Soft cloth Oo not use abrasive cleaners, Industrial cleaners or bleach. _Te Do not attempt to clean the oven unless It Is completely cool.
CAREAND CLEANING Cleaning/Removable Parts 3. Place the tabs of the glass cover Tnto the grooves of the socket. 4. Turn the glass cover clockwise V4turn. 5. Reconnectelectrical power to the ovenat the maincircuit breaker or fuse box. disconnect electdcal CAUTION: You must power to the oven at the main circuit k)reaker or fuse box before attempting to replace oven light bulbs. Do not touch the light bulbs with bare hands. The bulbs get very hot very quickly.
CAREMID CL£A#I#6 RemovableParts RemovableOven Door (cont.) Hinge Arm 3. Fullyopen the door. If the door will not fully open, the indentation I is not seated correctly in the bottomedge of the slot. The door is very heavy. Be carefulwhen removing andlifting the door. Do not lift the door by the handle. 4. Push the hinge locks TO REMOVE 1. Fully open the door. 2. Pul! the hinge locks down toward the door frame, to the unlocked position. This may require a flat-blade screwdriver.
BEFORECALLINGFORSERVICE To save you time and money, before making a service call check the list below for any problem you may feel you have with the performance of your oven. If the problem is something you cannot fix, use the Consumer Service Numbers located at the back of this guide. When making any calls, have the Model No., Serial No., Repair Parts List, Use and Care Guide and the Date of Purchase available. PROBLEM POSSIBLE CAUSE POSSIBLE SOLUTION The display of your Oven malfunc',ion.
BEFORECALLINGFORSERVICE PROBLEM POSSIBLE CAUSE Oven smokes. e. Dirty oven. Foods do not bake properly. a. Oven was not preheated a. Check for heavy spillover b. Use of foil not b. Improper use of recommended. aluminum foil. c. Clean pan and grid c. Broiler pan containing after each use. grease left in the oven. b. Improper rack or pan placement c. Oven vent blocked or covered, d. Improper use of foil e. Impropertemperature setting for utensil used. f. Oven temperature needs adjustment. g.
"170IT YOURSELF" TEMPERATURE ADJUSTMENT You may feel that your new oven cooks differently than the oven it replaced. We recommend that you use your new oven a few weeks to become more familiar with it,following the times given in your recipes as a guide, If you think your new oven is too hot (burning foods) or not hot enough (foods are undercooked), you can adjust the temperature yourself, The appearance and texture of foods is a better indicator of oven accuracy than an oven thermometer.
"DO IT YOURSELF" TEMPERATURE ADJUSTMENT (_1. both the BAKE and Press holdstdown BROILand pads, (_ 3 seconds, until the the same time "BF." for display shows (_2. If you think the oven is not hot enough, (_) to Increase 3a. arrow Press pad the TEMP UP (+) the temperature up TEMP to +_LS° F @ or If you think the oven is too hot, 3b. Press the TEMP DOWN arrow pad to decrease (-) the temperature down to -35°F. 4. A factory set 2 digit Press thewill BAKE number showpad.
NOTES 29 201::_30_2FJqvQ1 2/14_3, 3:57 PM
OUILT-IN WALLOVENWARRANTY fFULL ONE YEAR WARRANTY ON ALL PARTS If, within one year from the date of installation, any part falls to function properly due to a defect in material or workmanship, Sears will repair or replace it. at our option, free of charge. If this product is subjected to other than private family use, the above warranty is effective for only 90 days. WARRANTY SERVICE IS AVAILABLE BY CALLING SEARS SERVICE AT 1-800-4-MY-HOME ®.
HORNODE PARED EMPOTRADODOBLE Indice El ©ale de autolimpieza (homo superior) ...................... 49-50 Panel de control ............................ 51 CaoeroIa y parrilla para asar ala pamlla ........................................... 51 Interior del homo con autolimpieza (homo superior) ....... 51 tnterior del homo conven©onal (homo inferior) .............................. 51 Foco de la luz del homo ............... 52 Parrillas Oel homo ......................... 52 Puerta del homo ....................
INSTRUCClONES DESEGURIDAD IMPORTANTES GUARDE ESTAS INSTRUCCIONES Lea todas las instrucclones antes de usar este aparato. Cuando use aparatos a gas o el_ctrlcos, se deberian seguir precauciones de seguridad, incluyendo Io slgulente: • NUNCA USE una toalla u otro paRo abultado como agarradera, Asegt]rese que ra agarradera est6 seea Las agarraderas h6medas podrian causar quemaduras por vapor.
INSTRUCCIONES DESEGURIDAD IMPORTANTES sefio de la puerta en los hornoscon autolimpieza. Es esencial para un buen sellado. • NUNCA TRATF de limpiar los utenwlios, elias, partesremovibleso la cacerola y la parrilla para asaren el ciclo de auto$impieza. • NO USE limpiaqorespara hornos- No se deberia usar ningunaclase de limpiadorpara homes dentroo alrededor de cualquier parte delhomo. • NO TOQUE las Buperficies para calentar, las superficies cerca de elias o tas superficies interiores.
OPERACIO# CARACTERI$TICAS DESU HORNOSDE PARED Cerrojo de le puerta pare Control del homo inferior Control del homo (homo superior) Interruptor automlitico de le Elemento pare aser e ie (ambos hornos) U bicacidn (homo superior solamente) Cacerola y panilie pBr8 8ser e Inferior del homo ,con autolimpieza (homo superior) Ubicaci6n del n,',mero de modelo Puerfe removihle del (ambos hornos) Sello de le puerto pare autollmpleza (homo superior) homo (detr_s de le rejllla ambos hornos) (embos homes)
OPERACION Control Del Homo, Reloj, Y CronGmetroDe La Cocina (Homo Superior} ® ®® @@@ Su nuevo control de homo a botones le permitir_ programar las varias funciones con facilidad. Mas abajo estan los diferentes tipos de func]ones y la descfipc]On de cada uno. HORNEAR- Cocina los alimentos en el homo _) tradicional a tlnatemperatura que varia de 170°Fa 550°F.
OPERAClON Panel De Control (Homo Superior) Indlcadorde temperature Indicadordeencendido delhorno_ ,.,.m. Indicadorde BBB BB-BB _, _ _ Indicador de tunci6n del homo Indicadorde la hora Indicador defunci6n del homo El Dial de Control es una referencia f&cil para ut]lizar el control del homo. Mas abajo est_n las descripciones para indicar c6mo funciona el Dial de Control.
Ileg ue a CERO, el control sonara 3 vecos seguido de un sonido cada 6 segundos hasla que el boron KITCHEN TIMER se empuje. El son]do de carla 6 segundos se puede eliminar para ciclos futuros si se desea. Para las instrucciones de cdmo eliminar estos sonidos continuos, yea TONOS en la p_gina siguiente. OPERACIO# Reloj YCroodmetro Deta Cocino(HomoSuperior) El relol debe ponerse a la correcta hora del dia anles que una funci6n demorada del horrid func]one correctamente.
TONO DE ATENCION - Este tono sonar& si hace un error u omite algo mienlras programa una funci6n del homo OPERAClON ControlDelHomo,Reloj Y Cronmetro(HorBoSuperior) Unos ejemplos serian: a. Programar un Gi61ode limpieza y la puerta del homo no esta bien cerrada b, Programar una funci6n y no empujar el bot6n START El nuevo control tiene una serie de tonos que sonaran a tiempos diferentes Estos tonos pueden sonar mientras usted programa una funci6n del homo, o al final de una funci6n del homo.
OPERAClON Consejo$Para Cocinar En El Homo Si abre la pueda frecuentemente para mirar los alimentos, causar_ una perdida de color y males resultados cuando hornee Es normal sentir un poca de olor cuando use su homo per primera vez. Esto es causado per el calentamiento de las pabes nuevas y del aislante. Pare ayudar a eliminar este oler, ventile la habilaci6n abriendo una ventana El precalentamiento es subir la temperalura del homo a la temperature que va a user cuando homee.
OPERACION ConsejosPare Cocinar En E1Homo Los resultados del horneado ser_ meier si las cacerolas para hornear est_.ncentradas en el home Io mas posible. Si est_ horneando con mas de un utensilio, col6quelos de manera que cada uno tenga per Io menos de 1"a 1V2"de espacio de aire a su alrededor. Coloque los utensilios de manera que n_nguno quede directamente encima de otre Cuando use su conveniente operaci6n de Comienzo Demorado, los allmentos tales come productos I_tcteos, pescado, eves, etc.
OPERACION Consejos Para Cocinar EnEl Ilomo/CGmo Hornear (HomoInferior) _£R o_m I, _1 ,@ Las parrillas del homo est_n diseSadas con topes, una conveniencia y tambien una precauci6n de segurBdad.Cuando los parrillas estan colocadas correctamente en el homo, las guias tienen un tope para prevenir que los parrillas se den vuella cuando se sacan del homo. Este diseNo permite que los parrillas puedan set inserladas de solo una manera. OFF _ '_ _ girar ponga la o 1.
OPERACION CmoI mur Y (11 oSuper ) Para programar que el homo se enc]enda a una hora posterior del dia, coctne por una cantidad de tiempo especi£ca y se apague autom_ticamente. (_1. Empuje el bot6n BAKE. (_ TEMP 1. Empuje el bot6n BAKE. 2. con Empuje las flechas los botones SUBIR y/o BAJAR la programar la temperatura TEMPERATURA para del homo que desea usar TEMP selecc]onar @ ®® Para programar que el homo cocine por un tiempo determinado y se apague automaticamente: Empuje el boron BAKE.
Mientras m_s cerca coloque los alimentos del elemento para asar, m_s r&pido se dorar_n per afuera, pero quedando rojo o rosario en el centre. OPERACION C6enoAsarA La Parrilla (AmbosHornos) Colocando las carnes lejos del elemento permitir_ que las carries se cocinen en eL centre mientras se doran per afuera. Usando estas posiciones, cocine el lade 1 per Io mends 2 minutes m_s que el lade 2.
2. OPERACION CGmoSele¢cionorProgramas EspecialesDolCoMrol (HomoSuperior) El nuevo control a botones tiene programas adicionales que usted ptJede seleccionar, Despues de hacer su selecciBn, si desea cambiar el programa, siga los pasos hasta que el dial muestre £u seleociBn, 3. (a) Empuje los botBns BROIL y OVEN COOKING "riMEal mismo tiempo. El dial del control mostrar& el signo para grade y "F," (b) Empuie los botBns BROIL y OVEN COOKING TIME al mismo tiempo nuevamente.
OPERAClON CGmo$eleccionar Programas Especiales (Homo Superior) Este Programa Especial le permitir& cambiar la velocidad; #1 signiflca que el cambio de velocidad es lento basra #5 que significa que el cambio de velocidad es r_pido Para seleccionar la velocidad que prefiere, siga estos pasos: Su nuevo control tiene una funciOn para cocinar y mantener la lemperatura para cocinar automaticamente solamente que manlendr_ !os alimentos tibios basra 3 horas despues que e$cocinado automatico haya terminado.
OPERAClO# CGmoSeleccionar Programas Especiales (Homo _lperior) (_ TIEIMP botones o DOWN que a 350°F. UP Toque los se serlalan con flechas para aumentar o disminu]r la temperatura en incrementoss de 5 °. La temperatura se puede ajustar entre 170°F y 550°F. No aparecerA ninguna sepal o temperatura (Dlse_ado para usar los S_b_dos Judios y los dias festivos.) La caracteristica de los S&bados puede ser usada solamente para hornear/asar.
OPERACIO# C no SeleccionarPrograms EspeGiales(HomoSuperior) (_) "rEMP NOTA: Para entender oPmo el contror del homo trabal a, practique util]zanqo las funciPnes de In]cio Inmediato y Parada Autorn_tica regulares (no S_bado) antes de usar la func On dei S&bado. 10. Despueselde un pefioqo g. Empuje boron START. de retraso al azar de aprox_madamente 30 s_Ejul_dos _, 1 il_ii_t_to, las sefiales -_ ¢aparecer_n en la pantalla ]ndicando que el homo ha s]do alustaqo para hornear/ asar.
OPERACION C no SeleccionarProgramas Especiales(HomoSuperior) COMO SALIR SABADO DE LA FUNCI(_N DEL Si el homo est& cocinando, espere por un periodo de tiempo 0e retraso al azar de aproximadamente 30 segundos a 1 m!nuto, hasta que las se_ales • aparezcan en la pantalla. (_) (_) empujados 8mbo9 3, Empuje botones, y BAKE sostenga (Horneado) y BROIL, al la pantalla muestre "SF.
CUIDADO Y LIMPIF.ZA El Ciclo De Autolimpiuza (Homo Superior) El sello de la puerta est& disefiado para que tenga un espac]o de 5"_" en el rondo del homo. Esto permite la circulaci(_n adecuad8 del aire 1. Saque la cacerola y la parrilla para asar, utensilios, y cualquier papal de aluminio que podda quedar en el horno. 2, Si su horno esl& equipado con parr]llas de niquel, los mismas deben ser removidas.
CUIDADO Y UMPIEZA E1Ciclo De Autolimpieza (Homo Superior) El Ciclode limpieza,incluyendoel tiempode enfriamiento,ofreceopcionespreseleccionadas de 3, 4, 6 5 horas,pero usted puedecambiar escogiendocualquiertlempoentre3 y 5 horas. SELECTCLEAN(SELECCIONDE 1. UMPIEZA).Mostrar_ sm 3 ho_ras:Empuieel boronde 3 horasy "Lo" en el dial. Eslafunciones recomendadaparaderrames pequenosconlenidos.
CUIDADOY UMPIEZA MA33£RIALES DE LIMPIFZA • Detergente liquido • Agua [bia • P_r_o suave para platos POLVOS PARA LIMPIAR El Iimpiar eqinterior del homo despu_s de cada uso hara mas facil la limpieza. Para suciedad pesada, si se usa un _impiador para b_rnos come,ciaL siga las instrucuiones de la etiqueta cuidadosamente. No ponga nada de limpiador sohre el sensor de la temperatura. Enjuague bien despues de limp_ar NO use Ilmp_ldores abrllsivos, llmpiadoms industrlales, o blanquedores (l:loro).
CUIDADOYLIMPIEZA _ 5, RECAUCION: Usteddebe MATERIALES DE LIMPIEZA desconectar el poder ehtctrico hacla el homo en el intermptor t_lnclpel del circulto o en la caJa de los fuMMes antes de ttatar de reemplazar los feces de [a luz del homo, No toque el foco de la I_ con las manes peladas, El foco se calienta mucho nipidemerdo. Envtmlva la gems de espuma del paquete del foco slrededor del foco pare la Instalackin. Cuando saque el foco, espere haste que el foco se hays enfriado y use url p_lo Seco.
Puerta removible del homo (cont.) CUIDADO Y LIMPIEZA Partes Removibles 3. lapuerta. Si la puerta no abre eompletamente, la hendidura no est_ asentada correctamente en el extremo inferior de la ranura Ls puerta es muypesacla.Tenga cuidado cuando remueva y levante la puert8. No levante la puertapor la manlja. C(_MOSACAR 1, Abralapuerta comptetamente. 2. Tire los topes de las bisagras hacia abalo hacia el marco de la 4. /_ I_ . 5. puerta, a la posicion de abierto.
ANTESDELLAMARPARAUNSERVlClO Pare ahorrar tiempo y dinero, antes de Ilamar para un serv]cio, revise la I]sta de mas aba)o para cualquier problema que usted crea que tiene con el funcionamiento de su homo. Si el prohlema es algo que usled no puede reparar, use los Numeros de Servicio pare el Consumidor qua se encuentran al fina! de este guia. Cuando haga un Ilamado, tonga disponible el nL_merode modelo, n,',mero de aerie, Ilsta de patios pars reparaclones, gu{a de use y cuidado y la techa de compre.
ANTESDE LLAMAR PARAUN $ERVICIO PROBLEMA El homo humea, POSIBLE CAUSA a. Homo 8uc]o. b. Mal uso de papel aluminio. Los allmentos no $e hom_n 8decuadamerlte. de a. Vea que no hayan derrames grandes b. Limpie el exceso de suciedad antes de comenzar un ciclo de autolimp]eza c. Se dejo la cacerola para asar con grasa dentro del homo. 6, Umpie la cacerola y la parrilla despues de cada uso a. a.
AJUSTE$BE TEMPERATURA "llAGALOSliSTEDMISAfO" Usted podda pensar que su nuevo homo coolna diferentemente aLhomo due reemplaz0. Recomendamos que use su homo nuevo unas pocas semana£ para que se fam]]iar]ce con el, sigu]endo los t]empos que se dan en qas recetas cored una guia, Si cree que su nuevo homo est& funcionando demasiado caliente (quema la comida) o no calienta Eosuficiente (la comida no queda bien cocida) usted mismo puede ajustar la temperatura.
AJUSTESDE TEMPEP,4TURA "IMGALOSlISTEDMISMO" SI plensa que el horno no esta suflclentemente c81iente, Q TEMP la flecha elSUBIR 3a. Empuje botOn TEMP con para aumentar (+) la temperatura hasta +35°F. o (_1. Si piense que el homo estlt demasiado caliente, botones BAKE y BROIL, Empuje y sujete al mismo tiempolospar 3 segundos, hasta que e] dial muestre "SF." 3b. Empuje el botOn con la flecha BAJAR TEMP para bejar (-) la temperatura hasta -35°F. (_4. (_2. Un nt3mero puesto en Empuje el dos baton BAKE.
GARANTIA DEL#ORNODE PAREDEMPOTRADO f UN AI_IOCOMPLETO DE GARANTIA PARA TODAS LAS PARTES Si, dentro de un afio de la fecha de instalaci6n, cualquier parte deja de funcionar adecuadamente debido a un defecto en el material o la obra de mano, Sears la reparar_, o reempPazar_t,a nuestra opci6n, sin costo. Si este produeto es someticlo a un uso que no sea el familiar privado, la garantia de arriba es efeetiva por solamente 90 dias.
Contrato de proteccibn maestra Felicitaciones por su compra inteligenle Su nuevo aparato Kenmore® est,. diserlado y fabricado para muchos afros de operaci6n confiable. Sin embargo, al igual que todos los productos, puede requerir de mantenimiento o reparaci6n preventives en cualquier momento. Es ahi cuando el contrato de protecci6n maestra le puede ahorrar dinero y molestias. Adquiera un Contrate de protecci6n maestra ahora mismo y prot6jase contfa inconvenientesy gastos mesperados.
i iiiiiiiiii_iiiiiii iiiiiiiii Your Home !_ _ For repair-in your home-of all major brandappliances, lawn and gardenequipment,or heatingand coolingsystems no matter who made it, no matter who sold itt For the replacementparts, accessories and owner's manualsthat you need to do-it-yourself. _-. For Sears professionalinstallationof homeappliances and itemslike garagedoor openers and water heaters. 1-800-4-MY-HOME _ (1.-800469-4863) Call anytime, day or night (U,S.A. and Canada) yr.