
Manual


BEFORE A CLEAN CYCLE
1. Remove the broiler pan and grid, oven racks, all
utensils and any foil that may be in the oven. Do not
try to clean utensils or any other objects in the oven
during a self.clean cycle, if oven racks are left in
the oven during a clean cycle, they will darken,
lose their luster and become hard to slide. If
you choose to leave the racks in the oven, you can
polish the edges of the racks with steel wool and
apply a small amount of vegetable oil to the rack
edges after the self-clean cycle. This will make the
racks easier to slide.
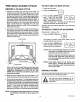
2. Soil on the oven front frame, under the front edge of
the cooktop, the door liner outside the door gasket
and the front edge of the oven cavity (about t" into the
oven) will not be cleaned during a clean cycle (see
illustratlon below). Clean these areas by hand before
starting a clean cycle,
FRONT FRAME
1. Close the oven door.
2. Press the CLEAN pad.
3. Press the UP or DOWN arrow _
pad. "3:00, HR, and TIME
CLEAN" wlll appear In the dis-
play. Three hours is the pro-
grammed clean time. You may set the clean time
anywhere between two and four hours.
The door will lock and the self-clean cycle will begin
immediately.
TO DELAY START OF CLEANING
Follow steps 1-3 above, then:
1. Press the STOP TIlME pad.
i i
The display will show "SET STOP TIME" and the
earliest stop time you can set.
2. Press the UP or DOWN arrow I---'--7 £_-'-I
pad to change the stop time to
a later time of day if desired.
DOOR
• DOOR UNER
Use hot water with a soap4IIled steel wool pad, then
rinse well. DO NOT LET WATER RUN DOWN
THROUGH OPENINGS iN THE TOP OF THE
DOOR. Door should be completely open when
cleaning top edge.
3. Wipe up heavy splllovers on the oven bottom, Too
much soil may cause smoking during the clean cycle.
4. Do not rub the door gasket. The fiberglass material of
the gasket hasanextremely low resista ncetoabrasiom
An intact and well fitting oven door gasket is essential
for energy efficient oven operation and good baking
results. If you notice the gasket becoming worn,
frayed or damaged in any way or if it has become
displaced on the door, you should replace the gasket.
NOTE:
NOTE:
Oven automatically figures the start.
ing time so cleaning will end at the
stop time you have selected.
Before a delayed self-clean cycle you
can find out when the oven is set to
turn on by pushing and holding CLEAN
for 3 seconds.
Oven light shoutd be off during self.
clean cycle. Leaving the light on dur-
ing a self.clean cycle will shorten the
llfe of your bulb.
DOUBLE OVENS
You can set a self-clean cycle for only one oven at atime.
The oven control uses one timing system.
A Do not use oven cleaners in or
around any part or your self.clean-
ing oven,
NOTE: The gasket is designed with a 5"-6" gap at
the bottom of the door to allow proper air
flow.
10
NESCL04-2