Use & Care Guide Manual de Uso y Cuidado English / Español Models/Modelos: 795.7132* Kenmore Elite ® Bottom Freezer Refrigerator Congelador Inferior Refrigerador * = color number, número de color. P/N MFL67851503 Sears Brands Management Corporation Hoffman Estates, IL 60179 U.S.A. www.kenmore.com www.sears.com Sears Canada Inc. Toronto, Ontario, Canada M5B 2C3 www.sears.
TABLE OF CONTENTS Warranty............................................................................. 3 Freezer Section Protection Agreements .............................................. 4 Durabase ........................................................ 25 Important Safety Instructions ........................... 5-7 Durabase Divider .......................................... 25 Electrical & Grounding Requirements .............. 7 Pullout Drawer ...............................................
WARRANTY REFRIGERATOR WARRANTY ® Kenmore Elite Limited Warranty When this appliance is installed, operated and maintained according to all supplied instructions, the following warranty coverage applies. To arrange for warranty service, call 1-800-4-MY-HOME® (1-800-469-4663). • For one year from the date of purchase, free repair will be provided if any non-consumable part of this appliance fails due to defective materials or workmanship.
PROTECTION AGREEMENTS Master Protection Agreements • Power surge protection against electrical damage due to power Congratulations on making a smart purchase. Your new Kenmore® product is designed and manufactured for years of dependable operation. But like all products, it may require preventive maintenance or repair from time to time. That’s when having a Master Protection Agreement can save you money and aggravation.
IMPORTANT SAFETY INSTRUCTIONS BASIC SAFETY PRECAUTIONS This guide contains many important safety messages. Always read and obey all safety messages. This is the safety alert symbol. It alerts you to safety messages that inform you of hazards that can kill or hurt you or others, or cause damage to the product. All safety messages will be preceded by the safety alert symbol and the hazard signal word DANGER, WARNING or CAUTION.
WARNING v Before replacing a burned-out or broken light bulb, XQSOXJ WKH UHIULJHUDWRU RU WXUQ Rç SRZHU DW WKH FLUFXLW breaker or fuse box in order to avoid contact with a live ZLUH oODPHQW $ EXUQHG RXW OLJKW EXOE PD\ EUHDN ZKHQ EHLQJ UHSODFHG H[SRVLQJ WKH ZLUH oODPHQW v DO NOT touch the automatic ice making mechanism while the refrigerator is plugged in. v DO NOT refreeze frozen foods which have thawed completely. The United States Department of Agriculture in Home and Garden Bulletin No.
CFC/HCFC DISPOSAL Your old refrigerator may have a cooling system WKDW XVHG &)&V RU +&)&V FKORURpXRURFDUERQV RU K\GURFKORURpXRURFDUERQV &)&V DQG +&)&V DUH believed to harm stratospheric ozone if released to the atmosphere. Other refrigerants may also cause harm to the environment if released to the atmosphere.
PARTS AND FEATURES A N B C M D E F G L H K I J O Use this page to become more familiar with the parts and features of your refrigerator. NOTE: This guide covers several different models. The refrigerator you have purchased may have some or all of the items listed below. The locations of the features shown below may not match your model.
REFRIGERATOR INSTALLATION WARNING WARNING Excessive Weight Hazard: Excessive Weight Hazard: Your refrigerator is heavy. When moving the refrigerator for cleaning or service, be sure to protect WKH pRRU $OZD\V SXOO WKH UHIULJHUDWRU VWUDLJKW RXW ZKHQ moving it. Do not wiggle or walk the refrigerator when WU\LQJ WR PRYH LW DV pRRU GDPDJH FRXOG RFFXU Use two or more people to move and install the refrigerator. Failure to do so can result in back or other injury.
REFRIGERATOR INSTALLATION INSTALLATION (continued) PRIOR TO USE 1. Clean your refrigerator thoroughly and wipe dust that accumulated during shipping. all 1. To avoid noise and vibration, the unit must be leveled If required, and installed on a solidly constructed adjust the leveling legs to compensate for unevenness The front should be slightly higher than of the the rear to aid in door closing. Leveling legs can be turned easily by tipping the cabinet slightly.
REFRIGERATOR INSTALLATION NOTE: Removing the doors is always recommended when it is necessary to move the refrigerator through a narrow opening. If it is necessary to remove the handles, follow the directions below. HOW TO REMOVE REFRIGERATOR DOOR HANDLE Mounting Fasteners NOTE: Handle appearance may vary from illustrations on this page. Loosen the set screws with a 3/32 in. Allen wrench and remove the handle. Set Screw NOTE: If the handle mounting fasteners need to be tightened or removed, use a ¼ in.
REFRIGERATOR INSTALLATION NOTE: Removing the doors is always recommended when it is necessary to move the refrigerator through a narrow opening. If it is necessary to remove the handles, follow the directions below. HOW TO REMOVE/REPLACE FREEZER DOOR HANDLE NOTE: Handle appearance may vary from illustrations on this page. To remove, loosen the set screws located on the lower side of the handle with a 1/8 in. Allen wrench and remove the handle.
REFRIGERATOR INSTALLATION REMOVING AND REPLACING REFRIGERATOR DOORS CAUTION: Before you begin, remove food and bins from the doors. (1) (2) WARNING Excessive Weight Hazard: Use two or more people to remove and install the refrigerator doors. Failure to do so can result in back or other injury. (3) (4) (7) (5) WARNING (6) Electrical Shock Hazard 1. Open the door. Remove the top hinge cover screw (1). Lift up the cover (2). 2. Remove the cover. 3. Pull out the tube (3). 4.
REFRIGERATOR INSTALLATION Reinstalling the Refrigerator Door Left Door Right Door 1. Lower the door onto middle hinge pin (9). 2. Line up the holes in the top hinge with the holes in the top of the refrigerator. Insert and tighten the three Bolts (6) in the hinge. 3. Hook the tabs on right side of hinge cover (2) under the edge of the top hinge (4) and position the cover in place. Insert and tighten the cover screw (1). 1. Lower the door onto middle hinge pin (10). 2.
REFRIGERATOR INSTALLATION HOW TO REMOVE THE FREEZER DRAWER Remove the screw WARNING: Use two or more people to remove and install the freezer drawer. Failure to do so can result in back or other injury. 2 from the rail on both sides. 2 CAUTION: Do not hold the handle when removing or replacing the drawer. The handle may come off, causing personal injury. To remove, pull the drawer out to full extension. Lift the drawer up and out, making sure to clear the rail system.
REFRIGERATOR INSTALLATION HOW TO INSTALL THE FREEZER DRAWER With the drawer pulled out to full extension, insert the lower basket 4 in the rail assembly. Pull out each rail to full extension. 4 To replace, with the drawer pulled out to full extension, insert the drawer in the rail assembly. Grasp the drawer on each side and hook door supports 1 into the rail tabs 2 located on both sides. 1 2 Lower the door into its final position and tighten the screws 3 located on both sides.
REFRIGERATOR INSTALLATION LEVELING AND DOOR ALIGNMENT Door Alignment If the space between your doors is uneven, follow the instructions below to align the doors: Leveling After installing, plug the refrigerator’s power cord into a 3-prong grounded outlet and push the refrigerator into the oQDO SRVLWLRQ Your refrigerator has two front leveling legs—one on the right and one on the left. Adjust the legs to alter the tilt from front-to-back or side-to-side.
USING YOUR REFRIGERATOR SETTING THE CONTROLS NOTE: When changing control settings, wait 24 hours before making additional adjustments. The controls are set correctly when milk or juice is as cold as you would If the temperature in like and when ice cream is either compartment is too cold or too warm, change the setting one increment at a time. Wait 24 hours for the change to stabilize before adjusting again.
USING YOUR REFRIGERATOR Articulating Mullion This feature is a metal strip attached to the left door that articulates (rotates) 90 degrees as the door is closed, forming a mullion (base) for the left and right door gaskets to seal against. Control Lock • When power is initially connected to the refrigerator, the Lock function is • If you want to activate the Lock function to lock other buttons, press and hold the Door Alarm button for three seconds or more.
USING YOUR REFRIGERATOR AUTOMATIC ICEMAKER The icemaker will produce approximately 70-210 cubes in a 24-hour period, depending on freezer compartment temperature, room temperature, number of door openings and other operating conditions. WARNING Personal Injury Hazard DO NOT place fingers or hands on the automatic ice making mechanism while the refrigerator is plugged in. • It takes about 12 to 24 hours for a newly installed refrigerator to begin making ice. Wait 72 hours for full ice production to occur.
USING YOUR REFRIGERATOR FOOD STORAGE GUIDE Wrap or store food in the refrigerator in airtight and moisture-proof material unless otherwise noted. This prevents food odor and taste transfer throughout the refrigerator. For dated products, check date code to ensure freshness. Items STORING FROZEN FOOD NOTE: Check a freezer guide or a reliable cookbook for further information about preparing food for freezing or food storage times. Freezing Your freezer will not quick-freeze a large quantity of food.
USING YOUR REFRIGERATOR REFRIGERATOR SECTION WATER DISPENSER WATER TRAY To dispense cold water, push on the dispenser switch with a glass. To remove the tray, press down on either of the front corners and pull out. NOTE: There is no drain beneath the tray. You may need to empty the tray of any liquid that collects in it. Dispenser Switch Push Some dripping may occur after dispensing. Hold your cup beneath the dispenser for a few seconds after dispensing to catch all of the drops.
USING YOUR REFRIGERATOR REFRIGERATOR SHELVES The shelves in your refrigerator are adjustable to meet your individual storage needs. Your model may have full or split shelves. Adjusting the shelves to fit different heights of items will make finding the exact item you want easier. Doing so will also reduce the amount of time the refrigerator door is open which will save energy. IMPORTANT: Do not clean glass shelves with warm water while they are cold.
USING YOUR REFRIGERATOR To remove the glass 1. Lift up the glass under the crisper cover. 2. Pull the glass up and out. DOOR BINS The door bins are removable for easy cleaning and adjustment. 1. To remove the bin, simply lift the bin up and pull straight out. 2. To replace the bin, slide it in above the desired support and push down until it snaps into place. NOTE: Pantry drawer not shown for clarity. NOTE: Some bins may vary in appearance and will only fit in one location.
USING YOUR REFRIGERATOR DURABASE REMOVAL AND REPLACEMENT PULLOUT DRAWER 1. To remove the Durabase, open the drawer to full extension 1 . Push the Durabase to the back as much as possible, tilt the front of the Durabase up, and then lift it up and out 2 . 2. To replace, tilt the back of the Durabase into the drawer, then lower it down and into the rail assembly. 1 1. To remove, pull the drawer out to full extension. Lift the drawer up and out, making sure to clear the rail system. 2 2.
WATER FILTER WATER FILTER It is recommended that you replace the water • Approximately every 6 months. indicator • When the water turns on. • When the water dispenser output decreases. • When the ice cubes are smaller than normal. up into • Rotate the water position and close the cover. The cover will click when closed correctly. 1. Remove the old water filter. • Lower or remove the top left shelf to allow the water to rotate all the way down. • Press the push button to open the cover.
WATER FILTER Performance Data Sheet The concentration of the indicated substances in water entering the system was reduced to a concentration less than or HTXDO WR WKH SHUPLVVLEOH OLPLW IRU ZDWHU OHDYLQJ WKH V\VWHP DV VSHFLoHG LQ 16) $16, 6WDQGDUG DQG 6WDQGDUG 6\VWHP WHVWHG DQG FHUWLoHG E\ 16) ,QWHUQDWLRQDO DJDLQVW 16) $16, 6WDQGDUG DQG 6WDQGDUG IRU WKH reduction of substances listed below.
WATER FILTER WARNING Application Guidelines/Water Supply Parameters Service Flow 0.5 gpm (1.9 lpm) Water Supply Potable Water Water Pressure 40-120 psi (138 - 827 kPa) Water Temperature 33°F - 100°F (0.6°C - 38°C) To reduce the risk associated with ingestion of contaminants: Do not use with water that is microbiologically unsafe or of unknown quality without adequate disinfection before and after of the system. Systems for cyst reduction may be used on disinfected water that may contain cysts.
WATER FILTER State of California Department of Public Health Water Treatment Device Certificate Number 09 - 2019 Date Issued: December 15, 2009 Manufacturer: Sears Roebuck and Co.
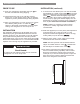
CARE AND CLEANING INSIDE WALLS (allow freezer to warm up so the cloth will not stick) To help remove odors, you can wash the inside of the refrigerator with a mixture of baking soda and warm water. Mix 2 tablespoons of baking soda to 1 quart of water (26 g soda to 1 liter water.) Be sure the baking soda is completely dissolved so it does not scratch the surfaces of the refrigerator. WARNING Explosion Hazard CAUTION: While cleaning the inside, do not spray water.
CARE AND CLEANING CARE CAREAND ANDCLEANING CLEANING POWER INTERRUPTIONS LIGHT REPLACEMENT WARNING If the power will be out for 24 hours or less, keep all refrigerator doors closed to help foods stay cold and frozen. 2. If the power will be out for more than 24 hours, remove all frozen food and store it in a frozen food locker. Electrical Shock Hazard Before replacing a Compartment Light, either unplug WKH UHIULJHUDWRU RU WXUQ Rç SRZHU DW WKH FLUFXLW EUHDNHU or fuse box.
CONNECTING THE WATER LINE BEFORE YOU BEGIN This water line installation is not covered by the refrigerator warranty. Follow these instructions carefully to minimize the risk of expensive water damage. Water hammer (water banging in the pipes) in house plumbing can cause damage to refrigerator parts and can OHDG WR ZDWHU OHDNDJH RU pRRGLQJ &DOO D TXDOLoHG SOXPEHU to correct water hammer before installing the water supply line to the refrigerator.
CONNECTING THE WATER LINE INSTALLATION INSTRUCTIONS 5. TIGHTEN THE PIPE CLAMP Tighten the clamp screws until the sealing washer begins to swell. NOTE: Do not overtighten clamp or you may crush the tubing. Washer ,QVWDOO WKH VKXWRç YDOYH RQ WKH QHDUHVW IUHTXHQWO\ XVHG drinking water line. 6+87 2)) 7+( 0$,1 :$7(5 6833/< Turn on the nearest faucet to relieve the pressure on the line. Pipe Clamp 2. CHOOSE THE VALVE LOCATION Choose a location for the valve that is easily accessible.
CONNECTING THE WATER LINE )/86+ 287 7+( 78%,1* Turn the main water supply on and pXVK RXW WKH WXELQJ XQWLO WKH ZDWHU is clear. 6KXW WKH ZDWHU Rç DW WKH ZDWHU valve after about one quart of ZDWHU KDV EHHQ pXVKHG WKURXJK WKH tubing. . CONNECT THE TUBING TO THE REFRIGERATOR NOTE: Before making the connection to the refrigerator, be sure that the refrigerator power cord is not plugged into the wall outlet. 5HPRYH WKH SODVWLF pH[LEOH FDS IURP WKH ZDWHU YDOYH 2.
TROUBLESHOOTING GUIDE Before conducting troubleshooting, make sure that the following basic requirements are met: Service Flow Water Supply Water Pressure Operating Ambient Temperature Limits 0.5 gpm (1.9 lpm) Potable Water 40-120 psi (138 - 827 kPa) Electrical Ratings 115 Volts, 60 Hz, AC only, and fused at 15 or 20 amperes. 55°F - 110°F COOLING Problem Refrigerator and Freezer section are not cooling. Possible Causes The refrigerator control is set to OFF (some models).
TROUBLESHOOTING GUIDE COOLING Problem Possible Causes Refrigerator or Refrigerator was recently installed. Freezer section is too warm. The air vents are blocked. Cold air circulates from the freezer to the fresh food section and back again through air vents in the wall dividing the two sections. Doors are opened often or for long periods of time. Unit is installed in a hot location. A large amount of food or hot food was added to either compartment. Interior moisture buildup.
TROUBLESHOOTING GUIDE COOLING/ICE & WATER Problem Food is freezing in the refrigerator compartment. Possible Causes Food with high water content was placed near an air vent. Refrigerator temperature control is set incorrectly. Solutions Rearrange items with high water content away from air vents. If the temperature is too cold, adjust the control one increment at a time and wait for the temperature to stabilize. Refer to the Setting the Controls section for more information.
TROUBLESHOOTING GUIDE ICE & WATER Problem Icemaker is not making enough ice (continued). Possible Causes Doors are opened often or for long periods of time. Doors are not closed completely. The temperature setting for the freezer is too warm. Dispensing water slowly. :DWHU oOWHU KDV EHHQ H[KDXVWHG 5HYHUVH RVPRVLV oOWUDWLRQ V\VWHP LV used. Low house water supply pressure.
TROUBLESHOOTING GUIDE ICE & WATER Problem Icemaker is not making ice. Possible Causes Refrigerator was recently installed or icemaker recently connected. Icemaker not turned on. Solutions It may take up to 24 hours for each compartment to reach the desired temperature and for the icemaker to begin making ice. Locate the icemaker ON/OFF VZLWFK DQG FRQoUP WKDW it is in the ON (I) position. The ice detecting sensor is obstructed.
TROUBLESHOOTING GUIDE ICE & WATER Problem Ice has bad taste or odor. Possible Causes Water supply contains minerals such as sulfur. Icemaker was recently installed. Ice has been stored for too long. The food has not been stored properly in either compartment. The interior of the refrigerator needs to be cleaned. The ice storage bin needs to be cleaned. Dispensing warm water. Refrigerator was recently installed. The water dispenser has been used recently and the storage tank was exhausted.
TROUBLESHOOTING GUIDE NOISE Problem Clicking Rattling Whooshing Gurgling Popping Sizzling Vibrating Dripping Pulsating or HighPitched Sound Possible Causes The defrost control will click when the automatic defrost cycle begins and ends. The thermostat control (or refrigerator control on some models) will also click when cycling on and Rç Rattling noises may come from the pRZ RI UHIULJHUDQW WKH ZDWHU OLQH RQ the back of the unit, or items stored on top of or around the refrigerator.
TROUBLESHOOTING GUIDE PARTS & FEATURES Problem Doors will not close correctly or pop open. Possible Causes Food packages are blocking the door open. Ice bin, crisper cover, pans, shelves, door bins, or baskets are out of position. The doors were removed during product installation and not properly replaced. Refrigerator is not leveled properly. Solutions Rearrange food containers to clear the door and door shelves.
Kenmore Connect™ System Kenmore Connect (On some models) Should you experience any problems with your refrigerator, it has the capability of transmitting data via your telephone to the Kenmore ConnectATeam. This gives you the capability of speak-ing directly to our trained specialists. B The specialist records the data transmitted from your machine and uses it to analyze the issue, providing a fast and effective diagnosis.
Get it fixed, at your home or ours! Your Home For troubleshooting, product manuals and expert advice: www.managemylife.com For repair – in your home – of all major brand appliances, lawn and garden equipment, or heating and cooling systems, no matter who made it, no matter who sold it! For the replacement parts, accessories and owner’s manuals that you need to do-it-yourself. For Sears professional installation of home appliances and items like garage door openers and water heaters.