24" (61 cm) Wide/120-Volt LAUNDRY CENTER Washer- Electric Dryer f CENTRO DE LAVANDERIA de 24" (61 cm) de ancho/120-Voltios Lavadora - Secadora el_ctrica Models/Modelos 1 10. 88732, 88794 \ Wt 0035030 Sears Roebuck and Co., Hoffman Estates, IL 60t 79 U.S.A. www.sears.
TABLE OF CONTENTS PROTECTION AGREEMENTS PROTECTION AGREEMENTS ....................................................... 2 WARRANTY ..................................................................................... 3 WASHER/DRYER 4 SAFETY ............................................................ INSTALLATION INSTRUCTIONS .................................................. Tools and Parts ............................................................................ Alternate Parts .................
KENMORE APPLIANCE WARRANTY ONE YEAR LIMITED WARRANTY When installed, operated and maintained according to all instructions supplied with the product, if this appliance fails due to a defect in material or workmanship within one year from the date of purchase, call 1-800-4-MY-HOME ®to arrange for free repair. If this appliance is used for other than private family purposes, this warranty applies for only 90 days from the date of purchase. THIS WARRANTY COVERS ONLY DEFECTS IN MATERIAL AND WORKMANSHIP.
WASHER/DRYER SAFETY Your safety and the safety of others are very important. We have provided many important safety messages in this manual and on your appliance. Always read and obey all safety messages. This is the safety alert symbol. This symbol alerts you to potential hazards that can kill or hurt you and others. All safety messages will follow the safety alert symbol and either the word "DANGER" or "WARNING.
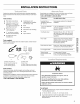
INSTALLATION INSTRUCTIONS Gather the required tools and parts before starting installation. Read and follow the instructions provided with any tools listed here. Tools needed:. Flat-blade screwdriver • Adjustable wrench that opens to 1" (2.5 cm) or %6" open-end wrench (for adjusting dryer feet) Caulking gun and compound (for installing new exhaust vent) • Knife • Vent clamps Pliers that open to 1%6" (3.
• Asturdyfloortosupport thelaundry center weight(laundry center, waterandload)of500Ibs(226.8 kg). Alevelfloorwithamaximum slopeof1"(2.5cm)underentire laundry center. Clothes maynottumble properly and automatic sensor cyclesmaynotoperate correctly iflaundry centerisnotlevel.Installing oncarpetisnotrecommended. • Awaterheater settodeliver 120°F (49°C) watertothe washer. • Hotandcoldwaterfaucets located within4 ft (1.2m)ofthe hotandcoldwaterfillvalves, andwaterpressure of5-100psi (34.5-689.6 kPa).
Floor drain system (view D) The floor drain system requires a siphon break that may be purchased separately. See "Alternate Parts." • Do not have a fuse in the neutral or ground circuit • Check with a qualified electrician if you are not sure the laundry center is properly grounded. The siphon break must be a minimum of 28" (71 cm) from the bottom of the washer. Additional hoses might be needed.
Exhaust If this is a new vent system Recommended hood styles are shown here. B Vent material • Use a heavy metal vent. Do not use plastic or metal foil vent. • 4" (10.2 cm) heavy metal exhaust vent and clamps must be used. DURASAFE TM venting products are recommended. (10.2 cm) A. Louvered hood style B. Box hood style 4" (10.2cm) heavymetal exhaust vent The angled hood style (shown here) is acceptable. DURASAFE TM vent products can be purchased from your dealer.
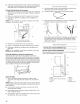
Install the front leveling legs 1. Examine the front leveling legs. Find the diamond marking, 5. 2. Screw front legs by hand, into the holes in the triangular braces in the front corners. Use wrench to finish turning the legs until the diamond marking is no longer visible, For laundry tub or standpipe drain systems 1. Open the yellow, single-wire clamp and slide over the hooked end of the drain hose to secure the rubber and corrugated sections together. 3. Gently stand the laundry center upright.
• Check thetemperature ofthewatertomakesurethatthehot waterhoseisconnected tothehotwaterfaucetandthatthe coldwaterhoseisconnected tothecoldwaterfaucet. Connect 1. Move the laundry center to its final location and remove any cardboard used to move the laundry center. 2. Locate the plastic strap included in the parts package. the inlet hoses to the washer 1. Attach the hot water hose to the bottom inlet valve. Attaching the hot water hose first makes it easier to tighten connection with pliers. 2.
Over-the-Top Optional exhaust installations This laundry center can be converted to exhaust out the right or left side. To convert the laundry center, use Side Exhaust Kit Part Number 279823. If your laundry center was previously exhausted from the right or left side, it can be converted to rear exhaust by using standard offset connections.
Vent system chart NOTE: Side exhaust installations add a 90 ° turn inside the laundry center. To determine maximum exhaust length, add one 90 ° turn to the chart. Number of 90 ° turns or elbows Type of Vent 0 1 2 1. Check that all parts are now installed. If there is an extra part, go back through the steps to see which step was skipped. Box or Louvered hoods Angled hoods 2. Check that you have all of your tools. 3.
WASHER USE SPIN ................................................................. 10 REGULAR HEAVYDUTY SHORT WATERTEMP PERMANENT RINSE MEDIUM WARM PRESS $OORT WATERLEVEL WARM c0_ LOAD WArM SMALLLL_ _ROE 8 .... REGUL_RlOSUPER12 RINSE COLD COLoD__0LD HOT __ e RES£T SELECT WASH _ KNiT/DELiCATE DRY SOAK 5.
7. Push in the Cycle Control knob and turn it clockwise to the wash cycle you want. Pull out the Cycle Control knob to start the washer. To stop or restart your washer: • To stop the washer at any time, push in the Cycle Control knob. • To restart the washer, close the lid (if open) and pull out the Cycle Control knob. This section describes the available wash cycles and will help you make the best cycle selections for your wash loads.
When the Cycle Control knob is set to a cycle and pulled out, the washer fills (to the selected load size) before agitation and timing start. The washer begins agitating immediately after filling; agitation occurs with the washer lid down. During agitation, the agitator creates a continuous rollover action that provides a thorough cleaning of the wash load. After agitation starts, the Cycle Control knob turns clockwise until it points to an Off area and the cycle ends.
DRYER USE PUSH TO START DRYER AUTO DRYil SELECT WASH _ DRY TIMED DRY 4. 5. Explosion Turn the Cycle Control knob to the recommended cycle and temperature for the type of load being dried. See "Drying, Cycle and Temperature Tips." Press PUSH TO START DRYER. PUSH TO START DRYER Hazard Keep flammable materials and vapors, gasoline, away from dryer. such as Do not dry anything that has ever had anything flammable on it (even after washing). Failure to follow these instructions explosion, or fire.
• Oyce a sd S%mpe al{ uss{ Select the correct cycle and temperature ps for your load. NOTE: Drying time with an automatic cycle varies according to the type of fabric, size of load, and temperature setting. See "Drying, Cycle and Temperature Tips." Drying tips • Follow care label directions when they are available. • • If the load is not as dry as you like, complete drying using the Timed Dry cycle. The next time you dry a similar load, select a setting closer to MORE DRY.
LAUNDRY CENTER CARE Keep laundry center area clear and free from items that would obstruct the flow of combustion and ventilation air. Explosion Every load cleaning The lint screen is located on the back wall of the dryer. Remove lint before each load. A screen blocked by lint can increase drying time. To clean 1. Pull out the lint screen and its cover. 2. Separate the cover and the screen by squeezing the screen and pulling on the cover at the same time.
As needed cleaning Laundry detergent and fabric softener residue can build up on the lint screen. This buildup can cause longer drying times for your clothes, or cause the dryer to stop before your load is completely dry. The screen is probably clogged if lint falls off the screen. To winterize laundry center Clean the lint screen (as outlined following) every 6 months, or more frequently if it becomes clogged due to a residue buildup. 1. Shut off both water faucets. 2. Disconnect 3.
TROUBLESHOOTING WASHER First try the solutions suggested here and possibly avoid the cost of a service call... Noisy, vibrating, off-balance Washer won't run, fill, rinse or agitate; washer stops Is the floor flexing, sagging or not level? Flooring that flexes or is uneven can contribute to noise and vibration of the washer. A s/4"(1.9 cm) piece of plywood under the washer will reduce the sounds, See "Installation Instructions." • Is the laundry center level? The laundry center must be level.
.... Washer continues to fill or drain, cycle seems stuck Is the top of drain hose lower than the control knobs on washer? The top of the drain hose must be at least 39" (99 cm) above the floor. See "Drain System" in the Installation Instructions. Load too wet • Does the drain hose fit too tightly in the standpipe, or is it taped to the standpipe? The drain hose should be loose yet fit securely, Do not seal the drain hose with tape.
Stains, gray whites, dingy colors Garments damaged • Did you properly sort the load? Dye transfer can occur when mixing whites and colors in a load. Sort dark clothes from whites and lights. • Were sharp items removed from pockets before washing? Empty pockets, zip zippers, snap or hook fasteners before washing to prevent snagging and tearing of load.
Clothes are not drying satisfactorily, long, or load is too hot • Is the dryer located in a closet? Closet doors must have ventilation openings at the top and bottom of the door. The rear of the dryer requires 51/2'' (14 cm) of airspace, and 1" (2,5 cm) is recommended for the sides and front of the dryer. See the Installation Instructions. drying times are too Is the lint screen clogged with lint? Lint screen should be cleaned before each load.
iNDICE CONTRATOS DE CONTRATOS DE PROTECCIC)N ................................................ 24 GARANTIA .................................................................................... 25 SEGURIDAD DE LA LAVADORA/SECADORA INSTRUCCIONES .......................... 26 DE INSTALACION ........................................ 27 Herramientas y piezas ............................................................... Piezas alternativas ...............................................................
GARANT[A DE LOS ELECTRODOMESTICOS GARANT|A LIMITADA DE UN AI_IO Cuando este electrodomestico haya side instalado, operado y mantenido segOn las instrucciones provistas con el producto, si este electrodomestico falla por defectos de material o de mano de obra dentro de un aSo a partir de la fecha de compra, Ilame al 1-800-4-MY-HOME ® para gestionar la reparaci6n libre de cargo.
SEGURIDAD DE LA LAVADORA/SECADORA Su seguridad y la seguridad de los demas es muy importante. Hemos incluido muchos mensajes importantes de seguridad en este manual yen su electrodomestico. todos los mensajes de seguridad. Lea y obedezca siempre Este simbolo le llama la atenci6n sobre peligros potenciales que pueden ocasionar la muerte o una lesion a usted y a los demas. Este el mensajes simbolo dedeadvertencia Todoseslos seguridad de iranseguridad.
NSTRUCCIONES ReQna las herramientas y piezas necesarias antes de comenzar la instalaci6n. Lea y siga las instrucciones provistas con cualquiera de las herramientas enlistadas aqui. DE INSTALACION Las piezas aqui enumeradas se pueden adquirir en la tienda Sears o en el Centro de Servicio Sears de su Iocalidad. Para mas informaci6n, Ilame por favor al 1-800-4-MY-HOME ® (1-800-469-4663}.
Espacios para la instalacibn La ubicaci6n debe ser Io suficientemente grande para poder abrir completamente la puerta de la secadora. Dirnensiones del centro de lavanderia 15%" (39,05 cm) Peligro de Explosi6n Mantenga los materialee y vapores inflamables, tales como la gasolina, alejados de la secadora. No seguir eetas instrucciones puede ocaeionar la muerte, explosi6n o incendio. Usted necesitar_ • Una ubicaci6n que permita una instalaci6n adecuada del ducto de escape.
Requisitos rodantes de instalacibn adicionales para las casas Este centre de lavanderfa es apropiado para instalaciones en casas rodantes. La instalaci6n debe ajustarse al Estandar de seguridad y construcci6n de casas fabricadas, Titulo 24 CFR, Parte 3280 (anteriormente conocido como Estandar federal para la seguridad y construcci6n de casas rodantes, Titulo 24, HUD Parte 280).
Para reducir el peligro de posibles choques electricos, el cable debe ser enchufado en un contacto apropiado de pared de tres terminales, conectado a tierra de acuerdo con los c6digos y normas locales. Si no hubiera un contacto de pared adecuado, el cliente tiene la responsabilidad de contratar a un electricista calificado para instalar un contacto de pared apropiado con conexi6n a tierra.
Ducto de escape de metal rigido • Para un 6ptimo rendimiento de secado, se recomiendan ductos de escape de metal rfgido. • Se recomienda el ducto de escape de metal rigido para evitar que se aplaste o se tuerza. Ducto de escape El estilo de capota de ventilaci6n angular (que se ilustra aqui) es aceptable. 4" (1 0,2 cm) _ de metal flexible • Los ductos de escape de metal flexible son aceptables Onicamente si se puede acceder a los mismos para limpiarlos.
Instale las patas niveladoras delanteras 1. Examine las patas niveladoras delanteras. Localice la marca en forma de diamante. 2. 4. Atornille las patas delanteras a mano dentro de los orificios de los puntales triangulares en las esquinas frontales. Use una Nave de tuercas para terminar de atornillar las patas hasta que la marca en forma de diamante no quede visible. Abra la abrazadera.
3. Inserte una nueva arandela plana (suministrada) en cada extremo de las mangueras de entrada. Asiente firmemente las arandelas en los acoplamientos. A Apriete los acoplamientos con los alicates, girandolos dos tercios de vuelta adicional. NOTA: No apriete demasiado ni use cinta o selladores en la valvula. Se pueden da_ar las valvulas. B A. Acoplamiento B. Arandela A. V#lvula de entrada de agua frfa (superior) B.
1. Traslade el centro de lavanderia a su ubicaci6n final y quite el cart6n que haya usado para moverlo. 2. Localice el fleje plastico incluido on el paquete de piezas, 692790 (blanco) 3979370 (grafito) 3977784 (bisque) Fleje rebordeado Asegure la manguera de desagQe a la pata del lavadero o al tube vertical con el fleje plastico (A 6 B abajo). 3= Instalaciones opcionales del escape Este centre de lavanderia puede convertirse para ventilarse al exterior per el lado derecho o izquierdo.
Instalaci6n en la parte superior: Cuadro del sistema de ventilaci6n Pieza nL_mero 26-49900 NOTA: Las instalaciones de ventilaci6n laterales tienen una vuelta de 90 ° dentro de la secadora. Para determinar la Iongitud maxima de ventilaci6n, agregue una vuelta de 90 ° al cuadro. Instalaci6n de periscopio (Para usar si hay desacoplo entre el ducto de escape de la secadora y el ducto de escape de la pared): Pieza nL_mero 26-49901 - Desacoplo de menos de 5" (12,7 cm).
1. 2. Usando una abrazadera de 4" (10,2 cm), conecte el ducto de escape a la salida de escape en el centre de lavanderia. Si se conecta a un ducto de escape existente, asegQrese de que el mismo este limpio. El ducto de escape de la secadora debe encajar sobre la salida de aire de la secadora y dentro de la capota de ventilaci6n. Cerci6rese de que el ducto de escape este asegurado a la capota de ventilaci6n con una abrazadera de 4" (10,2 cm). Mueva el centro de lavanderia a su posici6n final.
USO DE LA LAVADORA SPIN ................................................................. 10 REGULAR HEAVYDUTY SHORT WATERTEMP PERMANENT RINSE MEDIUM WARM PRESS $OORT WATERLEVEL WARM co_ LOAD WArM SMALLLL _lh_._ U_ROE 8 .... REGUL&RlOROPER12 RINSE COLD COLoD__0LD HOT __ e RES£T SELECT _' WASH _ KNiT/DELiCATE DRY SOAK Pues@ es ma_i}sI:}a de a av@ ' o_A:5 4. Cierre la tapa de la lavadora. 5.
NOTA: En temperaturas de agua inferiores a 60°F (15,6°C), los detergentes no se disuelven bien. Ademas puede set dificil quitar la suciedad. Algunas telas pueden retener las arrugas del uso y aumentar las motitas (la formaci6n de pequeSas bolitas en la superficie de las prendas). 7. Empuje la perilla de control de ciclos y gfrela en la direcci6n de las manecillas del reloj hasta el ciclo de lavado que desee. Jale la perilla del control de ciclos para poner la lavadora en marcha.
ccosde 8 ,sw:do Cuando se fija la perilla del Control de ciclos en un ciclo y se jala hacia afuera, la lavadora se Ilena (hasta el tama_o de carga seleccionado) antes de que comience la agitaciCn y la medida del tiempo. Inmediatamente despues del Ilenado la lavadora comienza la agitaciCn con la tapa cerrada. Durante la agitaciCn, el agitador crea una acciCn continua envolvente que proporciona una limpieza minuciosa de la carga de lavado.
USO DE LA SECADORA PUSH TO START DRYER AUTO DRY II A,RORY SELECT WASH _ DRY TIMED DRY I' IJ_s,.;::.___(Jl I I@_I;I ii:I Q_'_';c£I c_e,,,<<_ll]l(J I Q_I Antes de usar su secadora, limpie el interior del tambor con un patio hQmedo para quitar residuos de polvo que se acumularon durante el almacenaje y el transporte. 1. Verifique el filtro de pelusa antes de cada carga. Vea "Limpieza del filtro de pelusa." 2. Coloque la ropa en la secadora de modo suelto y cierre la puerta.
Coloque la ropa en la secadora de mode suelto. No Ilene en exceso la secadora. Deje suficiente espacio para que la ropa rote con libertad. El cuadro a continuaci6n ilustra ejemplos de cargas balanceadas que permitiran el movimiento de tambor adecuado.
Tipo de carga Minutos* Siempre que use el Secado al aire • Revise que las cubiertas tengan buenas costuras. Hule espuma--almohadas, sostenes acolchados, juguetes de peluche 20 - 30 • Sacuda y ahueque las almohadas a mano peri6dicamente durante el ciclo. • Plastico--cortinas 20 - 30 Seque el articulo completamente. espuma tardan en secarse.
• Sial quitar la pelusa del filtro esta cae dentro de la secadora, revise la capota de ventilaci6n y quite la pelusa, Vea "Requisitos de ventilaci6n." Limpieza peribdica Los residuos de detergente y suavizante de telas pueden acumularse en el filtro de pelusa. Esta acumulaci6n puede dar lugar a per[odes mas prolongados de secado de su ropa, o causar que la secadora se detenga antes de que su ropa este completamente seca. El filtro esta probablemente obstruido si la pelusa se cae del mismo.
Para transportar el centro de lavanderia 1. Cierre ambos grifos de agua. 8. Cerci6rese de que las patas niveladoras esten seguras. 9. Coloque las mangueras de entrada en la canasta. 2. Desconecte y elimine el agua de las mangueras de entrada de agua. 10. Cuelgue el cable electrico y la manguera de desagQe sobre el borde y hacia adentro de la canasta. 3. Siva a mover el centre de lavanderfa durante una temporada de invierno riguroso, coloque 1 L (un litro) de anticongelante tipo R.V. en la canasta.
&Estan obstruidos los filtros de la valvula de agua? Cierre el agua y quite las mangueras de lavadora. Saque cualquier pel[cula o particulas acumulado. Vuelva a abrir las mangueras, abra revise si hay fugas de agua. entrada del entrada de la que se hayan el agua y &Estan abiertos los grifos del agua caliente y del agua fria? Abra el agua. Ropa demasiado • &Esta retorcida la manguera de entrada del agua? Enderece las mangueras.
• &Se han invertido las mangueras del agua caliente y del agua fria? Cerci6rese de que las mangueras del agua caliente y del agua frfa esten conectadas alas Ilaves correctas. Un enjuague caliente seguido de un exprimido producira arrugas. Vea "Conexi6n de las mangueras de entrada" en las Instrucciones de instalaci6n. • &Ha enrollado las prendas alrededor del agitador? Ponga los articulos de manera suelta en la lavadora. No enrolle los artfculos alrededor del agitador.
&Estan las cuatro patas instaladas y esta la secadora nivelada de frente hacia atras y de lado a lado? La secadora puede vibrar si no esta instalada adecuadamente. Vea las Instrucciones de instalaci6n. &Las prendas estan enredadas o hechas un ovillo? Si la carga esta hecha un ovillo, rebotara haciendo vibrar a la secadora. Separe los articulos de la carga y reinicie la secadora.
Your Home For repair-in your home-of all major brand appliances, lawn and garden equipment, or heating and cooling systems, no matter who made it, no matter who sold it! For the replacement parts, accessories and owner's manuals that you need to do-it-yourself. For Sears professional installation of home appliances and items like garage door openers and water heaters. 1-800-4-MY-HOME Call anytime, ® (1-800-469-4663) day or night (U.S.A. and Canada) www.sears.com www.sears.