24" (61 cm) Wide LAUNDRY CENTER Washer- Electric Dryer ......... _+_: ......... ++:_"+ _!i_,_J d _'"_'_°+'_ _ _:;_ _ '++' __++I_!_;7_ '_ _'' AI" CENTRO DE LAVANDERIA de 24" 161 cm) de ancho Lavadora - Secadora el_ctrica Vi3C)]+/ +,,,,+;:_ +++_ ...... _J_;;;,+++,,# !J _J+,,_+,,J_,l%,_ Models/Modelos 1 10. 80714, 88752 I _V_i,.#ll, v i - _ -l_v \ W10034990 Sears Roebuck and Co., Hoffman Estates, IL 60179 U.S.A. www.sears.
TABLE OF CONTENTS PROTECTION AGREEMENTS PROTECTION AGREEMENTS ....................................................... 2 WARRANTY ..................................................................................... 3 WASHER/DRYER 4 SAFETY ............................................................ Master Protection Agreements Congratulations on making a smart purchase. Your new Kenmore ®product is designed and manufactured for years of dependable operation.
KENMORE APPLIANCE WARRANTY ONE YEAR LIMITED WARRANTY When installed, operated and maintained according to all instructions supplied with the product, if this appliance fails due to a defect in material or workmanship within one year from the date of purchase, call 1-800-4-MY-HOME ®to arrange for free repair. If this appliance is used for other than private family purposes, this warranty applies for only 90 days from the date of purchase. THIS WARRANTY COVERS ONLY DEFECTS IN MATERIAL AND WORKMANSHIP.
WASHER/DRYER SAFETY Your safety and the safety of others are very important. We have provided many important safety messages in this manual and on your appliance. Always read and obey all safety messages. This is the safety alert symbol. This symbol alerts you to potential hazards that can kill or hurt you and others. All safety messages will follow the safety alert symbol and either the word "DANGER" or "WARNING.
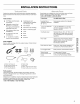
INSTALLATION INSTRUCTIONS Gather the required tools and parts before starting installation. Read and follow the instructions provided with any tools listed here. Tools needed: #2 Phillips and flat-blade screwdriver Adjustable wrench that opens to 1" (2.
Laundry Center Dimensions 15%" (39.05 cm) Explosion Hazard Keep flammable materials and vapors, such as gasoline, away from dryer. Failure to do so can result in death, explosion, or fire. You will need • A location that allows for proper exhaust installation. See "Venting Requirements." • A separate30-amp • A grounded electrical outlet located within 2 ft (61 cm) of either side of the laundry center. See "Electrical Requirements.
Mobile Home - Additional Installation Requirements This laundry center is suitable for mobile home installations. The installation must conform to the Manufactured Home Construction and Safety Standard, Title 24 CFR, Part 3280 (formerly the Federal Standard for Mobile Home Construction and Safety, Title 24, HUD Part 280). Mobile home installations • E ect Metal exhaust system hardware, which is available for purchase from your local Sears store or Sears Service Center.
If your outlet looks like this: If connecting by direct wire: Power supply cable must match power supply (4-wire or 3-wire) and be: 4-wire receptacle (14-30R) Then choose a 4-wire power supply cord with ring or spade terminals and UL listed strain relief. The 4-wire power supply cord, at least 4 ft (1.22 m) long, must have four 10-gauge copper wires and match a 4-wire receptacle of NEMA Type 14-30R. The ground wire (ground conductor) may be either green or bare.
li!!ect sica !s cton Power Supply Cord Direct Wire Fire Hazard Fire Hazard Use a new UL listed 30 amp power supply cord. Use 10 gauge solid copper wire. Use a UL listed strain Use a UL listed strain relief. relief, Disconnect power before making electrical connections. Disconnect Connect neutral wire (white or center wire) to center terminal (silver). Connect terminal Ground wire (green or bare wire) must be connected green ground connector. Connect remaining 2 terminals (gold).
Put power supply cord through the strain relief. Be sure that the wire insulation on the power supply cord is inside the strain relief. The strain relief should have a tight fit with the dryer cabinet and be in a horizontal position.
1= Remove center, silver-colored 2. terminal block screw. Remove neutral ground wire from internal ground conductor screw. Connect neutral ground wire and the neutral wire (white or center wire) of power supply cord under center, silver-colored terminal block screw. Tighten screw. 4-wire connection: Direct Wire IMPORTANT: A 4-wire connection is required for mobile homes and where local codes do not permit the use of 3-wire connections. Direct wire cable must have 5 ft (1.
Move the green painted screw from the internal to the external ground location. Connect ground wire (green or bare) of power supply cable to external ground conductor screw. Tighten screw. 3. 1. 2. Loosen or remove center, silver-colored terminal block screw. Connect neutral wire (white or center wire) of power supply cord to the center, silver-colored terminal screw of the terminal block. Tighten screw. B B ...... C C D E A. Neutral wire (white or center wire) B.
1= Loosen or remove center, silver-colored 2. terminal block screw. Place the hooked end of the neutral wire (white or center wire) of direct wire cable under the center screw of terminal block (hook facing right). Squeeze hooked end together. Tighten screw. Use for direct wire or power supply cord where local codes do not permit connecting cabinet-ground conductor to neutral wire. 1. Remove center, silver-colored 2. Remove neutral ground wire from internal ground conductor screw.
• Remove excess flexible metal vent to avoid sagging and kinking that may result in reduced airflow and poor performance. • Do not install flexible metal vent in enclosed walls, ceilings or floors. Elbows 45° elbows provide better airflow than 90° elbows. J / Fire Hazard Use a heavy metal vent. Do not use a plastic vent. Do not use a metal foil vent. Failure to follow or fire.
Excessive Weight Hazard Use two or more people to move and install washer/dryer. Failure to do so can result in back or other injury. To protect the floor, use a large flat piece of cardboard from the shipping carton. Gently place the laundry center on its side, on the cardboard.
6. Insert a new flat washer (supplied) into each end of the inlet hoses. Firmly seat the washers in the couplings. A NOTE: Do not overtighten or use tape or sealants on the valve. Damage to the valves can result. If you are working in a closet or recessed area Move the laundry center into its final position and remove cardboard from under laundry center. Remove the access panel by removing 3 Phillips-head screws and one bumper, located at the top of the access panel. Set panel, screws and bumper aside.
Refer to the manufacturer's system. Choose your exhaust installation type Recommended exhaust installations Typical installations vent the dryer from the rear of the washer/ dryer. Other installations are possible. A I r'[ .... instructions Jr : -i provided with the vent ....... , [....... i r....... M ( ( 1. [',\ \ , "-,,j ............... ,\, .......... B _ A. Dryer B. Rigid metal or flexible metal vent C. Clamps D. Wall '\,\, ................. C A.
• Bend vent gradually to avoid kinking. • Use the fewest 90 ° turns possible. 2. If the laundry center is not level, prop up the front with a wood block and adjust the feet up or down as necessary. Remove wood block and lower laundry center. Repeat this step until the laundry center is level. 1. Using a 4" (10.2 cm) clamp, connect vent to exhaust outlet in laundry center. If connecting to existing vent, make sure the vent is clean.
WASHER USE SPIN ...................................................................... 10 REGULAR HEAVY DUTY ESHORT WATER TEMP PERMANENT RINSE WATER LEVEL MEDIUM WARM PRESS WARM LOAD co_D W2RM LOAO SMALL COLD HOT COLD COLD LOAD U_R.E e • RESET SHORT 8 -REGULAR 10 - SPIN RINSE SUPER 12 _o L_ KNIT/DELICATE RINSE SOAK_ • Choose a load size that allows the load to move freely for best fabric care. See "Loading.
Soak This section describes the available wash cycles and will help you make the best cycle selections for your wash loads. Each cycle is designed for different types of fabric and soil levels. • • The washer pauses briefly throughout each cycle. These pauses are normal. Refer to "Normal Sounds" for sounds you may hear during a wash cycle. Refer to "Understanding Washer Cycles" to learn what happens during a wash cycle.
When the Cycle Control knob is set to a cycle and pulled out, the washer fills (to the selected load size) before agitation and timing start. The washer begins agitating immediately after filling; agitation occurs with the washer down. During agitation, the agitator creates a continuous rollover action that provides a thorough cleaning of the wash load. After agitation starts, the Cycle Control knob turns clockwise until it points to an Off area and the cycle ends.
DRYER USE PUSH TO START DRYER AUTO DRY |l NORMAL DRY LESS DRY TOUCH UP -- Explosion TIMED DRY Hazard Keep flammable materials and vapors, gasoline, away from dryer. Fire Hazard such as No washer items containing on a clothesline can result in death, foam, rubber, or plastic must be dried or by using an Air Cycle. Failure to follow these instructions or fire. Before using your dryer, wipe the dryer drum with a damp cloth to remove dust from storing and shipping. To restart your dryer 1.
Dry most loads using the Normal Dry (*) setting. When the cycle ends, check the dryness of the load. Select the correct cycle and temperature for your load. Drying tips • Follow care label directions when they are available. • If you use fabric softener sheets, use only ones labeled as dryer safe. Follow package instructions. • Remove the load from the dryer as soon as tumbling stops to reduce wrinkling. This is especially important for permanent press, knits and synthetic fabrics.
LAUNDRY CENTER CARE To clean 1. Pull out the lint screen and its cover. 2. Separate the cover and the screen by squeezing the screen and pulling on the cover at the same time. Keep laundry center area clear and free from items that would obstruct the flow of combustion and ventilation air. Explosion Hazard Keep flammable materials and vapors, such as gasoline, away from dryer. Failure to do so can result in death, explosion, or fire. ......
Wet a nylon brush with hot water and liquid detergent. Scrub lint screen with the brush to remove residue buildup. To use laundry center again 1. Flush water pipes and hoses. 2. Reconnect water inlet hoses. 3. 4. Rinse screen with hot water. 5. Thoroughly dry lint screen with a clean towel. Replace screen in dryer. Turn on both water faucets. Electrical Shock Hazard Plug into a grounded 3 prong outlet. Do not remove ground To clean dryer drum 1.
TROUBLESHOOTING WASHER First try the solutions suggested here and possibly avoid the cost of a service call... Noisy, vibrating, off-balance Washer won't run, fill, rinse or agitate; washer stops Is the floor flexing, sagging or not level? Flooring that flexes or is uneven can contribute to noise and vibration of the washer. A 3/4"(1.9 cm) piece of plywood under the washer will reduce the sounds, See "Installation Instructions." • Is the laundry center level? The laundry center must be level.
• Is your water colder than 60°F (15.6°C)? Wash water colder than 60°F (15.6°C) may not completely dissolve the detergent. • Did you use the proper cycle time and agitation speed for the load? Reducing wash time (duration) and agitation speed are ways to reduce lint. Washer continues to fill or drain, cycle seems stuck Is the top of drain hose lower than the control knobs on washer? The top of the drain hose must be at least 39" (99 cm) above the floor.
Did you overload the washer? The wash load must be balanced and not overloaded. Loads should move freely during washing. Garments damaged • Were sharp items removed from pockets before washing? Empty pockets, zip zippers, snap or hook fasteners before washing to prevent snagging and tearing of load. • Were strings and sashes tied to prevent tangling? Straps and strings can easily become entangled in the load, causing strain on seams and tearing.
Lint on load • Is the lint screen clogged? before each load, Lint screen should be cleaned Stains on load or drum Was dryer fabric softener properly used? Add dryer fabric softener sheets at the beginning of the cycle. Fabric softener sheets added to a partially dried load can stain your garments, Explosion Hazard Keep flammable materials and vapors, such as gasoline, away from dryer. Drum stains are caused by dyes in clothing (usually blue jeans). This will not transfer to other clothing.
iNDICE CONTRATOS DE CONTRATOS DE PROTECCION ................................................ 30 GARANTIA .................................................................................... 31 SEGURIDAD DE LA LAVADORA/SECADORA INSTRUCCIONES .......................... 32 DE INSTALACION ........................................ 33 Herramientas y piezas ............................................................... Piezas alternativas ................................................................
GARANT[A DE LOS ELECTRODOMESTICOS GARANT|A LIMITADA DE UN AI_IO Cuando este electrodomestico haya side instalado, operado y mantenido segOn las instrucciones provistas con el producto, si este electrodomestico falla por defectos de material o de mano de obra dentro de un aSo a partir de la fecha de compra, Ilame al 1-800-4-MY-HOME ® para gestionar la reparaci6n libre de cargo.
SEGURIDAD DE LA LAVADORA/SECADORA Su seguridad y la seguridad de los demas es muy importante. Hemos incluido muchos mensajes importantes de seguridad en este manual yen su electrodomestico. todos los mensajes de seguridad. Lea y obedezca siempre Este simbolo le llama la atenci6n sobre peligros potenciales que pueden ocasionar la muerte o una lesion a usted y a los demas. Este el mensajes simbolo dedeadvertencia Todoseslos seguridad de iranseguridad.
INSTRUCCIONES ReQna las herramientas y piezas necesarias antes de comenzar la instalaci6n. Lea y siga las instrucciones provistas con cualquiera de las herramientas enlistadas aqui. DE INSTALACION Las piezas aquf enumeradas se pueden adquirir en la tienda Sears o en el Centro de Servicio Sears de su Iocalidad. Para mas informaci6n, Ilame por favor al 1-800-4-MY-HOME ® (1-800-469-4663}. Herramientas necesarias Destornillador Phillips #2 y de cabeza plana Llave de tuercas ajustable que se abra a 1" (2.
Espacios para la instalacibn La ubicaci6n debe ser Io suficientemente grande para poder abrir completamente la puerta de la secadora. Dirnensiones del centro de lavanderia 15%" (39,05 cm) Peligro de E×plosibn Mantenga los materiales y vapores inflamables, tales como la gasolina, alejados de la secadora. No seguir estas instrucciones puede ocasionar la muerte, e×plosion o incendio. Usted necesitara • Una Iocalizaci6n que permita una instalaci6n adecuada del ducto de escape.
Requisitos rodantes de instalacibn adicionales para las casas Este centre de lavanderfa es apropiado para instalaciones en casas rodantes. La instalaci6n debe ajustarse al Estandar de seguridad y construcci6n de casas fabricadas, Titulo 24 CFR, Parte 3280 (anteriormente conocido como Estandar federal para la seguridad y construcci6n de casas rodantes, Titulo 24, HUD Parte 280).
• Si los c6digos locales no permiten la conexi6n de un conector para conexi6n a tierra del equipo al alambre neutro, vea la secci6n "Conexi6n opcional de 3 hilos". Use un cable conductor de 4 alambres cuando se instale la secadora en una casa rodante o un Area donde los c6digos locales no permiten la conexi6n a tierra mediante el alambre neutro.
Cable de suministro el_ctrico Cable directo Peligro de Incendio Peligro de Incendio Use un cable de suministro eiectrico nuevo de 30 amperes que este en la lista de UL. Utilice alambres Use un protector de cables que este en la lista de UL. Desconecte cone×iones Desconecte el suministro conexiones electricas. Use un protector de cables que este en la lista de UL electrico antes de hacer las Conecte el alambre neutro (el blanco o el del centro) al terminal central (plateada).
Haga pasar el cable protector de cables. cables del cable de protector de cables. bien con el gabinete horizontal.
1= Saque el tornillo central de color plateado del bloque terminal. 2. Saque el hilo de tierra neutro del tornillo conductor de tierra interno. Conecte el hilo neutro de puesta a tierra y el hilo neutro (hilo blanco o central) del cable de suministro de energia debajo del tornillo central de color plateado del bloque de terminal, Apriete el tornillo.
Mueva el tornillo verde de la ubicaci6n del conductor a tierra interno a la del conductor a tierra externo. Conecte el hilo de tierra (verde o desnudo) del cable de suministro de energia al tornillo conductor de tierra extemo. Apriete el tornillo. B J 3= ......... 1. Afloje o saque el tornillo central de color plateado del bloque terminal. 2. Conecte el hilo neutro (hilo blanco o central) del cable de suministro electrico al tornillo central de color plateado del bloque terminal. Apriete el tornillo.
AI conectar el hilo al bloque de terminal, coloque el extremo del hilo en forma de gancho debajo del tornillo del bloque de terminal (viendo hacia la derecha). Apriete y junte el extremo en forma de gancho y apriete el tornillo. 1= Afloje o saque el tornillo central de color plateado del bloque terminal. 2.
c(®qs stos de < Ducto de escape Los ductos de escape de metal flexible son aceptables Qnicamente si se puede acceder a los mismos para limpiarlos. • El ducto de escape de metal flexible debe extenderse y sostenerse per complete cuando la secadora esta en su ubicaci6n final. • Quite el exceso del ducto de metal flexible para evitar que se doble y se tuerza, Io cual podrfa dar lugar a una reducci6n del flujo de aire y a un rendimiento insuficiente.
Una capota de ventilaci6n debe tapar el ducto de escape para evitar el ingreso de roedores e insectos a la casa. La capota de ventilaci6n debe estar por Io menos a 12" (30,5 cm) de distancia del piso o de cualquier objeto que pudiese estar en el trayecto del ducto de escape (come (lores, rocas o arbustos, limite de nieve, etc). • No use capotas de ventilacidn 1. Abra la tapa de la lavadora. El seguro debajo de la secadora mantendra la tapa abierta. 2.
Para el sistema vertical 1. de desagiie en tina de lavadero o tubo 4. Apriete los acoplamientos con los alicates, girandolos tercios de vuelta adicional. dos Abra la abrazadera unifilar amarilla y desl[cela sobre el extreme de gancho de la manguera de desagQe para asegurar la secci6n de caucho y la corrugada juntas. NOTA: No apriete demasiado ni use cinta o selladores en la valvula. Se pueden da_ar las valvulas. A. Extremo con forma de gancho B. Manguera de desagf_e 2.
Si usted estb trabajando en un clbset o en un brea empotrada Traslade el centro de lavanderfa a su posici6n final y quite el cart6n que esta debajo del mismo. Quite el panel de acceso desatornillando 3 tornillos Phillips y un tope, ubicados en la parte superior del panel de acceso. Deje a un lado el panel, el tornillo y el tope. Complete la conexi6n de las mangueras de agua y (en los modelos a gas) el conector flexible de gas a traves del Area de acceso.
Instalaciones alternas para espacios limitados Los sistemas de ventilaci6n vienen en una amplia gama. Seleccione el tipo mas apropiado para su instalaci6n. A continuaci6n se ilustran dos tipos de instalaci6n para espacios limitados. Consulte las instrucciones del fabricante. ........ Determinacibn de la via del ducto de escape • Seleccione la vfa que proporcione el trayecto mas recto y directo al exterior. • Planifique la instalaci6n a fin de usar el menor nQmero posible de codos y vueltas.
nsc s sc 6 scIe s sc4:emade vs!nt ac d;}n 1. Instale la capota de ventilaci6n. Ernplee una masilla de calafateo para sellar la abertura de la pared externa alrededor de la capota de ventilaci6n. 1. Revise para cerciorarse de que todas las piezas est@n instaladas. Si hay alguna pieza extra, vuelva a revisar todos los pasos para ver cual se omiti6, 2. Oonecte el ducto de escape a la capota de ventilaci6n. El ducto de escape debe encajar dentro de la capota de ventilaci6n.
USO DE LA LAVADORA WATER TEMP HEAVY DUTY PERMANENT PRESS WATER LEVEL UEDlUM CI'I8 WARM SMALL LARGE KNiT/DELiCATE PREWASH SOAK • WATER LEVEL MEDIUM LOAD SMALL LARGE _ESEr _OA_LOAOe Peligro de Incendio Nunca coloque en la lavadora articulos que eeten humedecidos con gaeolina o cualquier otro Hquido inflarnable. Ninguna lavadora puede eliminar completamente el aceite. No seque ningun art_culo que haya tenido alguna vez cualquier tipo de aceite (incluyendo aceitee de cocina). 5.
Empuje la perilla de control de ciclos y girela en la direcci6n de las manecillas del reloj hasta el ciclo de lavado que desee. Jab la perilla del control de ciclos para poner la lavadora en marcha. Para detener o volver a porter en marcha • • Para detener la lavadora en cualquier momento, empuje la perilla de control de ciclos. • Para velvet a poner en marcha la lavadora, cierre la tapa (si esta abierta) y jale la perilla de control de ciclos. La lavadora hace una breve pausa durante cada ciclo.
Una vez iniciada la agitaci6n, la perilla de Control de ciclos gira a la derecha hasta se_alar la zona Apagado (Off) y el ciclo termina. CONSEJOS DE LAVANDERiA NOTA: La lavadora hace pausas breves durante cada ciclo. Estas pausas son normales para el funcionamiento de la lavadora. LAVADO _ __ ENJUAGUE 1.Llenado _ 2. Enjuague Sin agitaci6n 3. Desag0e* Sin agitaci6n 3. DesagQe _j Enjuague por 4.
USO DE LA SECADORA PUSH TO START DRYER AUTO DRYU TOUCH UP 20 Peligro de Explosion TIMED DRY Peligro de Incendio Mantenga los materiales y vaporee inflamables, tales corno la gasolina, alejados de la secadora. Ninguna lavadora puede eliminar el aceite. No seque ningun articulo que haya tenido alguna vez cualquier substancia inflamable (aun despues de lavarlo). No seque ningun articulo que haya tenido alguna vez cualquier tipo de aceite (incluyendo los aceites de cocina).
Coloque la ropa en la secadora de modo suelto. No Ilene en exceso la secadora. Deje suficiente espacio para que la ropa rote con libertad. El cuadro a continuaci6n ilustra ejemplos de cargas balanceadas que permitiran el movimiento de tambor adecuado.
Secado al aire (Air Dry) Use el ciclo de secado al aire para artfculos que requieren secado sin calor, tales como articuios de goma, plastico y tejidos sensibles al caior. Este cuadro muestra ejemplos de articulos que pueden secarse usando el ciclo de secado al aire.
3. Quite la pelusa enrollandola con los dedos. No enjuague o lave el filtro para quitar la pelusa. La pelusa mojada es dificil de quitar. En el interior del gabinete de la secadora SegL_nel uso de la secadora, se debe quitar la pelusa cada 2 a_os, o con mas frecuencia. La limpieza debera efectuarla una persona calificada. En el ducto de escape SegL_nel use de la secadora, se debe quitar la pelusa cada 2 a_os, o con mas frecuencia. 4.
2. Desconecte y elimine el agua de las mangueras de entrada de agua. 3. Siva a mover el centro de lavanderfa durante una temporada de invierno riguroso, coloque un litro (1 L) de anticongelante tipo R.V. en la canasta. Ponga a funcionar la lavadora en un ajuste de exprimido per 30 segundos aproximadamente para mezclar el anticongelante y el agua. 4. 5. Conecte a un contacto de pared de conexion a tierra de 3 terminales. Desconecte y elimine el agua del sistema de desagQe.
6Se quem6 un fusible de la casa o se dispar6 un disyuntor? Reemplace el fusible o reposicione el circuito. Si el problema continQa, Ilame a un electricista. La lavadora no se pone en marcha, no Ilena, no enjuaga o no agita; la lavadora se detiene &Est_i la lavadora en una pausa normal en el ciclo? La lavadora hace una pausa por unos 2 minutos durante ciertos ciclos. Deje continuar el ciclo. Algunos ciclos presentan perfodos de agitaci6n y remojo. &Esta sobrecargada pequeSas.
_,Se han invertido las mangueras del agua caliente y del agua fria? Cerci6rese de que las mangueras del agua caliente y del agua fr[a esten conectadas alas Ilaves correctas. Un enjuague caliente seguido de un exprimido producira arrugas. Vea "Conexi6n de las mangueras de entrada" en las Instrucciones de instalaci6n. Ropademasiadomojada • &Ha empleado el ciclo correcto para la carga que est_ lavando? Seleccione un ciclo con una velocidad mas alta de exprimido (siesta disponible).
SOLUCION DE PROBLEMAS DE LA SECADORA En primer lugar, pruebe las soluciones sugeridas aqui y posiblemente se evite el gasto de una Ilamada de servicio t_cnico... La secadora no funciona &Se quem6 un fusible de la casa o se ha disparado un disyuntor? Es posible que la secadora tenga 2 fusibles o cortacircuitos. AsegOrese de que ambos fusibles esten intactos y ajustados, o de que ambos cortacircuitos no se hayan disparado. Reemplace el fusible o reposicione el cortacircuitos.
Pelusa en la ropa • &Estd obstruido el filtro de pelusa? El filtro de pelusa debe ser limpiado antes de cada carga. Manchas • Peligro de Exploei6n IVlantenga los rnateriales y vapores inflamables, la gaeolina_ lejos de la eecadora. come No seguir eetae instruccionee puede ocaeionar la muerte, explosi6n o incendie. &Esta la secadora ubicada en un armario? Las puertas del armario deben tener aberturas de ventilaci6n en la parte superior e inferior de la puerta.
Your Home For repair-in your home-of all major brand appliances, lawn and garden equipment, or heating and cooling systems, no matter who made it, no matter who sold it! For the replacement parts, accessories and owner's manuals that you need to do-it-yourself. For Sears professional installation of home appliances and items like garage door openers and water heaters. 1-800-4-MY-HOME Call anytime, ® (1-800-469-4663) day or night (U.S.A. and Canada) www.sears.com www.sears.