Use & Care Guide English Freestanding Water Optimizer Freestanding Purifier·Dispenser Model: KM1000(B) Customer Assistance 1-844-374-6576 www.kenmore.com Kenmore and the Kenmore logo are the registered trademarks of KCD IP, LLC and/or Sears Brands, LLC and are used under license by Drinkpod, LLC All Rights Reserved.
KM1000 KM1000B
Table Of Contents IMPORTANT SAFETY INSTRUCTIONS II GETTING TO KNOW YOUR WATER OPTIMIZER 1 Filters 6 Technical Specifications 8 Powering On/Off Your Optimizer 9 Dispensing Water 9 USING YOUR WATER OPTIMIZER 9 Customizing QuickFill Mode 10 Controlling Dispenser Light 10 Using ECO Mode 11 Replacing Your Water Optimizer’s Filters 13 MAINTAINING YOUR WATER OPTIMIZER 13 Storing & Relocating Your Water Optimizer 15 Leaving Your Water Optimizer (Vacation) 17 TROUBLESHOOTING YO
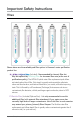
Important Safety Instructions When using electrical appliances, basic safety precautions should always be followed, including the following: 1. 2. 3. 4. 5. 6. 7. 8. 9. 10. 11. 12. 13. 14. 15. 16. 17. 18. 19. 20. Read all instructions. Should your appliance ever fail, please disconnect the power and water immediately before calling for assistance. To avoid leakage and damage, never remove appliance parts. Unsupervised children should not be allowed to operate the machine.
Getting To Know Your Water Optimizer G A B C D E H F I J M K L N O II Behind Dispenser Nozzle P Q Getting To Know Your Water Optimizer 1
Important Safety Instructions EE FF S HH O DD T P Q Z R GG EE V X GG Y DD U AA Z Important Safety Instructions 2 BB HH FF
Important Safety Instructions U CC Leak Detector Compartment AA BB JJ Product Features A Control Panel B Dispenser Light Button - Toggles dispenser light. C ECO Mode/Filter Rest Button - Press to toggle ECO Mode, hold to reset filter. D Light Sensor - Light sensor that activates ECO Mode.
Important Safety Instructions E Heating System Status Light - When lit, indicates heating system is active. F Cooling System Status Light - When lit, indicates cooling system is active. G System Power Status Light - When lit, indicates is powered on. H UV Sterilizer Status Light - When lit, UV sterilizer is active (ambient only). I Pod Filter(s) Status Light - When light is red, pod filters needs replaced. J Hot Dispense Mode Button - Press before dispense to select hot water.
Important Safety Instructions Z 110v Power Cord - Provides power to Water Optimizer. Standard U.S. 110v only. AA Accessory Output Port - Port to connect accessory appliances (i.e. ice-maker). BB Source Input Port - Port that connects to water source to provide water to Optimizer. CC Leak Detection Sensor - Detects internal leaks. If triggered, disables water flow. DD External Filter - OPTIONAL external pod filter. Particle Filter recommended.
Important Safety Instructions Filters F1 F2 F3 F4 F5 Shown above are the available pod filter options in Kenmore’s water purification product line. F1. ULTRA+3 Hybrid Filter (Included)- Recommended for internal filter slot. May be replaced by Polishing Filter for increased flow rate (at the cost of purification quality).
Important Safety Instructions F3. Chemical Filter (Sold Separately)- This filter can be used as an alternative, replacing the secondary Particle Filter. The Chemical water filter replacement pod utilizes a activated carbon granules to improve the safety of drinking water by effectively removing common disinfection byproducts (THMs), organic contaminants like chlorinated solvents and other industrial pollutants, pesticides, and select heavy metals such as lead and mercury.
Important Safety Instructions Technical Specifications Model KM1000 (white), KM1000B (black) Rated Power 555 Watts Heating Power 420 Watts Refrigeration Power 90 Watts Rated Pure Water Flow 0.32 gal/min [43.5 psi] (1.2 L/min [0.3 MPa]) Hot Water Production 1.01 gal/hr ≥ 172.4°F (4 L/hr ≥ 78°C) Hot Water Storage 0.24 gal (0.9 liter) Cold Water Production 0.79 gal/hr ≤ 50°F (3 L/hr ≤ 10°C) Cold Water Storage 0.3 gal (1.3 liters) Environmental Temperature Requirements 40°F - 100°F (4.
Using Your Water Optimizer This guide will explain how to use, maintain, and troubleshoot your new Water Optimizer. Be sure to complete all of the applicable instructions in the Installation Guide, included with your Optimizer prior to using the appliance. Powering On/Off Your Optimizer Be sure to never plug in your Optimizer, or power on either temperature mode before you’ve connected a proper water source, and enabled water flow. 1.
Using Your Water Optimizer on the N Dispense Button. Water (of selected temperature mode) will continue to dispense until button is released, or 10 minutes has elapsed. QuickFill Mode, when triggered, will dispense water for 10 seconds (this time is customizable, see “Customizing QuickFill Mode” on page 10), and then stop. It is active by default, and can be toggled by pressing M QuickFill Mode Button. To dispense water using QuickFill Mode (when active), simply press the N Dispense Button.
Using Your Water Optimizer that can be toggled by pressing the B Dispenser Light Button. By default, it is set to illuminate only when dispensing. 1. To toggle to always illuminate, press B Dispenser Light Button once. Button will remain illuminated. 2. To toggle to never illuminate, press B Dispenser Light Button again. Button light will turn off. 3. To toggle back to illuminate only when dispensing, press B Dispenser Light Button one last time. Button will re-illuminate.
Using Your Water Optimizer Using Your Water Optimizer 12
Maintaining Your Water Optimizer Replacing Your Water Optimizer’s Filters Your Water Optimizer is equipped with a I Pod Filter(s) Status Light to indicate when you need to change your pod filters (based on typical usage). This reminder is controlled by a timer that will change the Pod Filter(s) Status Light from white to red every six months. This timer can be reset by following the last step in this section.
Maintaining Your Water Optimizer 1/4 in. Quick Connect Shutoff Valve, until the water exiting the filter is clear. Be sure to aim the water outlet on the attachment into your container. 8. Now, disconnect the G Filter Flushing Setup from the C 1/4 in. Quick Connect Shutoff Valve and reattach it to the BB Source Input Port 9. Next, if replacing the internal filter, open the R Internal Filter Door by inserting your finger into the opening at the top, and pulling lightly down and outward. 10.
Maintaining Your Water Optimizer Storing & Relocating Your Water Optimizer At some point, you may need to store or relocate your Water Optimizer. Should one of these situations be the case for you, below are a few simple steps to prevent any damage from occurring. 1. First, if the cooling and/or heating systems are powered on, flip X Hot Mode Power Switch and Y Cold Mode Power Switch into the down position to power off. This should always be done prior to shutting off water supply. 2.
Maintaining Your Water Optimizer 6. Slide the blue DP1 Retainer Clip off of the JJ Appliance Drain Port. JJ DP1 DP2 DP3 7. Press the dark gray DP2 Quick Connect Sleeve all the way up into the port then, while keeping the sleeve pressed in, pull down and remove the white DP3 Plug. 8. Now, press and hold the N Dispense Button (with Cold Mode selected) until water flow from the drain port stops, indicating your Optimizer has been fully drained. 9.
Maintaining Your Water Optimizer 12. Disconnect the tubing running between our Optimizer’s BB Source Input Port and the C 1/4 in. Quick Connect Shutoff Valve you just shutoff, and place end of the tubing into a container to catch any water that drains back. 13. Next, place the container below the rear ports, and tilt the Water Optimizer backwards (no more than 45 degrees), allowing any remaining water to drain from the appliance. 14. Now remove the filter(s).
Troubleshooting Your Water Optimizer Below are some simple steps to troubleshoot the most frequent issues our users experience. If your issue is not listed in this section, or you feel in any way confused, please feel free to contact us. Call us at 1-844-374-6576, or email us at support@drinkpod.com. Issue #1: My Water Optimizer is dispensing slowly. Solution 1: Check to ensure you home’s water line is providing sufficient water pressure. Solution 2: Something may be restrictng water flow.
Troubleshooting Your Water Optimizer Solution 3: If you haven’t already, try attaching the secondary external Particle Filter and external attachment assembly to your Water Optimizer. It was included to specifically address scenarios a users water source has abnormally high levels of large particle contaminants, to extend the primary filters lifespan. Issue #3: My Water Optimizer isn’t powering on.
Troubleshooting Your Water Optimizer Solution 2: Cold tank’s water level may have been drained and exhausted by above average use, and requires sufficient time to replenish. Solution 3: Compressor may have failed or lost the R-134A refrigerant. If compressor is running continuously and/or feels extremely hot to touch, power off X Cold Mode Power Switch, and contact support at 1-844-374-6576, or support@ drinkpod.com. Issue #7: My Dispenser Button Light is flashing.
Troubleshooting Your Water Optimizer Solution 3: Check for broken, cracked or weak fitting connections. Solution 4: Contact support at 1-844-374-6576, or email us at support@drinkpod. com.
Notes Notes 22
Warranty KENMORE LIMITED WARRANTY FOR TWO YEARS from the date of sale this appliance is warranted against defects in material or workmanship when it is correctly installed, operated and maintained according to all supplied instructions. WITH PROOF OF SALE a defective appliance will receive free repair or replacement at option of seller: Drinkpod, LLC 1-844-374-6576 This warranty applies for only 90 DAYS from the date of sale if this appliance is ever used for other than private household purposes.
Kenmore ® Customer Care Hotline For technical support, warranty repair service, or to order replacement parts. 1-844-374-6576 www.kenmore.