KTC-D600E DIGITAL TV TUNER INSTRUCTION MANUAL © B64-4758-08/00 (E) 1-KTC-D600E_ENG_1018.
Contents Safety precautions 3 Notes 3 Basic Operation 4 Function During TV Screen Menu Control Screen Settings 5 System Setting Automatic Search (Searching for currently available station) Manual Search ( Manually Searching Station) My Favorite Channel List Restoring to Factory Default Updating the Software Parental Level Setup Language Setup Time Setup AV Setup Displaying EPG 13 Viewing the Program Guide Operation of Remote Control Unit 14 Preparing the Remote Control Unit Accessories 16
Safety precautions Notes WARNING To prevent injury or fire, take the following precautions: To select TV Type (PAL or NTSC) To prevent a short circuit, never put or leave any metallic objects (such as coins or metal tools) inside the unit. The TV picture display can be divided roughly into two TV formats (PAL and NTSC). They are variable depending on countries and areas. This unit has a function for changing the video format according to the TV type.
Basic Operation (When connected with DNX9260BT A) Various control screens appear in the Digital TV/ Video Source mode. (You can only operate Digital TV with the optional accessory Digital TV Tuner connected). Refer to the user manual for the connected monitor to see basic operations including how to convert to TV. Function During TV Screen Menu Control Screen Basic functions are available even when the TV screen is displayed. Menu Control Screen appears by touching the area shown below.
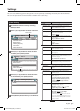
Settings You can select following system setting items. Set the system by controlling the touch panel of the monitor. You can also operate the enclosed remote controller in the same way. System Setting Setting item 1 Show Menu Control Screen by touching [Menu] button. 2 Touch [] or [] button to select main item.
Settings Automatic Search (Searching for currently available station) Manual Search ( Manually Searching Station) Search for currently available stations and save them in the Channel List. Search a station by specifying area or channel. 1 Show Menu Control Screen by touching [Menu] button. 2 Touch [] or [] button to select "Search". 3 Touch [] or [] button to select "Automatic Search" and then press [Enter] button. 1 Show Menu Control Screen by touching [Menu] button.
Favorite Channel List Using remote controller You can additional and erase for TV/RADIO favorite channel list. Additional channel list Move the cursor over area A. 1 Show Menu Control Screen by touching [Menu] button. 2 Touch [] or [] button to select "Channel". 3 Touch [] or [] button to select "Edit Channel" and then press [Enter] button. Setting > Channel Search System Channel Preference Push [] or [] button to select additional channel and then press [ENTER] button.
Settings Restoring to Factory Default Updating the Software Restore this unit's settings to factory default. Download the new software from the USB Memory stick and update the software installed in this unit. 1 Show Menu Control Screen by touching [Menu] button. 2 Touch [] or [] button to select "System". 3 Touch [] or [] button to select "Reset Default" and then press [Enter] button. 1 Show Menu Control Screen by touching [Menu] button. 2 Touch [] or [] button to select "System".
Parental Level Setup • Do not turn off the power while update is in progress. • If the power is turned off accidentally during upgrading, turn on the power while keeping the USB stick in the slot. The Update menu will then be activated automatically. 6 Touch [Return] button when you are finished. • This function is only available when the USB Memory stick supports this feature. • When new software is loaded, this might have different functions than the software you are using now.
Settings 6 Touch [] or [] button to select Parental Level and then press [Enter] button. Parental Control > Setting Censorship Setting Censorship Language Setup Selects a language you use for the Menu, Audio and the Subtitle. 1 Show Menu Control Screen by touching [Menu] button. View all 5 2 Touch [] or [] button to select "Preference". 7 12 3 Touch [] or [] button to select "Language Setting" and then press [Enter] button. 15 When you change the password ...
Time Setup AV Setup Set the time zone of GMT (Greenwich mean time) and summer time as necessary. Set the audio and video output mode. 1 Show Menu Control Screen by touching [Menu] button. 2 Touch [] or [] button to select "Preference". 3 Touch [] or [] button to select "Time Setting" and then press [Enter] button. 1 Show Menu Control Screen by touching [Menu] button. 2 Touch [] or [] button to select "Preference". 3 Touch [] or [] button to select "A/V Control" and then press [Enter] button.
Settings 6 Touch [] or [] button to select Screen ratio and then press [Enter] button. 4:3 16:9 Continent Time Difference City Hawaii –10:00 Alaska –9:00 Pacific Time –8:00 Arizona –7:00 Mountain Time –7:00 Central Time –6:00 Eastern time –5:00 Indiana –5:00 Atlantic Time –4:00 Mid-Atlantic –2:00 W.
Displaying EPG Receiving and displaying EPG (Electronic Program Guide) sent together with a program. Viewing the Program Guide You can check the programs on each channel in the EPG (Electronic Program Guide). 1 Show Menu Control Screen by touching [EPG] button. 2 Select the channel or time to display EPG 1000. RTL Television 09:30 ~ 10:00 Die Kinderrzte von St. Marien 10:00 ~ 10:30 Unsere erste gemeinsame Woh... 10:30 ~ 11:00 Mein Garten 11:00 ~ 12:00 Punkt 12 - Das RTL-Mittagsjou...
Operation of Remote Control Unit PWR / To turn on and off this unit. Toggles between menu items (up/down). INFO / To show the carrier information of the currently selected station (toggle between pages in menu using // / ). Toggles between menu items (left/right). EPG Opens the Electronic Program Guide. CH LIST Opens the channels list. CH / Changes channels (channel up, channel down). MENU Press once to enter Setting Menu. The Setting Menu consists of 4 main-menus.
AUDIO Switches to Audio language. Preparing the Remote Control Unit Pull the battery sheet out from the remote control unit to the direction of the arrow. TELETEXT Switches to teletext. VOL / To adjust volume. Volume mute only works in TV/ Radio mode. MUTE Mutes the sound. Volume mute only works in TV/ Radio mode. 0–9 a. Selects a favorit list. b. Selects a sub-menu item. c. Selects a teletext. Changing the battery of the remote control unit Use a commercially available button battery (CR2025).
Accessories Installation Installing the Main Unit Wiring harness (6m)............................ 1 Remote Control Sensor (6m)......... 1 The Digital TV Tuner (main unit) can be installed by securing it to the pile carpet with Velcro or by screwing it on to a commercially available audio board. • There are various terminals on the main unit. Leave some space to connect cables on the terminal side of the main unit. • Do not place anything on top of the main unit. This can cause product failure.
Installing the Remote Control Sensor Inserting CA Card and CAM Paste the remote control sensor to the dashboard. Insert the CA card (Conditional Access card) and CAM (Conditional Access Module) into the card slot. 1 Remove the paper from double-stick tape and paste it on the back of the remote control sensor. 2 Wipe the dirt and oil off from the installation area and paste the remote control sensor to the dashboard. Remote control sensor • Wipe oil and dirt off from the installation surface.
Connection Remoto control sensor Digital TV Tuner Ignition wire (Red) Fuse (1A) It is used for updating the software. Battery wire (Yellow) Fuse (5A) Ground wire (Black) (To car chassis) Wiring harness • 75Ω/ F connector • For VHF/UHF Up to 2 antennas can be connected to the antenna sockets “ANT A” and “ANT B”. Set "Active Antenna DC" is "Enable" (DC5V ON) when active antenna is used. TV Interface Cable To the Monitor unit such as a DVD receiver.
LZ-612IR Operation LZ-612IR Setup1 LZ-612IR Setup2 1 Enter Select screen mode Touch the display window. 1 Enter Select screen mode Touch the display window. 2 Select the function Touch the function button. 2 Select the function Touch the function button. PAGE MENU PAGE EPG PWR AVIN TV.M CH.L TV/R SEEK RTN ENT MUTE INFO VOL CH VOL CH RTN ENT Display PAGE MENU PWR AVIN MUTE Function Move to the DVB-T Tuner unit Setup Screen 2. Move to Monitor Setting screen .
LZ-612IR Connection Specifications System Connection with LZ-612IR TV tuner LZ-612IR Hideway Unit Input Frequency VHF : 174 – 230 MHz UHF : 470 – 862 MHz Demodulation Type : QPSK/ 64QAM/ 16QAM Channel Bandwidth : 7/ 8 MHz FFT Size : 2K and 8K KTC-D600E Remote Control Cable Guard Interval : 1/4, 1/8, 1/16, 1/32 Puncture Rate : 1/2, 2/3, 3/4, 5/6, 7/8 Antenna input : 2-ch Diversity Connector Type : F Type × 2 General • Connect the audio/video output of KTC-D600E to “AV2 INPUT” of LZ-612IR.
Declaration of Conformity with regard to the EMC Directive 2004/108/EC Manufacturer: Kenwood Corporation 2967-3 Ishikawa-machi, Hachioji-shi, Tokyo, 192-8525 Japan EU Representative’s: Kenwood Electronics Europe BV Amsterdamseweg 37, 1422 AC UITHOORN, The Netherlands This Product is not installed by the manufacturer of a vehicle on the production line, nor by the professional importer of a vehicle into an EU Member State.
7-KTC-D600E_PT_1018.