MGR-E8 DIGITAL AUDIO RECORDER INSTRUCTION MANUAL Declaration of Conformity with regard to the EMC Directive 2004/108/EC Manufacturer: Kenwood Corporation 2967-3 Ishikawa-machi, Hachioji-shi, Tokyo, 192-8525 Japan EU Representative's: Kenwood Electronics Europe BV Amsterdamseweg 37, 1422 AC UITHOORN, The Netherlands © B60-5825-08/00 (E/X) 1AJ6P1P0109-- (XE0) B60-5825-08_00_MGR-E8(E)_English_1AJ6P1P0109--(XE0).
Contents Safety precautions ............................................4 Unpacking ...........................................................9 Other recording operations ....................... 32 Recording by manually adjusting the microphone recording level.................... 32 Recording from an external microphone ............................ 33 Recording from an external audio component or musical instrument connected to the line input .................... 34 Changing the Recording Settings........
Adjusting the audio Adjusting the audio ...................................... 58 Adjusting the volume....................................... 58 Selecting the sound effects .......................... 58 Menu function Common settings under the menu......... 60 Setting the time.............................................. 62 Sleep timer and alarm timer ...................... 64 Utilizing your computer Connecting a PC ............................................. 66 Connecting a PC .........................
Safety precautions IMPORTANT SAFETY INSTRUCTIONS ¤ Caution: Read this page carefully to ensure safe operation. Read Instructions – All the safety and operating instructions should be read before the product is operated. Retain Instructions – The safety and operating instructions should be retained for future reference. Heed Warnings – All warnings on the product and in the operating instructions should be adhered to. Follow Instructions – All operating and use instructions should be followed.
Do not use or place the product in the following locations: • A place with high humidity, such as in a bathroom or shower room. Also do not use this unit in a place subject to water splashes. Otherwise, a fire hazard or battery leak may result. • Do not approach this unit to heating equipment (a stove, iron, etc.). Otherwise, a fire hazard or battery leak may result.
Safety precautions Handling • Do not apply an excessive force to the display part. Otherwise, it may be damaged. • Avoid storing this unit in a bag together with a hard object. Otherwise, this unit may be damaged when the bag is pushed. • Do not expose this unit to an insecticide or other volatile substance or bring this unit in extended contact with a rubber or vinyl material. Otherwise, discoloration or peeling of the surface finish may result. • Do not put this unit in a pocket of trousers.
Note on the built-in battery • The battery built into this unit discharges spontaneously even when this unit is not used. This means that the built-in battery may be exhausted completely when this unit is left unused for a long period. If this happens, recharge the battery before using this unit. • The battery recharging time is variable depending on the condition of the battery and ambient temperature. • The available playback time reduces when this unit is used under low temperatures.
Safety precautions Storage and maintenance of SD card Before storage • Be sure to put the SD card in the case before storing it. • Do not leave the SD card in a place with extremely high temperature (under direct sunlight, etc.) or extremely high humidity. When the SD card gets dirty • Wipe lightly with a soft cloth, etc. • Do not use lacquer thinner, benzine or alcohol. Other cautions • Do not open or modify the SD card. • Do not peel off the label from the SD card.
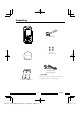
Unpacking USB cable Recorder Ear tip (L size, S size) Wind-screen Headphones (Ear tip: M size) 0*5 ( ',*,7$/ $8',2 5(&25'(5 ,16758&7,21 0$18$/ ¤CAUTION Excessive sound pressure from earphones or headphones can cause hearing loss.
Read Before Use Names and functions of parts 4 5 6 - 7 ~ ! 1 = 2 3 * ( ) ^ 8 9 @ & 0 _ + ¡ # $ % 1 Reset button • If all of the buttons of this unit are defeated while [* HOLD] is set to OFF, press the RESET button to reset and switch off this unit. Press the RESET button with the tip of a clip. CAUTION When this unit is reset, its settings return to those of the last time it was switched on. The settings made since then are cleared.
8 /LIST Power/ List button • Press and hold to switch the power ON/OFF. • Press shortly during stop or play mode to open the list screen at the highest level of hierarchy. • Press shortly while a list is displayed to return to the display during playback. 9 Select/ Play button 5 Up button • Press while the menu or list is displayed to move the cursor upward. • Press during stop or play mode to open the list screen. ∞ Down button • Press while the menu or list is displayed to move the cursor downward.
Names and functions of parts ~ REC button • Press to enter recording standby mode. Press again to start recording. • Press during recording to enter recording pause mode. Press again to resume recording. • Rec indicated by the indicator Steady lighting Recording mode Blink Recording standby or Recording pause mode Extinguished Stop mode # Strap eyelet • Pass the strap through this hole. CAUTION • Do not pass a metallic hook or like (a key holder, etc.) through the strap eyelet.
) MIC REC LEVEL Microphone recording level switch • When the built-in microphones or an external microphone is used, set the recording level adjustment method to either MANUAL or AUTO. _ MIC MODE Microphone mode switch • When the built-in microphones are used, set the microphone mode to Monaural, 2-Microphone or 3-Microphone. + PLUG IN POWER Plug-in power switch • Set ON when using an external microphone with the plug-in power type.
Screen display items Press for various settings. Record settings menu (page 35) Playback settings menu (page 46) Common settings menu (page 60) Press to select the track to be played from a list. (page 44) List screen (page 44) MGR-E8 14 B60-5825-08_00_MGR-E8(E)_English_1AJ6P1P0109--(XE0).
Press to edit files, etc. File edit screen - File move (page 38) - File divide (page 40) - File delete (page 56) - Favorite (page 50) - A-B repeat (page 47) The first press initiates recording standby and the second press starts recording. (page 24) Display during recording (page 28) Display during playback (page 42) 15 B60-5825-08_00_MGR-E8(E)_English_1AJ6P1P0109--(XE0).
Getting started About the power supply HOLD Power Switch this unit ON 1 Cancel the HOLD function 2 Switch this unit ON Slide [HOLD] to the “OFF” position. Press [Power] until the KENWOOD logo is displayed. Switch this unit OFF 1 Switch this unit OFF Press and hold [Power] until the display is turned off. • This unit switches OFF automatically after it has been left in stop mode for a certain period of time (Auto Power-OFF). The time until Auto Power-OFF occurs can be changed (page 60).
Recharging from a PC connected with USB connection This unit incorporates a rechargeable battery (hereafter “the battery”), which can be charged from a PC connected through a USB cable. 1 2 3 Start up the PC Connect a USB cable to the USB port of the PC Connect the USB cable to the USB jack of this unit USB cable The battery will be recharged fully in about 2.5 hours. The battery icon is animated during recharging. When recharging completes (about 4 hours), the icon stops in the “ ” condition.
Turning On/Off the power Operation while supplying external power For long hours of recording or playback, the power can be supplied externally from the USB port of a PC. 1 2 3 4 Start up the PC Connect a USB cable to the USB port of the PC Switch this unit OFF Press and hold [Power] until the display is turned off.
Preventing accidental operation (Hold function) The HOLD function defeats all of this unit’s buttons and helps prevent erroneous operation when this unit is carried in a bag, etc. Defeating all control buttons 1 Set the hold function for all buttons of this unit Slide [HOLD] to the “ALL” position. Defeating only the record button 1 Set the hold function for the REC button Slide [HOLD] to the “REC” position. Enabling all buttons 1 Cancel the hold function Slide [HOLD] to the “OFF” position.
Switching on for the first time When you switch this unit on for the first time after purchase, you need to set the language used in the display and the current date/time information. It is recommended to set the correct date and time because each of the recorded file will be named after the date and time of each recording session (time stamp function). 4 Power £/8 1 Switch this unit ON 2 Setting the menu language 3 4 5 ¢ ∞ Press the [Power] until the KENWOOD logo is displayed.
• The language set here will be used in the subsequent screen display. • The language and date/time set here are held even after this unit is switched off. • The information set here can later be modified in (page 60) and (page 62), both of which belonging to under “Menu”. • If the remaining battery power is low, connect this unit to a PC for recharging. About 10 minutes of recharging will make it possible to check the operations of this unit.
Connecting stereo headphones Connect the provided stereo headphones to this unit. R Entanglement-prevention slider To prevent the headphone cord from being entangled, slide the entanglement-prevention slider to fix the headphone bodies in position. L Hold the headphone body and insert into each ear. The optimum condition is when the ear hole is stopped completely by the ear tip. Selecting the ear tips The headphones are shipped from the factory with the M-size ear tips attached.
Inserting/ removing a microSD card This unit can play music stored in a microSD card or recording music in a microSD card. This unit accepts a microSD or microSDHC memory card. For details, see (page 76).
Recording music Basic recording operation REC LEVEL MIC REC LEVEL Power MIC MODE REC EDIT 7/BACK £/8 Preparing for recording 1 Switch this unit ON 2 Setting the recording format 3 Select a folder for recordings 4 Setting the microphone mode Press [Power]. Select in under “Rec setting”. (page 35) The default recording format set before this unit left the factory is “WAV 44.1kHz 16bit”. Select in under “Rec setting”.
Setting 2MIC MONO 5 Setting overview Display Stereo recording mode using the L/R (omnidirectional) built-in microphones that are installed at an angle of 120°. This mode can record stereo audio with a rich feeling of expansion. Monaural recording mode using only the Center (unidirectional) built-in microphone. This mode can record audio with high directivity in the front direction. Set the recording level ■ To set the recording level automatically Slide [MIC REC LEVEL] to the “AUTO” position.
Basic recording operation ■ To divide a recorded file During recording, press [EDIT]. Stop recording 1 Stop recording Press [7/BACK]. About wind noise If the “wind noise” due to strong wind causes a problem during outdoor recording, attach the provided windscreen to this unit. It will be effective for reduction of the “wind noise”. About successive recording Every file can record data until the file size becomes 2 GB.
• The built-in speaker does not output audio during recording. • Use headphones to monitor the audio being recorded. The headphones volume can be adjusted by pressing [ ] or [ ]. This volume adjustment does not affect the recording level. • During monitoring of the recorded audio through the headphones, a howling sound may be produced if the headphones are too close to the microphone. If this happens, increase the distance between the microphone and headphones or reduce the headphones monitoring volume.
Control and display during recording Example of display 7 9 8 0 = # $ % 5 ~ ! 1 6 @ 2 3 4 ^ & MGR-E8 * ( )_ 28 B60-5825-08_00_MGR-E8(E)_English_1AJ6P1P0109--(XE0).
1 MENU button • Press during stop or recording standby mode to open the menu. The menu can be used in settings of recording format, etc. (page 35) • Press during stop mode to open the file edit screen. 7 Microphone mode (page 24) 8 Recording destination (page 35) 9 Delayed recording (page 36) 2 REC button • Press during stop mode to enter the recording standby mode. • Press during recording standby to start recording. • Press during recording to let it pause temporarily.
Folders and recorded files Name of recorded files The files recorded with this unit are named based on the date/time the recording is started. 100901_0000_001A.WAV 1 2 3 4 5 1 Recording start date (2 last digits of year, month and day) 2 Recording start time (hour and minute) 3 File number, which is the sequential number of file in the folder. The file number varies when files are deleted, divided or moved. 4 Save folder name A, B, C or D, which represents one of “MIC_A” to “_D”. “L” represents LINE.
Switching the folder 1 MENU £/8 5 7/BACK ∞ Enter MENU mode During stop and recording standby, press [MENU]. ✎ If [MENU] is pressed during recording standby, go to step 3 below. 2 3 4 Enter the Rec setting Press [5]/[∞] to select “Rec setting” and press [£/8]. Set the recording destination ■ To set the microphone recording destination Press [5]/[∞] to select “MIC Rec destinat” and press [£/8]. Press [5]/[∞] to select “Internal memory” or “SD card” and press [£/8].
Other recording operations MIC REC LEVEL MIC MODE EDIT 5 £/8 ∞ 7/BACK PLUG IN POWER Recording by manually adjusting the microphone recording level 1 Set the MANUAL recording level adjustment 2 Enter the recording standby mode 3 Adjusting the recording level Slide [MIC REC LEVEL] to the “MANUAL” position. Press [REC]. Turn [REC LEVEL] to adjust. While observing the level meter and PEAK indicator, adjust the recording level usually to between -6 and -12 dB.
Recording from an external microphone Dynamic microphone, etc. Microphone input Condenser microphone with the plug-in power type 1 To connect to external microphone Connect an external microphone to [ ■ 2 MIC] jack. To connect a plug-in power type microphone Slide [PLUG IN POWER] to the “ON” position. Prepare and start recording Start recording following the instructions in (page 24). • Do not connect anything to the line input terminal.
Other recording operations Recording from an external audio component or musical instrument connected to the line input Musical instrument, etc. (Line output) Line input 1 Connect the audio component 2 Enter recording standby mode 3 Adjust the recording level Connect the desired audio component to the [LINE IN] terminal. Press [REC]. Turn [REC LEVEL] to adjust. While observing the level meter and PEAK indicator, adjust the recording level usually to between -6 and -12 dB. ■ 4 Stereo, etc.
Changing the Recording Settings The “Rec setting” allows you to set various items according to the type of the recorded sound. Rec format Setting Setting overview WAV 96kHz 24bit/ WAV 48kHz 24bit/ WAV 44.1kHz 24bit/ WAV 96kHz 16bit/ WAV 48kHz 16bit/ WAV 44.1kHz 16bit* Linear PCM formats with which recorded audio is not compressed. Larger figures mean higher audio quality. The 44.1 kHz sampling frequency and 16 quantization bits are most suitable for recording of a music CD, etc.
Changing the Recording Settings Mic Sync Rec Setting OFF*/ON Analogue limiter OFF*/ON Low-cut filter OFF*/ON Delay Rec OFF*/5sec/10sec/30sec Line auto divide OFF*/ON Auto divide level High/Mid*/Low Line Ext. Mic Int. Mic Item Setting overview Recording starts in synchronism with the start of microphone sound input. Recording pauses when no sound has been input for 2 seconds. This item is enabled when [MIC REC LEVEL] is set to AUTO.
1 MENU £/8 5 7/BACK ∞ Enter MENU mode During stop and recording standby, press [MENU]. ✎ If [MENU] is pressed during recording standby, go to step 3 below. 2 Enter the Rec setting 3 Set each item Press [5]/[∞] to select “Rec setting” and press [£/8]. Press [5]/[∞] to select a setting item and press [£/8]. Press [5]/[∞] to select a setting value and press [£/8]. The “✓” mark indicates the current setting. ■ 4 Press [7/BACK] to return to the previous screen page. Exit MENU mode Press [MENU].
Editing a recorded file Moving a recorded file The files recorded with this unit can be moved between the internal memory and SD card. When a file is moved, the file in the original location is deleted. LIST £/8 7/BACK EDIT 5 ∞ 1 Enter list mode 2 Select the Recorded file control item 3 Select a folder 4 Select the recorded file to be moved 5 To stop playback 6 Enter File edit mode 7 Select the file movement operation Press [LIST]. Press [5]/[∞] to select “Recorded” and press [£/8].
8 Move the recorded file Press [5]/[∞] to select “To SD card” or “To internal memory” and press [£/8]. ■ 9 Press [7/BACK] to return to the previous screen page. Exit File edit mode Press [EDIT]. • Only the files recorded with this unit can be moved. • Recorded files can be moved between the specified folders. Example: “Internal memory” - “MIC_A” “SD card” - “MIC_A_SD” • When a recorded file is moved, the file number sections in the file names are changed.
Dividing a recorded file A file recorded with this unit can be divided into two files. LIST £/8 7/BACK EDIT 5 ∞ 1 Enter list mode 2 Select the Recorded file control item 3 Select a folder 4 Select the recorded file to be divided 5 Enter File edit mode 6 Divide the recorded file Press [LIST]. Press [5]/[∞] to select “Recorded” and press [£/8]. Press [5]/[∞] to select “Internal memory” or “SD card” and press [£/8]. Press [5]/[∞] to select “MIC_A” to “_D” or “LINE” and press [£/8].
• Only the files recorded with this unit can be divided. • A recorded file cannot be divided in the following cases. - When the folder containing the file already contains 199 files. - When the recording time of the file is short. - When the point to divide the file is close to the end of the file. - When the internal memory or microSD card does not have enough available space. • When a recorded file is divided, the file number sections in the file names are changed.
Playing music tracks Operations and display in playback Example of display 9 0 - @ # = ~ ! 1 2 3 4 5 6 7 8 $ % ^ & * () Resume function This unit memorizes the status immediately before it is switched off. Next time it is switched on, it enters pause mode at the position playback was last stopped. MGR-E8 42 B60-5825-08_00_MGR-E8(E)_English_1AJ6P1P0109--(XE0).
1 MENU button Press to open the menu. The menu can be used in settings of playing mode, etc. (page 46) 2 /LIST Power/List button Press to open the list screen at the highest level of hierarchy. 3 4 Left button Press to play the current or previous track from the beginning. Press and hold to fast reverse the music. 4 £/8 Play/Pause button Press during playback to let it pause temporarily. Press again to resume playback. 8 ¢ Right button Press to play the next track from the beginning.
Playback by selecting music from the list The files recorded with this unit can be played by selecting the folder. The music files transferred from the PC can be searched based on DB classified by their tag informations. (page 72) Category Track Contents A music file transferred from the PC can be selected in order of Artist name*3 → Album title*1 → Track title*1. A music file transferred from the PC can be selected in order of Album title*1 → Track title*1.
LIST £/8 7/BACK 1 EDIT 5 ∞ Enter list mode ■ To open the list screen at the highest level of hierarchy Press [LIST]. ■ To open the list screen at the level of the music file being played Press [5]. 2 Select the list category to be used for selecting the desired music file 3 Select the desired music file Press [5]/[∞] to select category and press [£/8]. Press [5]/[∞] to select an item and press [£/8] to enter. Repeat these operations until the desired music file is displayed.
Various play modes The “Play setting” makes it possible to select various playback methods. Item Play mode Setting OFF ONE Repeat Setting overview Plays music in a list. Playback of the same track repeatedly. ALL Repeat Playback of all of the tracks in the list repeatedly. Random Play speed Intro play 200% — 100% — 50% OFF ON FF/FB Speed High/Mid/Low Time search - Property - MENU £/8 7/BACK Display Repeated playback of all of the tracks in the list in a random order.
3 Set each item Press [5]/[∞] to select a setting item and press [£/8]. Press [5]/[∞] to select a setting value and press [£/8]. The “✓” mark indicates the current setting. ■ 4 Press [7/BACK] to return to the previous screen page. Exit MENU mode Press [MENU]. Setting A-B repeat 1 Set the start point (point A) 2 Select A-B repeat 3 Set the end point (point B) Press [EDIT] at the point you want to set as the start point of the repeated section.
Varying the playback speed The playback speed can be increased or decreased. Setting 200% — 100% — 50% Setting overview Increases the playback speed in 10% increments. Playback at the original speed. Decreases the playback speed in 5% decrements. MENU £/8 7/BACK 1 Display 4 5 ¢ ∞ Enter MENU mode Press [MENU]. ✎ If [MENU] is pressed during playback, go to step 3 below. 2 Enter the Play setting 3 Set the play speed Press [5]/[∞] to select “Play setting” and press [£/8].
Searching the point to be played by specifying the time The desired point in a file can be specified by the playing time. MENU £/8 1 Select the desired track 2 Enter MENU mode 3 Select the time search 4 5 4 5 ¢ ∞ Play the desired track. (page 44) Press [MENU]. Press [5]/[∞] to select “Time search” and press [£/8]. Specify the time of the point you want to start playback ■ Press [4]/[¢] to select Hour, Minute and Second. ■ Press [5]/[∞] to vary the figures.
Adding to/Deleting from the Favorite Tracks you are particularly fond of can be registered in the Favorite folder for playing only the favorite tracks later. Up to 100 tracks can be added to the Favorite folder. LIST £/8 7/BACK EDIT 5 ∞ Adding to the Favorite 1 Select the track to be added to the Favorite folder 2 Enter File edit mode 3 Add the track in the Favorite folder Play the desired file or select it in the list. (page 44) Press [EDIT].
Playing Favorite The tracks in the Favorite folder can be played in the order they were added to it. 1 Enter list mode 2 Select the Favorite folder 3 Select a track Press [LIST]. Press [5]/[∞] to select “Favorite” and press [£/8]. Press [5]/[∞] to select a track and press [£/8].
Connection of external components The Line output can be used to connect an external component such as a speaker with built-in amplifier. The USB connector can be used to connect an external component such as a stereo set with USB capability. Connecting to the Line outout Speaker with built-in amplifier Stereo amplifier FM transmitter Car stereo Cable with stereo mini-plugs 1 2 Switch this unit ON Connect an external component Connect it to the [LINE OUT] terminal of this unit.
Connecting to the USB connector USB cable 1 USB-compatible stereo Connect a USB cable to the USB jack of this unit • For the operating procedure and the playable files, read the instruction manual for the connected stereo set. • Do not use or leave this unit or connected component in an automobile compartment with high temperatures. Otherwise, equipment failure may result.
Digital Audio Player Link When this unit is connected to a Kenwood audio component with the Digital Audio Player Link compatibility, playback of this unit can be controlled from the external audio component. Digital Audio Player Linkcompatible stereo Special cable Digital audio input 1 2 3 Switch this unit ON Connect a stereo Connect it to the [LINE OUT] terminal of this unit.
B60-5825-08_00_MGR-E8(E)_English_1AJ6P1P0109--(XE0).
Deleting files Deleting files Deleting a selected file LIST £/8 7/BACK 1 Enter stop mode 2 Enter list mode 3 Select the file to be deleted EDIT 5 ∞ Press [7/BACK]. Press [LIST]. Press [5]/[∞] to select an item and press [£/8] to enter. Repeat these operations until the desired music file is displayed. Press [5]/[∞] to move the cursor on the file to be deleted. ✎ If the music starts to play, press [7/BACK] to stop it. 4 Enter File edit mode 5 Delete the selected file Press [EDIT].
Deleting all files (Formatting) Caution • Formatting deletes all of the files in this unit. • Once formatted, the memory cannot be restored to the previous condition. MENU £/8 5 7/BACK ∞ 1 Enter stop mode 2 Enter MENU mode 3 Select the common setting and then the formatting operation 4 Select either Internal memory or SD card Press [7/BACK]. Press [MENU]. Press [5]/[∞] to select “Common setting” and press [£/8]. Press [5]/[∞] to select “Format” and press [£/8].
Adjusting the audio Adjusting the audio Adjusting the volume 1 Adjusting the volume Press [ ] or [ ]. Pressing and holding a button segment varies the volume gradually. • If the headphone volume is increased too much, you will be unable to hear the sounds from outside. Be careful not to increase the volume too much. • The adjustment range of the built-in speaker is different from that of the headphones output.
MENU £/8 4 5 ¢ ∞ 1 Enter MENU mode 2 Select the sound mode setting under the play setting 3 Select the Sound mode ■ 4 During playback, press [MENU]. Press [5]/[∞] to select “Play setting” and press [£/8]. Press [5]/[∞] to select “Sound mode” and press [£/8]. Press [5]/[∞] to select the Sound mode and press [£/8]. The “✓” mark indicates the current setting. To select “Custom” Set the equalizer ■ Press [4]/[¢] to select a frequency band. ■ Press [5]/[∞] to vary its level.
Menu function Common settings under the menu Some function items of this unit including the display brightness and auto power OFF function can be set as desired.
Item System info. Setting - Setting overview Displays the system information of this unit (model ID, firmware version, available memory capacity, total memory capacity). (* : Factory setting) MENU £/8 5 7/BACK ∞ 1 Enter stop mode 2 Enter MENU mode 3 Enter the common setting 4 Select the item to be set 5 Vary the setting value Press [7/BACK]. Press [MENU]. Press [5]/[∞] to select “Common setting” and press [£/8]. Press [5]/[∞] to select a setting item and press [£/8].
Setting the time Adjust the date and time of this unit. The date/time information is required for naming the recorded files. It is recommended to set the accurate date and time. MENU £/8 7/BACK 1 Enter stop mode 2 Enter MENU mode 3 Enter the common setting 4 Select the clock setting 5 6 4 5 ¢ ∞ Press [7/BACK]. Press [MENU]. Press [5]/[∞] to select “Common setting” and press [£/8]. Press [5]/[∞] to select “Clock setting” and press [£/8].
7 Exit MENU mode Press [MENU]. 63 B60-5825-08_00_MGR-E8(E)_English_1AJ6P1P0109--(XE0).
Sleep timer and alarm timer Item Sleep timer Contents Both the sleep timer and alarm timer are switched off. This unit can be switched off after the set period of time. Alarm timer An alarm tone (beep) can be generated after the set period of time. OFF MENU £/8 4 5 ¢ ∞ 1 Enter stop mode 2 Enter MENU mode 3 Select the common setting and then the timer setting 4 Select the sleep timer or alarm timer 5 Display Press [7/BACK]. Press [MENU].
■ To set the alarm timer Press [5]/[∞] to select “ON” and press [£/8]. To switch only the alarm timer off, select “OFF”. Press [4]/[¢] to select the hour or minute. Press [5]/[∞] to vary the figure. ■ Press [7/BACK] to return to the previous screen page. 6 Enter the timer setting 7 Exit MENU mode Press [£/8]. Press [MENU]. • The alarm timer is generated for about 30 seconds. The beep stops when any button is pressed during generation.
Utilizing your computer Connecting a PC Connecting a PC 1 2 3 Start up the PC Connect a USB cable to the USB port of the PC Connect the USB cable to the USB jack of this unit USB cable This unit is connected to the PC with the USB mass storage class connection. • • • • For the PC system requirements, see (page 76). This unit is switched ON automatically at the moment it is connected to the PC. When the USB connection, always use a supplied USB cable.
Disconnecting this unit from the PC 1 Click the [Safe To Remove Hardware] icon Display the indicator on the task tray if it is not displayed. Windows 7/ Vista Windows XP 2 Click [Safely remove USB Mass Storage Device] Windows 7 Windows Vista Windows XP 3 When a message is displayed indicating that the USB device can be removed safely, disconnect the USB cable from this unit Caution • Do not disconnect the USB cable during data transfer from the PC.
Configurations of folders and files This unit creates the following folders in the internal memory and SD card and saves files in the folders. When transferring files from a PC to this unit, the files should be written in accordance with the following folder configuration. Internal memory KENWOOD_DAP Music files created with Kenwood stereo components ]KWD ]LINE Folders and files recorded ]MIC_A with this unit ¡100901_0000_001A.WAV ¡100901_0001_002A.WAV ¡100901_0010_003A.
• About the files and folders in the MUSIC and KWD folders - Up to 3,000 folders can be recognized including the MUSIC and KWD folders in the internal memory and SD card. - Up to 7,000 files can be recognized in the MUSIC and KWD folders in the internal memory and SD card. - Up to 8 hierarchy levels can be recognized. • About the files in the MIC_A to _D and LINE folders - Up to 199 files can be recognized in each folder.
Transferring recorded files to a PC The files recorded with this unit can be stored in a PC. 1 2 Connect this unit to a PC (page 66) Open the removable disk Click [Start] – [Computer]. Double click [KENWOOD_DAP] (internal memory) or [removable disk]/ [KENWOOD_SD] (SD card). 3 Open the desired folder of this unit 4 Open the save destination folder of the PC Double click one of folder names “MIC_A” to “MIC_D” and “LINE.” Click [Start] – [Music].
5 6 Drag & drop or copy & paste the desired files from this unit into the PC Disconnecting this unit from the PC (page 67) • If the filename created by this unit is altered, the file cannot be played back on this unit. To prevent this, the recorded files with modified names should be moved to the MUSIC folder. 71 B60-5825-08_00_MGR-E8(E)_English_1AJ6P1P0109--(XE0).
Capturing Music in PC/ Transferring Music from PC To play music files as tracks of this Player, first rip music files in the PC. The obtained music files can then be transferred to this unit. This unit can play the following 3 types of music files. • MP3 (*.mp3) : MPEG-1 Audio Layer-3 Sampling frequency Transfer bit rate Variable Bit Rate (VBR) ID3 tag 8/ 11.025/ 12/ 16/ 22.05/ 24/ 32/ 44.1/ 48 kHz 32k – 320 kbps 32k – 320 kbps Ver. 1.0/1.1/2.2/ 2.3/ 2.4 • WMA (*.
5 3 4 6 7 Close the Windows Media Player Disconnecting this unit from the PC (page 67) Data transfer by drag & drop Open the Windows Explorer and drag & drop the desired file from the PC’s hard disk drive to this Player. Copy & paste can also be used for data transfer. 1 2 Connect this unit to a PC (page 66) Open the removable disk Click [Start] – [Computer]. Double click [KENWOOD_DAP] (internal memory) or [removable disk]/ [KENWOOD_SD] (SD card).
Capturing Music in PC/ Transferring Music from PC 3 Open the “Music” folder 4 Open the folder storing the desired music file 5 Drag & drop the music file into the removable disk 6 Disconnecting this unit from the PC (page 67) Double click [Music] folder. The music files transferred to this unit must always be saved in the MUSIC folder. For details, see (page 68). Click [Start] – [Music]. Select the music file to be transferred or the folder saving it.
Deleting files The music files transferred from the PC to this unit can be deleted from this unit. Deleting using the Explorer 1 2 3 4 5 Connect this unit to a PC (page 66) Open the removable disk Click [Start] – [Computer]. Double click [KENWOOD_DAP] (internal memory) or [removable disk]/ [KENWOOD_SD] (SD card).
Appendix Specifications Built-in flash memory *1 Battery type : 2 GB : Built-in Li-ion rechargeable battery Headphone output Recharging time : 3.5 mm stereo mini jack : 10 + 10 mW/ 16 Ω : Approx. 2.5 hours Battery operation time *3 Line output Continuous play time WAV (44.1 kHz) : Approx. 31 hours MP3 (128 kbps) : Approx. 35 hours WMA (128 kbps) : Approx. 29 hours (Playback of music files in the internal memory) Recording time WAV (96 kHz, 24 bit) : Approx. 16 hours WAV (44.
WAV (44.1 kHz, 16 bit) : Approx. 12 hours 20 minutes MP3 (320 kbps) : Approx. 55 hours MP3 (192 kbps) : Approx. 92 hours MP3 (128 kbps) : Approx. 138 hours MP3 (96 kbps) : Approx. 184 hours * The figure shown are standard values of stereo recording. * During continuous recording, the file is divided every 2 GB. Playback format MP3 Extension: .mp3 Sampling rate: 8/ 11.025/ 12/ 16/ 22.05/ 24/ 32/ 44.1/ 48 kHz Bit rate: 32 - 320 kbps Variable bit rate *4: 32 - 320 kbps ID3 tag: ver. 1.0/1.1/2.2/ 2.3/ 2.
Error messages Message Remedy Can’t play The file being displayed does not exist actually. \ If is set to , be sure to execute after deleting a file or removing the SD card (page 60). The music file with DRM cannot be played after its license has expired. \ Check the license and retry transferring a music file with valid license. A WMA file with DRM was transferred using the Explorer.
Message Remedy Please check the connection of line input Please check the connection of external microphone The connection cord was disconnected during recording. \ Check the cord connection and reconnect it as required. 79 B60-5825-08_00_MGR-E8(E)_English_1AJ6P1P0109--(XE0).
Troubleshooting In the case of a trouble such as the impossibility of switching this unit ON, spontaneous power shutdown or erroneous display, press the Reset button (page 8). For details, refer to the support information in our website by visiting: http://www.kenwood.com/ Symptom Remedy Power cannot be switched ON or pressing a button does not start an operation. The hold function is set to “ALL.” Cancel the HOLD function with the HOLD switch on this unit (page 19). The battery is nearly exhausted.
Symptom Remedy Recording standby cannot be entered. Recording is impossible. The hold function is set to “REC.” Cancel the HOLD function with the HOLD switch on this unit (page 19). If the music starts to play, press [7/BACK] to stop it. [REC] button: • Press during stop mode to enter the recording standby mode. • Press during recording standby to start recording. Recording from a line input is impossible. A plug is connected to the microphone input.
Glossary MSC (Mass Storage Class): USB device type that is classified as a large-capacity storage device, the examples of which include a hard disk drive and CD drive. When an MSC device is connected to a PC, the PC recognizes the device just like a removable disk, with which files can be exchanged easily using the standard drag & drop operation. DB (Database): Function for creating tag information of music files and basic information on their filenames so that they can be selected from the list screen.
Trademark Information ÷ "Microsoft" and "Windows Media" are trademarks or registered trademarks of Microsoft Corporation in the USA and other countries. ÷ microSDHC logo is a trademark. Other system names and product names are also trademarks or registered trademarks of their respective developers. Note that the "™" and "®" markings are omitted in the text of this manual.
B60-5825-08_00_MGR-E8(E)_English_1AJ6P1P0109--(XE0).