CD PLAYER DPF-1010 DPF-2010 DPF-3010 INSTRUCTION MANUAL KENWOOD CORPORATION COMPACT DIGITAL AUDIO B60-3730-08 00 KO ( T, M, X ) OC 99/12 11 10 9 8 7 6 5 4 3 2 1 98/12 11 10 9 8 7 6 5 4 3
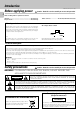
Introduction DPF-3010/2010/1010 (En) Before applying power 2 Caution : Read this section carefully to ensure safe operation. Units are designed for operation as follows. Australia .................................................................................. AC 240 V only Europe and U.K. ..................................................................... AC 230 V only *Other countries ............................
DPF-3010/2010/1010 (En) Unpacking Unpack the unit carefully and make sure that all accessories are put aside so they will not be lost. Examine the unit for any possibility of shipping damage. If your unit is damaged or fails to operate, notify your dealer immediately. If your unit was shipped to you directly, notify the shipping company without delay. Only the consignee (the person or company receiving the unit) can file a claim against the carrier for shipping damage.
IMPORTANT SAFEGUARDS Caution : Read this page carefully to ensure safe operation. DPF-3010/2010/1010 (En) 4 Please read all of the safety and operating instructions before operating this appliance. Adhere to all warnings on the appliance and in the instruction manual. Follow all the safety and operating instructions. These safety and operating instructions should be retained for future reference. 1.
Caution : Read this page carefully to ensure safe operation. DPF-3010/2010/1010 (En) 13.Lightning – For added protection for this appliance during a lightning storm, or when it is left unattended and unused for long periods of time, unplug it from the wall outlet and disconnect the antenna or cable system. This will prevent damage to the appliance due to lightning and power-line surges. 14.
System connections DPF-3010/2010/1010 (En) Malfunction of microcomputer Caution: 6 If operation is not possible or erroneous display appears even though all connections have been made properly, reset the ™ microcomputer referring to “In case of difficulty”. Do not plug in the power lead until all connections are completed. Make connections as shown below. When connecting the related system components, refer also to the instruction manuals of the related components.
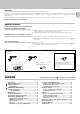
DPF-3010/2010/1010 (En) 7 Connection to a general-use amplifier Use the provided audio cords to connect the OUTPUT jacks of this unit to the CD input jacks (or AUX jacks) of the amplifier. Connection to digital amplifier or MD (only for DPF-3010/2010) Connect the DIGITAL OUTPUT (OPTICAL) jack to the digital input jack of the amplifier, DAT recorder, MD recorder, etc., using an optical fiber cable which are commercially available in audio stores.
DPF-3010/2010/1010 (En) 8 SYSTEM CONTROL CONNECTIONS Connecting system control cords after connecting a KENWOOD audio component system lets you take advantage of convenient system control operations. There are two KENWOOD system control modes. Make connections according to the groups of terminal symbols shown below. SYSTEM CONTROL SYSTEM CONTROL [XS8] Mode : lets you combine F, f, and ƒ terminals terminals only [SL16] Mode : for SYSTEM CONTROL This unit is compatible with both [XS8] and [SL16] modes.
Maintenance DPF-3010/2010/1010 (En) Disc handling precautions 9 Cleaning Handling If fingerprints or foreign matter become attached to the disc, lightly wipe the disc with a soft cotton cloth (or similar) from the center of the disc outwards, in a radial manner. Hold compact discs so that you do not touch the playing surface. Label side Sticker Playing side Sticky paste ÷ Do not attach paper or tape to either the playing side or the label side of compact discs.
Controls and indicators DPF-3010/2010/1010 (En) 10 REPEAT indicator CCRS indicator Program check indicator TRACK TRACK mode indicator Program mode indicator PGM REPEAT TRACK NO. 88 EDIT indicator CCRS EDIT P.C. Play track No. indicator The figure shows an example for the DPF-3010 1 TIME TIME _8 8 : 8 8 Pause indicator Play indicator SINGLE TOTAL SINGLE TIME indicator TOTAL TIME indicator 1 2 3 4 5 6 7 8 9 10 11 12 13 14 15 16 17 18 19 20 TIME indicator, program No.
Operation of remote control unit (DPF-3010/DPF-2010 only) DPF-3010/2010/1010 (En) The keys with the same name as those on the main unit operate the same way as the main unit. The keys marked * are provided only on the remote control unit. 1 2 RANDOM 1 DISC SELECTOR 2 REPEAT 4 5 DISC SKIP P.MODE 1 2 3 TIME DISPLAY 4 5 6 EDIT 7 8 9 CHECK 0 +10 CLEAR 7 6 4 ¢ 1 ¡ OUTPUT DOWN UP 3 3 1 Program-related and other keys ) RANDOM key REPEAT key ^ P.
Normal play (TRACK mode) DPF-3010/2010/1010 (En) Use the following procedure to play a CD in the original order of tracks from track No. 1. The figure shows an example for the DPF-3010 12 7 6 4 ¢ 1 ¡ : Keys and control used in the operations described on this page. Playing tracks in order from track No. 1 1 Press the ON/STANDBY switch to ON. ON/STANDBY ÷ Playback starts when a disc has been loaded. 2 Load a disc. 1 Open the tray. 0 2 Place a disc.
DPF-3010/2010/1010 (En) Playback from desired track Press the numeric keys as shown below.... 1 2 3 4 5 6 7 8 0 To enter track No. 23 : To enter track No. 40 : 003 0000) 9 ÷ Playback starts from the selected track and continues on the subsequent tracks. +10 Skipping tracks To skip backward 4 ¢ To skip forward ÷ The track in the direction of the pressed key is skipped, and the selected track will be played from the beginning.
Programmed play (PGM mode) DPF-3010/2010/1010 (En) Use the following procedure to program desired tracks in a desired order. (up to 20 tracks) 14 The figure shows an example for the DPF-3010 Preparation ÷ Load a disc in the CD player. @ 7 6 4 ¢ 1 ¡ : Keys and control used in the operations described on this page. 1 Press so that the “PGM” indicator lights. Do this operation in the stop mode. Lights up. P.MODE PGM TRACK NO. 01 2 Program desired tracks. 1 Select the desired track No.
DPF-3010/2010/1010 (En) Auto space function During programming of tracks, a non-recorded space of a few seconds will be automatically created between tracks. By recording tracks with these spaces on tape, the search and repeat play operations of tape using the DPSS function (which works by searching the non-recorded spaces) can be performed reliably.
Repeated playback DPF-3010/2010/1010 (En) Preparation 16 ÷ Load a disc in the CD player. @ The figure shows an example for the DPF-3010 ™ 7 6 4 ¢ 1 ¡ : Keys and control used in the operations described on this page. To repeat only the programmed tracks 1 Press so that the "PGM" indicator lights. Lights up. P.MODE PGM Do this operation in the stop mode. TRACK NO. 01 2 Select the desired track No. Press the numeric keys as shown below... To enter track No.
DPF-3010/2010/1010 (En) The figure shows an example for the DPF-3010 7 6 4 ¢ 1 ¡ : Keys and control used in the operations described on this page. To repeat the entire disc 1 Press so that the “TRACK” indicator Lights up. lights. TRACK P.MODE TRACK NO. 01 2 Switch REPEAT ON. Lights up. TRACK REPEAT REPEAT TRACK NO. 01 3 Start playback. PLAY/PAUSE 6 To cancel repeated playback Goes off. Press the REPEAT key again. TRACK REPEAT REPEAT TRACK NO.
Editing DPF-3010/2010/1010 (En) 18 The following procedure allows to record a CD within the specified tape length so that no music is interrupted in the middle at the ends of sides A and B. Preparation ÷ Load a disc in the CD player. The figure shows an example for the DPF-3010 @ 7 6 4 ¢ 1 ¡ : Keys and control used in the operations described on this page. 1 Light the “EDIT” indicator. Do this operation in the stop mode. Lights up. Lights up. EDIT EDIT PGM Go to step 2 within 5 seconds.
DPF-3010/2010/1010 (En) The figure shows an example for the DPF-3010 7 6 4 ¢ 1 ¡ : Keys and control used in the operations described on this page. To check the edited contents Lights up. A EDIT P.C. CHECK 5 FI LE ÷ When the CHECK key is pressed, track numbers and remaining time in the file A are displayed first, then those in the file B. ÷ The "P.C." indicator goes off in a few seconds. To clear the edited contents Press any one of these keys. CLEAR P.
Playback in a random order (Random playback) DPF-3010/2010/1010 (En) As tracks are selected at random, you can enjoy listening to for a long time. 20 Preparation The figure shows an example for the DPF-3010 ÷ Load a disc in the CD player. @ ™ 7 6 4 ¢ 1 ¡ : Keys and control used in the operations described on this page. Press the P.MODE key so that the "TRACK" 1 indicator lights. If the "PGM" indicator is lit, press the P.MODE key. Lights up. TRACK TRACK NO. 01 P.
Timer operations DPF-3010/2010/1010 (En) This unit Timer playback of CD can be started at any time using an audio timer which is available in audio stores. Preparation System control cord 7 6 4 ¢ 1 ¡ 21 Audio cord ÷ Connect the power cords of the associated components so that their power can be turned ON through the audio timer. (Also, be sure to read carefully the instruction manual of the timer.) Amplifier 12 F00 Audio timer Turn the powers of the associated components 1 ON.
In case of difficulty DPF-3010/2010/1010 (En) What appears to be a malfunction may not always be serious. If your unit should not perform as expected, consult the table below to see if the problem can be corrected before seeking help from your dealer or service representative. 22 Operation to reset The microcomputer may fall into malfunction (impossibility to operate, erroneous display, etc.) when the connection cords are unplugged while unit is ON or due to an external factor.
Specifications DPF-3010/2010/1010 (En) [ Format ] System ..................................................................................... Compact disc digital audio system Laser ................................................................................................................ Semiconductor laser [ D/A Convertors ] D/A Conversion .......................................................................................................................... 1 Bit Oversampling ...................
For your records Record the serial number, found on the back of the unit, in the spaces designated on the warranty card, and in the space provided below. Refer to the model and serial numbers whenever you call upon your dealer for information or service on this product.