GPS NAVIGATION SYSTEM DNX7140 DNX7000EX DDX714 DDX7034BT MONITOR WITH DVD RECEIVER INSTRUCTION MANUAL Take the time to read through this instruction manual. Familiarity with installation and operation procedures will help you obtain the best performance from your new GPS Navigation System/DVD Receiver. For your records Record the serial number, found on the back of the unit, in the spaces designated on the warranty card, and in the space provided below.
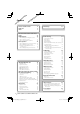
Contents How to read this manual Before Use Notes 4 6 7 Functions of the buttons on the front panel 10 Getting Started 12 How to Display the Navigation Screen How to Select the Source How to Set a Medium / a Device Basic Operation How to Display the Source Control Screen How to Display Top Menu Screen Operation on the Playback Screen of Visual Sources How to Display the Easy Control Screen 12 12 13 14 14 15 16 17 Initial Setup 90 Radio Listening 30 Source Control Screen Preset Select Auto Memory
Hands Free Unit Control Before Use Downloading the Phonebook Receiving a Call During a Call Call Waiting Making a Call Calling by Phonebook Calling by Entering a Phone Number Making a Call Using Call Records Calling by Voice Recognition Controlling Tone-based Services Setting Up the Hands-Free Phone Voice Registration Key Word Voice Registration Phone Number Preset SMS (Short Message Service) Audio Control Audio Control Menu Audio Control Equalizer Control Graphic Equalizer Setup Zone Control Space Enhance
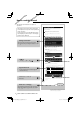
How to read this manual This manual uses illustrations to explain its operations. Source Control Screen The displays and panels shown in this manual are examples used to provide clear explanations of the operations. For this reason, they may be different from the actual displays or panels used, or some display patterns may be different. Switches to the source control screen to use various functions. 1 Display the Source Control Screen See .
Ab About the h mod dell groups If different functions are used in different model groups, the model groups are described as shown below. Names of models included in each model group are as follows: DNX models DNX7140, DNX7000EX DDX models D 714 DDX 714,, DDX DDX703 7034BT 703 4BT Function Icon Icons representing available functions are shown below. DEO DEO EO : Function of DVD-VIDEO playback. -VVR : Function of DVD-VR playback. -VR o CD : Function of Video CD playback.
Before Use 2WARNING To prevent injury or fire, take the following precautions: • To prevent a short circuit, never put or leave any metallic objects (such as coins or metal tools) inside the unit. • Do not watch or fix your eyes on the unit’s display when you are driving for any extended period. How to reset your unit • If the unit or the connected unit fails to operate properly, press the Reset button. The unit returns to factory settings when the Reset button is pressed.
Notes recorded in the same disc, only the playback system recorded at the first setout is played. List of playable discs Disc types DVD CD Others Standard Support DVD Video DVD Audio DVD-VR DVD-R ‡ × ‡ ‡ DVD-RW ‡ DVD+R ‡ DVD+RW ‡ DVD-R DL (Dual layer) DVD+R DL (Double layer) DVD-RAM Music CD ‡ ‡ × ‡ CD-ROM ‡ CD-R ‡ CD-RW ‡ DTS-CD Video CD (VCD) Super video CD Photo CD CD-EXTRA ‡ ‡ × × % HDCD % CCCD Dualdisc Super audio CD × × % Remark Not compatible with CPRM.
Notes • Acceptable media CD-R/RW/ROM, DVD±R/RW, mass-storage-class USB device Acceptable discs, disc formats, USB device file system, file and folder names and playing order are the same as those for audio files. See .
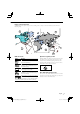
Region codes in the world The DVD players are given a region code according to the country or area it is marketed, as shown in the following map. 1 5 2 6 1 2 3 1 4 5 2 4 DVD disc marks Operation regulatory marks Symbol With this DVD, some functions of this unit such as the play function may be restricted depending on the location where the DVD is playing. In this case, the following marks will appear on the screen. For more information, refer to the disc manual.
Functions of the buttons on the front panel For DDX models TOP ATT VOLUME AUD NAV SRC A B C D E TEL F G Reset button (page 6) SI indicator (page 66) Remote control sensor 1 sec. : Press for more than 1 second A Attenuation of the volume On/Off. 1 sec. Keep the tag data of the currently listening music of HD Radio. t B Volume adjustment. C Displays Graphic Equalizer screen.*1 P 1 sec. Rear view display On/Off.*2 D DNX models Displays the navigation screen.
Functions of the buttons on the front panel F DNX models Hands Free control On/Off. 1 sec. 7 While watching the navigation screen or playback screen of a visual source Displays the Easy Control screen. & 7 While watching the screen other than the above Screen Switching function On/Off. ! DDX models Hands Free control On/Off. 1 sec. While watching the navigation screen or playback screen of a visual source Displays the Easy Control buttons. & G Opens the panel and ejects the disc. Closes the panel.
Getting Started How to Display the Navigation Screen How to Select the Source DNX models Sources can be selected from the Source Select screen. Source Select screen (Example) NAV The navigation screen appears. DDX models TOP SRC The Source Select screen appears. Touch the icon of the source. Use or to turn the page. For how to operate each source, see the following pages. The navigation screen appears. • For how to set up and use the navigation function, see the Navigation Instruction Manual.
Getting Started How to Set a Medium / a Device 7 Disc media 0 Press the [0] button to open/close the front panel. If a disc is already inserted, it is ejected by pressing the [0] button. 7 iPod To disconnect the iPod, stop the playback by touching the [38] button on the source control screen, and then disconnect the iPod. See (page 28). 7 USB device To disconnect the USB device, touch the [0] button on the source control screen, and then disconnect the USB device.
Basic Operation How to Display the Source Control Screen On the Source Control screen you can find all the control buttons for the selected source. Source Control Screen The Source Control Screen appears. DNX/DDX models While watching the Easy Control Screen • For how to use each button, see the operation pages of each source. TEL How to display the Source Control screen DNX models 1 sec. While watching the navigation screen The Source Control Screen appears. ⁄ The Source Control Screen appears.
Basic Operation How to Display Top Menu Screen Top Menu Screen is the entrance to all the functions. You can enter source operation screen as well as various setup menu from this screen. Top Menu screen How to display the Top Menu screen Buttons on the Top Menu screen V ] Switches to the navigation screen. [NAV ] Switches to the source control screen [SRC of the selected source. [TEL ] Switches to the Hands Free Main screen. [NAV SETUP] Displays Navigation SETUP screen.
Basic Operation Operation on the Playback Screen of Visual Sources How to display the playback screen While watching visual sources, basic operation is possible by touching the screen. SRC The screen has 4 function areas. The function of each area is different depending on the sources. (Some areas are unavailable for some sources.) Playback screen of a visual source The Source Select screen appears. Touch the icon of the source. 2 1 3 The Playback screen of a visual source appears.
Basic Operation How to Display the Easy Control Screen Basic operation buttons of the selected source can be displayed on the playback screen of visual sources so that you can control the source without switching the screen. Easy Control Screen Buttons on the Easy Control Screen [∞] Changes the function as follows by touching the [∞] button. [SCRN] Displays Screen Control screen (page 49). [TEL] Switches to the Hands Free Main screen (page 51). [EXT SW] Switches to the EXT SW Control screen (page 47).
Watching DVD/Video CD You can play DVD/Video CD using various functions. • Set the remote controller mode switch to "DVD" mode before starting operation, see (page 84). Playback Screen Easy Control Screen Basic functions are available even when the playback screen is displayed. Displays the basic operation buttons on the screen. 1 Display the Playback Screen 1 Display the Easy Control Screen See (page 16).
Video CD Multi Function 1 [ [38] Plays or pauses. [7] Stops playing. When touched twice, the disc is played from its beginning when you play it the next time. [0] Ejects a disc. [1], [¡] Fast Forwards or Fast Backwards. [4], [¢] DVD-VIDEO Searches for a chapter. DVD-VR Searches for a chapter. Video CD Selects a scene (when PBC is On) or a track (when PBC is Off ). [ ], [ ] DVD-VIDEO , DVD-VR Slow Forwards or Backwards. [ ] Switches to the playback screen. 1 Information display Title display.
Watching DVD/Video CD DVD-VIDEO Disc Menu Selects an option from the DVD-VIDEO Disc Menu. 1 Display the Playback Screen See (page 16). 2 Display the Menu Control 1 screen ⁄ • To cancel Highlight Control, press the [TEL] button for more than 1 second. • The Highlight Control is cleared automatically after approximately 10 seconds. 5 Operation on the Menu Control 2 screen 3 Operation on the Menu Control 1 screen [Menu] Calls the Menu.
[2], [3], [5], [∞] Scrolls the screen in the direction you touch. [Return] Returns to the previous screen. [Exit] Exits the Zoom Control screen. DVD-VR Menu Control [Zoom] Changes the zoom ratio at 4 levels (2 times, 3 times, 4 times, or off ) each time you touch. [2], [3], [5], [∞] Scrolls the screen in the direction you touch. [Return] Returns to the previous screen. [Exit] Exits the Zoom Control screen. Selects an option from the DVD-VR Disc Menu.
Music Disc/ Audio File Listening & Video File/ Picture File Watching You can recall various control screens during playback of CD, audio file, video file and picture file. • See (page 7) for playable discs. • See (page 7), (page 7) or (page 7) for playable files. Source Control Screen Switches to the source control screen to use various playback functions.
[RDM] Starts or stops Random Play (to play files of the present folder in random order). [4Line]/ [2Line] Switches the number of lines displayed in the Information Display. [FOLD]/ [Flist] Displays the folder list. [Plist] Audio File in USB Displays the play list. [SLIDE] Displays images in the folder currently being played one after another. If there is no image in the folder currently being played, initial background is displayed.
Music Disc/ Audio File Listening & Video File/ Picture File Watching Scrolls to the position of the specified initial USB device select Selects the connected USB device (or a partition). 1 Display the Source Control Screen See (page 22). 2 Display the USB Device Select Screen Scrolls to the selected initial. 3 Select a USB device 1 1 Selects a device or partition. [ UP] Returns to the Device Selection screen. [ ] When appears, the text display is scrolled by touching it.
Link search (Audio File in USB) Playback Screen (Video file, Picture file) Searches for another song of the currently selected artist. Basic functions are available even when the playback screen is displayed. 1 Display the Source Control Screen 1 Display the Playback Screen See (page 22). 2 Start Link search See (page 16). 2 Operation on the Playback Screen 2 1 3 4 3 Select a song 1 1 Plays the touched song.
Music Disc/ Audio File Listening & Video File/ Picture File Watching Easy Control Screen (Video file, Picture file) Displays the basic operation buttons on the screen. [ ] ] [ ] [ [Exit] Reverses the picture horizontally. Rotates counter clockwise. Rotates clockwise. Ends Picture Control. 1 Display the Easy Control Screen See (page 17). 2 Operation on the Easy Control Screen 1 Movie Menu Control Selects an option from the Movie Menu.
iPod Control You can control and listen to songs in your iPod by connecting an iPod to this unit with KCA-iP301V (optional accessory). You can also display video contents on this unit when connecting an iPod with video. Playback Screen Easy Control Screen Basic functions are available even when the playback screen is displayed. Displays the basic operation buttons on the screen.
iPod Control Source Control Screen Switches to the source control screen to use various playback functions. 1 Display the Source Control Screen See (page 14). 2 Operation on the Source Control Screen [ARDM] Starts or stops Album Random Play (plays randomly from current album).* [INFO] Displays information screen of music/ video being played. [LINK] MUSIC Searches for another song of the currently selected artist. See (page 29).
Scrolls to the position of the specified initial Link search (Music file) Searches for another song of the currently selected artist. 1 Display the Source Control Screen See (page 28). 2 Start Link search Scrolls to the selected initial. 3 Select a song 1 1 Plays the touched song. [ ] When appears, the text display is scrolled by touching it. [ TOP] Moves to the top category. [ CUR] Displays the currently playing category. [CTRL] Returns to the Source Control screen.
Radio Listening Various control screens appear in the Tuner Source mode. • Set the remote controller mode switch to "AUD" mode before starting operation, see (page 84). Source Control Screen Multi Function Switches to the source control screen to use various functions. 1 Display the Source Control Screen See (page 14). 2 Operation on the Source Control screen 1 [FM] Switches to the FM1/2/3 band. [AM] Switches to the AM band.
Preset Select Auto Memory Lists and selects memorized station. Stores stations with good reception in memory automatically. 1 Display the Source Control Screen See (page 30). 2 Display the Tuner Preset List Screen 1 Display the Source Control Screen See (page 30). 2 Select a band you wish to store in memory 3 Select a station 1 3 Select the Auto Memory mode 1 Memorized stations are displayed. Touch to tune in.
Radio Listening Manual Memory Stores the current receiving station in memory. 1 Display the Source Control Screen See (page 30). 2 Select a station you wish to store in memory Radio Text (North American sales area only) You can display the radio text. (Only when receiving the FM broadcast) 1 Select a station See (page 30). 2 Display the radio text 3 Store in memory 1 2 sec. Continue to touch until the memory number appears.
Set Station Name Assigns a name to a station. 1 Tune in to the station to name See (page 30). 2 Start Name set Traffic Information (North American sales area only) When a traffic bulletin starts, any source is switched to the traffic information and it is displayed automatically. 1 Display the Source Control Screen See (page 30). 2 Set the Traffic information mode 3 Enter the name See (page 47) for information on how to enter a name.
Radio Listening Search by Program Type (North American sales area only) A program is tuned when you set its program type. (Only when receiving the FM broadcast) 1 Display the Source Control Screen See (page 30). 2 Enter Program Type Search mode 3 Select a Program Type 1 1 Program Type is displayed. Touch to select a Program Type. [Search] Searches for the program type. It is displayed when the Program type is selected. [User] Continue to touch more than 2 seconds.
TV Watching (DDX7034BT only) Various control screens appear in the TV source mode. You can only operate TV with the optional accessory TV Tuner connected. Function During TV Screen Easy Control Screen Basic functions are available even when the TV screen is displayed. Displays the basic operation buttons on the screen. 1 Display the TV screen 1 Display the Easy Control Screen See (page 16). See (page 17).
TV Watching (DDX7034BT only) Source Control Screen Multi Function Switches to source control screen to use various functions. 1 Display the Source Control Screen See (page 14). 2 Operation on the Source Control Screen 1 [BAND] Switches to TV1 or TV2. [4], [¢] Select a channel. Use the [SEEK] to change the channel tuning sequence. [List] Display the TV Preset List Screen. (page 38). [ ] Switches to the TV screen.
Auto Memory Manual Memory Stores stations with good reception in memory automatically. Stores the current receiving channel in memory. 1 Display the Source Control Screen See (page 36). 1 Display the Source Control Screen See (page 36). 2 Select a band you wish to store in memory 2 Select a station you wish to store in memory 3 Select the Auto Memory mode 3 Store in memory 4 Start Auto Memory 2 sec. Continue to touch until the memory number appears.
TV Watching (DDX7034BT only) Preset Select Set Station Name Lists and selects memorized station. Assigns a name to a station. 1 Display the Source Control Screen 1 Tune in to the station to name See (page 36). 2 Start Preset Select See (page 36). 2 Start Name set 3 Select a station 1 3 Enter the name See (page 47) for information on how to enter a name. 4 End Name set 1 Memorized stations are displayed. Touch to tune in.
SIRIUS/XM Control (North American sales area only) Various control screens appear in the Satellite radio source mode. (only with the optional accessory Satellite radio connected. To connect the SIRIUS tuner, a conversion cable CA-SR20V (optional accessory) is necessary and to connect the XM tuner, an XM interface Box KCA-XM100V (optional accessory) is necessary.) • This document uses the SIRIUS display as an example.
SIRIUS/XM Control (North American sales area only) Channel Search Channel Memory Specifying the desired category and selecting a channel. Stores the current receiving channel in memory. 1 Display the Source Control Screen See (page 39). 2 Display the Category List Screen 1 Display the Source Control Screen See (page 39). 2 Select a channel you wish to store in memory 3 Select a category 1 3 Store in memory 1 Selects a category.
Direct Channel Search Tuning in by entering the desired channel number. 1 Display the Source Control Screen See (page 39). 2 Start Direct Channel Search 3 Enter the channel number 1 1 Enters the channel number. [Cancel] Cancels the direct channel search. [Clear] Clears the channel number. 4 Tune in the channel English B64-4502-00_00_K_English.indd 41 41 09.2.
HD Radio Control (North American sales area only) Various control screens appear in the HD Radio Source mode. (only with the optional accessory HD Radio tuner connected) Source Control Screen Multi Function Switches to the source control screen to use various functions. 1 Display the Source Control Screen See (page 14). 2 Operation on the Source Control screen 1 [HD FM] Switches to the HD FM1/2/3 band. [HD AM] Switches to the HD AM band.
Auto Memory Manual Memory Stores stations with good reception in memory automatically. Stores the current receiving station in memory. 1 Display the Source Control Screen See (page 42). 1 Display the Source Control Screen See (page 42). 2 Select a band you wish to store in memory 2 Select a station you wish to store in memory 3 Select the Auto Memory mode 3 Store in memory 4 Start Auto Memory 2 sec. Continue to touch until the memory number appears.
HD Radio Control (North American sales area only) Receive mode Direct Search Sets the radio broadcasts receive mode. Tuning in by entering the desired frequency or channel number. 1 Display the Source Control Screen See (page 42). 2 Display the Receive mode screen KTC-HR300 (optional accessory) connected only. 1 Display the Source Control Screen See (page 42).
iTunes Tagging (HD Radio Tagging) Using an iTunes Tagging enabled HD Radio you can tag your music. When you hear a song you enjoy on your local HD Radio station, you only have to press the [ATT] button for at least 1 second. The song’s information will then be saved on this unit. The saved songs will then show up in a playlist called “Purchased” in iTunes the very next time you sync your iPod to your computer.
Bluetooth Audio Control You can listen to audio files stored in Bluetooth audio player and cell-phone. Before Use • You need to register your audio player and cell-phone before using it with this unit. For more details, see (page 71). • If you have registered two or more audio players or cellphones, you need to select one of them. For more details, see (page 73). Source Control Screen Switches to control screen to use various functions.
Other Functions How To Use the Character Entry Screen External Device Power Supply Control Character Entry screen Controlling the external device power supply. 1 1 Display the Source Select Screen See (page 12). 2 Display the EXT SW Control screen 1 Enters characters. [2], [3] Shifts the cursor. [5], [∞] Scrolls up or down the character button display. [QWE]/ [ABC] Sets the key layout of the character buttons. ABC : Alphabetical key layout. QWE : Qwerty key layout.
Other Functions Muting Audio Volume upon Reception of Phone Call When a telephone call is received... The Phone Call ("CALL") screen appears, and system is paused. Phone Call ("CALL") screen When the call ends... Hang up the phone. The system resumes playing automatically. ⁄ • To use the TEL Mute feature, you need to hook up the MUTE wire to your telephone using a commercial telephone accessory. Refer to .
Screen Control Setting the monitor screen. Screen Control 1 Display the Easy Control Screen See (page 17). 2 Display the Screen Control screen "NAV-SYNC": Turning the Dimmer function On or Off according to the Navigation Day/Night display setting. [Mode] Selects a screen mode. You can select any of the following screen mode. "Full", "Just", "Zoom", "Normal" ⁄ • The Screen Control screen is displayed only when you have applied the parking brake.
Hands Free Unit Control Various functions can be used in the Hands Free control mode. Before Use • You need to register your cell-phone before using it with this unit. For more details, see (page 71). • If you have registered two or more cell-phones, you need to select one of them. For more details, see (page 73). • To use the Phone Book, it must be downloaded to this unit in advance. For details, see (page 50).
Call Waiting [ [ ] • Answering another incoming call with the current call suspended • Switching between the current call and waiting call Each touch of this button switches the calling party. ] • Answering another incoming call after terminating the current call • Answering the waiting call after terminating the current call Making a Call Displaying the control screen and using various functions.
Hands Free Unit Control Calling by Phonebook Calling by Entering a Phone Number You can call a person using his/her phone number that you have registered in the Phonebook. Makes a call by entering a phone number. 1 Display the Hands-Free Control screen See (page 51). 1 Display the Hands-Free Control screen See (page 51). 2 Display the number input screen 2 Display the Phonebook screen 3 Enter a phone number 3 Select the name to call 1 2 1 1 Phonebook data list.
Making a Call Using Call Records 2 Display the Voice Recognition screen Calls by selecting a phone number from the outgoing, incoming, or missed calls list. 1 Display the Hands-Free Control screen 3 Say the name registered in the Phonebook See (page 51). 2 Display the Outgoing Calls, Incoming Calls, or Missed Calls screen 3 Select from calls list When a beep is heard, say the name within 2 seconds.
Hands Free Unit Control Controlling Tone-based Services Setting Up the Hands-Free Phone Uses tone base service using DTMF (Dual Tone Multi Frequency). The Hands-Free system can be set as follows. 1 Display the Talking screen See (page 52). 1 Display the Hands-Free Control screen See (page 51).
[Call Beep] Sets the beep of the incoming call. ( "ON") "ON": Beep is heard. "OFF": Beep is canceled. [SMS Receive Beep] Sets the beep of the incoming SMS. ( "ON") "ON": Beep is heard. "OFF": Beep is canceled. [Phone Information Use] Sets whether to use cell-phone phonebook, outgoing calls list, incoming calls list and missed calls list. ( "ON") "ON": Yes. "OFF": No. [SMS Use] Sets the SMS function. ( "ON") "ON": Use SMS function. "OFF": SMS not available.
Hands Free Unit Control 5 Say the name to register (2nd try) Say within 2 seconds after the Beep. 6 End voice registration [Record] Registers voice for the selected Phone number category. [Play] Plays voice registered for the selected Phone number category. [Delete] Deletes voice registered for the selected Phone number category. Touch to display the confirmation screen. Touch [Yes] to delete or [No] to cancel. 4 Display voice registration screen ⁄ • A message is displayed if the voice is not recognized.
Phone Number Preset 5 Register phone number Registers frequently used phone number to Hands Free control screen preset button. 1 Display the Hands-Free Control screen See (page 51). 2 Select the Preset number to register SMS (Short Message Service) Uses SMS function. 1 Display the Hands-Free Control screen 1 sec. ⁄ See (page 51). 2 Display the SMS Select screen • If no Preset number is registered, pressing this button momentarily moves to the step 3.
Hands Free Unit Control 4 Select a message to display 3 Create a message 1 1 1 Calls the number in the selected message. [DISP] Displays the selected message. SMS Message screen Creates a new message for the selected message. Create a message 1 Enter phone number / Select contact 1 Enters characters. [2], [3] Moves the cursor. [5], [∞] Scrolls up or down the character button display. [QWE]/ [ABC] Sets the key layout of the character buttons. ABC : Alphabetical key layout. QWE : Qwerty key layout.
Audio Control Audio Control Menu Audio Control Displays the Audio Control menu to set the sound effect function of this unit. You can adjust the front/rear and right/left audio balance. 1 Display the Source Select Screen 1 Display the Audio Control screen Touch [ SRC ]>[ ] > [Audio Control]. (page 59) 2 Set each item 1 2 Display the Audio Control menu In this manual, the above selection is indicated as: Touch [ ] > [ ].
Audio Control Equalizer Control Graphic Equalizer Setup You can set up the equalizer. You can Manually set the equalizer curve. 1 Display the Equalizer screen 1 Display the Equalizer screen Touch [ ]>[ ] > [Equalizer]. (page 59) 2 Set each item Touch [ ]>[ ] > [Equalizer]. (page 59) 2 Display the Graphic Equalizer screen ⁄ • When "iPod" is selected in , the [EQ] button is deactivated. "iPod" uses its equalizer function. [SystemQ] Selects an equalizer curve type.
Zone Control Space Enhancer You can set the front and rear audio source. You can enhance the soundscape. 1 Display the Zone Control screen 1 Display the Space Enhancer screen Touch [ ]>[ ] > [Zone Control]. (page 59) 2 Set the Zone Control Touch [ 59) ]>[ ] > [Space Enhancer]. (page 2 Set the Space Enhancer 1 1 Sets the soundscape level. ⁄ • You cannot set Space Enhancer in tuner source. [Single Zone] Turns off the dual zone. [Front Source] Sets the front audio source.
Audio Control Position You can adjust the sound effects according to your listening position. Position DTA Control You can fine-adjust your listening position. 1 Display the Position DTA screen 1 Display the Position screen Touch [ ]>[ ] > [Position]. (page 59) 2 Set the Position Control 2 Select a speaker you wish to adjust 1 2 3 4 5 [P1] - [P3] Stores the present adjustment setup in memory, or calls it from memory.
Setup Menu You can set up various receiver parameters. How to Display SETUP Menu Screen Displays the Setup menu to set various functions. 1 Display the Source Select Screen SRC 2 Display the Setup Menu Screen In this manual, the above selection is indicated as: Touch [ ] > [ ].
Setup Menu Software Information Checks the software version of this unit. 1 Display the Software Information screen ] > [Information] > Touch [ ] > [ [Software]. (page 63) Displays the software version. ⁄ • For how to update the software, refer to the relevant update procedure manual which comes with the software. User Interface You can setup user interface parameters. 1 Display the User Interface screen Touch [ ] > [ ] > [System] > [User Interface].
Advanced mode (DNX models only) Clock Setup You can adjust the clock time. 1 Display the Clock Setup screen [GUI Language Select] Selects the display language used for the control screen and so forth. ( "American English") [Navigation Language Select] Selects the language used for navigation. ( "American English") Touch [ ] > [ (page 63) ] > [System] > [Clock]. 2 Setup the Clock 1 2 Touch Panel Adjustment You can adjust the touch panel operations.
Setup Menu Security Setup 6 Reenter the security code You can set a security code to protect your receiver system against theft. ⁄ • When the Security Code function is activated, the code cannot be changed and the function cannot be released. Note the Security Code can be set as the 4 digit number of your choice. Reenter the same security code as that you have entered in Step 4 for confirmation. ⁄ • If you enter a different security code, the screen returns to Step 4 (for the first code entry).
Monitor Angle Control EXT SW Setup You can adjust the position of the monitor. Setting up power specification of the external device for which the power is controlled from this unit. 1 Display the Angle Setup screen Touch [ ] > [ (page 63) ] > [System] > [Angle]. 2 Set the Monitor Angle 1 1 Display the Angle Setup screen Touch [ ] > [ (page 63) ] > [System] > [EXT SW]. 2 Perform EXT SW Setup 1 Sets the Monitor angle. [Memory] Stores the current monitor angle as the angle during power off.
Setup Menu Setup Memory Audio Control, AV-IN SETUP, AV Interface, Navigation, and Audio SETUP settings can be memorized. The memorized settings can be recalled at any time. For example, even when the settings are cleared due to replacement of the battery, the settings can be restored. 1 Display the SETUP Memory screen Touch [ ] > [ ] > [System] > [SETUP Memory].
Entering Background 6 Load the image Loads a image for background. 1 Connect the device which has the image to load 1 2 Display the Background screen ] > [Display] > Touch [ ] > [ [Background]. (page 63) 3 Display the Background Memory screen 1 Rotates the image. ⁄ • See (page 7) for readable image specifications. • This operation is not possible when USB is selected as the source. Background Change Selects a image for background. [Change] Selects a image for background.
Setup Menu Panel Color Coordinate To register your original color Sets the screen and button illumination color. 1 Start the RGB coordinate 1 Display the Color screen Touch [ ] > [ (page 63) ] > [Display] > [Color]. 2 Adjust each color value 2 Display the Panel Color Coordinate screen 1 [Panel Color Scan] When set to "ON", the illumination color of the screen and buttons changes one after another. 3 Select a color 1 Selects a preset number to register. [Red Value] Adjusts the Red value.
Screen Adjustment Registering Bluetooth Unit You can adjust the screen mode of the monitor. Registers the Bluetooth unit to be connected. 1 Display the Screen Adjust screen 1 Display the Bluetooth Setup screen Touch [ ] > [ Adjust]. (page 63) ] > [Display] > [Screen 2 Set each item [Bright] Brightness Control [Contrast] Contrast Control [Black] Black Level Adjustment [Dimmer] Dimmer Mode Setup ( "ON") "ON": The display dims. "OFF": The display doesn’t dim.
Setup Menu 4 Select the Bluetooth unit to register 1 Registering Special Bluetooth Unit Registers Special Bluetooth unit, that resulted in error by normal registration method, by selecting from the listed models. 1 Display the Special Device List screen 1 Displays the searched Bluetooth unit. [Search] Searches for a Bluetooth unit. [Cancel] Cancels searching of Bluetooth unit. 2 Select a model name 5 Enter PIN code 1 Displays the Bluetooth unit name that can be registered.
Registering Bluetooth Unit PIN Code Bluetooth Unit Connection Sets the PIN code of the Bluetooth unit to enter when registering (pairing) from the cell-phone or audio player side. Selects the Bluetooth unit to connect. 1 Display the Bluetooth Setup screen Touch [ ] > [ (page 63) ] > [Bluetooth SETUP]. 1 Display the Bluetooth Setup screen Touch [ ] > [ (page 63) ] > [Bluetooth SETUP].
Setup Menu AV Input Setup AV Interface Setup You can set AV input parameters. You can set audio and visual (AV) interface parameters. 1 Display the AV-IN Setup screen Touch [ 63) ]>[ ] > [AV-IN SETUP]. (page 2 Set each item [AV-IN Interruption] Sets an image display of the system that is connected via the AV INPUT port. ( "OFF") "OFF": When the image source is switched, an image entered via the AV INPUT port is displayed.
Navigation Setup You can set Navigation parameters. 1 Display the Navigation Setup screen Touch [ ]>[ ] > [Navigation]. (page 63) [On Screen Navigation] Sets an on-screen display of the navigation screen. ( "OFF") (DDX models only) "Auto": Information is displayed for 5 seconds when updated. "OFF": Information is not displayed. 2 Set each item [NAV Interrupt Speaker] Selects speakers used for voice guidance of the navigation system.
Setup Menu DSP Bypass Control Temporarily bypassing DSP (Digital Signal Processor) System. 1 Display the Audio SETUP screen Touch [ 63) ]>[ ] > [Audio SETUP]. (page front speakers, set the tweeter to "ON". In the "ON" position, the Equalizer is adjusted to its best position. [X'over] Displays the Speaker Crossover Setup screen. You can adjust the crossover setup that was set automatically when you selected the speaker type.
[Adjust] Displays the Car Type Adjust screen. You can adjust the digital time alignment that was set automatically when you selected the car type. 3 Set the crossover Speaker Location setup 1 Display the Speaker Location Setup screen [Phase] Sets the phase of subwoofer output. The phase is reversed 180 degrees when set to "Reverse". Sets the sub woofer phase. (Only when "Subwoofer" is set to "ON" in Audio Setup) [HPF FREQ] High Pass Filter adjustment.
Setup Menu DVD Setup 3 Set a delay time You can set up the DVD play. 1 Display the DVD Setup screen Touch [ ]>[ ] > [DVD SETUP]. (page 63) 2 Set each item Make fine adjustment of the delay time of the speaker output specified at to have a more suitable environment for your vehicle. The settings of the delay time are automatically identified and compensated by specifying the distances of each speaker from the center of the vehicle interior.
[Screen Ratio] Selects the screen display mode.*1 ( "16:9") "16:9": Displays wide pictures. "4:3 LB": Displays wide pictures in the Letter Box format (having black stripes at the top and bottom of screen). "4:3 PS": Displays wide pictures in the Pan & Scan format (showing pictures cut at the right and left ends). [Parental Level] Displays the Parental Lock screen.*1 ( "OFF") (See , page 79) [Disc SETUP] Makes the settings related to the disc media.
Setup Menu 4 Display the Parental Level SETUP screen 5 Select a parental level and complete the setup Selects a parental level. ⁄ • If a disc has higher parental lock level, you need to enter the code number. • The parental lock level varies depending on a loaded disc. • If a disc has no parental lock, anybody can play it back even when you have set the parental lock. Performs setup when using disc media. 1 Display the DVD Setup screen ]>[ ] > [DVD SETUP].
iPod Setup SIRIUS Parental Code Setup Performs setup when using iPod. Sets a SIRIUS Parental code. 1 Display the iPod Setup screen 1 Display the SIRIUS Setup screen Touch [ ]>[ ] > [iPod SETUP]. (page 63) 2 Set each item ]>[ Touch [ 63) ] > [SIRIUS SETUP]. (page 2 Display the Parental Code screen [AudioBook Speed] Sets the Audio book playback speed. ( "Normal") [Wide Screen] Sets Wide Screen on or off. ( "OFF") [On Screen iPod] Sets an on-screen display of the iPod Playback screen.
Setup Menu 4 Enter the new code number SIRIUS Parental Lock Setup Sets a SIRIUS Parental Lock function on or off. 1 Display the SIRIUS Setup screen Touch [ 63) ]>[ ] > [SIRIUS SETUP]. (page 2 Display the Parental Code screen 5 Confirm the code number Enter the same code number as you input in step 4. ⁄ • You need to complete beforehand. SIRIUS Parental code is now set, and the display returns to SIRIUS Setup screen.
SIRIUS Parental Lock Channel Select 5 Set the parental lock for each channel Selects the channel to enable SIRIUS Parental lock function. 1 2 1 Display the SIRIUS Setup screen Touch [ 63) ]>[ ] > [SIRIUS SETUP]. (page 3 2 Display the Parental Code screen 3 Enter the code number Enter the same code number as you input in . 1 Channel list 2 Sets the Parental lock function on or off for each channel.
Remote Controller For DNX7140/ DNX7000EX/ DDX7034BT : This unit can be operated using the Remote Controller supplied with this unit. For DDX714 : Optional Remote Controller KNA-RCDV330 is designed for controlling this unit. ¤ • Put the Remote Controller in a place where it will not move during braking or other operations. A dangerous situation could result, if the Remote Controller falls down and gets wedged under the pedals while driving. • Do not place the battery near an open flame or heat source.
Common operations (AUD mode) Source switching Switches to the source to be played. Display angle Switches the display angle each time it is pressed. NAVI O AUDIO RETURN MODE/TOP MENU FNC/MENU/PBC ROUTEM CANCEL VOICE AV OUT OPEN VIEW MAP DIR SUBTITLE DISP ANGLE O O ENTER • DVD • • Cursor key Moves the cursor when displaying menu. ZOOM MENU OUT O MAP DIR ANGLE O O D O 1 VOL ZOOM AM− O Y 2 ZONE 2ABC 3 DEF CLEAR ENTER Enters options.
Remote Controller DVD/VCD (DVD mode) Track search and file search Selects the track or file to be played. VIEW MAP DIR ANGLE FM+ O O O D O 1 VOL ZOOM AM− O Y 2 ZONE 2ABC 3 DEF 1 Play/Pause Pauses the track. Press again to resume playing. DISP SRC V.SEL ZOOM MENU OUT Track number Cancel VCD 2.X (PBC ON) O VCD 1.X, VCD 2.
ZOOM Switches the zoom ratio each time you press this key. VIEW Direct search R.VOL 7PQRS 8TUV 9WXYZ CLEAR 1 + DIRECT 0 # BS ATT MAP DIR ANGLE FM+ O O O D O 1 O VOL ZOOM AM− O Y 2 ZONE 2ABC 3 DEF 1 Picture Angle Switches the picture angle each time you press this key.
Remote Controller Radio (AUD mode) NAVI (NAVI mode) Band switching Switches to bands received by the unit. Joystick Scrolls the map, or moves the cursor. ZOOM MENU O VOL AM− O Y 2 ZONE MAP DIR R.VOL BS OUT ATT O 9WXYZ 2ABC 1 Example: 810kHz (AM) 8TUV 0 IN POSITION 1 AUD ENTER V.SEL ZOOM 0 MENU OUT IN POSITION O AUD ENTER O O 1 Y TV• DISP SRC Numeric keypad • DVD • MENU Displays Main menu. Example: 92.1MHz (FM) 0 O DISP V.
O AUDIO RETURN CANCEL VOICE MAP DIR SUBTITLE ROUTEM ANGLE O MODE/TOP MENU FNC/MENU/PBC ROUTEM OPEN VIEW MAP DIR ANGLE FM+ D O ZOOM O FM+ O O O D VIEW VOL ZOOM O Y 2 ZONE MAP DIR ANGLE O ROUTEM VOICE AV OUT OPEN VIEW MAP DIR O 1 AUDIO RETURN CANCEL SUBTITLE O 2 ZONE 2ABC 3 DEF Direct tuning (NTSC TV type only) 7PQRS 8TUV 9WXYZ CLEAR MAP DIR Switches between the heading up navigation and north up navigation map displays.
Initial Setup When pressing the Reset button or turning on the unit for the first time, the Initial SETUP screen is displayed. Initial Setup 3 End initial setup 1 Turns the power On 2 Set each item ⁄ • The settings above can be changed in (page 63). [Language] Select the language used for the control screen and setting items. (page 64) [Angle] You can adjust the position of the monitor. (page 67) [iPod AV Interface Use] Sets the terminal to which the iPod is connected to.
Status bar Indicator items Shown below is a list of indicators displayed on the Status bar. Source Display Overview General "ATT" "DUAL" "TEL" Indicates that the attenuator is active. Turns on the Dual zone function. Indicates the connection state of the Bluetooth hands-free unit. (Orange: Connected. White: Not connected.) DVD/CD "FO-REP" Indicates that the Folder repeat function is ON. "IN" Indicates that a disc is inserted. (White: A Disc is inside the unit. Orange: Error at the disc player.
DVD Language Codes 92 Code Language Code Language Code Language aa ab af am ar as ay az ba be bg bh bi bn bo br ca co cs cy da de dz el en eo es et eu fa fi fj fo fr fy ga gd gli gn gu ha he hi hr hu hy ia ie ik id Afar Abkhazian Afrikaans Amharic Arabic Assamese Aymara Azerbaijani Bashkir Byelorussian Bulgarian Bihari Bislama Bengali, Bangla Tibetan Breton Catalan Corsican Czech Welsh Danish German Bhutani Greek English Esperanto Spanish Estonian Basque Persian Finnish Fiji Faroese French Frisian
Help? Troubleshooting Some functions of this unit may be disabled by some settings made on this unit. ! ! • Cannot set up the subwoofer. • Cannot set up subwoofer phase. • No output from the subwoofer. • Cannot set up the low pass filter. • Cannot set up the high pass filter. ▲ Subwoofer is not set to On. ☞ (page 76) ▲ The DSP Select is Bypass. ☞ (page 76) ▲ The Dual zone function is enabled. ☞ (page 61) ▲ The unit is set to STANDBY source.
Help? Error When the unit fails to operate correctly, the cause of the failure appears on the display. "Protect" : Protective circuit has been activated because a speaker cord has shorted or it has come in contact with the car chassis. ➡ Wire or insulate the speaker cord as appropriate and then push the Reset button. "Hot Error" : When the internal temperature of this unit rises to 60°C or more, the protection circuit is activated and you may not be able to operate the unit.
"Check SIRIUS" : The unit cannot recognize the connected SIRIUS Tuner Box. ➡ Check the connection of the SIRIUS Tuner Box. "Antenna Error" : Something is wrong with the anntena. ➡ Check the connection of the antenna. "Acquiring Signal" : The unit cannot receive any signal. ➡ Move the vehicle to the area where the unit can receive signal. "Updating Firmware" : Updating the firmware of SIRIUS tuner. "Ch Unavailable" : The selected channel is invalid. ➡ Select a different channel.
Specifications Monitor section USB interface section Picture Size : 6.95 inches (diagonal) wide : 156.2 mm (W) x 82.4 mm (H) Display System : Transparent TN LCD panel Drive System : TFT active matrix system Number of Pixels : 336,960 (480H x 234V x RGB) Effective Pixels : 99.99 % Pixel Arrangement : RGB striped arrangement Back Lighting : Cold Cathode Fluorescent Tube USB Standard : USB 2.
FM tuner section Audio section Frequency Range 200 kHz : 87.9 MHz – 107.9 MHz (DNX7140/DNX7000EX/DDX714 only) 50 kHz : 87.5 MHz – 108.0 MHz (DDX7034BT only) Usable Sensitivity (S/N : 30 dB) : 9.3 dBf (0.8 μV/ 75 Ω) Quieting Sensitivity (S/N : 50 dB) : 15.2 dBf (1.6 μV/ 75 Ω) Frequency Response (± 3.0 dB) : 30 Hz – 15 kHz S/N Ratio (dB) : 70 dB (MONO) Selectivity (± 400 kHz) : ≥ 80 dB Stereo Separation : 35 dB (1 kHz) Maximum Power (Front & Rear) : 50 W x 4 Full Bandwidth Power (Front & Rear) (4 Ω, 14.
Specifications Navigation section (DNX7140/DNX7000EX only) Receiver : High-sensitivity GPS receiver Reception Frequency : 1575.42 MHz (C/A code) Acquisition Times Cold : < 38 seconds Factory Reset : < 45 seconds (On average for a stationary receiver with a clear view of the sky) Accuracy Position : < 10 meters typical Velocity : 0.05 m/sec. RMS Position Method : GPS Antenna : External GPS antenna External SW Maximum Power Supply Current : 500 mA General Operating voltage : 14.4 V (10.
DNX7140/ DNX7000EX/ DDX714 2CAUTION Use of controls or adjustments or performance of procedures other than those specified herein may result in hazardous radiation exposure. In compliance with Federal Regulations, following are reproductions of labels on, or inside the product relating to laser product safety. Kenwood Corporation 2967-3, ISHIKAWA-MACHI, HACHIOJI-SHI TOKYO, JAPAN KENWOOD CORP. CERTIFIES THIS EQUIPMENT CONFORMS TO DHHS REGULATIONS N0.21 CFR 1040. 10, CHAPTER 1, SUBCHAPTER J.
The Bluetooth word mark and logos are owned by the Bluetooth SIG, Inc. and any use of such marks by Kenwood Corporation is under license. Other trademarks and trade names are those of their respective owners. The "AAC" logo is a trademark of Dolby Laboratories. Font for this product is designed by Ricoh. iPod is a trademark of Apple Inc., registered in the U.S. and other countries. iPhone is a trademark of Apple Inc. iTunes is a trademark of Apple Inc.