MONITOR WITH DVD RECEIVER DDX9906XR DDX8906S DDX8706S DDX819WBTL DMX906S DMX9706S MONITOR WITH RECEIVER INSTRUCTION MANUAL • Updated information (the latest Instruction Manual, system updates, new functions, etc.) is available from . • The Instruction manual is subject to change for modification of specifications and so forth. Be sure to download the latest edition of the Instruction manual for reference.
Contents Before Use 4 APPS 29 Precautions.................................................................... 4 Wireless Mirroring Operation................................29 How to read this manual.......................................... 5 Apple CarPlay Operation........................................29 Android Auto™ Operation......................................32 Basic Operations 6 Functions of the Buttons on the Front Panel.... 6 Turning on the Unit......................................
SiriusXM® 54 Controlling Audio 90 SiriusXM® Basic Operation.....................................54 3-way speaker system setup.................................90 Storing Channels in Preset Memory...................56 Speaker / X’over setup.............................................91 Preset select................................................................56 Controlling General Audio.....................................93 Direct search.......................................................
Before Use Before Use Precautions # WARNINGS ÑÑTo prevent injury or fire, take the following precautions: • To prevent a short circuit, never put or leave any metallic objects (such as coins or metallic tools) inside the unit. • Do not watch or fix your eyes on the unit’s display when you are driving for any extended period. • If you experience problems during installation, consult your KENWOOD dealer.
Before Use ÑÑAcquiring GPS signal The first time you turn on this unit, you must wait while the system acquires satellite signals for the first time. This process could take up to several minutes. Make sure your vehicle is outdoors in an open area away from tall buildings and trees for fastest acquisition. After the system acquires satellites for the first time, it will acquire satellites quickly each time thereafter.
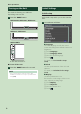
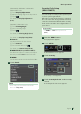
Basic Operations Basic Operations Functions of the Buttons on the Front Panel DDX9906XR / DDX8906S / DDX8706S 9 1 2 3 4 5 6 7 8 4 5 6 3 DMX906S / DMX9706S 1 2 DDX819WBTL 6 2 99 1 5 3 7 4 6
Basic Operations NOTE • The panels shown in this manual are examples used to provide a clear explanation of operations. For this reason, they may be different from the actual panels. Number Name Motion 1 Remote Sensor • Receives the remote control signal. 2 S, R (Volume) • Adjusts the volume. The volume will go up to 15 when you keep pressing R. (P.11) 3 CAM • Switches view camera display on/off.
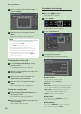
Basic Operations Turning on the Unit The method of turning on is different depending on the model. 1 Press the [HOME] button. DDX9906XR / DDX8906S / DDX8706S Initial Settings Initial setup Perform this setup when you use this unit first time. 1 Set each item as follows. DMX906S / DMX9706S DDX819WBTL hh The unit is turned on. ●● To turn off the unit: 1 Press the [HOME] button for 1 second.
Basic Operations (DDX9906XR / DDX8906S / DDX8706S / DDX819WBTL only) 5 Touch [Display Adjustment]. 6 Adjust a viewing angle and a tilt position. 7 Touch [ ]. For details, see Display Adjustment (P.11). (DMX906S / DMX9706S only) 5 Touch [Viewing Angle]. 6 Select a viewing angle. 7 Touch [ ]. For details, see Viewing Angle (P.12). For details, see Display Setup (P.86). ■■ [Camera] Set the parameters for the camera. 1 Touch [Camera]. 2 Set each item and touch [ ]. For details, see Camera Setup (P.78).
Basic Operations 5 Enter a security code with 4 to 8 digits and touch [Enter]. Calendar/clock settings 1 Press the [MENU] button. hh Popup menu appears. 2 Touch [SETUP]. hh SETUP Menu screen appears. 6 Enter the same code again and touch [Enter]. Now, your security code is registered. 3 Touch [User Interface]. NOTE • This setting is available when demonstration mode is set to “OFF”. (P.86) • Touch [BS] to delete the last entry.
Basic Operations NOTE • Please set the date and time. If they are not set, some functions may not work. Adjusting the volume You can adjust the volume (0 to 40). Press [R] to increase, and press [S] to decrease. Holding [R] increases the volume continuously to level 15. Display Adjustment (DDX9906XR / DDX8906S / DDX8706S / DDX819WBTL) 1 Press the [G] button. hh Display Adjustment screen appears. 2 Select a tilt position you want to set up. Default is "0".
Basic Operations Viewing Angle (DMX906S / DMX9706S) You can adjust the viewing angle when the image on the screen is difficult to see evenly. The smaller the (negative) value, the more whitish the image on the screen looks. 1 Press the [MENU] button. hh Popup menu appears. 2 Touch [SETUP]. 3 Touch [Display]. hh Display screen appears. 12 4 Touch [Viewing Angle]. 5 Select an angle you want to set up. Default is "0". (P.
Basic Operations HOME screen descriptions Most functions can be performed from the HOME screen. Popup menu 1 Press the [MENU] button. hh Popup menu appears. 2 Touch to display the popup menu. 1 2 1 3 1 • Widget (P.18) –– You can change the widget by flicking left or right on the widget area. –– Touch the widget to display the detailed screen. 2 • Displays the source selection screen. (P.14) 3 • Short-cut playback source icons (P.15) The contents of the menu are as follows.
Basic Operations Turn off the screen Select the playback source 1 1 Press the [HOME] button. hh HOME screen appears. 2 Touch [ ]. From the screen, you can select the following sources and functions. Select [Display OFF] on the popup menu. NOTE • Switches to the Apple CarPlay screen from the connected iPhone. (P.29) • Touch the display to turn on the screen. • To display the clock while the screen is off, it is necessary to set "OSD Clock" to "ON". (P.
Basic Operations • For sources and information displayed when an ADS adapter is connected, see OEM Features Operation (P.82). *1 When connecting as Apple CarPlay or Android Auto, it works as a phone provided in Apple CarPlay or Android Auto. If Apple CarPlay or Android Auto are connected during talking by the Bluetooth device or iDataLink phone, the current call will be continued.
Basic Operations Source control screen descriptions 5 Artwork & information You can select whether to display an artwork and song information or only song information in more detail. Touching the artwork area switches to the VU meter. (The Disc, USB, iPod, Bluetooth audio sources only) There are some functions which can be performed from most screens. Indicators 4 5 3 6 7 1 2 Short-cut source icons 1 All sources icon Displays the source selection screen. (P.
Basic Operations List screen 5 [ There are some common function keys in the list screens of most sources. See (P.26, 41, 43, 72). ]/[ ] Page scroll Returns to the previous screen. For Disc media/USB/iPod: 1 ]/[ Return 6 Display the list screen ]/[ You can change pages to display more items by pressing [ ]/[ ]. •[ ]/[ ] : Displays the top or bottom page. NOTE • Depending on the current source or mode, some function key may not appear.
Widget Widget Widget 1 2 Multi Widget Press the [HOME] button. You can change the widget by flicking left or right on the widget area. You can place a widget on each of the following areas. Up to 4 widgets can be placed per a multi widget screen. 1 2 Press the [HOME] button. Flick the widget area to the left/right to display the multi widget.
Widget ●● To replace the widget 1 Touch [ ] on the multi widget screen. ÑÑAdd a new multi widget You can add pages to the multi widget screen. 1 1 ■■ [ ] Displays confirmation message to delete the current page from the multi widget screen. For details, see To delete the multi widget (P.19). hh Widget list popup appears. 1 Widget icon The widgets which can be placed to the multi widget screen are listed. 2 Flick the widget list popup to the left/ right to select the widget to replace.
Widget Photo Frame Widget You can display a slideshow of the image files stored in the USB memory on the Home screen. ÑÑPreparation Widget Setup Set up the widgets on the Home screen. 1 Press the [MENU] button. hh Popup menu appears. 2 Touch [SETUP]. hh SETUP screen appears. 3 Touch [User Interface]. • Select “ON” for Photo Frame Widget. See Widget Setup (P.20). ●● Acceptable Picture files Max. Picture size JPEG (.jpg, .jpeg) *1 PNG (.png) BMP (.
Widget To Photo Frame Setup Make settings related to display of the photo frame widget. 1 Touch [Photo Frame SETUP] on the Widget SETUP screen. 2 Set each item as follows. ■■ [Sort Order] Specify a file sorting criterion. "By Name(Ascending)"/ "By Name(Descending)"/ "By Date(Newest First)"(Default)/ "By Date(Oldest First)" ■■ [Slide Show Interval] Specify the slideshow interval. "5" to "30" seconds. Default is "5" seconds. ■■ [Photo Frame is • • • • •] Display help topics about the photo frame.
Disc Disc (DDX9906XR / DDX8906S / DDX8706S / DDX819WBTL) Playing a disc DDX819WBTL ÑÑInsert a disc 1 Press the [G] button. DDX9906XR / DDX8906S / DDX8706S hh The panel closes automatically. The unit loads the disc and playback starts. DDX819WBTL ÑÑEject a disc 2 3 Touch [DISC EJECT]. hh The panel opens. Insert the disc into the slot. DDX9906XR / DDX8906S / DDX8706S 22 1 2 Press the [G] button. 3 Press the [G] button. hh The panel closes. Touch [DISC EJECT].
Disc DVD/VCD Basic Operation • Linear PCM, etc.: Audio format • OFF/Zoom2 – 4 (DVD)/Zoom2 (VCD): Displays the zoom ratio. This function can be used from the remote control. (P.99) • [Hide]: Hides the control screen. •[ ] : Repeats the current content.
Disc 4 Operation keys • [E] [F] : Searches for the previous/next content. Touch and hold to fast-forward or fastbackward the disc. (It will be cancelled automatically after about 50 seconds.) • [DH] : Plays or pauses. •[ ] : Displays the Graphic Equalizer screen. (P.93) 5 Indicator Items • [IN]: Disc insertion status. White: A Disc is inside the unit. Orange: Disc player failure. VCD • [1chLL/2chLL]: Identifies the left audio output of channel 1 or 2.
Disc •[ ] : Repeats the current track/folder. Each time you touch the key, repeat mode switches in the following sequence; Track/File repeat ( ), Folder repeat ( ) (Disc media only), Repeat all ( ) •[ ] : Randomly plays all tracks in current folder/disc. Each time you touch the key, random mode switches in the following sequence; Track random ( ) (Music CD only), Folder ) (Disc media only), Random off random ( ( ) 2 Track information • Displays the information of the current track/file.
Disc File search Operation (Disc media only) You can search for a file according to hierarchy. NOTE DVD Disc Menu Operation You can set up some functions using the DVDVIDEO disc menu. 1 Touch the framed area during playback. • For operations in the list screen, see List screen (P.17). 1 Touch [1]. hh Folder List screen appears. 2 Touch the desired folder. hh Menu Control screen appears. 2 Perform your desired operation as follows. hh When you touch a folder its contents are displayed.
Disc ■■ To switch among picture angles Touch [Angle]. Each time you touch this key, picture angles are switched. * These keys may not function depending on the disc. DVD Setup You can set up the DVD playback functions. 1 Touch the framed area during playback. 2 Touch [ ] on the left side of the screen. Touch [SETUP]. ÑÑHighlight control Highlight control lets you control the DVD menu by touching the menu key directly on the screen. 1 Touch [Highlight] on the Menu Control screen.
Disc ■■ [Screen Ratio] Sets the screen display mode. [16:9 ](Default): Displays wide pictures. [4:3 LB]: Displays wide pictures in the Letter Box format (having black stripes at the top and bottom of screen). [4:3 PS]: Displays wide pictures in the Pan & Scan format (showing pictures cut at the right and left ends). ÑÑLanguage setup This setting is for the languages used for the menu, subtitle, and voice. 1 Touch the desired item; [Menu Language], [Subtitle Language], [Audio Language].
APPS APPS Wireless Mirroring Operation (Except DDX819WBTL) You can display the same screen of the Android device on the monitor of the unit using the Wireless Mirroring function of the Android device. Preparation • You can use the Wireless Mirroring function with Android devices compatible with this function. • This function may be called Wireless Display, Screen Mirroring, AllShare Cast, etc., depending on the manufacturer. • The settings on the Android device differ depending on the device type.
APPS Wireless connection (Except DDX819WBTL) You can select the iPhone registered as the Bluetooth device from [Apple CarPlay Device List] and use it as the Apple CarPlay device. Preparation • To register an iPhone by the connection via the USB (Black) terminal –– Connect an iPhone via the USB (Black) terminal and operate the iPhone according to the confirmation messages displayed on the iPhone. The iPhone is registered in [Apple CarPlay Device List].
APPS To delete the registered Apple CarPlay device 1 2 Touch [ ÑÑOperation buttons and available Apps on the home screen of Apple CarPlay ]. Touch the device name to check. You can use the Apps of the connected iPhone. The items displayed and the language used on the screen differ among the connected devices. To enter the Apple CarPlay mode, touch [Apple CarPlay] icon on the source selection screen. (P.14) 2 ■■ [þ [ALL] Selects all Apple CarPlay devices. ■■ [¨ [ALL] Clears all check marks.
APPS DDX819WBTL Press for 1 second 2 Press the [ ] button. ÑÑSwitch to the Apple CarPlay screen while listening to another source 1 Press the [ ] button. DDX9906XR / DDX8906S / DDX8706S DMX906S / DMX9706S DDX819WBTL NOTE • When listening to another source with the Apple CarPlay screen displayed, playing music in the Apple CarPlay mode will switch the current source to the Apple CarPlay source. 32 Android Auto enables you to use the functions of your Android device convenient for driving.
APPS ÑÑConnect Android device Wired connection 1 2 3 4 5 Connect an Android device via the USB terminal. (P.112) To use the hands-free function, connect the Android device via Bluetooth. When an Android device compatible with Android Auto is connected to the USB terminal, the device is connected via Bluetooth automatically, and the Bluetooth Hands-Free phone currently connected is disconnected. Unlock your Android device. Press the [HOME] button.
APPS To exit the Android Auto screen 1 screen while listening to another source Press the [HOME] button. ÑÑUsing voice control 1 ÑÑSwitch to the Android Auto Press the [ ] button for 1 second. 1 Press the [ ] button. DDX9906XR / DDX8906S / DDX8706S DDX9906XR / DDX8906S / DDX8706S Press for 1 second DMX906S / DMX9706S DMX906S / DMX9706S Press for 1 second DDX819WBTL DDX819WBTL Press for 1 second NOTE To cancel 1 34 Press the [ ] button.
APPS Spotify Operation 3 Operation keys •[ You can listen to Spotify on this unit by controlling the application installed in the iPhone or Android. To select the Spotify source, touch [Spotify] icon on the source selection screen. (P.14) •[ ],[ ] : Skips the current song. (Note that this function is disabled when the Spotify skip limitation is exceeded.) Preparation • Install the latest version of the Spotify application "Spotify" on your iPhone or Android.
APPS ÑÑSelecting a track 1 Touch [ ]. hh Station list screen appears. 2 Select the list type, then select a desired item. Pandora® Operation (Except DDX819WBTL) You can listen to Pandora® on this unit by controlling the application installed in the iPhone or Bluetooth device. To select the Pandora source, touch the [Pandora] icon on the source selection screen. (P.14) Preparation ■■ To select the category and station Touch the category and station name in the list.
APPS • [ ] (Thumbs up) : Registers the current content as a favorite content. • [D] , [H] : Plays or pauses the content of the current station. • [F] : Skips the current song. (Note that this function is disabled when the Pandora skip limitation is exceeded.) • [ ] (Bookmark Song) : Bookmarks a song in the current contents. • [ ] : Creates a new station. See Creates a new station (P.37). •[ ] : Displays the Graphic Equalizer screen. (P.
APPS Genre list screen 1 Touch [Create station from genre]. 2 The selected genre is created as a new station. About Pandora® NOTE • In the application on your device, log in and create an account with Pandora. (If you are not already a registered user, an account can also be created at www.pandora. com.) • Establish an Internet connection. • Pandora is only available in certain countries. Please visit http://www.pandora.com/legal for more information.
USB USB Connecting a USB device 1 Connect the USB device with the USB cable. (P.111) USB Basic Operation Most functions can be controlled from the source control screen and playback screen. NOTE • Set the remote controller mode switch to AUD mode before starting operation, see Switch the operation mode (P.99). Control screen 2 3 4 1 2 Press the [HOME] button. 6 5 Touch [ 7 ]. Touch [USB]. (P.14) ÑÑDisconnect the USB device 1 2 3 3 4 Open the drawer Press the [HOME] button.
USB •[ ] : Randomly plays all tracks in the current folder. Each time you touch the key, random modes are switched in the following sequence: File random ( ), Random off ( ) • [USB DEVICE CHANGE]: Switches to another USB device when two USB devices are connected. (Except DDX819WBTL) 2 Track information 8 Indicator Items • Displays the information on the current file. Only a file name and a folder name are displayed if there is no tag information.
USB Search Operation You can search music or video files by the following operations. 1 2 Touch [1]. 3 Select a list type. Touch [S]. ÑÑLink search You can search for a file of the same artist/ album/genre as that in the current track. 1 2 ÑÑCategory search You can search for a file by selecting a category. 1 2 3 Touch [Category List]. Touch the desired tag type. You can select from artists, albums and genres. hh The list corresponding to your selection appears.
iPod/iPhone iPod/iPhone Preparation 1 Connect the iPod/iPhone using the KCAiP103. (P.111) ÑÑConnectable iPod/iPhone 2 3 4 Press the [HOME] button. The following models can be connected to this unit. Made for • iPhone X • iPhone 8 Plus • iPhone 8 • iPhone 7 Plus • iPhone 7 • iPhone SE • iPhone 6s Plus • iPhone 6s • iPhone 6 Plus • iPhone 6 • iPhone 5s • iPhone 5c • iPhone 5 • iPod touch (6th generation) NOTE • Latest compatible list of iPod/iPhone. For details, see www.kenwood.com/cs/ce/ipod/.
iPod/iPhone Open the drawer 6 2 5 5 Content list • Touch the right side of the screen to display the Content list. Touch again to close the list. • Displays the playing list. When you touch a track/file name on the list, playback will start. 6 [ Close the drawer 2 5 7 1 Track information • Displays the information on the current file. • Touch to display the category list screen. See Category search (P.44).
iPod/iPhone ÑÑCategory search You can search for a file by selecting a category. 1 2 Touch [Category List]. Touch the desired category. hh The list corresponding to your selection appears. 3 Touch to select the desired item in the list. Repeat this step until you find the desired file. ÑÑLink search You can search for a file of the same artist/ album/genre/composer as that in the current track. 1 2 Touch [Link Search]. Touch the desired tag type.
Radio Radio (DDX8706S / DDX819WBTL / DMX9706S) Radio Basic Operation 1 Information display • Displays the information on the current station: Frequency Touching [ ] allows you to switch between Content A and Content B. Content A: PS name, Radio Text, Title & Artist Content B: PTY Genre, Radio Text plus Preset#: Preset number • Change the text size of the information smaller when the "Small Audio Text" is set to "ON" in the User Interface screen (P.84).
Radio • [PTY] (FM only) : Searches for a program by program type. For details, see Search by program type (P.47). • [MONO] (FM only) : Selects the Monaural reception mode. 7 Indicator Items • [ST]: A stereo broadcast is being received. • [MONO]: The forced monaural function is active. • [TI]: Indicates the reception state of traffic information. White: TP is being received. Orange: TP is not being received.
Radio Selecting Operation ÑÑPreset select You can list and select memorized stations. 1 Touch [ ] on the right side of the screen. Select a station from the list. Traffic Information (FM only) You can listen to and watch traffic information automatically when a traffic bulletin starts. However, this feature requires a Radio Broadcast Data System that includes TI information. 1 Touch [ ] on the left side of the screen. Touch [TI].
HD Radio™ Tuner HD Radio™ Tuner (DDX9906XR / DDX8906S / DMX906S) HD Radio Tuner Basic Operation 1 Information display Most functions can be controlled from the source control screen. To listen to the HD Radio source, touch [HD Radio] icon on the source selection screen. (P.14) NOTE • Set the remote control mode switch to AUD mode before starting operation, see Switch the operation mode (P.99). • HD Radio broadcasting is for North American sales area only. • The screen shot below is for tuner.
HD Radio™ Tuner 5 Operation keys • [E] [F] : Tunes in a station. The method of switching frequencies can be changed (see 2 Seek mode). • [CHS] [CHR] : Selects a channel. • [1] : Display the Channel List screen. See Channel search (P.51). • [ ] : Display a list of registered bookmarks. See Bookmark list (P.52). •[ ] : Displays the Graphic Equalizer screen. (P.93) 6 Preset list • Touching [ ]/[ ] allows you to change the display size. • Recalls the memorized station or channel.
HD Radio™ Tuner Receive Mode 2 Touch [ ] on the left side of the screen. Touch [AME]. 3 Touch [Yes]. You can set the radio broadcasts receive mode. 1 2 Touch [ ] on the left side of the screen. Touch [RCV]. Select a receive mode. hh Auto memory starts. ÑÑManual memory You can store the currently being received station or channel in the memory. ■■ [Auto] Switch between digital and analog audio automatically. 1 Select the station or channel you wish to store in the memory.
HD Radio™ Tuner ÑÑDirect search 2 Select the desired content from the list. You can tune in by entering the desired frequency or channel number. 1 Touch [ ] on the left side of the screen. Touch [10key Direct]. NOTE • Touch [Info Change] in the channel list. Select the sequence of the list (Song title, artist name, album name). 2 Select the search method. ÑÑSearch by program type (FM only) You can tune in the station broadcasting the specified type of program when listening to FM.
HD Radio™ Tuner Bookmark Stores tag information (title, artist, album, URL, and description) about the song you are listening to now. Detailed information and QR codes can be displayed according to the stored tag information. ÑÑBookmark registration 1 Touch [ Touch [ ] on the left side of the screen. ]. ■■ [ Delete] Deletes the bookmarks being displayed. Bookmark delete Deleting a bookmark. hh Registers a bookmark. 1 Touch [Delete]. 2 Select the bookmark to delete from the list.
HD Radio™ Tuner Alert Message This function is to receive alert messages. First, you need to turn on the “Emergency Alerts”. (P.48) ÑÑWhen an Alert Message comes [Snooze] ÑÑDisplay of the received Alert Message You can read the received alert message afterward. 1 Touch [ ] on the left side of the screen. Touch [Alert Message Log]. 2 Select the desired Alert Message from the list. The alert message is erased. Same alert message cannot be displayed for next 10 minutes.
SiriusXM® SiriusXM® (Except DDX819WBTL) SiriusXM® Basic Operation Only SiriusXM® brings you more of what you love to listen to, all in one place. Get over 140 channels, including commercial-free music plus the best sports, news, talk, comedy and entertainment. Welcome to the world of satellite radio. A SiriusXM Vehicle Tuner and Subscription are required. For more information, visit www.siriusxm.com. To listen to the SiriusXM source, touch the [SiriusXM] icon on the source selection screen. (P.
SiriusXM® • Change the text size of the information smaller when the "Small Audio Text" is set to "ON" in the User Interface screen (P.84). NOTE • While getting contents, "Waiting" is showing on the display. 2 Band button Switches among bands. (SXM1/SXM2/SXM3/ SXM4) 3 Artwork • Displays/hides artwork area. • Displays the album artwork for most SiriusXM music channels 4 Operation keys • [1] : Display the Category search screen. For details on search operation, see Category/ Channel search (P.57).
SiriusXM® Storing Channels in Preset Memory You can store the current channel in memory. 1 Tune in the channel you wish to store in the memory. 2 Touch [ 3 Direct search You can tune in a channel directly. 1 Touch [ ] on the left side of the screen. Touch [Direct Channel]. 2 Enter the channel number and touch [Enter]. ] on the right side of the screen. Touch [SXM(1-4) P(1-6)] in which you want to store the channel for 2 seconds until a beep sounds.
SiriusXM® Category/Channel search Replay You can specify the desired category and select a channel. You can replay the last 60 minutes of the program from the current channel. 1 Touch [1]. 1 2 Select a category. 3 Touch [L] or [Replay] on the function panel. hh Channel list appears. ■■ [E] [F] Press to skip to the previous/next track. Press and hold to rewind or fast forward. (It will be cancelled automatically after about 50 seconds.) Select the desired content from the list.
SiriusXM® To return to live music/content 1 2 Touch the left side of the screen. Touch [Live]. TuneMix™ TuneMix™ plays a unique blend of songs from your Preset music channels of the current SiriusXM Preset Band, allowing you to build a custom channel from as few as two to as many as 6 music channels. You can even skip songs you don’t want to hear.
SiriusXM® Traffic & Weather Now™ Traffic & Weather Now™ allows you to access the latest report whenever you want to hear it. Select your city in the set up menu Select a City for Traffic & Weather (P.65). 1 Touch [ 2 Touch [Traffic & Weather]. The report starts from the beginning. To stop and return to the previous channel, touch it again. Indicator display • (White) : Played already. • (Green) : New information arrived. • (Purple) : Playing. • (Gray) : No information.
SiriusXM® SportsFlash™ SportsFlash™ will notify you when a big play happens during a game with one of your favorite sports teams. Choose to tune in and hear the play unfold like it was live. Continue listening to the game or return to your previous channel. 1 1 Touch [ ] on the left side of the screen. Touch [SETUP]. When a big play happens during one of the games, an Alert screen appears. ■■ [Listen] Touch to tune in that channel and play back the big play.
SiriusXM® ÑÑParental code ÑÑParental Control You can set a SiriusXM parental code for Parental Control. Parental Control is a feature that provides the user with the ability to prevent unauthorized access to mature content and user selected channels. 1 Touch [Parental Code] on the SiriusXM SETUP screen. hh Parental Pass Check screen appears. NOTE • The code number is set to “0000” as default. 2 1 Touch [Parental Control] on the SiriusXM SETUP screen. 2 Touch [User], [Mature] or [OFF].
SiriusXM® NOTE 3 • Touch [All-Channels] to display all channels. • To delete the parental lock channel setting, touch [Disable All] and then touch [YES] on the confirmation screen. 4 Touch each channel in the list and set to ON or OFF. Touch each channel on the list and set to ON or OFF. [ON]: Locks the channel. [OFF]: Unlocks the channel. NOTE • To delete the skip channel setting, touch [Disable All] and then touch [YES] on the confirmation screen. • Touch [Info Change].
SiriusXM® 3 Touch each content list item you want to select ON or OFF. NOTE • You can select up to 60 artists or songs. To select a Team Get alerted when your favorite sports team is playing on another SiriusXM channel with GameAlert™ 1 Touch [My Games]. 2 Touch the desired league in the list. 3 Touch the team(s) in the list you want to select. ●● To delete the Artist and Song 1 Touch [Delete]. 2 Touch the content(s) in the list you want to select. ■■ [þ All] Selects all contents.
SiriusXM® ÑÑSportsFlash™ setup 5 Touch [ ] twice. Activating SportsFlash 1 Touch [SportsFlash] on the SiriusXM SETUP screen. hh SportsFlash is turned on or off. Default is “ON”. Selecting SportsFlash Beep 1 Touch [SportsFlash Beep] on the SiriusXM SETUP screen. hh SportsFlash Beep is turned on or off. Default is “ON”. ■■ [Edit] Sets and removes teams. ■■ [Priority] Sets the priority of a team. Selecting the teams for SportsFlash 1 Touch [SportsFlash Team Set] on the SiriusXM SETUP screen.
SiriusXM® 3 Touch [Done]. ÑÑTuneStart™ 1 Touch [Tune Start] on the SiriusXM SETUP screen. The TuneStart is turned on or off. Default is “ON”. ÑÑReset NOTE 1 • Priority can be set on up to 5 teams. • When priority has already been set for 5 teams, it cannot be set for any other team. Delete an unnecessary team. Touch [SiriusXM Reset] on the SiriusXM SETUP screen. hh Confirmation screen appears. 2 Touch [YES]. hh All SiriusXM settings are reset to defaults.
Bluetooth Control Bluetooth Control Using the Bluetooth function allows you to use various functions such as listening to the audio file and making/receiving a call. Information for using Bluetooth® devices Bluetooth is a short-range wireless radio communication technology for mobile devices such as cell-phones, portable PCs, and other devices. Bluetooth devices can be connected without cables and communication with each other.
Bluetooth Control Register the Bluetooth device 4 Touch [Select Device] on the Bluetooth Setup screen. 5 Touch [ It is necessary to register the Bluetooth audio player or cell-phone in this unit before using the Bluetooth function. You can register up to 10 Bluetooth devices. NOTE • Up to 10 Bluetooth devices can be registered. If an attempt is made to register the 11th Bluetooth device, the Bluetooth device connected on the earliest date will be deleted to register the 11th one.
Bluetooth Control ●● Input the PIN Code in your smartphone/cell-phone. PIN Code is set to “0000” as the default. Bluetooth Setup NOTE • The Bluetooth Setup is disabled while using Apple CarPlay. 8 Select the function you want to use. 1 Press the [MENU] button. hh Popup menu appears. 2 Touch [SETUP]. hh SETUP Menu screen appears. 3 Touch [Bluetooth]. hh Bluetooth SETUP screen appears. See the following section for each setting. • Connect the Bluetooth device (P.68) • Change the PIN Code (P.
Bluetooth Control 3 Set each profile as follows. NOTE • You cannot select an Android device connected as an Android Auto device. ■■ [TEL (HFP) 1], [TEL (HFP) 2] Select when the device is connected with the unit as hands-free phone 1 or 2. ■■ [Audio (A2DP)/App (SPP)] Select to interwork with an application installed in a smartphone or to use as an audio player. 4 Touch [Close]. To delete the registered Bluetooth device 1 Touch [ 2 Touch the device name to check. ] on the Select Device screen.
Bluetooth Control ÑÑChange the PIN Code 1 2 3 Touch [PIN Code] on the Bluetooth SETUP screen. hh Change PIN Code screen appears. Touch and hold [ Input the PIN Code. ]. Playing the Bluetooth Audio Device Most function can be controlled from the source control screen. To select Bluetooth source, touch [Bluetooth] icon on the source selection screen. (P.14) NOTE • The Bluetooth audio source is disabled while using Apple CarPlay.
Bluetooth Control •[ ] : Displays the Graphic Equalizer screen. (P.93) 4 KENWOOD Music Mix Bluetooth audio devices can be switched easily to play music. See KENWOOD Music Mix (P.71). 5 [ ]/[ ]* •[ ] : Repeats the current track/folder. Each time you touch the key, repeat modes are switched in the following sequence: File repeat ( ), Folder repeat ( ), All songs repeat ( ), Repeat off ( ) •[ ] : Randomly plays all tracks in the current folder.
Bluetooth Control NOTE • If a connected Bluetooth audio device is operated to play music, connections are switched. • When a Bluetooth source is switched to another one, its settings are deleted and the connection is restored to the connection before source switching. • You cannot select an Android device connected as an Android Auto device. ÑÑFile search 1 2 Touch [1]. Using the Hands-Free Unit You can use the telephone function by connecting the Bluetooth telephone to this unit.
Bluetooth Control 4 Select a dialing method. Call using call records 1 2 • • • • [ [ [ [ ]: Call using call records ]: Call using the phonebook ]: Call using the preset number ]: Call by entering a phone number ●● Select the cell-phone to use When you connect two cell-phones 1) Touch [ ] to select the phone you want to use. ●● Bluetooth SETUP 1) Touch [ ]. Bluetooth SETUP screen appears. Touch [ ]. Select the phone number from the list. Call using the phonebook 1 2 3 Touch [ Touch [ ]. ].
Bluetooth Control 5 Select the phone number from the list. ÑÑVoice Recognition You can access the voice recognition function of the cell-phone connected to this unit. You can search the cell-phone phonebook by voice. (The functionality depends on the cell-phone.) 1 Press the [ ] button for 1 second. DDX9906XR / DDX8906S / DDX8706S Press for 1 second NOTE • You can sort the phone numbers in the list by last name or first name. For details, see Hands-Free Setup (P.77).
Bluetooth Control ÑÑReceive a call 1 Touch [ [ DDX9906XR / DDX8906S / DDX8706S ] to answer a phone call or ] to reject an incoming call. DMX906S / DMX9706S DDX819WBTL NOTE • While monitoring the picture from the view camera, this screen does not appear even if a call comes in. To end call 1 While talking, touch [ ]. ÑÑOperations during a call ●● Mute your voice Touch [ ] to mute or not to mute your voice. ●● Output the dial tone Touch [DTMF] to display the tone input screen.
Bluetooth Control To display it again ■■ [Add number direct] Enter the telephone number directly and touch [SET]. See Call by entering a phone number (P.74). 1 Press the [HOME] button. 2 Touch [ ]. 3 Touch [TEL]. ■■ [Delete] To delete a preset number, touch [Delete] and then touch [OK] on the confirmation screen. ÑÑPhone number preset You can register frequently used phone numbers in this unit. 1 2 Touch [ ]. Touch [Edit].
Bluetooth Control 3 Touch [Delete]. hh Confirmation message appears. 4 Touch [Yes]. ■■ [Auto Response]* Set the automatic response time to pick-up an incoming call. [OFF ](Default): Turns off the Automatic response function. [1/5/10/15/20/25/30]: Sets the ringing time (second). Hands-Free Setup You can make various settings for the HandsFree function. 1 Press the [MENU] button. hh Popup menu appears. 2 Touch [SETUP].
Other External Components Other External Components View Camera 4 Switching the Angle *2 Touching each time changes camera angles. NOTE • To connect a camera, see P.113. • To use a rear view camera, a REVERSE lead connection is required. (P.107) • If [Rear Camera Interruption] is active the camera screen is displayed when you shift the gear to the reverse (R) position. ÑÑDisplay the camera screen 1 Press the [MENU] button. hh Popup menu appears. 2 Touch [Camera].
Other External Components 4 Set each item as follows. ■■ Camera Assignment Settings Set up the camera assignment. See To set up the camera assignment settings (P.79). ■■ [Rear Camera Interruption] [ON]: Displays the picture from the rear view camera when you shift the gear to the reverse (R) position. [OFF ](Default): Select this when no camera is connected. ÑÑTo set up the camera assignment settings 1 Touch [Camera Assignment Settings] on the Camera screen. (P.78) 2 Set each item as follows.
Other External Components ÑÑTo adjust the parking 5 [Left] guidelines 6 [None] 3 NOTE Touch [Enter]. For AV-IN input terminal: 1 Touch [AV-IN]. hh Displays the picture from view camera connected to AV-IN input terminal. 2 Select the view camera to set up. 1 2 3 4 5 • Install the rear view camera in the appropriate position according to the instruction manual supplied with the rear view camera.
Other External Components Use Dashboard Camera (Except DDX819WBTL) External audio/video players (AV-IN) A Dashboard Camera, DRV-N520 (optional accessory), connected to this unit lets you play video-recorded data and so on. For details, see the instruction manual of the Dashboard Camera DRV-N520 (optional accessory). NOTE • To connect a dashboard camera, see P.113. • To use the dashboard camera function, it is necessary to set “Camera Assignment Settings” to “Dashboard Camera”. (P.
Other External Components ■■ Hides the indicators and buttons. Touch [Hide]. • Displays information about the air conditioner of the vehicle. * ■■ Change the channel. Touch [CHR], [CHS]. • Displays information about the Parking Distance Sensor of the vehicle.
Setup Setup Monitor Screen Setup You can adjust the image quality of video, menu screen, etc. 1 Press the [MENU] button. hh Popup menu appears. 2 Touch [Screen Adjustment]. System Setup 1 Press the [MENU] button. hh Popup menu appears. 2 Touch [SETUP]. hh Screen Adjustment screen appears. 3 Adjust each setting as follows. ■■ [Backlight/Contrast/Black/ Brightness/Color/Tint] Adjust each setting. ■■ [Aspect] Select a screen mode.
Setup User Interface Setup ■■ [Parking Assist Position] (Except DDX819WBTL) Select where to display information about obstacles on the screen (left or right). “Left”/“Right” (Default) This can be set when the iDataLink (commercially available) is connected. You can setup user interface parameters. 1 Press the [MENU] button. hh Popup menu appears. 2 Touch [SETUP]. hh SETUP screen appears. 3 Touch [User Interface]. ■■ [Language Select] Select a language.
Setup 6 Adjust the date, then adjust the time. 2 Press and hold the steering remote controller button. NOTE • You can have the unit learned all buttons at a time. In that case, press the all buttons one at a time and after pressing all of them, touch [Learning completed] in Steering Remote Controller Setting screen. However, new functions cannot be learned after this operation. 7 Touch [Set]. 3 Touch the function you want to set. 4 Repeat steps 2 and 3 as necessary. 5 Touch [Learning completed].
Setup Special Setup You can setup special parameters. 1 Press the [MENU] button. hh Popup menu appears. 2 Touch [SETUP]. hh SETUP screen appears. 3 Touch [Special]. hh Special screen appears. 4 Set each parameter as follows. NOTE • For how to update the software, see the relevant update procedure manual which comes with the software. Display Setup 1 Press the [MENU] button. hh Popup menu appears. 2 Touch [SETUP]. hh SETUP screen appears. 3 Touch [Display].
Setup ■■ [Screen transition effect] Select whether to use the screen transition effect when the source control screen is switched to the Home screen. "ON" (Default)/"OFF" ÑÑCustomizing the key color ÑÑChange the wallpaper image or color 1 Touch [Wallpaper Customize] on the Display screen. 2 Select an image. You can set the key illumination color. 1 2 Touch [Key Color] on the Display screen. Touch the desired color. *1 *2 *3 *1 The album art currently being displayed is used as a wallpaper.
Setup To register an original image You can load an image from the connected USB device and set it as the wallpaper image. Before starting this procedure, it is necessary to connect the device which has the image to load. 1 Touch [User1 Select] or [User2 Select] on the Wallpaper Customize screen. 2 Select the image to load. AV Setup You can set AV parameters. 1 Press the [MENU] button. hh Popup menu appears. 2 Touch [SETUP]. hh SETUP screen appears. 3 Touch [AV]. hh AV screen appears.
Setup ■■ [AV-OUT] You can select an AV source to be output from the AV OUTPUT port. OFF, AV-IN, DISC (DDX9906XR / DDX8906S / DDX8706S / DDX819WBTL only), USB or iPod • You cannot select AV-IN if the AV-IN input terminal is used for camera. • You cannot select iPod if it is connected via Bluetooth. • If you select USB, iPod, DISC (Music CD/Disc media), Spotify, Pandora or Bluetooth audio as the main source, you cannot select USB or iPod as the AV output source.
Controlling Audio Controlling Audio You can adjust various settings such as audio balance or subwoofer level. 1 Press the [MENU] button. hh Popup menu appears. 2 Touch [Audio]. 3 4 Touch [STANDBY]. Press the button 1 followed by the button 2 for 1 second at the same time. DDX9906XR / DDX8906S 2 1 DMX906S 1 2 DDX819WBTL 2 • • • • • • • • See the following section for each setting. Set up speaker / X’over (P.91) Controlling equalizer (P.93) Set listening position / DTA (P.
Controlling Audio Speaker / X’over setup 1 Press the [MENU] button. hh Popup menu appears. 2 Touch [Audio]. hh Audio screen appears. 3 Touch [Speaker / Xʼover]. ■■ [Tweeter] (Only for Front) You can set up the tweeter when you are selecting front speakers. None, Small, Medium, Large ■■ [Xʼover] Display the speaker crossover setup screen. You can adjust the crossover frequency that was set automatically when you selected the speaker type. For details, see Crossover network setup (P.
Controlling Audio 3 Set each parameter as follows. ■■ [HPF FREQ] High Pass Filter adjustment. (When Front or Rear is selected on the Speaker Select screen) ■■ [LPF FREQ] Low Pass Filter adjustment. (When Subwoofer is selected on the Speaker Select screen) ■■ [Slope]*1 Set a crossover slope. ■■ [Gain] Adjust the gain of the front speaker, rear speaker, or subwoofer. ■■ [TW Gain] *2 Adjust the tweeter level.
Controlling Audio Controlling General Audio 1 Press the [MENU] button. hh Popup menu appears. 2 Touch [Audio]. hh Audio screen appears. 3 Touch [Fader / Balance]. 4 Equalizer Control You can adjust equalizer by selecting the optimized setting for each category. 1 Press the [MENU] button. hh Popup menu appears. 2 Touch [Audio]. hh Audio screen appears. 3 Touch [EQ / SW Level]. 4 Touch the screen and set the Graphic Equalizer as desired. Set each parameter as follows.
Controlling Audio ■■ [SW Level] Adjust the subwoofer volume. This setting is not available when Subwoofer is set to “None”. See Speaker / X’over setup (P.91). ÑÑRecall the EQ curve 1 2 Volume Offset Finely adjust the volume of the current source to minimize the difference in volume between different sources. 1 Press the [MENU] button. hh Popup menu appears. 2 Touch [Audio]. hh Audio screen appears. 3 Touch [Volume Offset]. 4 Touch [+] or [-] to adjust the level. Touch [Preset Select].
Controlling Audio Zone Control You can select different sources for front and rear positions in the vehicle. ■■ [Zone Select] Touch [Single Zone] to turn off the dual zone function. 1 Press the [MENU] button. hh Popup menu appears. 2 ■■ [[Front Source], [Rear Source] Select an audio source for each. Rear Source; “AV-IN”/“DISC”/“iPod”/“USB”/“OFF” Touch [Audio]. hh Audio screen appears. ■■ [Rear VOL.] Adjust the rear source volume. 3 Touch [Zone Control]. hh Zone Control screen appears.
Controlling Audio Sound Effect You can set sound effects. 1 Press the [MENU] button. hh Popup menu appears. 2 Touch [Audio]. hh Audio screen appears. 3 Touch [Sound Effect]. 4 Set each parameter as follows. ■■ [Bass Boost] Set the amount of bass boost “OFF”/ “1”/ “2”/ “3”. ■■ [Loudness] Set the amount of boost of low and high tones. “OFF”, “Low”, “High” ■■ [Drive Equalizer] Reduces the driving noise by raising the bandwidth.
Controlling Audio Listening Position / DTA 3 Touch [T] or [U] to adjust the delay time of the selected speaker. 4 5 Touch [Level]. Listening Position / DTA allows you to improve the sound field depending on the position of the seat you sit. Listening Position / DTA allows you to set “Listening Position” and “Front Focus”. You cannot set both at the same time. 1 Press the [MENU] button. hh Popup menu appears. 2 Touch [Audio]. hh Audio screen appears. 3 Touch [Position / DTA].
Controlling Audio ÑÑFront Focus fine adjustment 1 2 3 Touch [Adjust]. Touch [Delay]. Set each parameter as follows. ■■ [Sound Image LR (Front)] Focus the sound image on the front of front seats. ■■ [Sound Image LR (Rear)] Focus the sound image on the front of rear seats. ■■ [Size of the Virtual Sound Field] Adjust the size of sound image to meet your taste. If the sound image is shifted from the front, move it back by [Sound Image LR (Front)] or [Sound Image LR (Rear)].
Remote control Remote control ÑÑSwitch the operation mode The functions operated from the remote control differ depending on the position of the mode switch. DISP If the remote control operates only over shorter distances or does not operate at all, it is possible that the batteries are depleted. In such instances, replace the both batteries with new ones. 1 Insert two “AAA”/“R03”-size batteries with the and poles aligned properly, following the illustration inside the case. • DVD • TV• • SRC V.
Remote control ■■ DVD Title number/Chapter number ■■ HD Radio tuner (DDX9906XR / DDX8906S / DMX906S) Frequency value/Channel number ■■ VCD 1.X and 2.X (PBC OFF) Track number ■■ SiriusXM (Except DDX819WBTL) Channel number ■■ VCD 2.X (PBC ON) Scene number/Track number ■■ Music CD Track number ■■ Radio (DDX8706S / DDX819WBTL / DMX9706S) Frequency value 2 Enter the number of the content you want to play using the numeric keypad. 3 For DVD or VCD, music CD, press the [ENTER] button.
Remote control Key Name 7 8 9 Mode switch Function ENTER ENTER − ROUTE M TOP MENU AUD Screen mode changes each time you press this key during video playback. DVD Returns to the DVD top menu. MENU AUD Displays the control screen of current source. (USB, iPod, DISC) DVD Displays the DVD menu. Turns the playback control on or off while playing VCD. VOICE Performs the selected function. 10 11 VIEW − AUD, DVD Switches the AV source to be output.
Connection/Installation Connection/Installation Before Installation Before installation of this unit, please note the following precautions. # WARNINGS • If you connect the ignition wire (red) and the battery wire (yellow) to the car chassis (ground), you may cause a short circuit, that in turn may start a fire. Always connect those wires to the power source running through the fuse box. • Do not cut out the fuse from the ignition wire (red) and the battery wire (yellow).
Connection/Installation In case of DDX9906XR 6 (M5 x 8 mm) x6 7 (M5 x 8 mm) Cooling fan • Do not press hard on the panel surface when installing the unit to the vehicle. Otherwise scars, damage, or failure may result. • Reception may drop if there are metal objects near the Bluetooth antenna. x6 8 [1] x1 9 [1] (3.
Connection/Installation 3) Connect the speaker wires of the wiring harness. 4) Connect the wiring harness wires in the following order; ground, battery, ignition. 5) Connect the wiring harness connector to the unit. 6) Install the unit in your car. 7) Reconnect the ¤ terminal of the battery. 8) Perform the Initial Setup. See Initial setup (P.8). Installing the unit ÑÑNon-Japanese cars (Except DDX819WBTL) Bend the tabs of the mounting sleeve with a screwdriver or similar utensil and attach it in place.
Connection/Installation ÑÑGPS antenna (Except DDX819WBTL) GPS antenna is installed inside of the car. It should be installed as horizontally as possible to allow easy reception of the GPS satellite signals. To mount the GPS antenna inside your vehicle: 1) Clean your dashboard or other surface. 2) Remove the separator of the metal plate (accessory 0). 3) Press the metal plate (accessory 0) down firmly on your dashboard or other mounting surface.
Connection/Installation ÑÑRemoving the trim plate ÑÑRemoving the unit 1) Engage the catch pins on the extraction key (accessory 5) and remove the two locks on the lower level. Lower the trim plate (accessory 8) and pull it forward as shown in the figure. 1) Remove the trim plate by referring to step 1 in "Removing the trim plate". 2) Insert the two extraction key (accessory 5) deeply into the slots on each side, as shown.
Connection/Installation ÑÑConnecting wires to terminals ●● Except DDX819WBTL Fuse (15A) Speaker impedance: 4-8 Ω White To front left speaker White/Black Gray To front right speaker Gray/Black Green To rear left speaker Connect to the vehicle’s parking brake detection switch harness. Light Green Accessory 1 Green/Black Purple (Parking sensor wire) (2 m) PRK SW For best safety, be sure to connect the parking sensor.
Connection/Installation ●● DDX819WBTL Fuse (15A) Accessory 1 If no connections are made, do not let the cable come out from the tab. Connect to the vehicle’s parking brake detection switch harness. Light Green PRK SW (Parking sensor wire) (2 m) Blue/White (Power control wire) P. CONT When using the optional power amplifier, connect to its power control terminal. (Max. 350mA, 12V) For best safety, be sure to connect the parking sensor.
Connection/Installation ÑÑ3-way speaker system setup ÑÑConnecting the system and ●● DDX9906XR / DDX8906S / DDX819WBTL / DMX906S ●● Except DDX819WBTL external components 14 13 12 10 9 8 7 5 Subwoofer Preout Mid Range Preout Tweeter Preout When connecting to an external amplifier, connect its ground wire to the car’s chassis to avoid damaging the unit.
Connection/Installation 1 AV Audio output (ø3.5 mini jack) 2 FM/AM antenna input 3 When connecting to an external amplifier, connect its ground wire to the car’s chassis to avoid damaging the unit. 10 Accessory 4: Bluetooth Microphone 11 Accessory -: Steering remote harness (DDX819WBTL only) Connect to vehicle’s steering remote harness. Contact your KENWOOD dealer for details.
Connection/Installation ÑÑConnecting a USB device ●● Except DDX819WBTL Accessory 3 (Gray) (1 m) [3] Accessory 2 (Black) (1 m) [3] ÑÑSecuring the USB extension cable Secure the USB extension cable with insulating tape or the like so that its connectors are not disconnected. USB device[2] USB (Gray) terminal[1] USB (Black) terminal[1] ÑÑConnecting an iPod/iPhone ●● Except DDX819WBTL iPod/iPhone[2] KCA-iP103 (0.
Connection/Installation ●● DDX819WBTL iPod/iPhone[2] KCA-iP103 (0.8m)[3] ÑÑConnecting an Android smartphone ●● Except DDX819WBTL Android smartphone[2] Micro USB to USB cable [2] USB (Black) terminal (1 m) Accessory 3 (Gray) (1 m) [3] Accessory 2 (Black) (1 m) [3] [1] USB (Gray) terminal[1] USB (Black) terminal[1] iPhone (with Apple CarPlay)[2] KCA-iP103 (0.8m)[3] SB maximum power supply current : U DC 5 V = 1.
Connection/Installation ÑÑConnecting the camera ●● DDX819WBTL Left Side View Camera and Right Side View Camera [2] ●● Except DDX819WBTL [4] Left Side View Camera and Right Side View Camera [2] [4] Front view camera [5] VIDEO input (Yellow) Front view camera [5] [3] VIDEO input (Yellow) Accessory = [3] Accessory ~ [6] Front view camera input (Yellow) CA-C3AV [1] Front view camera/Dashboard camera input (Yellow) Rear view camera [5] Rear view camera [5] Rear view camera input (Yellow) Rear v
Troubleshooting Troubleshooting Problems and Solutions If any trouble occurs, first check the following table for possible problems. NOTE • Some functions of this unit may be disabled by some settings made on this unit. • What might seem to be a malfunction in your unit may just be the result of slight misoperation or miswiring. ÑÑAbout settings • Cannot set up the subwoofer. • Cannot set up subwoofer phase. • No output from the subwoofer. • Cannot set up the low pass filter.
Troubleshooting Read Error The disc is quite dirty. Clean the disc. See Precautions on handling discs (P.4). Disc is upside down. Load the disc with the labeled side up. ÑÑSiriusXM Region Code Error The disc you wanted to play has a region code that cannot be played with this unit. See Region Codes in the World (P.119) or try another disc. Subscription Updated - Press Return To Continue The SiriusXM subscription has been renewed. Touching [Return] on the popup screen will clear the message.
Troubleshooting ÑÑApple CarPlay The speed sensor must be connected to use Apple CarPlay wirelessly. Please verify the proper connections or plug in by USB to use Apple CarPlay. The speed pulse is not detected when the Apple CarPlay is started by connecting wirelessly or when the iPhone compatible with wireless Apple CarPlay is registered in [Apple CarPlay Device List]. Check the connection of the speed pulse or plug in over USB to use Apple CarPlay.
Appendix Appendix Playable Media and Files You can play various kinds of media and files on this unit. ÑÑList of playable discs (DDX9906XR / DDX8906S / DDX8706S / DDX819WBTL) Disc types / Standard Support DVD Video DVD Audio DVD-VR DVD-R*1 v × × v DVD-RW DVD+R DVD+RW DVD-R DL (Dual layer) DVD+R DL (Double layer) DVD-RAM CD Music CD*1 CD-ROM CD-R CD-RW DTS-CD Video CD (VCD) Super video CD Photo CD CD-EXTRA HDCD CCCD Others Dualdisc Super audio CD v : Playback is possible.
Appendix ÑÑAbout files The following audio and video files are supported. ■■Playable Audio files Format Bit rate Sampling frequency Bit count AAC-LC (.m4a) MPEG-2/MPEG-4 AAC LC HE-AAC(V1,V2) MP3 (.mp3) MPEG-1/MPEG-2 Audio Layer 3 WMA (.wma) Windows Media Audio Standard L3 profile (Version 7,8,9) Linear PCM RIFF waveform Audio (WAVE) (.wav) Format FLAC (.flac) flac 8 – 320kbps, VBR 16 – 48 kHz 16 bit 8 – 320kbps, VBR 16 – 48 kHz 16 bit 8 – 320kbps 16 – 48 kHz 16 bit 16 bit/24 bit Vorbis (.
Appendix Region Codes in the World The DVD players are given a region code according to the country or area it is marketed, as shown in the following map. 1 5 2 6 1 2 3 1 4 5 2 4 ■■DVD disc marks ALL Indicates a region number. The discs with this mark can be played with any DVD player. 8 Indicates the number of audio languages recorded. Up to 8 languages can be recorded in a movie. You can select a favorite language.
Appendix DVD Language Codes Code aa ab af am ar as ay az ba be bg bh bi bn bo br ca co cs cy da de dz el en eo es et eu fa fi fj fo fr fy ga gd gl gn gu ha he hi hr hu hy 120 Language Afar Abkhazian Afrikaans Amharic Arabic Assamese Aymara Azerbaijani Bashkir Byelorussian Bulgarian Bihari Bislama Bengali, Bangla Tibetan Breton Catalan Corsican Czech Welsh Danish German Bhutani Greek English Esperanto Spanish Estonian Basque Persian Finnish Fiji Faroese French Frisian Irish Scots Gaelic Galician Guarani G
Appendix Specifications ■■Monitor section Picture Size DDX9906XR : 6.75 inches (diagonal) wide : 152.1 mm (W) × 79.5 mm (H) 5-63/64 × 3-1/8 inch Except DDX9906XR : 6.95 inches (diagonal) wide : 156.6 mm (W) × 81.6 mm (H) 6-3/16 × 3-3/16 inch Display System DDX9906XR: AAS LCD panel Except DDX9906XR: TN LCD panel Quantifying Bit Number : 16 bit/20 bit/24 bit ■■USB interface section USB Standard : USB 2.
Appendix Output Power 2.4 GHz/SISO : 11b: 14 dBm ± 2 dB / 11g: 13 dBm ± 2 dB / 11n(20MHz):12 dBm ± 2 dB 5 GHz/SISO : 11a: 9 dBm ± 2 dB / 11n (20 MHz)/11ac (20 MHz): 9 dBm ± 2 dB / 11n (40 MHz)/11ac (40 MHz): 8 dBm ± 2 dB / 11ac (80 MHz): 8 dBm ± 2 dB 5 GHz/MIMO : 11n (20 MHz)/11ac (20 MHz): 11 dBm ± 2 dB / 11n (40 MHz)/11ac (40 MHz): 11 dBm ± 2 dB / 11ac (80 MHz): 11 dBm ± 2 dB ■■Bluetooth section Technology : Bluetooth Ver.5.0 Frequency : 2.402 – 2.
Appendix Frequency Response : 30 Hz – 15 kHz S/N Ratio (dB) : 65 dB (MONO) Selectivity (± 400 kHz) : Over 80 dB Stereo Separation : 45 dB (1 kHz) ■■AM tuner section Frequency Range (step) : 530 kHz – 1700 kHz (10 kHz) Usable Sensitivity : 28 dBμ ■■Video section Color System of External Video Input : NTSC External Video Input Level (mini jack) : 1 Vp-p/75 Ω External Audio Max Input Level (mini jack) : 2 V/25 kΩ Video Input Level (RCA jacks) : 1 Vp-p/75 Ω Video Output Level (RCA jacks) : 1 Vp-p/75 Ω Audio O
Appendix About this Unit ■■Copyrights • The Bluetooth® word mark and logos are registered trademarks owned by the Bluetooth SIG, Inc. and any use of such marks by JVC KENWOOD Corporation is under license. Other trademarks and trade names are those of their respective owners. • Manufactured under license from Dolby Laboratories. Dolby, Dolby Audio and the double-D symbol are trademarks of Dolby Laboratories.
Appendix GRANTED OR SHALL BE IMPLIED FOR ANY OTHER USE. ADDITIONAL INFORMATION MAY BE OBTAINED FROM MPEG LA, L.L.C. SEE HTTP://WWW.MPEGLA. COM • libFLAC Copyright (C) 2000-2009 Josh Coalson Copyright (C) 2011-2013 Xiph.Org Foundation Redistribution and use in source and binary forms, with or without modification, are permitted provided that the following conditions are met: –– Redistributions of source code must retain the above copyright notice, this list of conditions and the following disclaimer.
Appendix ■■FCC WARNING This equipment may generate or use radio frequency energy. Changes or modifications to this equipment may cause harmful interference unless the modifications are expressly approved in the instruction manual. The user could lose the authority to operate this equipment if an unauthorized change or modification is made. NOTE • This equipment has been tested and found to comply with the limits for a Class B digital device, pursuant to Part 15 of the FCC Rules.
Appendix ■■Información acerca de la eliminación de equipos eléctricos y electrónicos al final de la vida útil (aplicable a los países que hayan adoptado sistemas independientes de recogida de residuos) ■■Informação sobre a eliminação de pilhas Los productos con el símbolo de un contenedor con ruedas tachado no podrán ser desechados como residuos domésticos.
MONITOR WITH DVD RECEIVER MONITEUR AVEC Rl:CEPTEUR DVD MONITOR CON RECEPTOR DVD DDX9906XR DDX8906S DDX8706S DDX819WBTL MONITOR WITH RECEIVER MONITEUR AVEC Rl:CEPTEUR MONITOR CON RECEPTOR DMX906S DMX9706S Quick Start Guide Guide de demarrage rapide Guia de inicio rapido JVC KENWOOD Corporation Updated information (the latest Instruction Manual, system updates, new functions, etc.) is available from .
Before Use IContents Before Use ......................••••.•...••............ 2 About the Quick start guide ................................. 2 How to read this manual........................................ 2 Precautions ................................................................. 2 Basic Operations ................................... 4 I Before Use About the Quick start guide • This Quick Start Guide describes basic functions of this unit.
Before Use • You can select a language to display menus, audio file tags, etc. See User Interface Setup (P.84) in the Instruction Manual. • Discs that are not round cannot be used. ® • The Radio Data System or Radio Broadcast Data System feature won't work in areas where the service is not supported by any broadcasting station. • 8-cm (3 inch) discs cannot be used. [i Protecting the monitor • Discs with coloring on the recording surface or discs that are dirty cannot be used.
Basic Operations I Basic Operations Functions of the Buttons on the Front Panel DDX9906XR I DDX8906S I DDX8706S KEN\l.-000 ' DMX906S I DMX9706S 4 NOTE • The panels shown in this manual are examples used to provide a clear explanation of operations. For this reason, they may be different from the actual panels.
Basic Operations Name Number Motion • Receives the remote control signal. Remote Sensor [TI ........ III • Adjusts the volume. The volume will go up to 15 when you keep pressing .&. (P.8) (Volume) m CAM • Switches view camera display on/off. The camera whose view is displayed first changes according to the "Camera Setup" setting and the shift lever position in the shift gate. • Pressing and holding turns the screen off.
Basic Operations Initial Settings Initial setup Perform t his setup when you use this unit first t ime. (P.9). D Set each item as follows. Initial SETUP (DDX9906XR / DDX8906S / DDX8706S I DDX819WBTL only) ® Touch Display Adjustment . ® Adjust a viewing angle and a tilt position. (J) Touch GI. For details, see Display Adjustment ~m1sh Language Clock Display (DMX906S I DMX9706S only) ® Touch Viewing Angle . ® Select a viewing angle. (J) Touch GI. For details, see Viewing Angle (P.9).
Basic Operations 0 Security Code Setup (DDX819WBTL) You can set up a security code to protect your receiver system against theft. When the Security Code function is activated, the code cannot be changed and the function cannot be deactivated. Note that the Security Code can be set with a 4 to 8 digit number of your choice. Preparation • Set DEMO to OFF in the Special screen. See Special Setup (P.86) in the Instruction Manual. D Press the MENU button. ► Enter the same code again and touch Enter.
Basic Operations Calendar/clock settings NOTE D Press the MENU button. • Please set the date and time. If they are not set, some functions may not work. ► Popup menu appears. • Adjust the date and time manually fl Touch SETUP . 'iue('n 01~play OFF D Touch Clock Adjust on the User • Camera /\ud10 U~B Interface screen. Ad1u .tnwnt ► fl Adjust the date, then adjust the time. SETUP Menu screen appears. D Touch User Interface.
Basic Operations Viewing Angle (DMX906S / DMX9706S) Display Adjustment (DDX9906XR / DDX8906S / DDX8706S I DDX819WBTL) I You can adjust the viewing angle when the image on the screen is difficult to see evenly. The smaller the (negative) value, the more whitish the image on the screen looks. D Press the ~ button. ► Display Adjustment screen appears. fl Select a tilt position you want to set up. Default is "O". D Press the MENU button. ► Popup menu appears. fl Touch SETUP. IJ Touch Display.
Basic Operations Touch screen operations HOME screen descriptions To perform operations on the screen, you need to touch, touch and hold, flick or swipe to select an item, display a setting menu screen or change pages. eTouch Touch the screen gently to Most functions can be performed from the HOME screen. D Q AM, select an item on the screen. .____ Tue • Touch and hold Touch the screen and keep your finger in place until the display changes or a message is displayed.
Basic Operations Widget D Press the HOME button. ► HOME screen appears. f) You can change the widget by flicking ■ I • Displays the control screen of current source. Icon feature differs depending on the source. This icon is for USB source. III • Short-cut source icons: The source changes to the one you have set with a short-cut. For the short-cut setting, refer to Customize Short-cut source icons on HOME screen (P. 12). • Close the popup menu. left or right on the widget area.
Basic Operations Select the playback source D Press the HOME button. ► HOME screen appears. D Touch ffll. From the screen, you can select the following sources and functions. a ■ ■ • Switches to the Apple CarPlay screen from the connected iPhone. • Switches to the Android Auto screen from the connected Android device. • Displays the Hands Free screen. (P.21) When neither Apple CarPlay, Android Auto, nor a Bluetooth Hands-Free phone is connected, displays Bluetooth pairing waiting dialog.
Basic Operations Source control screen descriptions List screen There are some common function keys in the list screens of most sources. There are some functions which can be performed from most screens. Display the list screen Indicators < ) "I '.:J· D FLAC 192kHz/24b1t USB ~ 1' Song Tilte ' Artist N<1me < C) ► ....... M10:00 ►II I◄◄ ► The list screen appears. D Cat ego ry List ..- Song Title Album Title 0·01 23 Q D Touch Q.. ►► I • ..- Song Title ..- Song Title ..
Disc I Di SC (DDX9906XR / DDX8906S / DDX8706S / DDX819WBTL) [i Insert a disc [i 1 Press the ~ button. 1 Press the DDX9906XR/DDX8906S/DDX8706S 2 (!,HOME MENU ca =l ~1dJ DDX819WBTL Eject a disc ~ button. Touch DISC EJECT. When removing a disc, pull it horizontally. 3 Press the ~ button. ► The panel closes. NOTE • To forcibly eject the disc, press and hold the ~ button for 2 seconds and then touch DISC EJECT after the message is displayed.
Disc Video screen DVD Disc Menu Operation You can set up some functions using the DVDVIDEO disc menu. 1 Touch [II area. ► Menu Control screen appears. 2 [I] Function panel Perform your desired operation as follows. +,-1+ Touch the left side of the screen to display the function panel. Touch again to close the panel. • ■ : Stops playback. Touching twice will play the disc from the beginning when you play it next time. • i . • Ki ~ :Fast-forwards or fast-backward the Angle . disc.
USB/iPod I USB/iPod Connecting a USB device 1 Connect the USB device with the USB cable. (P.32) Connect iPod/iPhone Preparation • With an Apple CarPlay-capable iPhone, turn off Apple CarPlay by operating the iPhone at functional setup before connecting iPhone. For details of the setup method, contact the manufacturer of the terminal. • Only one iPod/iPhone can be connected. Wired connection 2 Press the HOME button.
USB/iPod USB/iPod Basic Operation 1 Press the HOME button. 2 3 Touch 1111. Touch USB or iPod. (P.12) Control screen [I] ~~===== 0 AM 10 DO D Song Tilte / Artist Name 0 Al bum Title 0 .01 :23 l- D & ================ Q I◄◄ ►II ►►I l!:::: '"=== "" DJ CODEC/BIEi • When a high-resolution source is played, its format information is displayed. • B : Repeats the current track/folder. • El :Random ly plays all tracks in the current folder. [I] Operation keys • Q. : Searches track/file.
HD Radio™ Tuner/Radio I HD Radio™ Tuner/Radio • 0. : Display the Channel List screen. HD Radio Tuner Basic Operation (DDX9906XR / DDX8906S I DMX906S) ·m: Display a list of registered bookmarks. •Ill :Displays the Graphic Equalizer screen. (P.23) [I] Preset list To listen to the HD Radio source, touch HD Radio icon on the source selection screen. I ii • Touching display size. (P.12) allows you to change the NOTE • Recalls the memorized station or channel.
HD Radio™ Tuner/Radio Radio Basic Operation (DDX8706S I DDX819WBTL / DMX9706S) [I) Band buttons Switches bands (between FM and AM). [!] Function panel Touch the left side of the screen to display the function panel. Touch again to close the panel. To listen to the Radio source, touch Radio icon on the source selection screen. (P.12) • Tl (FM only) : Selects the traffic information mode. Control screen 99.9MHz Pre~et1 • AME : Presets stations automatically. (P.
8/uetooth Control I Bluetooth Control • Input the PIN Code in your smartphone/cell-phone. PIN Code is set to "0000" as the default. Register the Bluetooth device It is necessary to register the Bluetooth audio player or cell-phone in this unit before using the Bluetooth function. 1 Press the MENU button. ► 2 8 Select the function you want to use. SETUP Menu screen appears. Touch Bluetooth . ► 4 Popup menu appears. Touch SETUP.
Bluetooth Control Using the Hands-Free Unit • In: Call using call records • El Call using the phonebook • I.I: Call using the preset number You can use the telephone function by connecting the Bluetooth telephone to this unit. NOTE • If you use the hands-free function frequently, move the TEL short-cut button (icon) to the Home screen. (P.12) • While Apple CarPlay or Android Auto is connected, the Bluetooth Hands-Free function and two Bluetooth devices connections cannot be used.
8/uetooth Control S Select the phone number from the list. [j Operations during a call Phonebook Detail 0123456789 j;J 'Jc~·.,· 0123456789 Iii 1B Nc•••s'((J'i_ 0123456789 Nd"W'. 0123456789 fiJ N<1me 1 \Other;. 0123456789 • Adjust the volume of your voice 1) Touch Speech Quality . NOTE 2) Touch ◄ or ► for Microphone Level . • Yo u can sort the phone numbers in the list by last name or first name. For details, see Hands-Free Setup (P.77) in the Instruction Manual.
Controlling Audio IControlling Audio You can adjust various settings such as audio balance or subwoofer level. 1 Press the MENU button. ► Popup menu appears. 2 D 1~play OFF Screen You can adjust equalizer by selecting the optimized setting for each category. 1 2 Touch Audio. (l [j Equalizer Control la 0 Camera SETUP Touch EQ / SW Level. Touch the screen and set the Graphic Equalizer as desired. USB AdJU5tment •• @SETUP -~ -- '"' >' Speaker/ Audio ~ !".} , •.
Connection/Installation IConnection/Installation Before Installation Before installation of this unit, please note the following precautions. A WARNINGS • If you connect the ignition wire (red) and the battery wire (yellow) to the car chassis (ground), you may cause a short circuit, that in turn may start a fire. Always connect those wires to the power source running through the fuse box. • Do not cut out the fuse from the ignition wire (red) and the battery wire (yellow).
Connection/Installation • Reception may drop if there are metal objects near the Bluetooth antenna.
Connection/Installation ' [i GPS antenna Installing the unit I (Except DDX819WBTL) [i Non-Japanese cars GPS antenna is installed inside of the car. It should be installed as horizontally as possible to allow easy reception of the GPS satellite signals. To mount the GPS antenna inside your vehicle: (Except DDX819WBTL) 1) Clean your dashboard or other surface. 2) Remove the separator of the metal plate (accessory@)).
Connection/Installation [i Microphone unit 1) Check the installation position of the microphone (accessory@). 2) When the lower level is removed, remove the upper two locations. 2) Clean the installation surface. 3) Remove the separator of the microphone (accessory@), and stick the microphone to the place shown below. 4) Wire the microphone cable up to the unit with it secured at several positions using tape or other desired method. 5) Adjust the direction of the microphone (accessory@) to the driver.
Connection/Installation [i Connecting wires to terminals e Except DDX819WBTL Fuse (1 SA) Speaker impedance: 4-8 0 White ~ yITJ To front left speaker White/Black o□ Gray @l-If1 8 __J7...1__J To front right speaker Gray/Black Green ~yITJ To rear left speaker Connect to the vehicle's parking brake detection switch ~ness. Light Green (Parking sensor wire) (2 m) Green/Black Purple @l-If1 8 __J7...L__J To rear right speaker Purple/Black For best safety, be sure to connect the parking sensor.
Connection/Installation e DDX819WBTL Fuse (1 SA) If no connections are made, do not let the cable come out from the tab. Connect to the vehicle's ./ (Power control wire) P.CONT When using the optional power amplifier, connect to its power control terminal. (Max. 350mA, 12V) For best safety, be sure to connect the parking sensor. Purple/White (Reverse sensor wire) (2 m) REVERS ~ Lii_____jj Connect to vehicle's reverse lamp harness when using the optional rear view camera.
Connection/Installation [i 3-way speaker system setup e DDX9906XR / DDX8906S / DDX819WBTL /DMX906S ~ [i Connecting the system and external components e Except DDX819WBTL ~ 0 @Dui?~~ @ i ::::::::::: o cl) :-05-@t-~,_:1 ~ l-----~--{ !' !' © n____ © •--•••••:u:L: __ ~------:-:-:-o i-@l.
Connection/Installation (TI When connecting to an external amplifier, connect its ground wire to the car's chassis to avoid damaging the unit. fill ,- Rear Audio Preout : (Left; White, Right; Red) Accessory()]): Steering remote harness (DDX819WBTL only) Connect to vehicle's steering remote harness. Contact your KENWOOD dealer for details. .. • - .... • .. I :(@(@!.! :~~~ Front Audio Preout ,@,@, r-(Left· White Right- Red) :@, @, ;.., ' ' ' •~~• Pin Color and function ' • • '"',. .. "'.
Connection/Installation [j Connecting a USB device [i Connecting an iPod/iPhone e Except DDX819WBTL e Except DDX819WBTL Accessory Q) (Gray) (1 m) 131 Accessory® (Black) (1 m) l3J I2I USBdevice c::=:]!1-+ c::=:]!1-+ iPod/iPhoneI2I KCA-iP 103 (0.8m)I31 ~ 0 ~ 0 ! USB (Gray) terminaI I1J USB (Black) terminaI111 ! Accessory Q) (Gray) (1 m) 141 Accessory® (Black) (1 m) 141 \ ,; 0 rr===Cfl[I-+ O>JD==~=d-' USB (Gray) terminaIr11 USB (Black) terminal(ll e DDX819WBTL USB deviceI2I c::=:]!1-+ USB
Connection/Installation [j Connecting an Android e smartphone DDX819WBTL e Except DDX819WBTL iPod/iPhone121 31 rrK=C=A= -iP=l=03=(=0.s=m=)r= ==eCJ1 I lo□ I· M;no USB to USB cable" Aadmi: fma,tphoal~ Accessory® (Gray) (1 m) r3l Accessory® (Black) (1 m) 131 h tr===-=="','\ O?JD--===, USB (Black) terminal (1 m) r11 USB (Gray) termina1r11 USB (Black) termina1r11 iPhone (with Apple CarPlay)r21 ==CCI1[0 ~KC=A=-iP=1=03=(=0.8=m=)= 131 D USB maximum power supply current: DC 5 V 1.
Connection/Installation i. Connecting the camera e DDX819WBTL Left Side View Camera and e Except DDX819WBTL Left Side View Camera and Right Side View Camera 121 [l@JJ ,--___,,,......,.....-----,,-..,,....--,. I l@I Cf w camera rsi VIDEO input ~=-ICC:)=, ~ ~~ ,...,ow_,,).,,.___ j~ I Front view camera/Dashboard Rear view camera rsi § i3 camera input (Yellow) !:i:::;;i !~j! IL.=----,....,.,..,1111r7-, • U@O Rear view camera input (Yellow) l_~___J Rear view camera rsi f"J]lllll====:!J L.
Appendix [j To set up the camera assignment settings 1 Press the MENU button. ► Popup menu appears. 2 Touch SETUP. ► SETUP Menu screen appears. 3 Touch Camera. ► Camera screen appears. 4 Touch Camera Assignment Settings. S Set each item as follows. ■ FRONT VIEW CAMERA/ DASH CAM (Except DDX819WBTL) FRONT VIEW CAMERA IAppendix Note for specifications ■ Bluetooth section Frequency : 2.402 - 2.
■ Copyrights • The Bluetooth• word mark and logos are registered trademarks owned by the Bluetooth SIG, Inc. and any use of such marks by JVC KENWOOD Corporation is under license. Other trademarks and trade names are those of their respective owners. Manufactured under license from Dolby Laboratories. Dolby, Dolby Audio and the double-D symbol are trademarks of Dolby Laboratories. •.2\!!? is a trademark of DVD Format/Logo Licensing Corporation registered in the U.S., Japan and other countries.
• THIS PRODUCT IS LICENSED UNDER THE VC-1 PATENT PORTFOLIO LICENSE FOR THE PERSONAL AND NONCOMMERCIAL USE OF A CONSUMER TO ( i ) ENCODE VIDEO IN COMPLIANCE WITH THE VC-1 STANDARD ("VC-1 VIDEO") AND/OR (ii) DECODE VC-1 VIDEO THAT WAS ENCODED BY A CONSUMER ENGAGED IN A PERSONAL AND NON-COMMERCIAL ACTIVITY AND/OR WAS OBTAINED FROM A VIDEO PROVIDER LICENSED TO PROVIDE VC-1 VIDEO. NO LICENSE IS GRANTED OR SHALL BE IMPLIED FOR ANY OTHER USE. ADDITIONAL INFORMATION MAY BE OBTAINED FROM MPEG LA, L.L.C.
Made for 11iPhone I iPod gc~oid ~· .,_ Apple CarPlay pandora® G Spotify {()) READY er- IJIII Works with H02/HD3) [I] DOLBY AUDIO™ Bookmark) Digital Sound) Program Into) Artist Experience) DVDVIDEo '" C)Bluetooth® KENWOOD C\1JFiJ CERTIFIED Emergency Alerts) , _ _ ____,
Warranty Card Identification du produ1t Modelo do aparelho e numero de s~rie Model number & serial number Revendeur & cachet Nome da loja e carimbo Dealer & stamp Date d'achtat Data da compra Purchase date Norn & adresse du client Nome eendereco do cliente Name & address of customer Attention: This card and receipt (or invoice) are necessary to purchase a new panel in case of theft or damage.
JVCKENWOOD USA Corporation U .S.A. This warranty will be honored only in the U.S.A. WHO IS PROTECTED EXCLUSION OF DAMAGES This warranty Is enforceable only by the original purchaser. KENWOOD'S LIABILITY FOR ANY DEFECTIVE PRODUCT IS LIMITEDTOTHEREPAIRORREPLACEMENTOFTHEPRODUCT AT OUR OPTION. KENWOOD SHALL NOT BE LIABLE FOR: 1.
MILITARY Unils purchased lhrough lhe U.SA mililary exchange service overseas may be serviced under warranty in lhe conlinental U.S.A., subject to the following conditions. 1) The original warranty is in ettect. 2) Proof of purchase 1s provided to lhe servicer. WARRANTY FOR MILITARY MARKET JVC KENWOOD corporation is proud of the quality and workmanship of ilsaudioequipment. This un ii has been properly designed, tested and inspected before it was shipped lo you.
CANADA KENWOOD WARRANTY JVCKENWOOD Canada Inc. (hereinafter called "KENWOOD'), gives the following written warranty to the original customer of each newKenwood productdistributed inCanada by KENWOOD and purchased from a dealer authorized by KENWOOD. KENWOOD warrants that each new Kenwood product, under normal use, is free from any defects, subject to the terms and conditions set forth below.