DNN9150DAB CONNECTED NAVIGATION SYSTEM Quick Start Guide You can update the system by connecting a USB device containing an update file. For updating the system, visit .
Contents About the Quick Start Guide................................. 2 Precautions.................................................................. 3 Safety Precautions and Important Information............................................................... 5 About the Quick Start Guide This Quick Start Guide describes basic functions of this unit. For functions not described in this Guide, refer to the Instruction Manual on the following website: http://manual.kenwood.
Precautions 2WARNING ÑÑTo prevent injury or fire, take the following precautions: • To prevent a short circuit, never put or leave any metallic objects (such as coins or metal tools) inside the unit. • Do not watch or fix your eyes on the unit’s display when you are driving for any extended period. • If you experience problems during installation, consult your Kenwood dealer. ÑÑPrecautions on handling discs • Do not touch the recording surface of the disc. • Do not stick tape etc.
ÑÑAcquiring GPS signal The first time you turn on this unit, you must wait while the system acquires satellite signals for the first time. This process could take up to several minutes. Make sure your vehicle is outdoors in an open area away from tall buildings and trees for fastest acquisition. After the system acquires satellites for the first time, it will acquire satellites quickly each time thereafter.
Safety Precautions and Important Information Read this information carefully before starting to operate the Kenwood Car Navigation System and follow the instructions in this manual. Neither Kenwood nor Garmin shall be liable for problems or accidents resulting from failure to observe the instructions in this manual. 2WARNINGS Failure to avoid the following potentially hazardous situations could result in an accident or collision resulting in death or serious injury.
Features of Connected systems By connecting this unit to Internet, you can use various services. ÑÑCooperation with Route Collector site • Destinations and routes specified on the PC can be input to this navigation system. • The routes you have traveled and the songs you have listened to can be logged. • By uploading music files to Dropbox and creating a play list on Route Collector site, you can listen to music anywhere through streaming without music files on this unit.
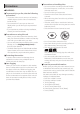
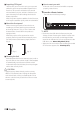
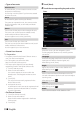
2 Touch the corresponding key and set the First Step item. Power on the unit and perform some setup steps before using. 1 Press the <8HOME> button. HOME 6 The unit is turned on. To turn off the unit: Press the <8HOME> button for 1 second. ✎✎NOTE • “Initial setup” also appears when the unit is reset. Language Setup Select the language used for the GUI and input methods. Default is “English (United States)”. 1) Touch [Language Setup]. 2) Select a language from the list.
Types of accounts Administrator As Administrator, you can create an owner account and perform initial setup. You can log in to the system if you have not created an owner account. Guest An account for guests such as your friends. The guest can operate this unit, but cannot use the functions related to mail, social media, and Route Collector site. Owner The account for the person who manages this unit. The owner can use the functions related to mail, social media, and Route Collector site.
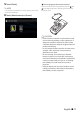
5 Touch [Finish]. ✎✎NOTE • For details on operations of each setting, refer to the Instruction Manual. ÑÑHow to prepare the remote control Insert two “AAA”/“R03”-size batteries with the and poles aligned properly, following the illustration inside the case. 6 Touch [Administrator] or [Owner]. !!CAUTION • Put the remote controller in a place where it will not move during braking or other operations.
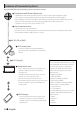
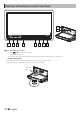
Functions of the Buttons on the Front Panel 9 10 1 2 3 4 5 HOME 6 6 7 8 ÑÑHow to insert an SD card 1) Press 8 button for 1 second. The panel fully opens. 2) Hold the SD card as the illustration in the right and insert it into the slot until it clicks. To eject the card: Push the card until it clicks and then remove your finger from the card. The card pops up so that you can pull it out with your fingers.
No. Name/ Motion 1 s (Reset) • If the unit or the connected unit fails to operate properly, the unit returns to initial settings when this button is pressed (Instruction Manual P.143). • If the SI function is turned on, this indicator flashes when the vehicle ignition is off (Instruction Manual P.118). 2 R, S (Vol) • Adjusts volume. 3 Remote Sensor • Receives the remote control signal. 4 NAV • Displays the navigation screen. • Pressing for 1 second turns the screen off.
Common Operation ÑÑGeneral There are some functions which can be operated from most screens. etc. Touch keys with various functions are displayed here. Displayed keys differ depending on the current audio source, status, etc. For examples, see List screen (P.24) in the Instruction Manual. ÑÑFlick scrolling You can scroll the list screen by flicking the screen up/down or right/left. (Mixed Media Search) Touch to display the Mixed Media Search screen. (Quick menu) Touch to display the quick menu.
Detaching The Front Panel You can detach the front panel to prevent theft. 1 Press the <0> button for 1 second to open the front panel. Then, detach the panel as the diagrams below. 3 2 1 4 After detaching 1) Put the panel in the protective bag supplied with the unit. ✎✎NOTE • The attaching plate closes automatically in about 10 seconds after the front panel is released. Remove the panel before this happens.
Login 1 Press the button to turn the power on. 2 Select the login user. 3 Enter the password. (Password) Enter the registered password. If you selected Administrator or Guest, this screen is not displayed. [Auto Login?] Checking this checkbox allows you to log in to the system automatically from the next time. [Login] Log in to the system. ✎✎NOTE • If you forgot your password, create your new password on the Route Collector site. http://www. route-collector.
ÑÑSource launcher panel Adding of a shortcut icon to Source launcher panel (Shortcut) You can register sources you use frequently so that you can start them quickly. (All source list) Displays all sources. All source list 1) Touch [ ] in Source launcher panel. 2) Touching the icon continuously to display the Source launcher panel screen. 3) Drag the icon to an empty space. How to Use the Navigation System 1 Press the
1 2 4 5 3 • For more information about your navigation system, download the latest version of the Owner’s Manual from manual.kenwood.com/edition/im387 3 Enter your destination and start the guidance. Finding points of interest 1) Touch [Where To?]. 2) Select a category and a subcategory. 3) Select a destination. 4) Touch [Go!]. ✎✎NOTE 6 7 Views the Next Turn page or the junction view page, when available. 2 Views the Turn List page. 3 Views the Where Am I? page.
ÑÑOther Features Manually avoiding traffic on your route 1) From the map, touch the traffic icon. 2) Touch [Traffic On Route]. 3) If necessary, touch the arrows to view other traffic delays on your route. ] > [Avoid]. 4) Touch [ Viewing the traffic map 1) The traffic map shows color-coded traffic flow and delays on nearby. About traffic ✎✎NOTICE • Traffic service is not available in some areas or countries.
To disconnect the device: 1) Touch [G] on the screen and disconnect the device from the cable. ✎✎NOTE • It applies when you set the iPod/iPhone connection with cable. SD card 1) Press the button for 1 second to open the front panel. 2) Hold the SD card as the diagram below and insert it into the slot until it clicks. Playback starts. I Stops playing. G Disconnects the device. EF Searches the previous/next content.
• *1 For iPod/USB, this function may be unavailable depending on the playing file format. ✎✎NOTE • For operations on the source control screen, see How to Play Music (P.17). However, searching by category/link/album artwork is not available. How to Listen to the Radio ✎✎NOTE • For details on searching operations, refer to Search Operation (P.70) in the Instruction Manual. How to Play Movie You can play DVD video, Video CD (VCD), movie files from disc media, iPod and USB storage device.
✎✎NOTE • For other operations, see Radio Basic Operation (P.88) in the Instruction Manual. How to Make a Phone Call You can use your Bluetooth cell-phone when paired to this unit. 1 Register your cell-phone to the unit. Follow as the procedures shown below. For detailed operation, see Registering the Bluetooth Unit (P.105) in the Instruction Manual. 1) Press the button twice to the Source launcher panel. ] in the Source launcher panel. 2) Touch [ 3) Touch [STANDBY].
Call using the phonebook Installation 1) Touch [ ]. 2) Select the name from the list. 3) Select the number from the list. ]. 4) Touch [ ÑÑBefore Installation Call using the preset number !!WARNINGS 1) Touch [Preset #] to start calling the corresponding phone number. Call by voice You can make a voice call using the voice recognition function of the cell-phone. ]. 1) Touch [ 2) Pronounce the name registered in the cellphone. ✎✎NOTE • For detailed operation, see Using Hands-Free Feature (P.
• Insulate unconnected wires with vinyl tape or other similar material. To prevent a short circuit, do not remove the caps on the ends of the unconnected wires or the terminals. • Connect the speaker wires correctly to the terminals to which they correspond. The unit may be damaged or fail to work if you share the ¤ wires or ground them to any metal part in the car.
ÑÑUnit 1) To prevent a short circuit, remove the key from the ignition and disconnect the ¤ terminal of the battery. 2) Make the proper input and output wire connections for each unit. 3) Connect the wire on the wiring harness. 4) Take Connector B on the wiring harness and connect it to the speaker connector in your vehicle. 5) Take Connector A on the wiring harness and connect it to the external power connector on your vehicle. 6) Connect the wiring harness connector to the unit.
ÑÑGPS antenna GPS antenna is installed inside of the car. It should be installed as horizontally as possible to allow easy reception of the GPS satellite signals. To mount the GPS antenna inside your vehicle: 1) Clean your dashboard or other surface. 2) Remove the separator of the metal plate (accessory 7). 3) Press the metal plate (accessory 7) down firmly on your dashboard or other mounting surface. You can bend the metal plate (accessory 7) to conform to a curved surface, if necessary.
ÑÑRemoving the trim plate 1) Engage the catch pins on the extraction key (accessory3) and remove the two locks on the lower level. Lower the trim plate (accessory5) and pull it forward as shown in the figure. ÑÑRemoving the unit 1) Remove the trim plate by referring to step 1 in “Removing the trim plate”. 2) Insert the two extraction keys (accessory3) deeply into the slots on each side, as shown.
ÑÑSystem connection (0.8 m) Accessory 6 Accessory 8 WiFi Receiver Accessory 9 WI-FI receiver - Reception may drop if there are metal objects near the Bluetooth antenna and WI-FI receiver. - Install the WI-FI receiver besides the place enclosed by the metal.
ÑÑConnecting wires to terminals Fuse (10A) HDMI/MHL M4 x 8mmMAX REMOTE OUT POWER EXT I/F SW FRONT AV-OUT AUDIO FUSE 10A iPod/ AV-IN2 AV-IN/OUT REAR MIC R L Accessory 1 Connector A a b 8 7 6 5 4 3 2 1 8 7 6 5 4 3 2 1 Connector B P.CONT Pin Color and functions A4 Yellow A5 Blue/White A6 Orange/White A7 Red A8 Black B1/B2 Purple ¢ / Purple/Black ¤ B3/B4 Gray ¢ / Gray/Black ¤ B5/B6 White ¢ / White/Black ¤ B7/B8 Green ¢ / Green/Black ¤ *Speaker Impedance: 4-8 Ω ANT.
ÑÑOptional accessory connection 3 2 1 2 USB device (sold separately) GPS USB HDMI/MHL M4 x 8mmMAX iPod/ AV-IN2 AV-IN/OUT REMOTE OUT 4 M4 x 8mmMAX iPod/ AV-IN2 MIC 3 REMOTE OUT AV-OUT AUDIO R 5 EXT Android smartphone I/F (sold separately) 6 1 SW L AV-OUT Output - Audio Output FRONT POWER REAR DAB PTT EXT I/F SW FRONT AV-OUT AUDIO FUSE 10A REAR DAB AV-OUT MIC R-CAM HDMI/MHL GPS R TV tuner remote output See TV Tuner Operation (P.98) in the Instruction Manual.
iPod/iPhone (sold separately) Music Video and Music (HDMI) 1 Lightning Digital AV Adapter (sold separately) KCA-HD100 (1.8m) (Optional Accessory) 3 KCA-iP103 (0.8m) (Charging) (Optional Accessory) 3 Music iPod (sold separately) USB terminal (0.8m) KCA-iP102 (Optional Accessory) Video and Music (analog) 2 3 AV Output (1.
• iPod classic • iPod with video • iPod nano (7th generation) • iPod nano (6th generation) • iPod nano (5th generation) • iPod nano (4th generation) • iPod nano (3rd generation) iPod/iPhone connection To connect the iPod/iPhone with this unit, the cable, adapter (both sold separately), and the profile which your iPod/iPhone supports are necessary as follows: To listen music and watch video with Lightning connector device –– Lightning Digital AV Adapter –– KCA-HD100 –– KCA-iP103 –– Bluetooth pr
6 Select the way to connect the device with this unit. selecting [iPod/iPhone] When If a connectable Bluetooth device is not displayed, touch [Search] and do the pairing of the devices. • “iPod connection setup” also appears when the unit is reset. • The setting of “iPod connection setup” is just for the unit and regardless of the account. For the setting items refer to iPod/iPhone connection setup (P.30).
• When you select “HDMI + BT”, “HDMI/MHL + BT” or “Bluetooth” in step 6, Bluetooth device selection screen will appear. Select the device to be connected. If a connectable Bluetooth device is not displayed, touch [Search] and do the pairing of the devices. • “Application link setup” also appears when the unit is reset. • The setting of “Application link setup” is just for the unit and regardless of the account.
• • • • • • • • Multimedia Interface, and the HDMI logo are trademarks or registed trademarks of HDMI Licensing LLC in the United States and other countries. MHL and the MHL logo are a trademark or registered trademark of MHL, LLC. - Incorporates MHL 2 ABOUT DIVX VIDEO: DivX® is a digital video format created by DivX, LLC, a subsidiary of Rovi Corporation. This is an official DivX Certified® device that plays DivX video. Visit divx.
ÑÑKENWOOD Route Network Service “Route Collector” User’s Agreement This KENWOOD Route Network Service “Route Collector” User’s Agreement (“Agreement”) sets forth the terms and conditions for use of the KENWOOD Route Network Service “Route Collector” provided by JVCKENWOOD Corporation (“Service”) to the users who fulfill the requirements for “Conditions of Use” in the paragraph 1 (“User(s)”), and the rules for handling User’s information necessary for use this Service. 1.
(12) Other acts deemed inappropriate by us 5. Compensation Claim Should any complaints, lawsuits or similar claims be asserted against us by other Users or third parties for any reasons attributable to the User in connection with the Service, we reserve the right to claim from the concerned User any damages, costs and expenses which we may incur (including compensation, attorney fees and legal costs). 6.
ÑÑInformation on Disposal of Old Electrical and Electronic Equipment and Batteries (applicable for EU countries that have adopted separate waste collection systems) Products and batteries with the symbol (crossed-out wheeled bin) cannot be disposed as household waste. Old electrical and electronic equipment and batteries should be recycled at a facility capable of handling these items and their waste byproducts. Contact your local authority for details in locating a recycle facility nearest to you.
Declaration of Conformity with regard to the EMC Directive 2004/108/EC Declaration of Conformity with regard to the R&TTE Directive 1999/5/EC Declaration of Conformity with regard to the RoHS Directive 2011/65/EU Manufacturer: JVC KENWOOD Corporation 3-12, Moriyacho, Kanagawa-ku, Yokohama-shi, Kanagawa 221-0022, JAPAN EU Representative: JVCKENWOOD NEDERLAND B.V.
QAU0569 (USB Wi-Fi® adapter) Instruction Manual 2 CAUTION Changes or modifications not approved by us could void the user’s authority to operate the equipment. • This adapter has been designed exclusively for use with Kenwood car receivers. Do not use this adapter with any other car receiver. • The Wi-Fi CERTIFIED Logo is a certification mark of the Wi-Fi Alliance. Keep the Wi-Fi adapter inserted when using the Wi-Fi function. When the adapter is removed, store it in a safe place.
Declaration of Conformity with regard to the R&TTE Directive 1999/5/EC Declaration of Conformity with regard to the RoHS Directive 2011/65/EU Manufacturer: JVC KENWOOD Corporation 3-12 Moriya-cho, Kanagawa-ku, Yokohama-shi, Kanagawa, 221-0022, Japan EU Representative: JVCKENWOOD NEDERLAND B.V. Amsterdamseweg 37, 1422 AC UITHOORN, The Netherlands English Hereby, JVC KENWOOD declares that this unit QAU0569 is in compliance with the essential requirements and other relevant provisions of Directive 1999/5/EC.